


 TL;DR:
Exporting photos from an iPhone to a PC, Mac, secondary phone, or external hard drive is best managed through dedicated software like MobileTrans, native Apple tools like AirDrop and iPhoto, iCloud syncing, or direct cable transfers.
● Phone-to-phone transfers via MobileTrans require connecting both handsets to a computer and verifying each iPhone has at least 60% battery life remaining.
● AirDrop transfers to a Mac demand active Wi-Fi and Bluetooth connections within a 30-foot proximity, while iCloud syncs are strictly limited by a 5GB free storage capacity.
● Saving images directly to an external hard drive requires a physical lightning cable connection and manually routing the files through the native iOS Files application.
Ask AI for a summary
 ChatGPT
 Perplexity
 Gemini
 Claude
 Grok
Grok
Apple phones have evolved significantly over the years — not only in terms of technology but also their ability to shoot amazing photos. But still, the capacity to store photos remains the same, and we don’t know how to get our photos off our iPhone to store them on any other device.
You may have tried to get photos off your iPhone, and you may have been surprised to find out that it's not as easy as you might have thought. You may have even heard stories of people who have lost all their pictures.
So, what should you do?
Have a cup of coffee, and relax!
This blog is designed to help you get your photos off the iPhone before making a mistake.
Part 1: Get Photos Off iPhone with MobileTrans [Best Choice]
Method 1: Get photos off iPhone to PC
Step 1: First things first, install the Mobiletrans software on your computer.
Step 2: Now, connect your iPhone with your PC using a USB cable. The software then will automatically detect your iPhone.
Step 3: Now, open the Mobiletrans software and select the 'File transfer > export.

Step 4: Next, select all the photos you want to get off your iPhone from the Photos folder.

Step 5: Finally, click on the ‘Export’ button, and that's it!
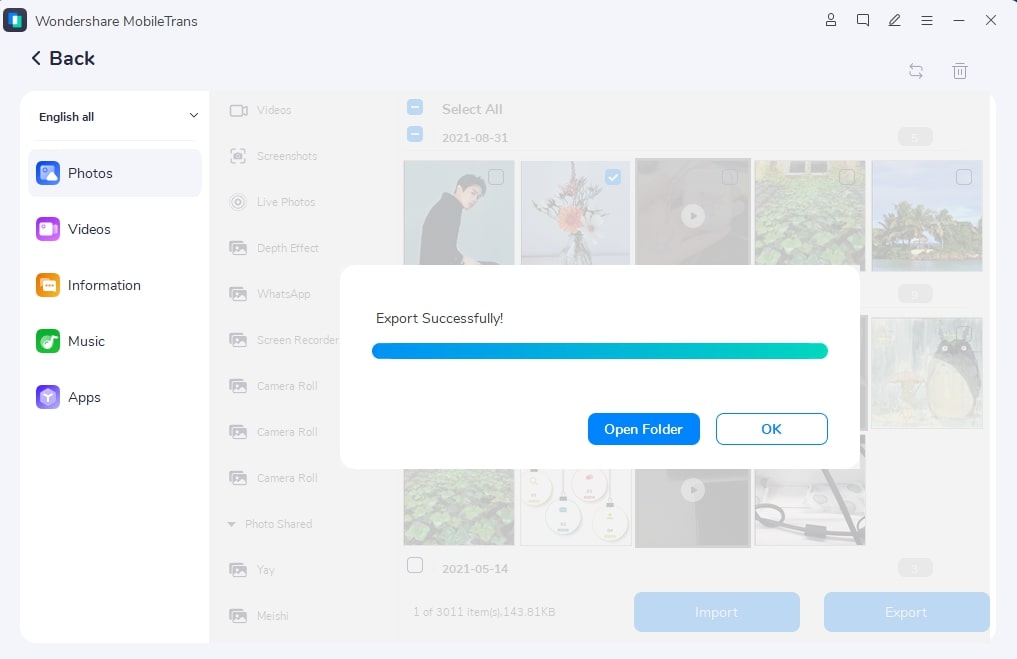
All your photos will automatically get transferred to your PC.
Method 2: Get photos off old iPhone to a New Phone
Step 1: Make sure both iPhones have at least 60% battery remaining.
Step 2: Connect both the old and new iPhone with your PC.
Step 3: Then, locate and launch the Mobiletrans software and click on the 'Phone Transfer' option.
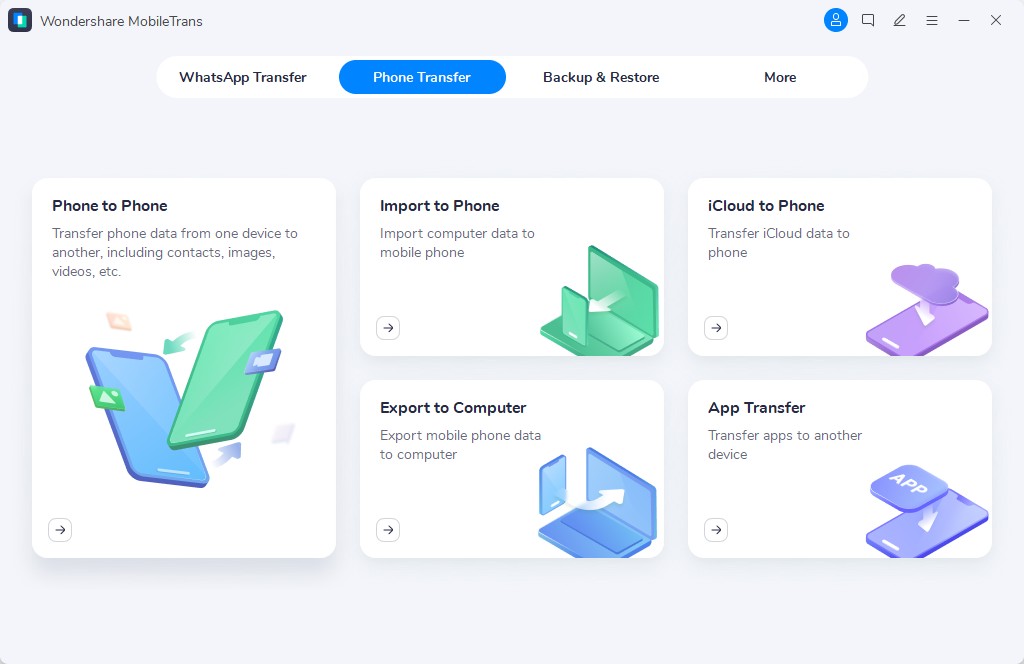
Step 4: Here, you can easily set the source and destination phones by simply using the 'flip' option.
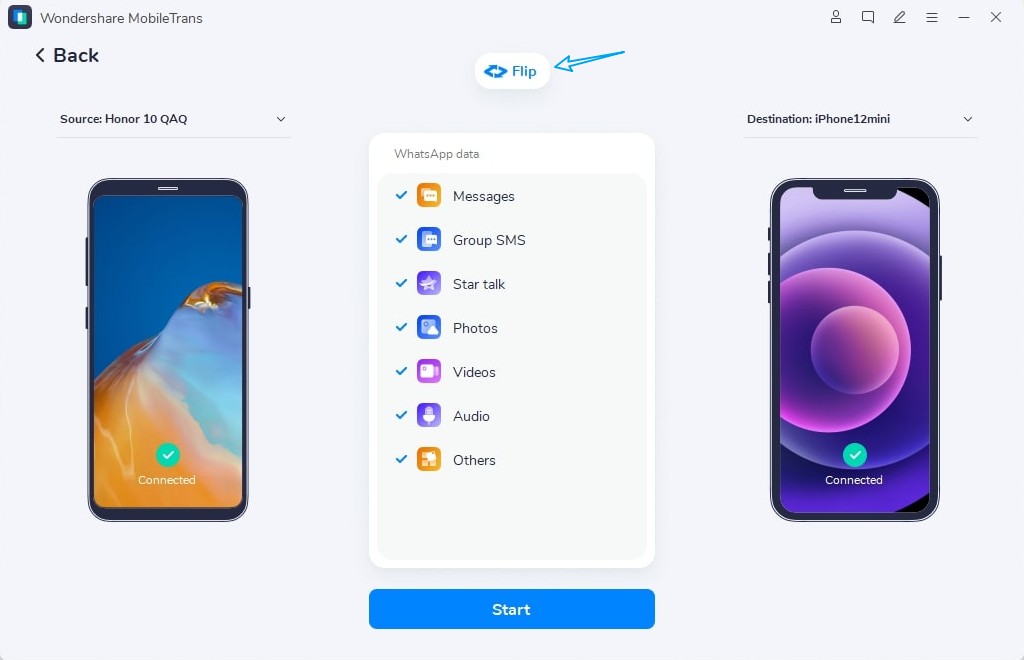
Step 5: Now, simply select the photos or other files you want to get off your iPhone and click on the start button.
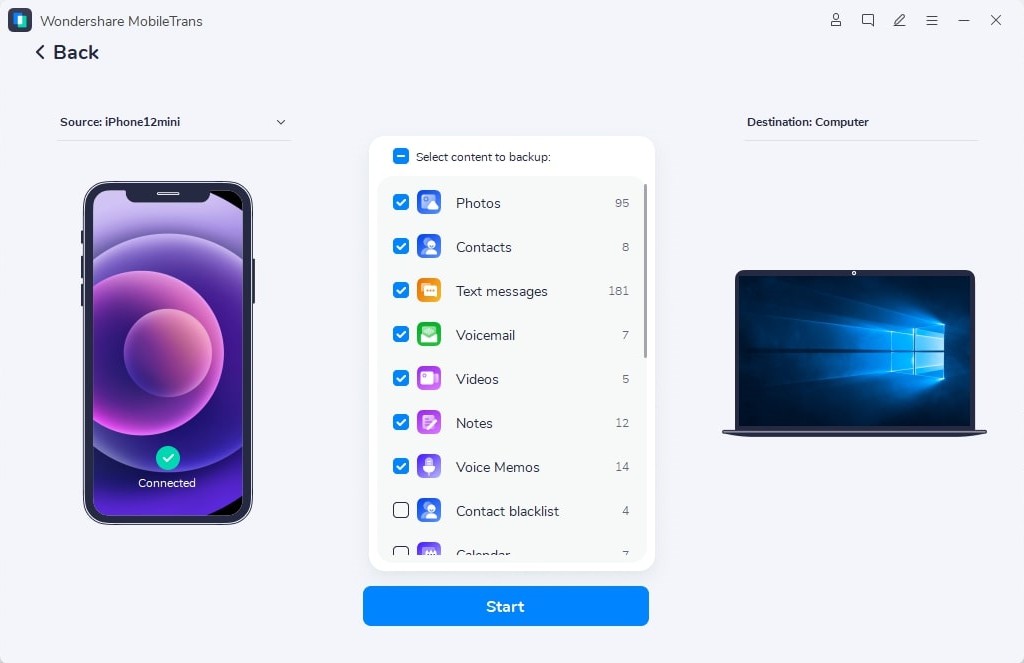
Method 3: Backup iPhone photos to PC/Mac
Step 1: First, launch Mobiletrans on your PC.
Step 2: Select the 'Backup&Restore' option after opening the software.
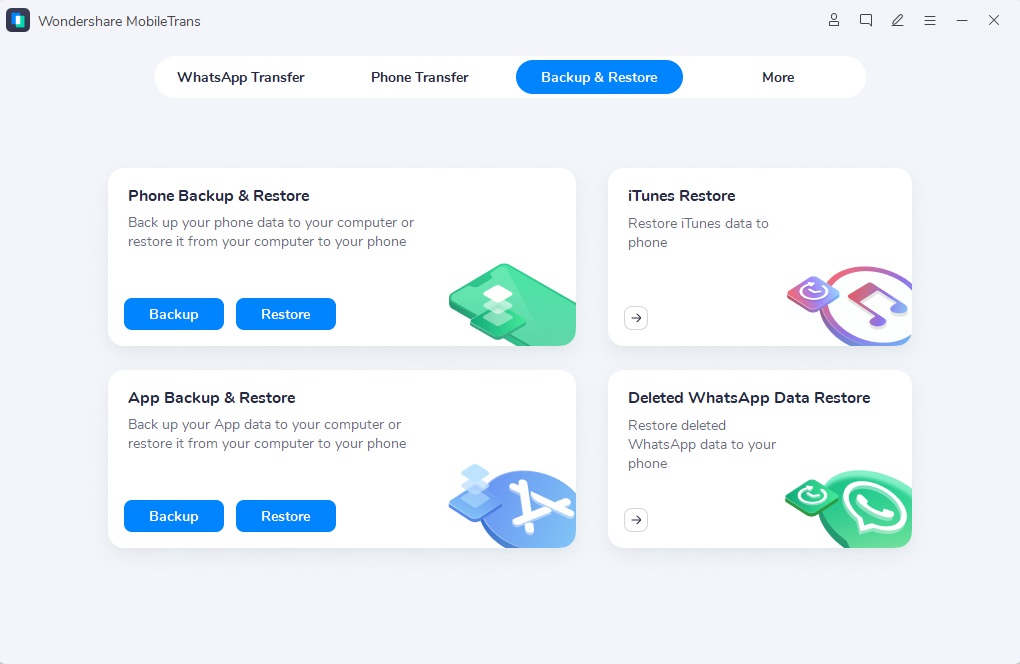
Step 3: Now connect your iPhone with your PC via USB cable, and your devices will automatically get detected.
Step 4: Now, simply select the file types and click the Start button, and that’s it. All of your selected file types will automatically get transferred.
Part 2: Ways to Take Photos off iPhone to PC
Method 4: Take photos off iPhone via Email:
Step 1: Select the photos you want to get off your iPhone and forward it to your secondary email, or a friend’s email with your iPhone.
Step 2: Log in to your email ID on your PC’s browser.
Step 3: Open the sent mail, which includes your photos.

Step 4: Now, you can easily get those photos downloaded by clicking on the download logo on the photos.

Method 5: Get photos off iPhone via cloud storage
Another way to get your photos off iPhone is by uploading them on iCloud.
Here's how you can upload your images to iCloud:
Step 1: First of all, you'll need to go to your iPhone's settings, tap on your profile photo, and select the 'iCloud Settings.’
Step 2: Make sure you have signed in to your iCloud ID. Now, just go to iCloud > photos and make sure to turn on the 'iCloud Photo Library.’ Doing so will automatically upload all the images from your iPhone to your iCloud account.

Step 3: Once the upload is complete, you can visit the iCloud website from any other device(iPhone, PC, or MAC), log in with your iCloud ID, and click on the 'Photos' option. Here, you can simply access all the images or download them.
Note: iCloud only comes with 5GB free space. Hence, you may not get photos off of your iPhone completely
Part 3: Ways to Take Photos off iPhone to Mac
There’s yet another way to transfer your photos from iPhone to MAC with the iPhoto App.
Wondering how? Just follow the steps below
Method 6: Move photos off iPhone to Mac with iPhoto
Step 1: Again, first of all, you'll need to connect your iPhone with your MAC.

Step 2: Next, launch the iPhoto application and select the 'Import' option.

Step 3: Finally, you can tick all the images you want to get off and click on the ‘Import Selected’ button.
Method 7: Take photos off iPhone to Mac with AirDrop
Step 1: Firstly, you'll need to enable Airdrop on both your iPhone and your MAC. Here's how —
Enable AirDrop on iPhone: Go to settings > scroll down to General > AirDrop.
Now make sure to choose 'Contacts only'; otherwise, every nearby Apple user will be able to transfer files to your devices. Plus, even ensure that your Bluetooth and Wi-Fi are turned ON and are within 30 feet with your MAC.

Enable AirDrop on your MAC: Go to finders > Airdrop from the left sidebar. The AirDrop dialogue box will open.
Now, simply select 'Contacts Only' from the dropdown menu under 'Allow me to be discovered by. Again make sure that your Bluetooth and Wi-Fi are turned on and are within 30 feet with your iPhone.

Step 2: After you have enabled AirDrop on both of your devices, open the Photos app and select all the photos you want to export.
Step 3: Now, click on the share button in the lower left, and select AirDrop.

Step 4: Next, simply select your device from the menu. Once all your photos are imported, select done. That's it!
Part 4: Get Photos Off iPhone to Hard Drive
Method 8: Connect your iPhone to an external hard drive directly
Step 1: To transfer your photos from your iPhone to an external hard drive you'll need to connect them with a lightning cable.
Step 2: Next, launch the Photos application, tick the photos you want to import and click on the share to import the images to Files.
Step 3: Finally, open the Files app and select the hard drive you want to import the photos, and that's it!
Wrapping Up!
So here we are with this blog to help you quickly get photos off your iPhone. We hope this blog was helpful to you and you didn't face any issue following any of the steps.
But if you face any issue following any of the above steps, feel free to reach us!
New Trendings

Top Stories
All Categories


Navkiran Dhaliwal
staff Editor