Copy iTunes Playlists to USB Drive - 2 Official Methods [2025]

Written By Axel Nash |

There are a few different situations that might permit you to transfer your iTunes music to USB Drive. For example, perhaps your computer has a hardware failure problem, or you want to listen to music on iTunes playlists in your car, back up iTunes music, or more. Then, transferring them to a USB is a smart move.
So, in this post, we will guide you through the two official methods to copy your iTunes playlist to USB Drive with just a few clicks.

Part 1: Detail information about iTunes playlist
Before jumping into transferring iTunes music to a USB drive. Let's look at the origins and formats of the iTune playlist.
● Origin
An iTunes playlist is usually composed of songs downloaded from Apple Music, purchased from the iTunes store, or imported from a computer. And it can be synced across various Apple devices using the same Apple ID.
● Format
Apple iTunes default format is AAC. However, the format of songs in iTunes playlists usually varies depending on their origins.
Songs purchased from iTunes Store are always in AAC format. In contrast, the downloaded from Apple Music are stored in MP4 formats and protected by Apple's Fairplay DRM. So, you can not play them on other music platforms or players.
Note: iTunes also supports formats like MP3, AIFF, WAV, and Apple Lossless.
Part 2: How to transfer iTunes music to USB
As mentioned earlier, there are only two official methods for transferring iTunes music to USB. Let's dive in.
However, if your player only supports MP3 or another specific format, you must convert the file format first.
Before transferring: Convert music file formats in iTunes
Follow the below steps to convert your iTunes playlist to MP3;
Step 1: Open the iTunes app on your computer and click Edit from the top bar. Then, select Preferences.

Step 2: Click Import Settings

Step 3: Click the drop-down icon under Import Using and select MP3 Encoder. After that, click OK to finish.
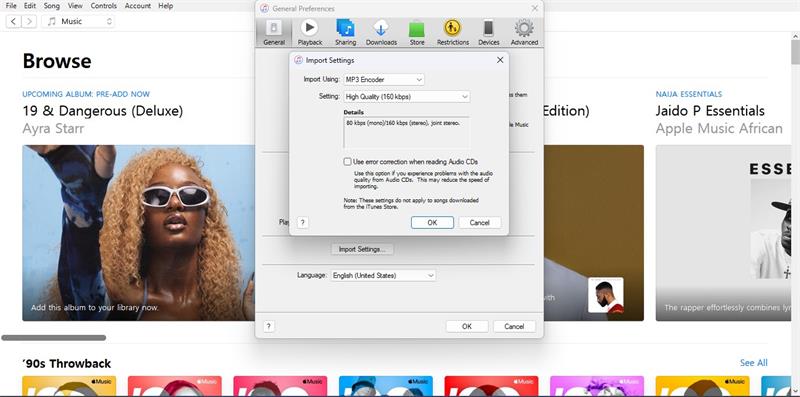
Step 4: Head to your iTunes library, select songs in the playlist, and then choose File > Convert > Create MP3 Version.
Method 1: Copy iTunes playlists to the USB
Fortunately, you can copy iTunes playlists to USB directly. But for this method, it's advisable to create a folder in your USB where only the iTunes playlist songs will be saved. This will prevent confusion when you want to locate the playlist on the USB Drive.
The following steps explain the process of using this method to copy iTunes playlists to a USB Drive directly. Keep in mind that the process might be slightly different in different versions.
Step 1: Connect the USB Drive to your PC and create a new folder.
Step 2: Open the iTunes app and locate the playlist you wish to transfer. Then click File from the top left corner and select Library > Export Library.

Step 3: In the pop-up window, select USB as the preferred location, choose the Folder you created earlier, and click OK to finish.

Pros
- It's easy to use.
- No third-party app is required.
- Transfer the playlist at once
Cons
- The process is relatively slow.
Method 2: Transfer Music from iTunes to USB
You can also transfer iTunes playlists to USB from the iTunes media folder, it allows to transfer all music at once. It just involves moving the iTunes playlist to the iTunes media folder first, then moving it to the USB afterward.
The procedure for this method is explained below;
Step 1: Open the iTunes app and click Edit from the top side. Then, select Preferences.
Step 2: In the new window, click Advanced and tick the checkbox next to Copy files to iTunes Media folder when adding to the library and Keep iTunes Media folder organized. After that, click OK to proceed.
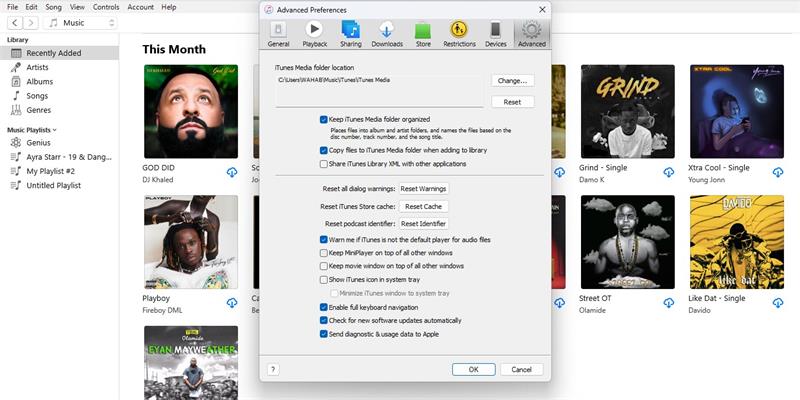
Note: You can use the Change… button to select the location of your iTunes Media Folder.
Step 3: Click File and select library> Organiz Library.

- Tick the checkbox next to Consolidate Files and click OK.

Now all media files should be saved in your iTunes Media Folder.
Step 4: Finally, connect your USB Drive to your PC and drag-n-drop the iTunes media folder there.
Note: If you're also transferring music in the Apple Music folder, you need to convert the MP4 songs to MP3 to play the music on other platforms.
Pros
- It does not require the download of any app.
- Allows the transfer of all music on iTunes.
Cons
- The process seems lengthy.
Bonus: Export music files on your phone to USB drive
Have you ever wondered if you can transfer music files on your phone to a USB drive? Well, the good news is you can. All thanks to MobileTrans.
MobileTrans allows seamless data transfer between devices, including phone-to-USB, phone-to-phone, phone-to-computer, etc. Besides, it does not matter how huge the music file you're looking to transfer is; MobileTrans will get the job done fast without lagging. All it takes is only a few clicks.
Below are the steps to transfer music files to USB using MobileTrans;
Step 1: Download and install the MobileTrans on your computer.
Step 2: Start the installed tool and select Phone Transfer > Export to Computer.
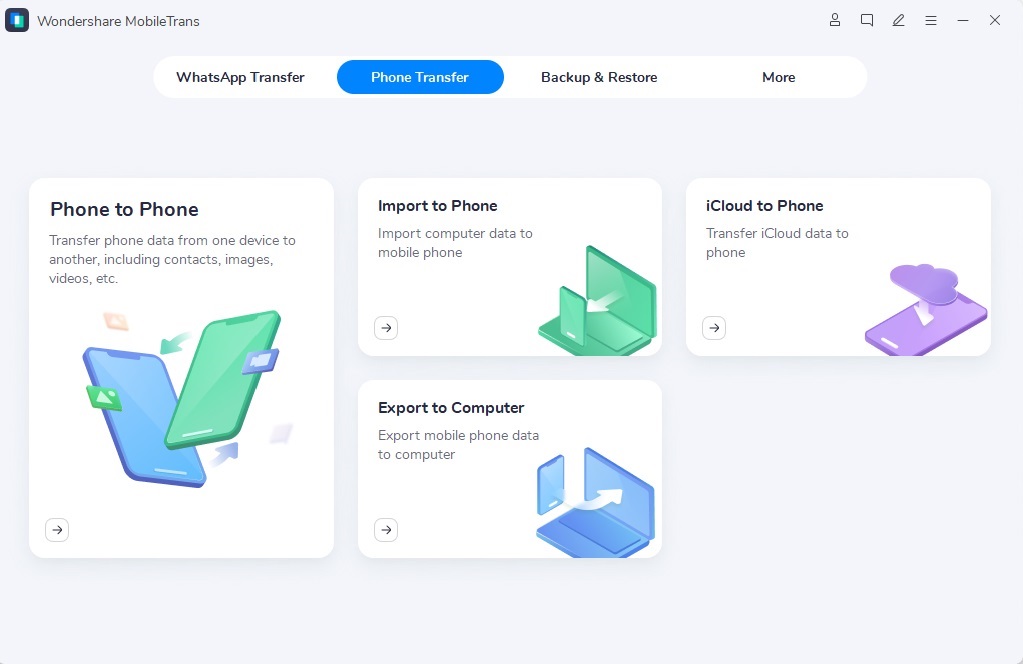
Step 3: Connect your phone and USB drive to the PC using their cable. Then, select music from the left side of the screen.
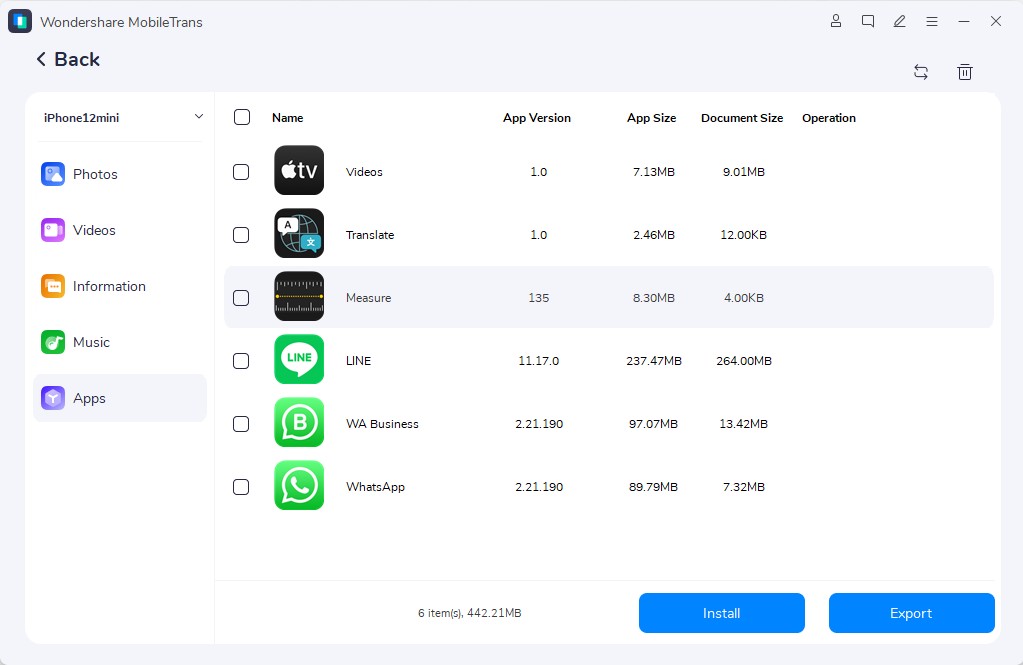
Step 4: Select the music files, and click Export. Then, select the USB Drive as the preferred location from the pop-up window to save the music files.
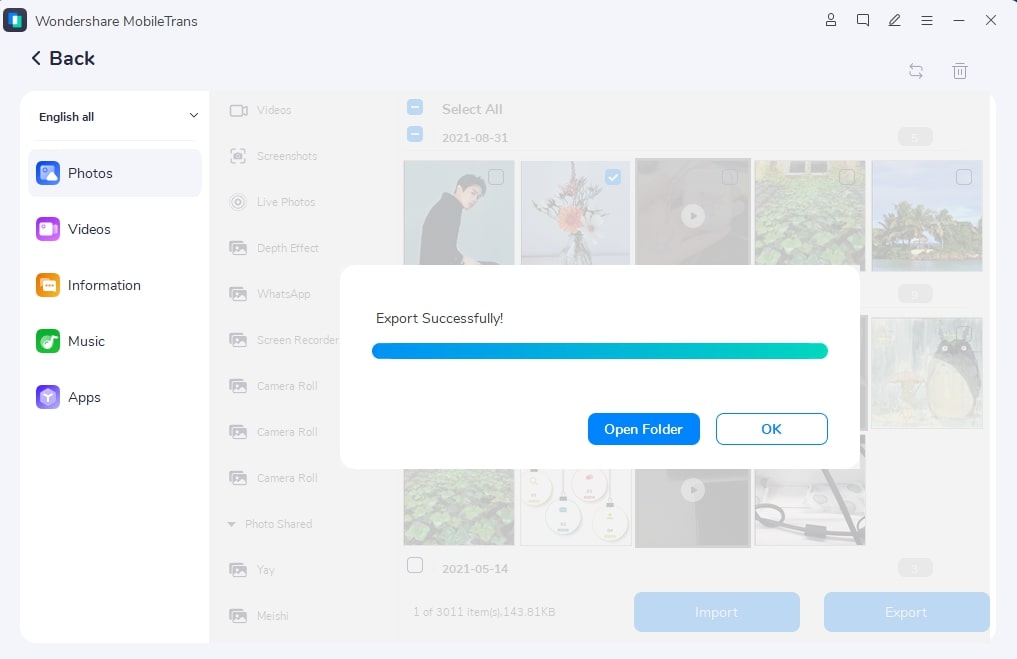
Step 5: Finally, click OK and wait for the music file transfer to complete.
Conclusion
Irrespective of your reason for copying iTunes playlists to a USB drive, the above methods can come in handy to complete the operation quickly and effortlessly. Choose the way you like.
Nevertheless, if the music files you wish to transfer are stored on your phone, MobileTrans is the ideal software to complete the job smoothly.
New Trendings
Top Stories
All Categories


Axel Nash
staff Editor