Are you endlessly searching for a technical solution online on platforms like Apple Support or Reddit, for why iTunes is not recognizing your iPhone? There might be a bunch of reasons why iTunes is unable to recognize your iPhone, like hardware malfunctions and software glitches. Having unsynced data can be frustrating as it can disturb essential tasks, such as backing up files.
When left unsolved, this problem can lead to users facing unnecessary stress and potential data loss. The aim of this article is to explore the common reasons why your iPhone not being recognized by iTunes. We will also look at the several fixes on how to resolve this solution with comprehensive steps.
In this article
Part 1. Common Reasons Why iTunes Not Recognized by iPhone
It is evident that if you’re unable to fix the “iTunes not finding iPhone” issue, it can distort your syncing workflow. Therefore, to understand this issue better, we’ll look at some of the common reasons why you face this “iPhone not found in iTunes” problem in the following:
- Faulty USB Port: If the USB port is damaged, using it might interfere with the syncing process and proper communication between iPhone and iTunes.
- Software Bug or Virus: One of the reasons for the “iTunes not detecting iPhone” issue can be a software bug or virus, causing significant problems when updating iPhones.
- Outdated iTunes Version: When this storage platform is not updated, it may fail to recognize your iOS device properly.
- Incompatible Drivers: As we know, drivers are important when connecting your phone to this storage platform. However, when corrupted or damaged, iTunes might not recognize your iPhone.
- Untrusted Device Connection: When you fail to approve the “Trust” after connecting your mobile to a new computer, it cannot access your device.
Part 2. The Ultimate Solution on How to Backup & Restore Data without iTunes
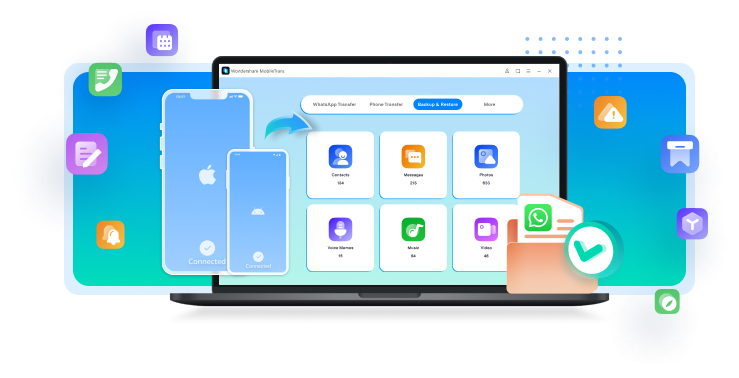
Wondershare MobileTrans is the best data restoration solution available for iOS and Android devices. This tool can easily tackle the “iTunes not recognizing iPhone” issue and help restore more than 18 file types. Using this software, you get the ability to transfer photos, videos, and other multimedia. Instead of using iTunes or any other transferring platform, this software provides an easy and accessible operating interface without needing any technical skills.
Unlike Google Drive or iCloud, it also lets you choose the data you want to restore or backup on your phone. During the backup and restoration process, MobileTrans ensures that your data is kept safe and no data is lost from your iPhone. It is a highly reliable tool that will let you back up your phone data seamlessly without any delay.
Wondershare MobileTrans
Restore Your Data to Phone Easily
- • No data loss. No data leaks.
- • Support various data, including files, photos, videos, apps, contacts, etc.
- • Compatible with thousands of device types acorss Android and iOS.
- • Restore from iTunes with simple steps.

 4.5/5 Excellent
Functional Guide on How to Backup and Restore Data Using Wondershare MobileTrans
Anyhow, let’s follow the steps given to back up data using this software. It only takes around 10 minutes to completely restore your information, which brings control over your important data:
Step 1. Connect iPhone to Computer after Installing MobileTrans
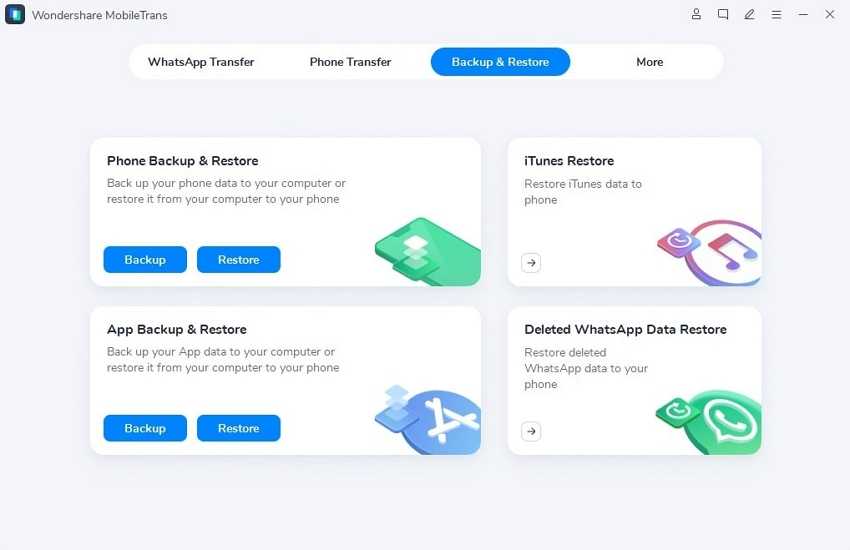
Initiate the process by downloading MobileTrans on your computer and opening its main interface after installation. Afterward, go to the top toolbar and click the “Backup and Restore” tab to reveal further options. Tap on the “Backup” button within the “Phone Backup & Restore” section to access a new screen. Now, connect your iPhone to your computer and allow accessibility to let this software process your phone.
Step 2. Choose Suitable Files and Initiate Backup Process
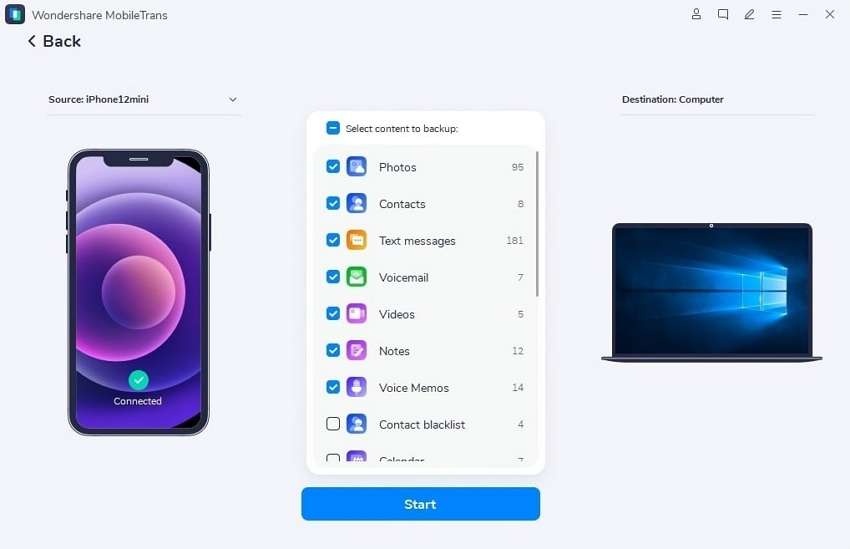
After it has processed the phone, you will be provided with a snapshot of all the file types on the software screen. Select all the files you want to back up from under the “Select content to backup” section in the middle. Once you’ve ticked the desired files, press the “Start” button to begin the backup process.
Step 3. Restore All the Backup Files on Your Phone from this Software
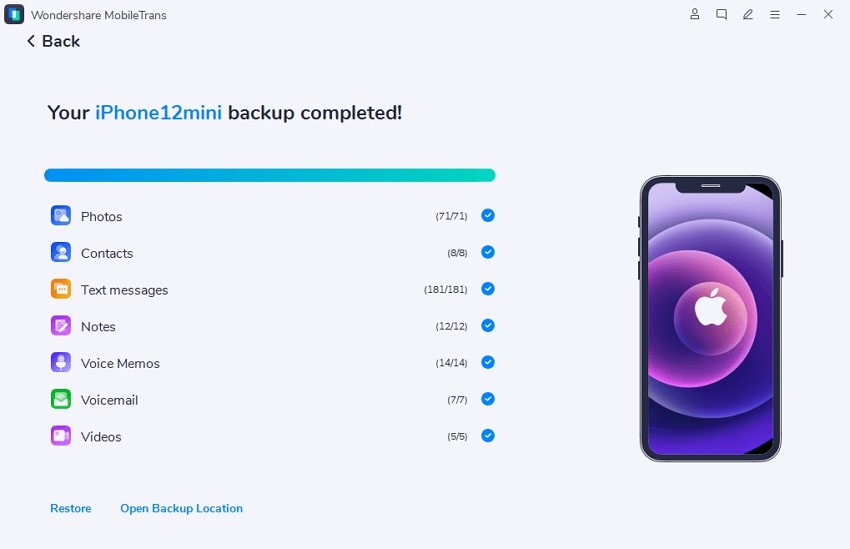
When the backup process is completed, an update will appear on a new screen indicating that your phone backup has been completed. You can hit the “Restore” button, which will restore all the files you have selected onto your phone.
Part 3. Top Fixes to Restore iTunes Recognition on iPhone
By far, you have discovered multiple reasons why the “iTunes not detecting iPhone” issue arises in the first place. Let us now look at the following top fixes on how to restore iTunes so that it can recognize your mobile properly:
1.Check Your Device and Cable
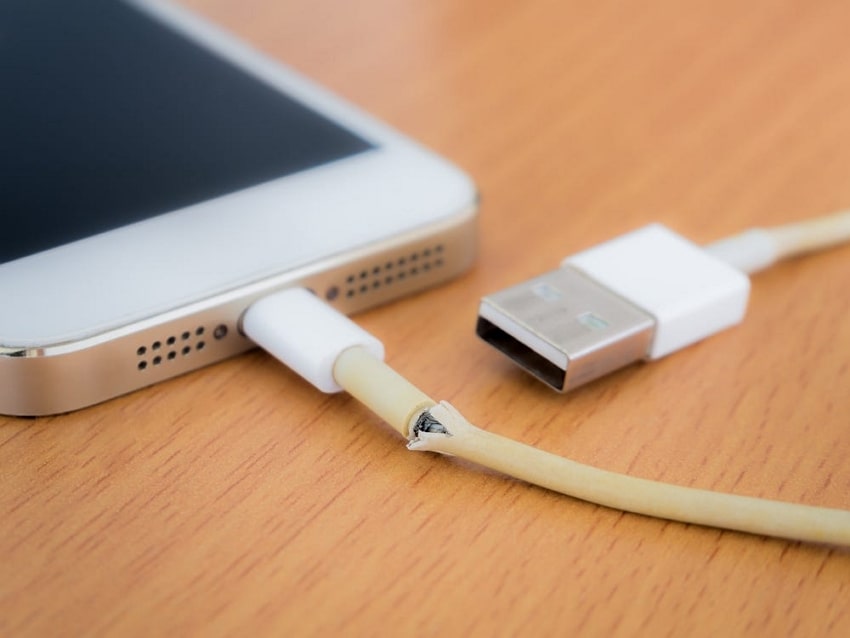
Before moving to the technical fixes, you need to ensure that the iOS device is properly connected to your computer with a reliable cable. The cable serves as the vital link between your iPhone and the computer, so any damage to the cable can disrupt the connection entirely.
Moreover, when you spot any physical damage to the cable, it also indicates an unstable connectivity between the devices. Therefore, it is essential that you carefully check the device and the cable to avoid the “iTunes not finding iPhone” issue.
2.Clean iPhone and Computer Port
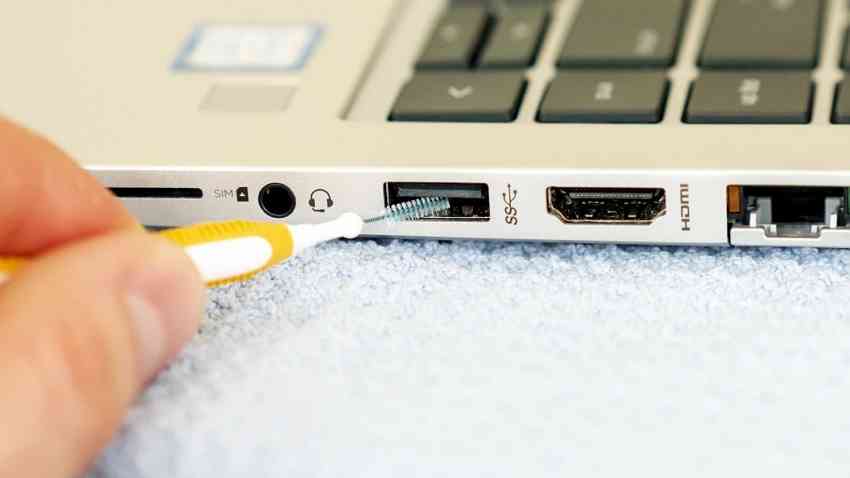
If the computer does not detect your iPhone, it can be one of two reasons that your iPhone or computer port is damaged or unclean. This debris can interfere with the phone syncing with the device and is also the reason why iTunes cannot recognize it. Therefore, you can try using a different USB port or cleaning it thoroughly to remove any dust or debris attached to it.
Furthermore, users can use a dry, anti-static brush to clean the phone and computer port. If you regularly clean the port, it can help prevent future connectivity problems with iTunes and other devices.
3.Update iTunes
In the previous parts, we learned that an outdated version of iTunes can lead to connectivity and detection issues. Having an old version of iTunes, you may lack the necessary protocols to interact correctly with your iPhone, failing to detect the mobile. So, let’s look at the following instructions on how we can fix this issue:
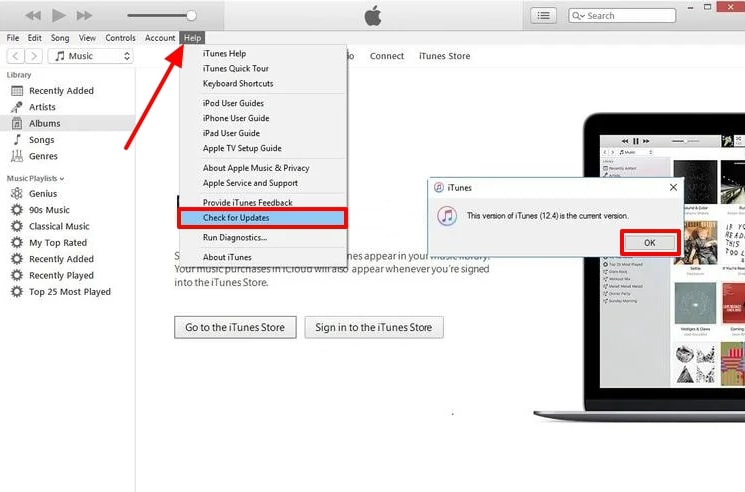
Instructions. After launching iTunes’ main interface, head to the top toolbar and click the “Help” tab to open a drop-down menu. From the menu, choose the “Check for Updates” option, which will open a small window. After that, you can make the necessary updates on your iTunes and relaunch the application to see if it connects to your phone or not.
4.Update Your Phone
Apple keeps providing users with updates to help them avoid the potential risk of a virus or bug. Through these updates, you can ensure your iPhone functions and performs properly without any bug infestation. An outdated iOS version can cause compatibility issues and raise the “iPhone not found in iTunes” problem. Thus, to tackle the situation, we provide you with the instructions to update your iPhone properly:
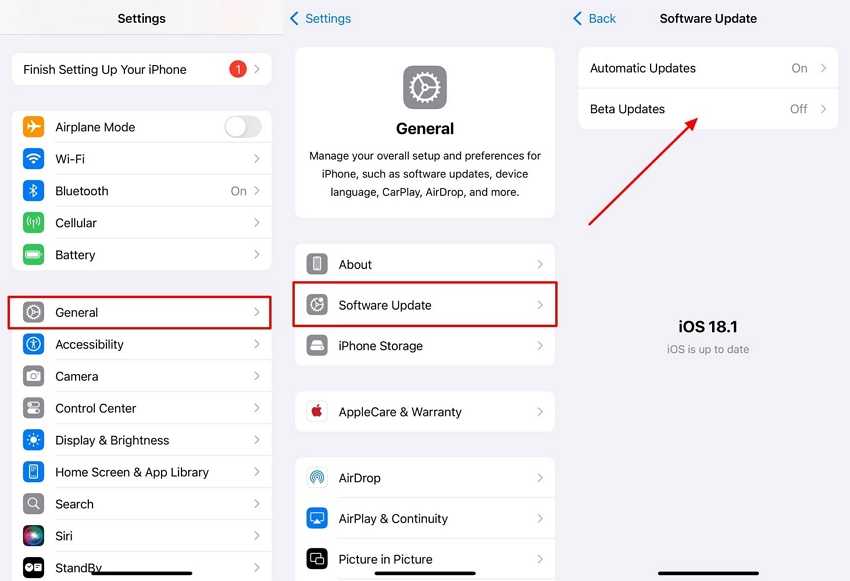
Instructions. Unlock your iPhone and tap on the “Settings” icon to open its main screen on your phone. After that, choose the “General” option to access the relevant settings on the next screen. From here, press the “Software Update” option, which will provide you with two update options. You can make the necessary updates to your iPhone by enabling the “Automatic Updates” or “Beta Updates” option.
5.Reset Privacy Settings on iPhone
There are times when you have set your iPhone to max restriction policies that might be blocking iTunes from accessing your phone. In this case, you need to reset the privacy settings on your iPhone and let it reconnect with your phone again. For this, read the given instructions to understand how to reset your iPhone settings:
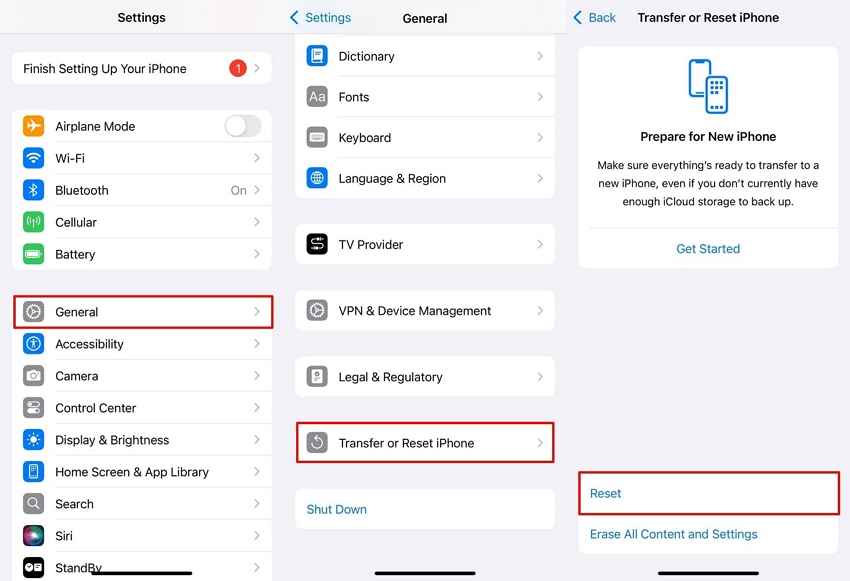
Step 1. After entering the “Settings” app, press the “General” option, and on the next screen, scroll down its available options. Now, tap the “Transfer or Reset iPhone” option, followed by the “Reset” option to reveal a bottom-up menu.
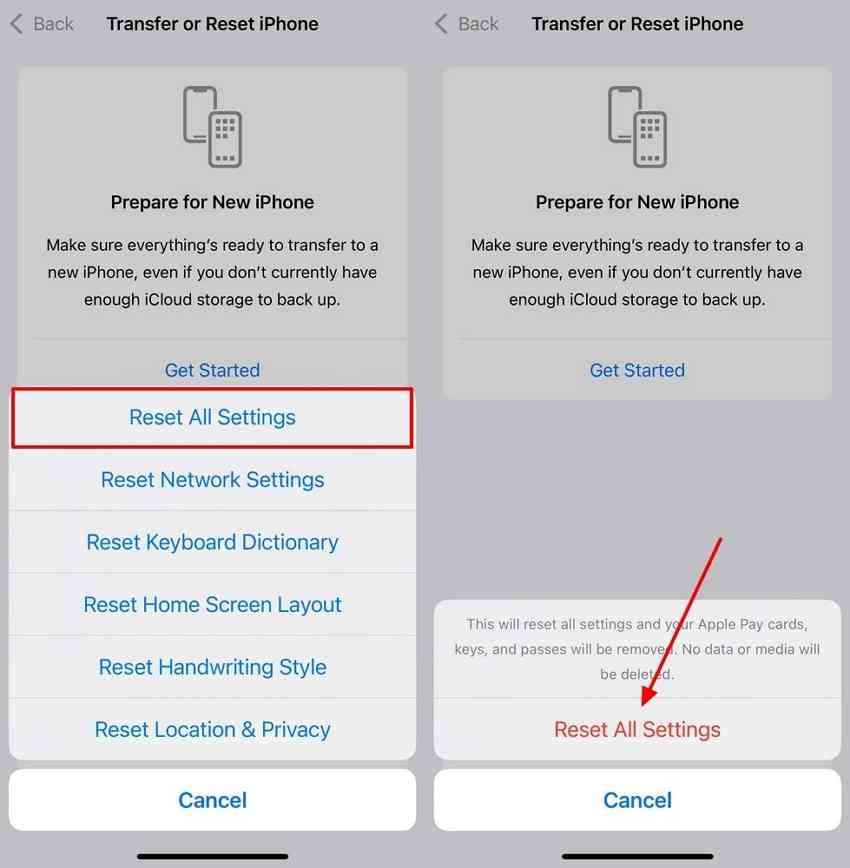
Step 2. Afterward, tap the “Reset All Settings” option and tap it again to rest all the available privacy options you have set. It will revert all your network settings, location, data, and other settings. Following that, you can reconnect your phone and give the “Trust” permission to iTunes for recognition on your computer.
6.Update USB Drivers
As discussed, outdated or missing drivers can lead to the “iTunes not recognizing iPhone” problem to arise. To ensure smooth connectivity, you should correctly install or update the USB Driver for the prevention of future recognition problems. Moving forward, let’s dive into the steps to update USB drivers on your computer:
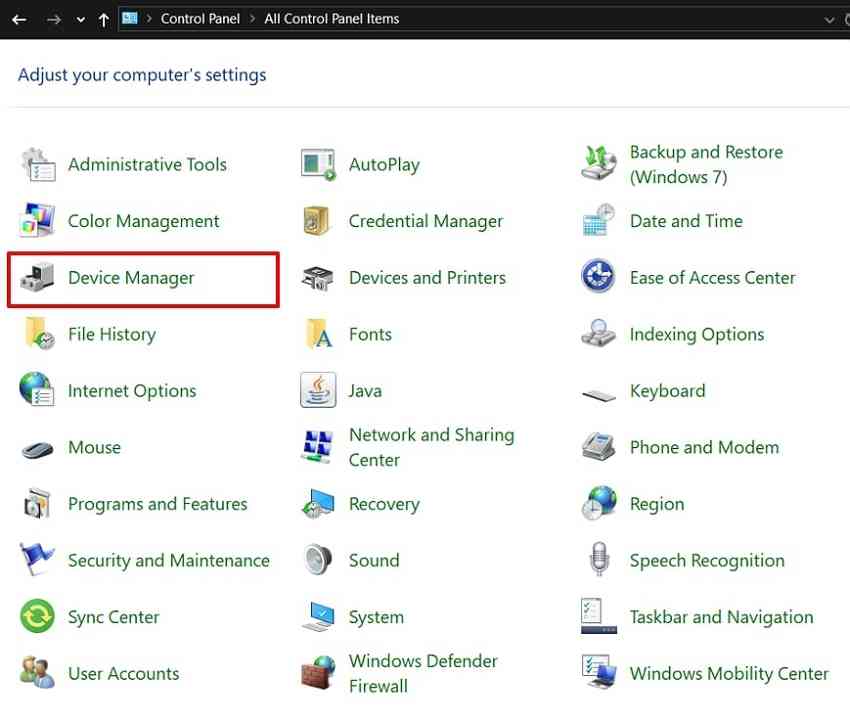
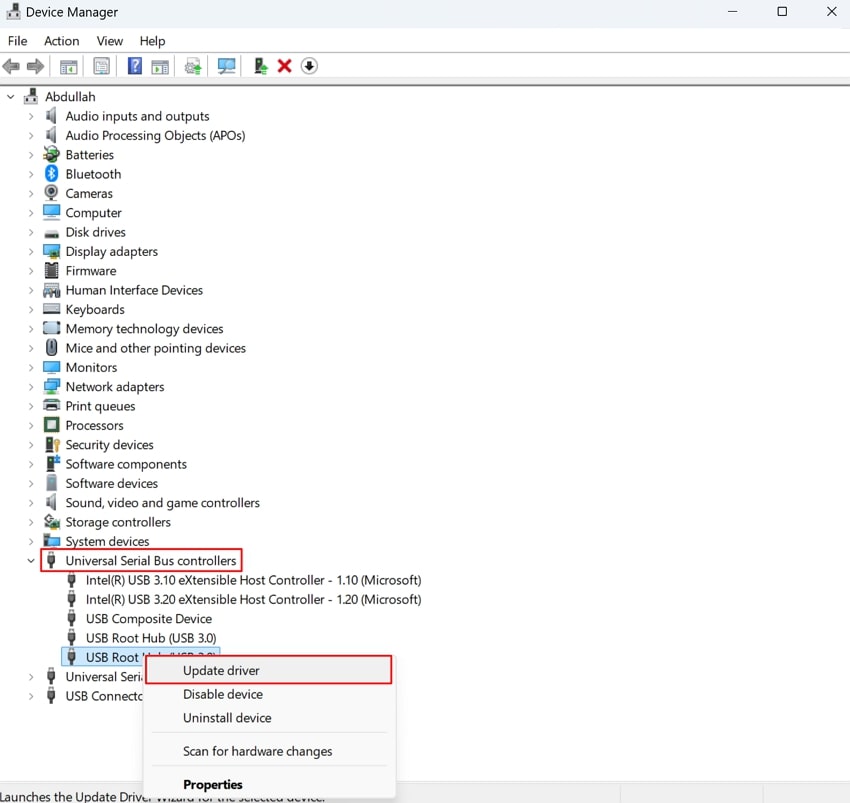
Step 1. Commence the USB driver update process by launching the "Control Panel” on your desktop device. From the available options, hit the “Device Manager” option to access its settings.
Step 2. This will open up a “Device Manager” window from where you have to pick the “Universal Serial Bus Controllers” option. Upon picking, another list of drivers will show up, where you can right-click the “USB Root Hub (USB 3.0)” and proceed with the “Update Driver” option.
7.Restart the iPhone and Computer
Another simplest solution to fix the “iTunes not finding iPhone” problem is to restart your operating systems. By doing so, you can fix any software conflicts, malfunctions, or glitches it might be experiencing within seconds. We have provided you with a comprehensive set of steps on how to restart your mobile and computer individually in the following:
iPhone
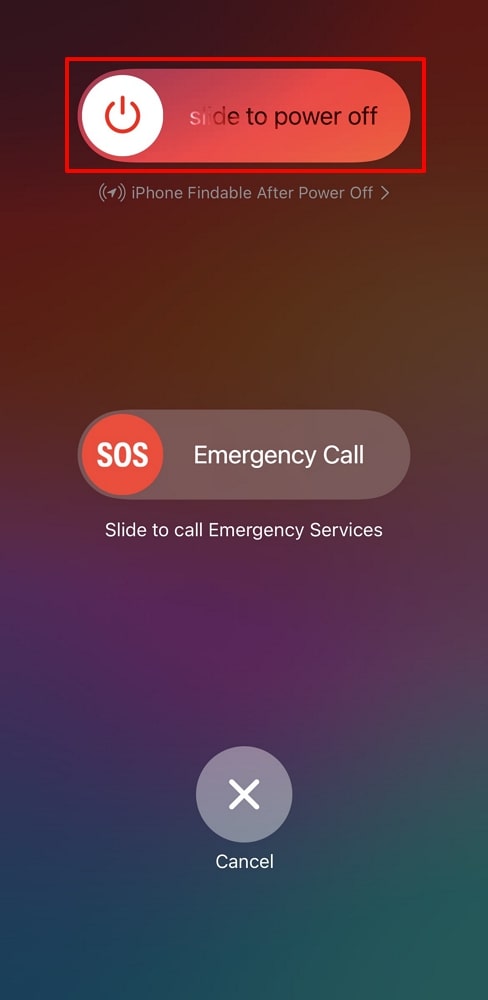
Instructions. Initiate the process of restarting your iPhone by pushing down the “Power” button and the “Volume Up” button simultaneously. Following that, a restart screen will appear where you need to slide the “Slide to Power Off” option from left to right.
Computer
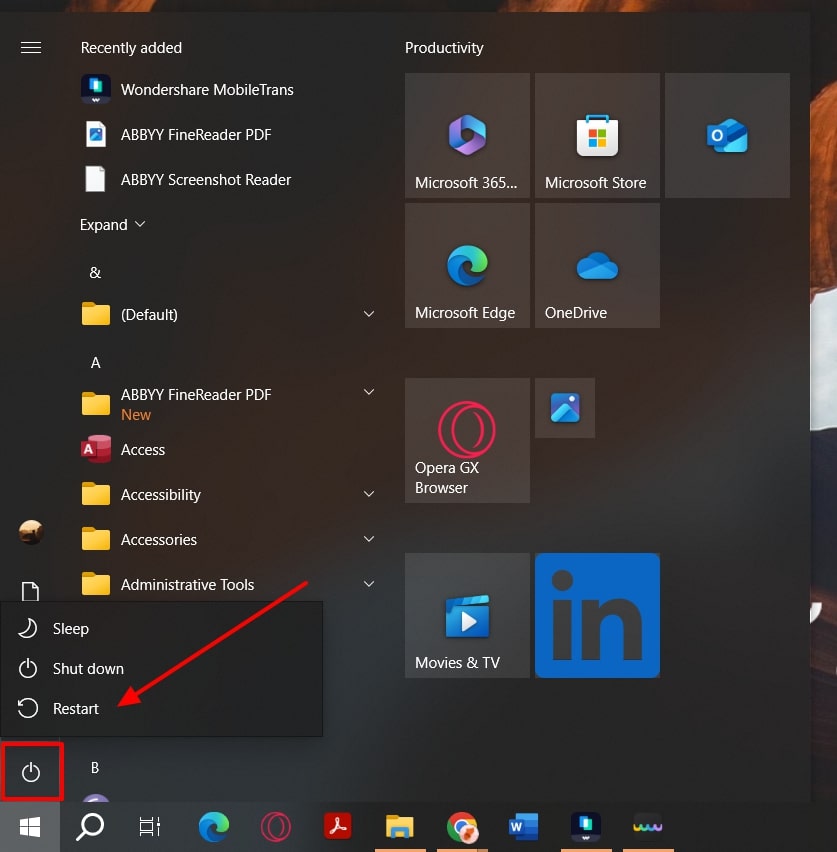
Instructions. To resolve the recognition problem, start by going to the “Windows” icon at the bottom left corner of the desktop screen. When a bottom-up menu appears, click the “Power” icon and select the “Restart” option from the extended menu. This will restart your desktop, and when that’s done, try connecting your phone to the computer again.
8.Unlock Your iPhone and Stay on the Home Screen
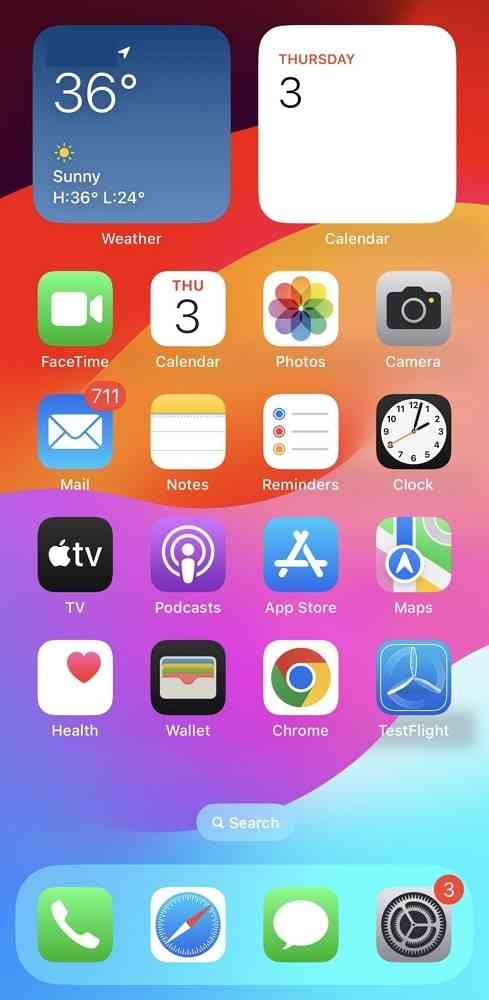
Sometimes, while trying to connect your phone to iTunes, the issue of “iPhone not found in iTunes” may arise. The main problem here is your iPhone screen, which is preventing iTunes from recognizing it. Therefore, unlocking the phone and staying on the home screen can allow iTunes to connect. Additionally, staying on this screen helps avoid distractions from notifications that may occur when using the device to ensure a stable connection.
9.Disable Security Software
An enabled firewall on your computer might prevent the iPhone to connect with iTunes. Furthermore, such security options can misidentify the connection between your iPhone and iTunes as a potential security threat. As a remedy, you have to disable the settings to fix the “iPhone not found in iTunes” problem. Follow the given steps and learn how to connect your iPhone to iTunes:
Step 1. To initiate the process of disabling firewall on your desktop, search for “Windows Defender Firewall” using the searching bar on the bottom of the screen. This will take you to a new interface displaying the firewall settings that needs to be altered.
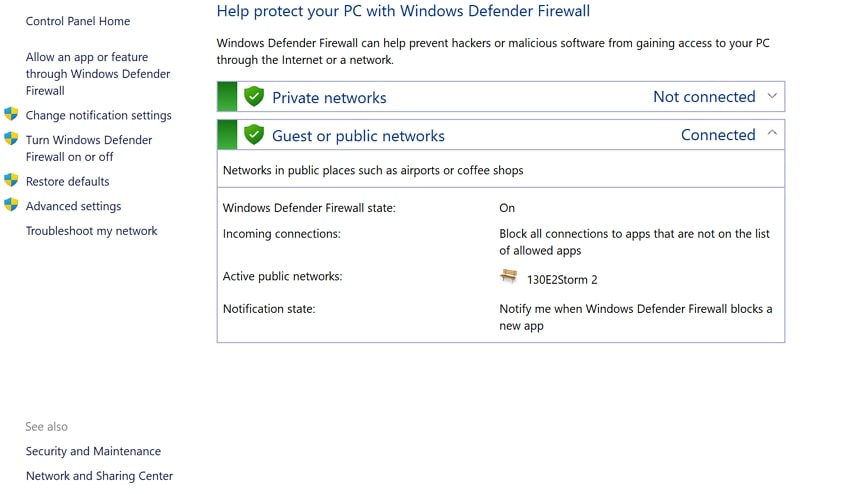
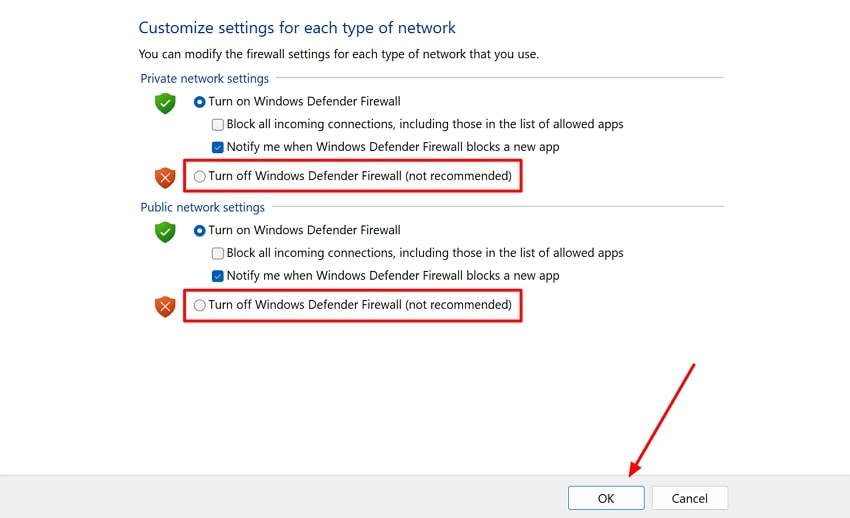
Step 2. Consequently, choose the “Turn Windows Defender Firewall on or off” option on the left panel to lead onto another window. Under the “Private network settings” and “Public network settings” section, select the toggle for turning off the firewall and click “OK.” This will potentially help you connect your iPhone to iTunes through the PC without any hindrance.
Conclusion
Now that you know how “iTunes not recognizing iPhone” issue occurs, this article tackles the problem by providing the best 9 solutions with comprehensive step guides. Aside from that, using Wondershare MobileTrans, users can simply backup and restore their data by connecting their iPhone to the software.


