PC to iPhone Transfer
- Easy Transfer: Transfer data from PC to iPhone seamlessly.
- Wide Compatibility: Works with a wide range of iOS devices.
- Versatile File Support: Transfer various file types with ease.
- User-Friendly Interface: Simple and intuitive interface for easy transfer.


 TL;DR:
The most reliable method to transfer photos from a Windows PC (versions 7 through 11) to an iPhone without overwriting original data is using MobileTrans for lossless bulk transfers, though cloud syncs, direct USB connections, and wireless tools offer alternative solutions based on file volume and available storage.
● Cloud-based methods including iCloud, Google Photos, and OneDrive allow for wireless synchronization but strictly require an active internet connection and are constrained by cloud storage limits.
● Direct USB transfers via iTunes preserve original image quality but lack the ability to transfer entire file folders, whereas manual copying through Windows File Explorer introduces data redundancy that can lower transferred file quality.
● Wireless alternatives like Email are strictly limited to sending a small number of photos, while third-party tools like AirDroid require mandatory account signups and expose users to in-app ads and potential data leak risks.
Ask AI for a summary
 ChatGPT
 Perplexity
 Gemini
 Claude
 Grok
Grok
“My computer keeps on crushing and is prone to data loss. What’s the best way to transfer photos from PC to iPhone and keep them safe?”
People value the photos they’ve taken with family and friends. They want to keep the memories alive forever and be the reference point when they meet after some time. And if you thought that the computer is the safest place to keep your photos, you could be wrong. They may get accidentally deleted or lost. But even though the phone is another culprit of data loss, at least you can sync your data to other devices for access. Our focus today is to transfer photos from PC to iPhone for easy access anywhere. Check out the best 9 ways to accomplish this mission.
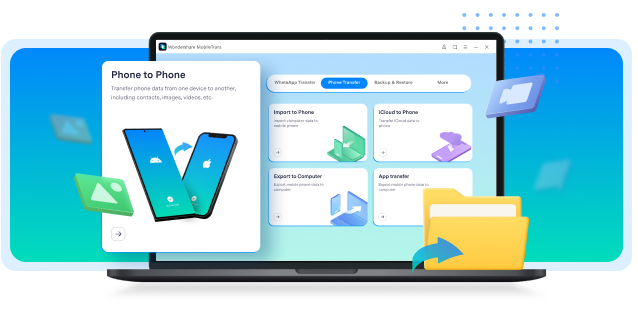
Part 1: Transfer Photos from PC to iPhone with MobileTrans [best choice]
The best choice to import photos from PC to iPhone is by using this sophisticated app. MobileTrans is intertwined with the latest technology to help you transfer data across different operating systems without a bridge. It will transfer your data losslessly while keeping the quality of the original files.
MobileTrans is highly compatible and supports over 6,000 mobile devices like iOS, Windows, Android, etc. It works well for the latest versions of devices like the iPhone 17. Also, know that your Windows 7/8/10 and version 11 are highly supported by this tool. Besides, it works at a 3X faster speed, guaranteeing quick data transmission.
MobileTrans Features
- It never overwrites original data
- Transfer and backup WhatsApp from phone to phone
- Transfers over 18 data types like music, video, photos, contacts, etc
- Easily restores backup files to your phone and iTunes
- Quickly transfers your data between devices like PC and phone
- It supports various Window OS versions like 7/8/10/11
- Transfers your data between different operating systems like Android and iPhone OS devices
A guide to sending photos from PC to iPhone with MobileTrans
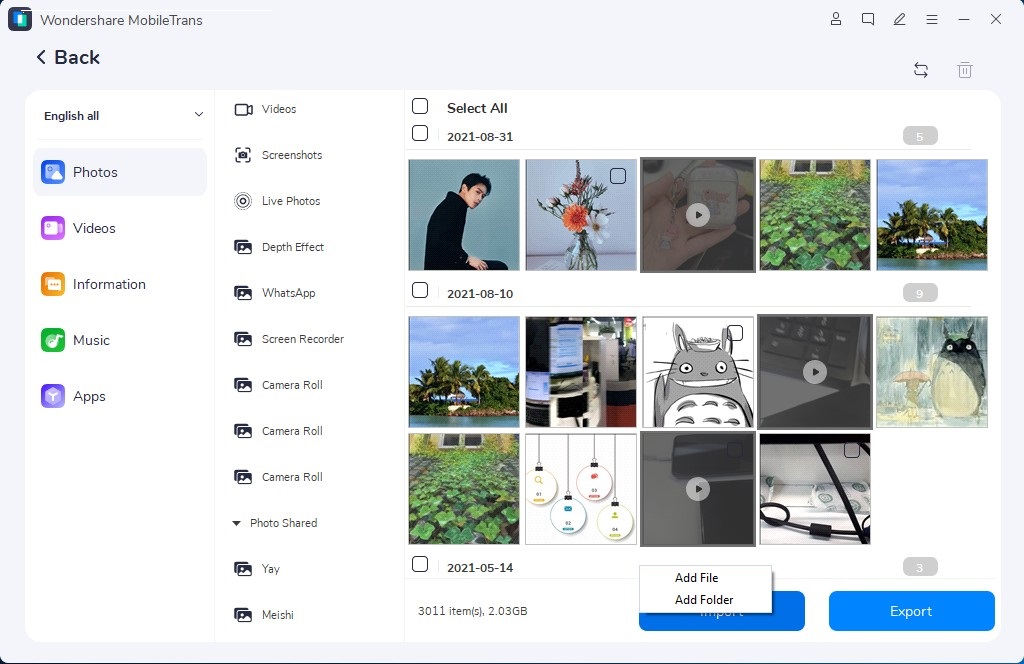
Follow these steps to import photos from your computer to your iPhone. Use the file transfer > import to phone feature.
- Once you download and install MobileTrans, launch it on your computer then choose the file transfer > import to phone feature.

- Use a USB cable to connect your phone to the computer.
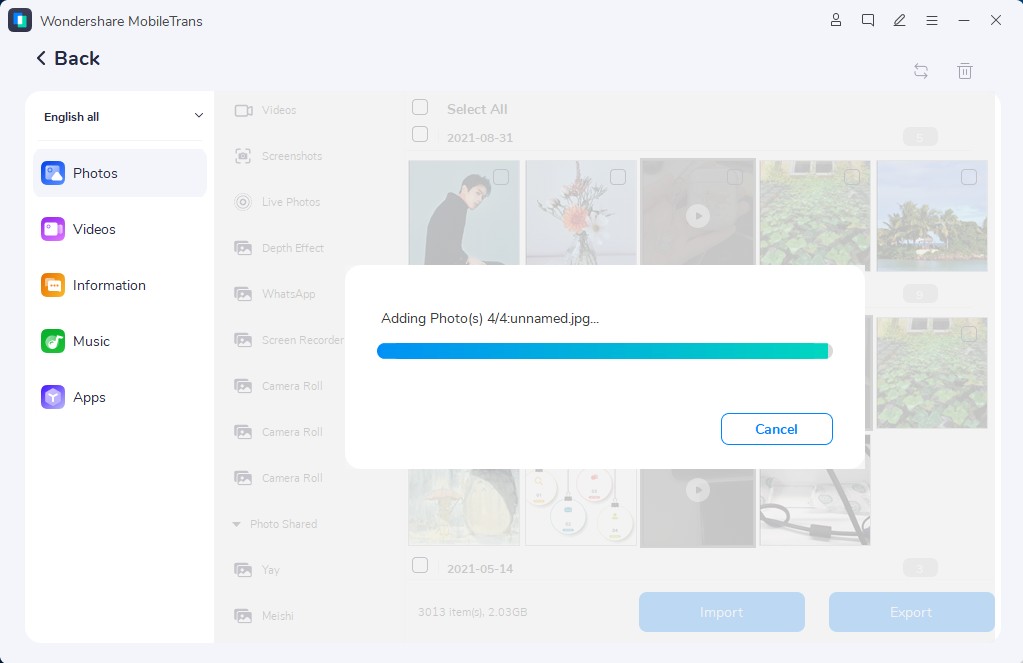
- Once the computer recognizes your phone, choose the “Photos” folder as the file type to transfer to the phone. Next, click on the “Import” button to let the transfer process begin.
- Your photos will immediately be transferred from your computer to the phone. You can then access them from your phone easily.
Part 2: Transfer Photos from PC to iPhone with File Explorer
File Explorer helps you to get the files you need easily. Access the file explorer from the taskbar or “Start” menu.

- The first step to transfer photos from PC to phone with File Explorer is to connect your phone to the computer with a USB cable.
- Then unlock your phone by clicking the “Trust this computer” option.
- Click on “Apple iPhone” in File Explorer and on the Internal Storage drive that appears. Next, choose the “Photos” folder labeled as “DCIM”.
- Finally, copy the photos folder and paste it to your iPhone’s icon. You will then access your photos on your iPhone.

Pros
- It offers different functionalities
- You can access it from OneDrive
Cons
- Data redundancy leading to low quality of the transferred data
Part 3: Transfer Photos from PC to iPhone with iTunes
Follow these steps to sync photos from computer to iPhone with iTunes.

- Ensure you have installed the latest iTunes version on your computer. Then launch it and connect your iPhone to the computer with a USB cable. Next, tap on the “Trust” option and enter your lock screen password on your phone. Your computer will then be able to access your data.
- Once iTunes detects your phone, click on the icon on the top bar and select the “Photos” option.
- Check the “Sync Photos” option then select the folder that harbors your photos on the computer. Then click on the “Sync” tab to sync your photos and access them on iPhone.
Pros
- No data quality loss
- It supports several data types
Cons
- It can’t transfer file folders but only individual and multiple files
- Not every application on the iOS device supports the iTunes file sharing feature
Part 4: Import Photos from PC to iPhone with iCloud

The next method for PC to iPhone photo transfer is via iCloud. Check out the steps.
- Go to the iCloud control panel and choose the “Photos” option. Then enable the “iCloud Photo Library” via iCloud settings and copy the photos you want to transfer.
- Then click the “Settings” option, enter your name, then click on the “iCloud” option and choose “Photos” to turn on the “iCloud Photos” on your phone.
- Next, go to the “Photos” app on your iPhone to find the photos from your computer. Finally, download them and transfer them to your iPhone.
Pros
- Easy to use
- You can sync data across all your devices
Cons
- You need your address and password for access.
- You require an internet connection to use iCloud
- It has a limit on storage space
Part 5: Copy Photos from PC to iPhone via Google Photos

This section shows you how to copy photos to the iPhone via Google Photos.
- First, go to “Google Photos” and sign in with your Google account.
- Next, click on the “Upload” tab and choose “Computer”. This will enable you to upload your photos to cloud storage.
- Then go to the “App Store” to download and install “Google Photos” on your iPhone. Sign in with the Google account that you use on your computer.
- Check the “Photos” tab to see the photos from your computer. The photos will now sync to your iPhone Google Photos. You can then easily download them to your iPhone.
Pros
- An attractive ad-free interface
- Easily organize your photos
Cons
- No built-in sharing to social media platforms
- Not enough photo storage space
Part 6: Move Photos from PC to iPhone using OneDrive
Follow the below steps and learn how to move photos from PC to iPhone with OneDrive.
- First, set up OneDrive on your computer.
- Identify and copy the photos that you wish to transfer to the iPhone, to the OneDrive folder on your computer.
- Then download and install the OneDrive app on your iPhone. Then sign in with the account that you use on your PC.
- Data syncing will begin immediately. Once completed, go to the OneDrive app and check for the photos from your PC.
- Connect your iPhone to the PC over a Wi-Fi connection to finally transfer the photos from PC to iPhone. You can use the drag and drop feature to move your photos to the phone icon on the computer.
Pros
- It integrates with Microsoft products and services
Cons
- Limited storage space
- Syncing of photos may take longer depending on the bulkiness of the photos
Part 7: Share Photos from PC to iPhone using Third-Party App
You can use Photo Transfer App with the help of a 3rd-party tool like AirDroid.

- Download the AirDroid app from the “Google Play” store.
- Then create an account on your phone or your PC
- Launch AirDroid on your phone or PC and click on the “Profile” icon
- Sign in to your account and you’ll be able to see your iPhone device listed.
- Click on the “File Transfer” icon and ensure the Device tab is selected.
- Then drag and drop the files you wish to copy from your computer to your phone. Alternatively, you can click on the “Send File” button and select the photos to send to your phone for access.
- Access the transferred photos on your phone.
Pros
- The basic version is free.
Cons
- You must sign up for an account to use either the free or premium versions
- There are adds in the app
- Risk for data leaking
Part 8: Send Photos from Windows to iPhone via Bluetooth
You can also use a Bluetooth connection to transfer photos from your PC to your iPhone. Just ensure your iPhone is paired with your PC and turned on for it to work properly.
- Go to your PC and click on the “Start” > “Settings” > “Devices” > “Bluetooth & other devices” option.
- Then select the “Send or receiver files via Bluetooth” option.
- In Bluetooth File Transfer, choose the “Send File” option and select your iPhone as the device you want to share to. Then hit the “Next” tab option.
- Select the “Browse” > then choose the files to share > go to “Open” and choose the “Next” option and finally hit the “Finish” button. You’ll receive your photos on your iPhone.

Pros
- Share files without losing quality
Cons
- You must pair your PC and iPhone for them to work as required.
Part 9: Transfer Photos from Windows to iPhone via E-mail
Last but not least is how to transfer photos from PC to iPhone via email.
- Log into your email account on your computer with your username and password.
- Compose a new email message and attach the photos that you wish to import to PC.
- Send the email together with the attachment to the same email address. You can also sign up for a new email address for this purpose to send the photos to. Log out from your computer.
- Use your phone to sign in to your email address once more.
- Check the “inbox” to find the incoming mails.
- Locate the received email with the photos’ attachment.
- Download the photos and save them to your phone for use.

Pros
- It is a quick way to transfer photos from a computer to iPhone 17 and other versions.
Cons
- It only suits the transfer of a limited number of photos
Conclusion
The above methods have shown in-depth how to import photos from PC to iPhone. The best option, MobileTrans, will not only let you transfer files from PC to phone but across operating systems as well. Move your data from Android to iOS and vice versa, while retaining the original quality.
FAQs
-
Q: How do I transfer photos from my laptop to an iPhone?
A: You can transfer photos using methods like iTunes, iCloud, Google Photos, File Explorer, or third - party tools like MobileTrans. Each method offers a step - by - step process for seamless photo transfer.
-
Q: How do I transfer photos from an iPhone to a PC?
A: Use File Explorer on Windows, iCloud for Windows, or Google Photos to download pictures from your iPhone to your PC. However, the best way to transfer photos from an iPhone to a PC is with MobileTrans. You can learn more in How to get photos off iPhone to PC.
-
Q: Can I transfer photos without using iTunes?
A: Yes, you can use iCloud, Google Photos, OneDrive, or MobileTrans to transfer photos without involving iTunes.
-
Q: What’s the easiest way to move all photos at once?
A: The simplest way is using MobileTrans or iCloud, as these tools allow bulk transfer in a few clicks.
-
Q: Is it possible to transfer photos wirelessly?
A: Yes, you can use iCloud, Google Photos, or AirDrop (for Mac users) to wirelessly transfer photos between devices.
-
Q: How do I ensure my photos retain quality during transfer?
A: Use tools like MobileTrans or iCloud, which preserve original photo quality during the transfer process.
New Trendings

Top Stories
All Categories


Navkiran Dhaliwal
staff Editor