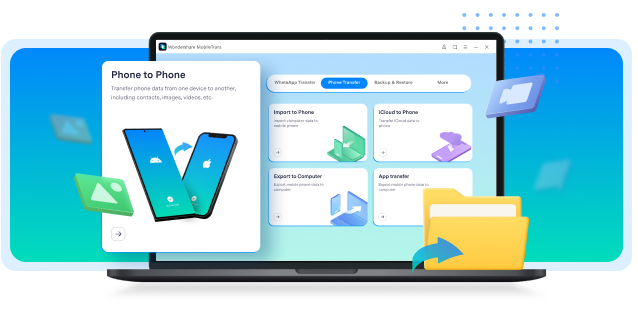
iPhone to PC Transfer
- Transfer photos, videos and more from Android or iOS device to Computer.
- Transfer 5 types of data from computer to mobile devices directly.
- Transfer iCloud data to Android directly.
- Transfer 18+ types of data including messages, contacts, photos. videos, and more between phones.


 TL;DR:
Transferring photos from devices like the iPhone 17 running iOS 26 to a PC requires a direct USB connection utilizing MobileTrans, Microsoft Photos, or iTunes, or a wireless synchronization setup via iCloud, Simple Transfer, or Photo Transfer App.
● Direct USB imports utilizing the built-in Windows Photos application necessitate having iTunes 12.5.1 or a later version installed on the PC.
● Moving images through the iTunes software allows users to select specific albums to sync but carries the inherent drawback of overwriting the current photos stored on the computer.
● The iCloud for Windows application facilitates wireless cross-device access but requires a prior cloud backup of the media and limits accounts to 5GB of free storage capacity.
Ask AI for a summary
 ChatGPT
 Perplexity
 Gemini
 Claude
 Grok
Grok
“I took my son’s graduation party photos using my iPhone. But lately, I realized the memory space is running out. How can I use the app to transfer photos from iPhone to a PC?”
The advancement of technology enables many operations with our smartphones. You can capture any moment, taking videos and photos alike. The only problem comes when your phone’s memory becomes full and the phone cannot function as it should. In such times, you need an app to transfer photos from iPhone to PC. This article covers the best 6 apps for photo transfer from phone to PC. And if you’re using the latest iPhone 17 with iOS 26, you’ll also discover updated wireless transfer options that make sharing files across devices faster and more secure than ever.

1. Best App to Transfer Photos from iPhone to PC: MobileTrans
MobileTrans is the best choice best app to transfer photos from iPhone to PC and other versions. This app works at a fast speed, to quickly transfer any data type between operating systems like Android to iPhone and vice versa. It also works excellently to backup and restores any data between phones, including photos to your PC.
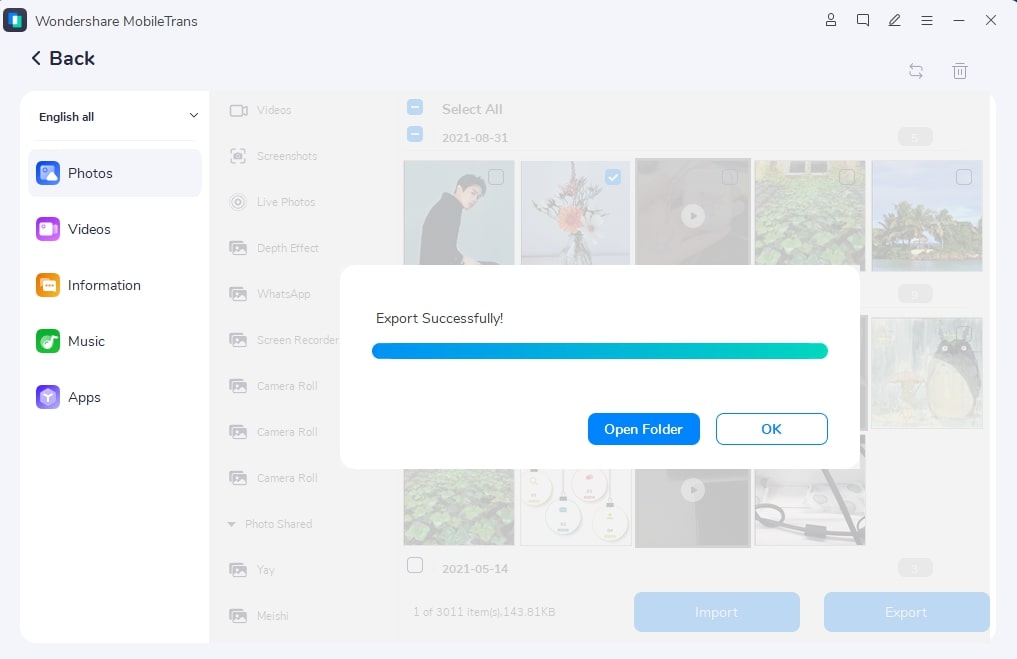
Step 1. Connect your iPhone to the Computer
Launch MobileTrans on your computer then choose the “File transfer” > “Export to computer” feature to start to transfer your data from the phone.

Step 2. Select the file type to transfer
MobileTrans will automatically load all the supported file types. Choose “Photos” and click on the “Start” button to begin the transfer.

Step 3. Transfer complete
Ensure you keep your phone connected until the transfer is complete. Then locate the transferred photos from your local computer folder.
2. App to Transfer Photos from iPhone to PC: Microsoft Photos
Fortunately, Windows 10 has a built-in app that provides a quick and easy solution for this task. This app is designed to import photos from an iPhone to a PC and is readily available without additional installation or setup.
With this app, you can easily transfer photos from your iPhone 17 to your PC with just a few clicks. It eliminates the need for using third-party apps or services, which can be unreliable and may compromise your privacy. This app comes standard with Windows 10 and is a quick remedy app to import photos from iPhone to PC.
Step 1. First, connect your iPhone to your PC via a USB cable.
Step 2. Then, launch the “Photos app” from the “Start” menu.

Step 3. Click on the “Import” tab that is located at the top-right corner.
Step 4. The app will select all photos by default. So, deselect the ones you don’t want to import.
Step 5. Finally, click on the “Continue” tab. The app will begin to transfer photos from your iPhone to the computer.

Pros
- Keeps your file organized by date or album
- Easy to use
Cons
- It will sluggish if you have many photos to transfer.
3. App to Transfer Photos from iPhone to PC: iCloud
If you're an iPhone user, you're probably familiar with iCloud, Apple's cloud-based storage service. iCloud offers a convenient way to back up your data, including photos, and keep it in sync across all your devices. One of the benefits of using iCloud is that it enables you to transfer photos from iPhone to PC wirelessly. All you need to do is follow a few simple steps, and you'll be able to access your photos on your computer in no time. Just make sure that you've previously backed up your photos to iCloud before attempting to transfer them..
Step 1. Install iCloud for Windows on your computer
Step 2. Then sign in to the iCloud app using your Apple ID and password

Step 3. Click the “Options” button next to “Photos”.
Step 4. Click the box next to iCloud Photos so that a checkmark appears.
Step 5. Then click the “Done” tab and tap “Apply”. Any photos in your iCloud will download to your PC.

Pros
- It has a 5GB of free storage capacity
- Instant access from any iOS device
Cons
- You need to log in to your account to use it
- You may need to upgrade your iCloud storage if you have more than 5GB capacity of photos and videos
4. App to Transfer Photos from iPhone to PC: iTunes

If you prefer to use iTunes to move photos from iPhone to PC, you'll be happy to know that it's a straightforward process. iTunes is Apple's media player and device management software, allowing you to manage your iPhone's content, including photos. You only need a USB cable to connect your iPhone to your computer, and you can start transferring your photos immediately. With iTunes, you can choose which photos to transfer and where to save them on your computer. It's a reliable and effective way to keep your photos organized and accessible on your PC.
Step 1. Download iTunes from Apple’s website and install it on your computer.
Step 2. Launch iTunes, then connect your iPhone to the PC via a USB cable.
Step 3. Once your computer recognizes your iPhone, click on your iPhone’s icon to start the backup process.
Step 4. Select “All Photos and Album” to transfer and click the “Apply” button.
Step 5. The syncing process will automatically begin. When it is complete, click on the “Done” tab.
Step 6. Now, use your computer to log into iTunes to access the photos.
Pros
- Syncs your data across all your devices
Cons
- It will overwrite the current photos on your computer
5. App to Transfer Photos from iPhone to PC: Simple Transfer
In today's digital era, we rely heavily on our smartphones to capture and store precious memories in the form of photos. If you're looking for a convenient and hassle-free way to transfer your iPhone photos to another device, a free app can help. This app offers wireless photo transfer, eliminating the need for cables or complicated setups. With its user-friendly interface and seamless functionality, you can effortlessly transfer your photos from your iPhone to another device at no cost.
Step 1. Install the Simple Transfer app to your computer
Step 2. Connect your iPhone and computer directly to your local WiFi network
Step 3. Then, checkmark the photos you want to transfer and hit the “Transfer” button.
Step 4. The app will transfer photos from your iPhone to your PC wirelessly. Finally, access your photos on your computer.
Pros
- It is free
- Exports photos in various formats like JPEG and HEIC
Cons
- Unable to transfer files to external servers
6. App to Transfer Photos from iPhone to PC: Photo Transfer App
If you're an iPhone user, you're probably familiar with the challenge of transferring photos from your phone to your PC. Fortunately, there are numerous apps available that can make this task more manageable. One such app is explicitly designed to transfer photos from iPhone to PC. This app offers a user-friendly interface and a simple process for transferring your photos wirelessly or with a cable. Whether you're a novice or an experienced user, this app makes transferring photos from your iPhone to your PC a breeze.
Step 1. First, connect your iPhone to the computer over a WiFi connection. Then go to the “Start” menu and select the “Photos app”. Ensure you grant the permission to connect the authority page that appears.
Step 2. The “Photos app” will then open. Next, use the “Import” option to facilitate photos import.
Step 3. A dialog box will then open up. Select your iPhone as the device you want to transfer photos from.

Step 4. The app will continue to scan your data. A confirmation pop-up message will appear once the scanning process is completed. Choose the photos you want to transfer and click the “Import” tab.
Step 5. Select your PC as the location to save the imported photos then click the “OK” button to complete the process. Finally, access them from your computer.

Pros
- Transfers your photos in full resolution without quality loss
Cons
- It supports only Windows XP and later versions
- It may not work on some public WiFi networks
FAQs
1. Can I plug my iPhone into my PC to transfer photos?
To transfer photos to your computer, connect your device to your PC and utilize the Windows Photos app. Ensure that you have the most recent version of iTunes installed on your computer. Importing photos to your PC necessitates iTunes 12.5.1 or a later version. Use a USB cable to connect your iPhone or iPad to your PC.
2. Can you AirDrop to a PC?
AirDrop is not accessible on Windows or Android; however, both platforms offer AirDrop-like functionalities. Nearby Sharing facilitates file transfers between Windows 10 and Windows 11 PCs, while Google's Nearby Share enables file transfers between Android devices and from Android to PC.
3. Can I mirror iPhone to PC with USB?
Yes, you can mirror your iPhone to a PC using a USB cable. To do this, you can use software like ApowerMirror, 5KPlayer, or the built-in QuickTime Player on Mac. Simply connect your iPhone to your PC using a USB cable and open the mirroring software to start mirroring your iPhone screen to your PC. Keep in mind that the specific steps may vary depending on the software you choose to use.
Conclusion
It is a gem to keep memorable photos and videos for future reference. We have brought you free iPhone photo transfer apps for your long-awaited journey. Don’t lose your photos anymore due to unlimited space on your iPhone. Engage these apps and transfer your photos to your computer for further safety.
New Trendings

Top Stories
All Categories


Axel Nash
chief Editor