


 TL;DR:
Transferring photos from an iPhone to an SD card requires bypassing the lack of a built-in slot by using either a direct Lightning or USB-C card reader or a computer equipped with a card adapter alongside tools like File Explorer, iCloud, or Wondershare MobileTrans.
● Select an SDXC memory card with a minimum capacity of 128GB and UHS-II read and write speeds to ensure optimal performance when handling HD multimedia files.
● To execute a transfer without a computer, attach a card reader directly to the iOS device, highlight the images in the Photos app, tap Share, and use the Export Unmodified Original option to save files to the external location.
● For computer-assisted methods, File Explorer enables direct manual copying, the Mac and Windows Photos apps automatically detect and import only new images, iCloud provides wireless syncing prior to desktop download, and Wondershare MobileTrans supports comprehensive bulk media migration without requiring a device reset.
Ask AI for a summary
 ChatGPT
 Perplexity
 Gemini
 Claude
 Grok
Grok
Many users capture countless memories on their Apple devices but struggle with storage limitations. As we know, pictures and videos take too much storage, so you should consider freeing up your phone's space. The effective way to store images externally is by using a memory card. A secure digital card offers a reliable and portable option for storing photos that helps you to get more storage on your smartphones.
Alongside that, unlike some Android phones, iOS devices do not have an inbuilt SD card slot. Fortunately, multiple methods still exist to complete this task. So, this article explores various techniques to learn how to transfer photos from an iPhone to an SD card with ease.
In this article
Part 1. When Should You Move iPhone Photos to an SD Card?
Before heading towards the solution, you should first know the importance of migrating your photos from your phone to a card. Even when you're freeing up space or creating a backup, knowing when to move your pictures helps you stay organized. Below, we will explore some key situations before learning how to export photos from an iPhone to an SD card:
- Storage is Full: When your storage is nearly full, your device may slow down and struggle to install new apps. That's why moving photos to a memory card helps free up space without losing important memories.
- Backup Photos: You also might sometimes lose your precious photo accidentally from your device. To overcome this challenge, creating a backup on a secure digital card ensures your pictures are safe.
- Sort Collection: Our phones store thousands of pictures, which makes it hard to find specific ones. Thus, you need to transfer images to the card that lets you organize them into folders by events or dates.
- Share Files: When you need to move pictures from one device to another, a secure card proves to be a quick solution. Even when you're migrating images to a camera or laptop, it allows easy access without relying on cloud services or cables.
Part 2. How to Select the Best SD Card to Store Your iPhone Photos
Moving forward, choosing the right memory card is also important when storing your phone’s photos. Since iOS devices lack storage card slots, you need an external adapter or computer to move images. Before going further, let’s dive below to understand what makes an SD card suitable for storing your pictures:
- Storage Size: While capturing HD photos or videos, a larger-capacity card is a must-have. Thus, you should choose at least a 128GB card that offers a balance between space and affordability.
- Read and Write Speed: Users must look for memory cards with high speeds, such as UHS-II cards. This can help you quickly access and transfer photos without long waiting times.
- Type of Cards: Different types of memory cards are available, including SDXC and microSD. Among them all, SDXC cards are ideal for storing HD multimedia files.
- Cost vs. Performance: Larger and faster memory cards cost more, but they offer better performance. Hence, you should invest in a reliable storage card that ensures smooth transfers and long-term storage stability.
Part 3. How to Transfer Photos from an iPhone to an SD Card with Wondershare MobileTrans?
Upon picking the right memory card, the next step should be looking to move your phone’s photos efficiently. Many methods exist, but using a reliable tool ensures a smooth process. Wondershare MobileTrans is the best option for exporting photos from an iPhone to a memory card. It offers a fast and secure way to move pictures via your computer without risking data loss.
Along with that, this tool supports multiple data types, including photos, for migration. In this regard, users just need to connect their devices and continue to move their preferred files. However, remember that this tool is compatible with nearly all devices, making it ideal for those wondering how to transfer photos from an iPhone to a memory card quickly.
Innovative Features
- Unlike other transfer methods, MobileTrans does not require resetting your device to move files.
- Users can create a full backup of their iPhone data and restore it whenever needed.
- Beyond photos and videos, it enables the transfer of contacts and even app data like WhatsApp.


Guide to Use MobileTrans to Transfer Photos from iPhone to Memory Card
With these features, this tool offers a reliable solution for anyone looking to move their multimedia files to a memory card. So, follow the detailed steps below to migrate your photos and free up your phone’s storage:
Step 1. Access Wondershare MobileTrans to Move Photos
Begin the procedure by accessing this tool once you have installed it on your computer. Upon entering its main interface, access the “Phone Transfer” tab to display a new array of transfer options. From that screen, choose the “Export to Computer” option to proceed with the process.

Step 2. Choose Photos to Transfer Them from Your Phone
Following this, link your phone to the desktop via a USB cable to show all your data on the MobileTrans interface. Alongside that, you need to attach the “Memory Card” with the same computer through the “Card Reader.” Then, select the multimedia files you want to transfer and select your “Memory Card” folder as the destination on your PC. Afterward, press the “Export” button to move further.

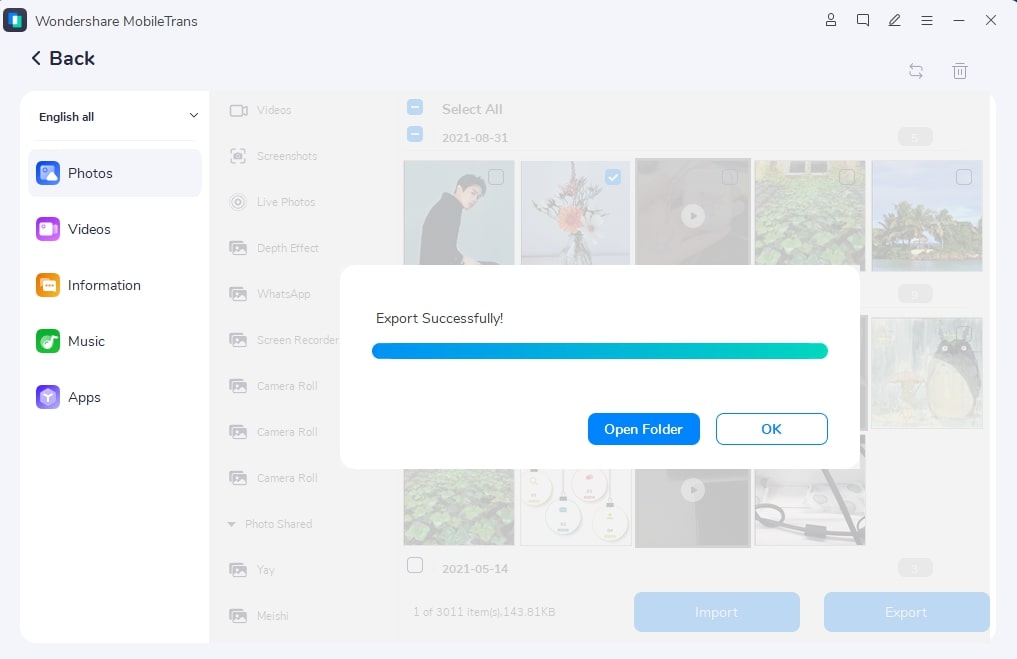
Step 3. Successfully Store Your Photos on a Memory Card
Upon doing this, the software will begin transferring your valuable photos from your phone to your computer.
Part 4. How to Transfer Photos from iPhone to Memory Card via File Explorer
When you don't want additional setups, navigate to your File Explorer, as it offers a simple way to move photos to a memory card. This method allows direct file transfers by just connecting your phone to the computer. It also ensures easy access to your images without relying on cloud services or software. Thus, let’s address the “how to transfer iPhone photos to memory card” query through the given guide:
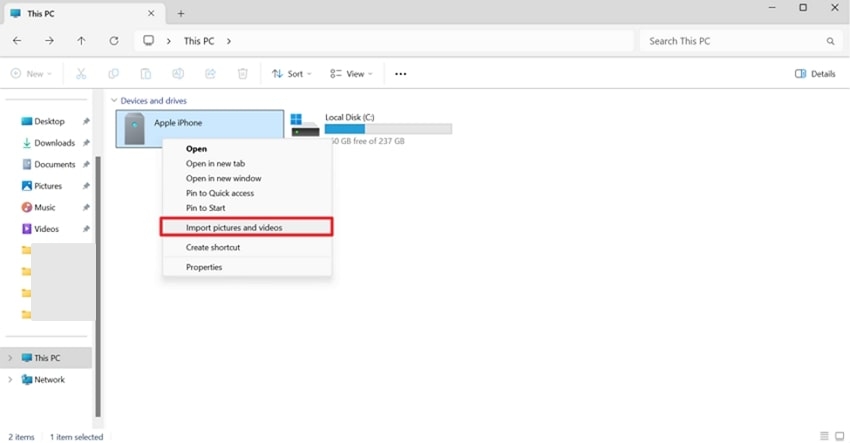
Step 1. Commence this procedure by linking your phone to your PC and opening the “File Explorer.” Upon locating the connected device, right-click and choose the “Import Pictures and Videos” option from the menu. By doing this, all the media will migrate to the desktop, which you can paste to the SD card.
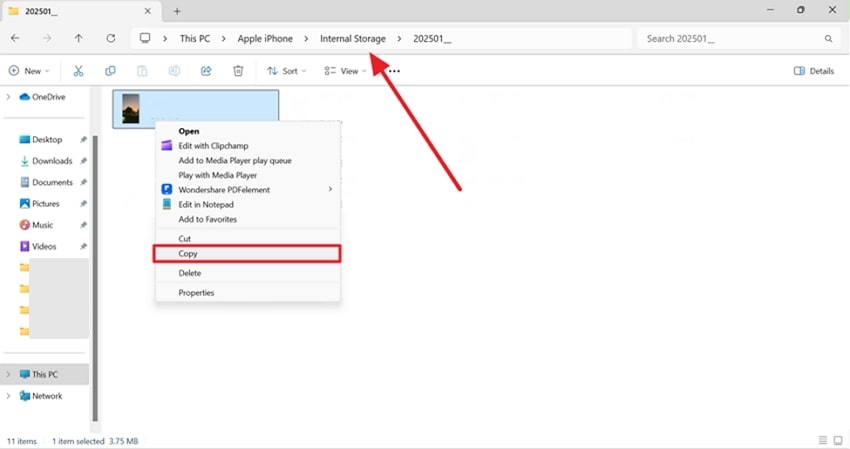
Step 2. Alternatively, access your connected device through “File Explorer” and find the desired media file. When you locate it in your phone's storage, right-click and select the “Copy” option.
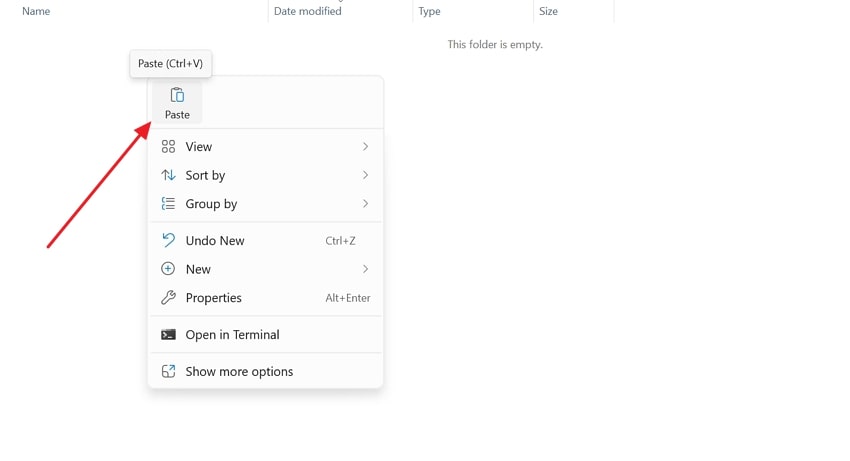
Step 3. Afterward, connect your memory card to the PC, either using an adapter or a card reader. Then, open it through the “File Explorer” and right-click on any folder to “Paste” the copied photos.
Part 5. How to Transfer iPhone Photos to Memory Card Using Photos App
Another method that provides an easy way to transfer iPhone photos to a memory card is the Photos app. Unlike manual copying with File Explorer, this method helps organize images automatically. It also ensures smoother transfer by detecting and importing only new photos. Follow the steps below to learn how to transfer photos from an iPhone to an SD card using this way:
1. For Windows
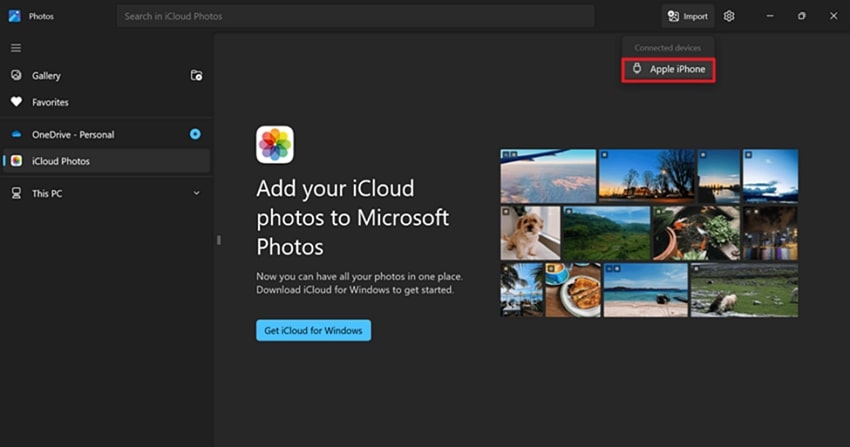
Step 1. To inaugurate, you need to make a connection between your computer and the phone. Afterward, open the “Photos” application and tap the “Import” button to select the connected smartphone.
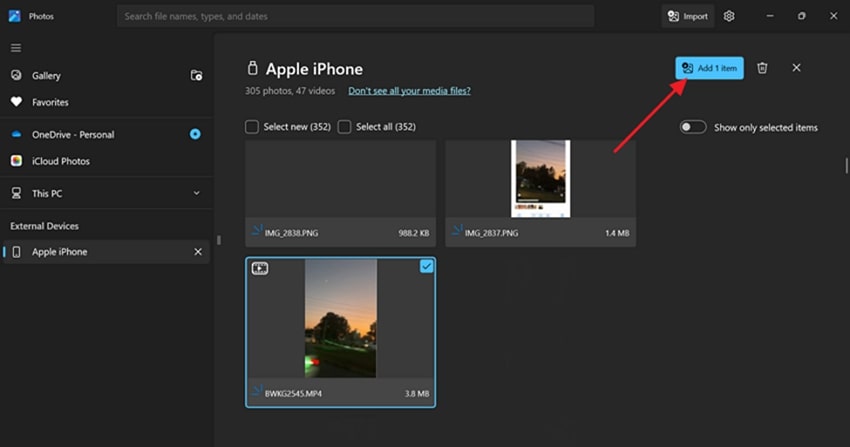
Step 2. When the application begins synchronizing the media from your iOS device, choose any image and click the “Add Item” button.
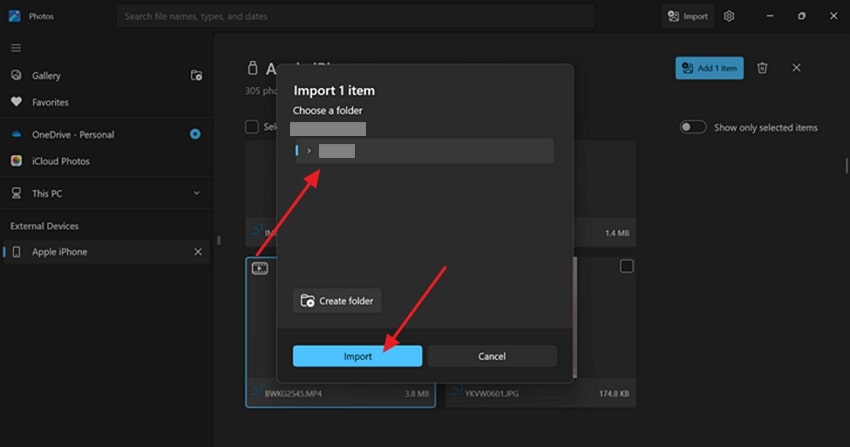
Step 3. Afterward, you need to attach your secure digital card to the desktop. Then, select the memory card folder from the pop-up options to save the media files and click the “Import” button.
2. For Mac
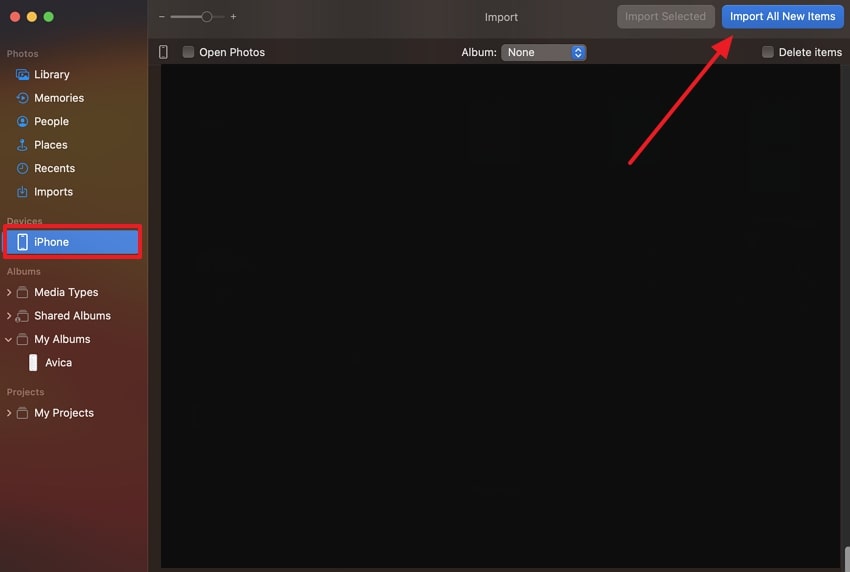
Step 1. To initiate, connect your phone to the “Mac” using the respective USB cable. When you see a small pop-up, press the “Allow” button and then navigate to the “Photos” app. Now, access your mobile’s section and press the “Import All New Items” button to move all the images to the application.
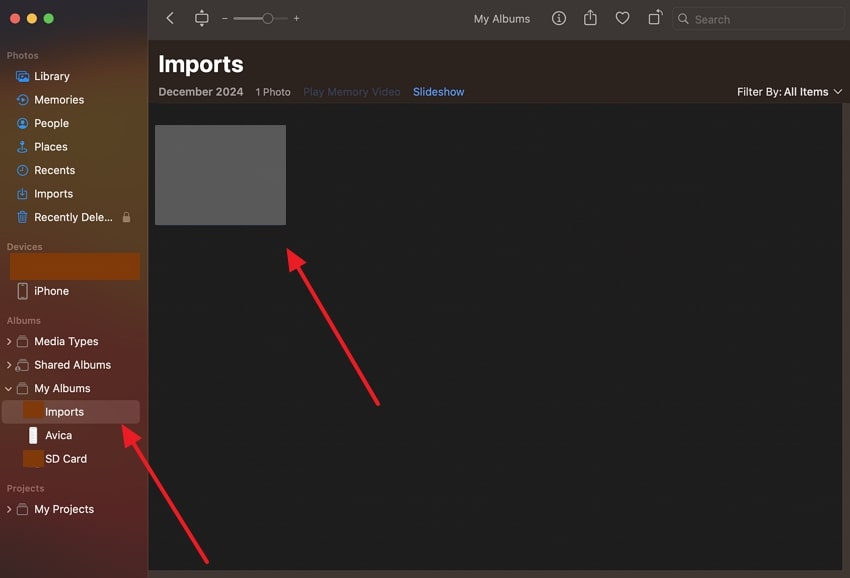
Step 2. Moving forward, go ahead to the “Imports” tab and copy the photos you want to transfer by pressing the “Command + C” keys.
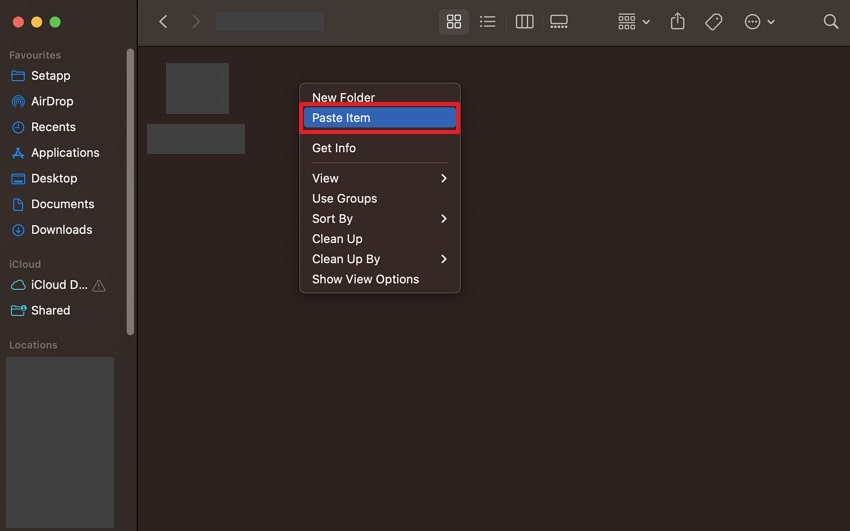
Step 3. Afterward, connect the memory card with the “Mac” using the respective card adapter. When connected, go to the “Finder” app and access the memory card folder. Now, press the “Control + Right-Click” on your keyboard and choose the “Paste Item” option to finish the task.
Part 6. How to Download Photos from iPhone to SD Card with iCloud
Users who prefer a wireless solution can utilize iCloud to move photos without connecting their devices to a computer. Unlike the above methods, it allows you to access your media from any device. While learning how to transfer iPhone photos to a memory card through iCloud Photos, you will automatically receive them on your iPhone. Go through the steps below to migrate your photos on a memory card through this method:
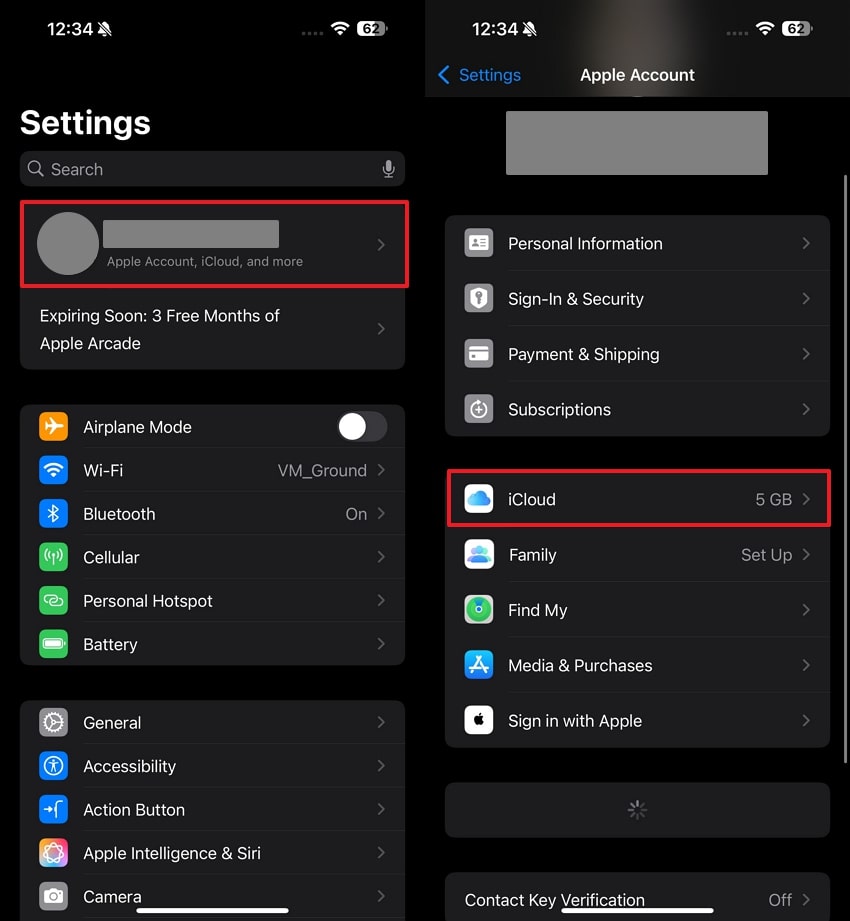
Step 1. To accomplish this, go to your phone’s settings and tap your “Apple Account.” Next, you need to tap on “iCloud” to move further with this task.
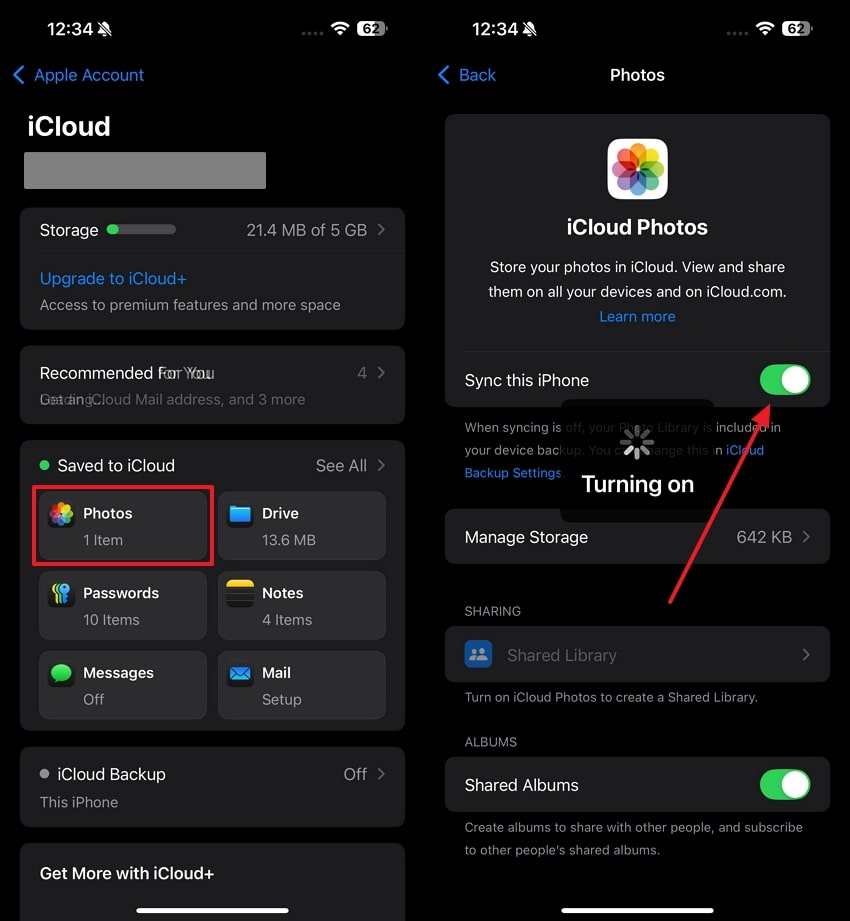
Step 2. Afterward, select the “Photos” option found in the “Saved to iCloud” section, which will direct you to its settings. Now, activate the “Sync this iPhone” feature in the “iCloud Photos” settings.
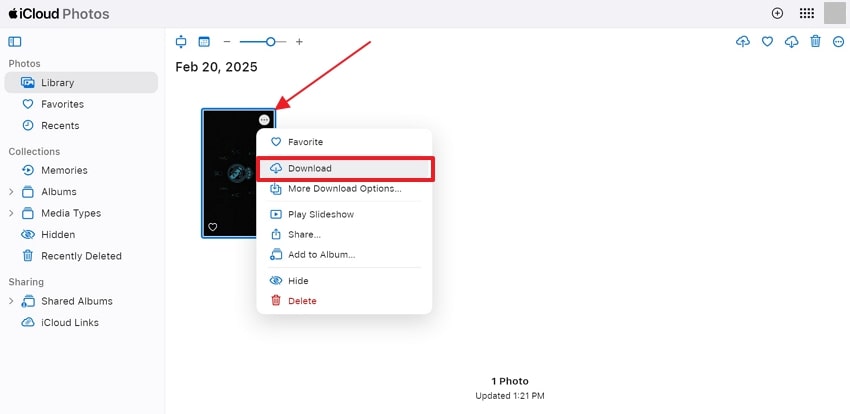
Step 3. Following, navigate to your preferred browser on your PC and log in to your “iCloud Photos“ account. Then, connect the memory card to the same desktop by using a card reader or an adapter. Now, access any photo you want to transfer and click the “Three Dots” on it to choose the “Download” option. Finally, copy the download image from your system and paste it into your memory card folder.
Part 7. How to Transfer Photos from iPhone to SD Card Without Computer
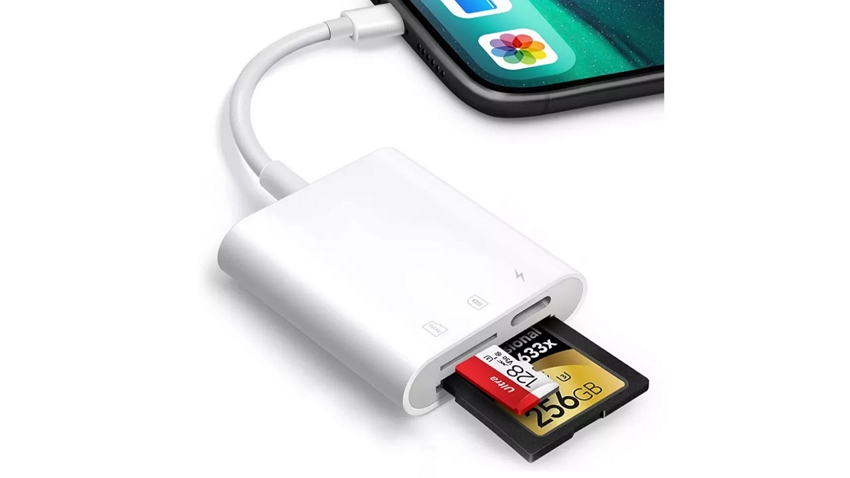
In case you don’t have access to a computer, transferring photos directly from your smartphone to a memory card is still possible. You just need to use an external card reader that connects to your phone via the Lightning or USB-C connector. Let’s dive below to learn how to transfer iPhone photos to memory cards through this method:
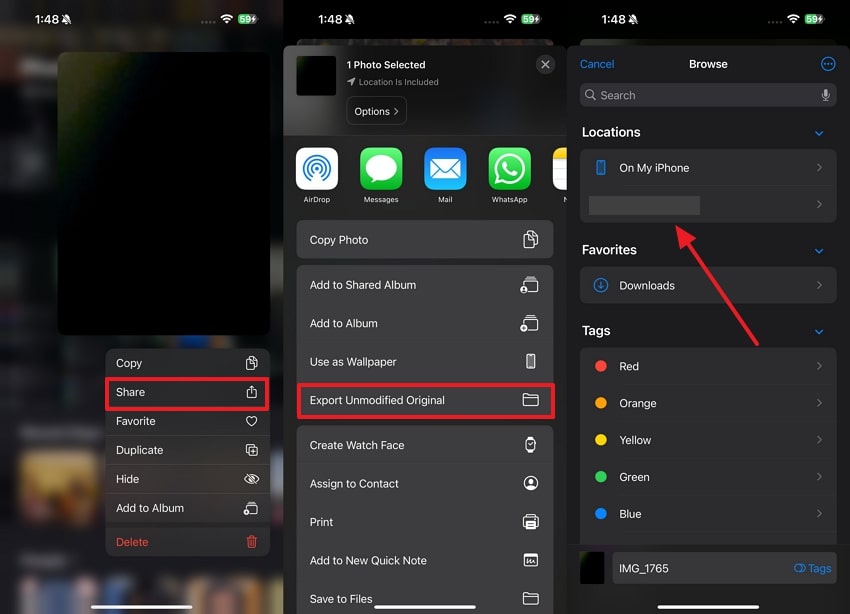
Instructions: Firstly, connect the memory card to your iOS device using the respective adapter. Upon connecting, navigate to the “Photos” app and tap on the image for a few seconds you want to transfer. Then, choose the “Share” option and select “Export Unmodified Original” on the following screen. Now, tap the memory card name under the “Locations” section to move the selected photo successfully.
Conclusion
To conclude, moving photos from your phone to a memory card is important for freeing up storage and creating backups. Even when you use a computer or direct transfer, each method offers a reliable way to manage your images. However, among all the available options, MobileTrans provides a secure way to help you learn how to export photos from an iPhone to an SD card.
It supports various data types and compatibility with all devices, which makes it a reliable tool to cater to all these needs. So, you must download and try MobileTrans today to move your data and keep your phone's storage organized for long-term use.


