


 TL;DR:
You can transfer photos from an iPhone to a Windows 11 PC offline using a direct USB cable connection or MobileTrans, or wirelessly via cloud services like iCloud and Google Photos.
● Direct USB transfers via Windows File Explorer provide a fast, internet-free method, but they only export locally stored images and often leave HEIC files unreadable on Windows.
● Wireless cloud methods are restricted by strict storage limits, offering only 5GB of free space on iCloud, 15GB on Google Photos, and 2GB on Dropbox, while messaging apps like WhatsApp severely compress image quality.
● Dedicated software like MobileTrans enables offline batch transfers that exactly preserve your original iPhone album structure without overwriting PC data, though the free version severely limits transfer functionality and requires a desktop installation.
Ask AI for a summary
 ChatGPT
 Perplexity
 Gemini
 Claude
 Grok
Grok
If you make lots of memories with your iPhone, storage space will soon become a problem. To ensure that these memories remain safe, the best thing is to transfer them to your computer. Many people feel confused about how to transfer photos from an iPhone to a PC Windows 11 easily. Thus, this guide explains multiple ways, including native options and powerful tools, to help you choose according to your needs.
In this article
Part 1. Comparison Table Between Methods to Transfer Photos from iPhone to PC Windows 11
Before heading towards the solution, it helps to compare all available choices. The following table shows key points side by side, so you can clearly understand how to transfer photos from iPhone to PC Windows 11 using each method:
|
Method |
Internet |
Storage |
Photo |
Speed |
Album |
Batch |
|
❌ |
PC Storage Only |
Original |
Fastest |
Preserves original album structure exactly |
✅ |
|
|
❌ |
PC Storage Only |
Original |
Moderate |
❌ |
✅ ( manual) |
|
|
✅ |
5 GB |
Original |
Slow |
✅ |
Limited to sync rules |
|
|
✅ |
25 MB/Email |
Converted Format |
Very Slow |
❌ |
Very limited |
|
|
✅ |
15 GB |
Compressed or original |
Moderate |
Partial organization may differ |
✅ |
|
|
✅ |
2 GB |
Original |
Moderate |
Possible (manual) |
✅ |
|
|
✅ |
App Limits |
Compressed |
Very Slow |
❌ |
Small batches only |
Part 2. Transfer Photos from iPhone to PC Windows 11 - Basic Methods
As explored, several quick and easy solutions are available to help you move photos effortlessly. So, this section provides easy steps to learn how to transfer photos from an iPhone to Windows 11:
Method 1: MobileTrans
While exploring how to import photos from iPhone to Windows 11, MobileTrans stands out as the most effortless solution. It is compatible with more than 6000 mobile devices running iOS versions, including iOS 26. Users will also be able to export 5+ types of data, like photos and videos, to their PC. Moreover, this dedicated program lets you preview files before transferring, ensuring only selected photos move across.
Key Features
- No Overwrite: Does not overwrite or delete existing PC data while transferring new media files.
- Offline Mode: Export works fully offline, reducing dependence on third-party services or online accounts.
- Stable Connection: Uses a USB connection to minimize risks of failure or corrupt transfers.
- Phone Transfer: Enables you to move your data between 2 smartphones, including Android to iPhone and vice versa.
- App Migrations: Lets you transfer apps, including WhatsApp and WhatsApp Business, from one phone to another.
Adhere to the given detailed guide to find out how to download photos from iPhone to Windows 11:
Step 1. Access the Phone to PC tab of MobileTrans and connect your phone with a USB cable.

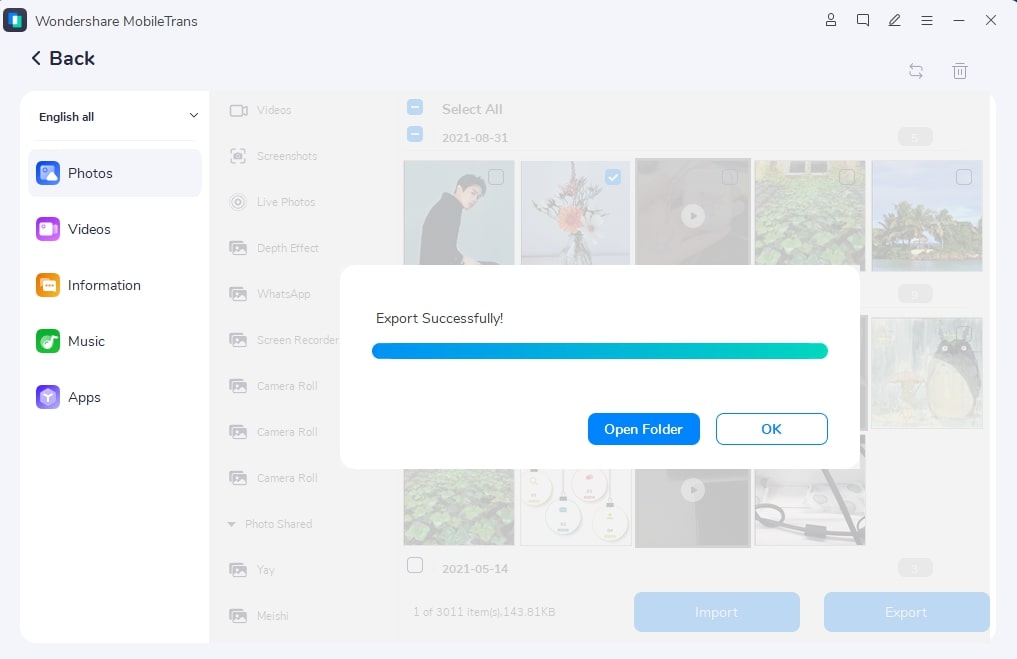
Step 2. Select the photos you want to move, then press the Export button.

Step 3. Press the Open Folder button to see your exported iPhone photos on the computer.
Limitations
- The free trial has limited transfer functionality.
- Needs installation on the computer before use.
Method 2: USB Cable
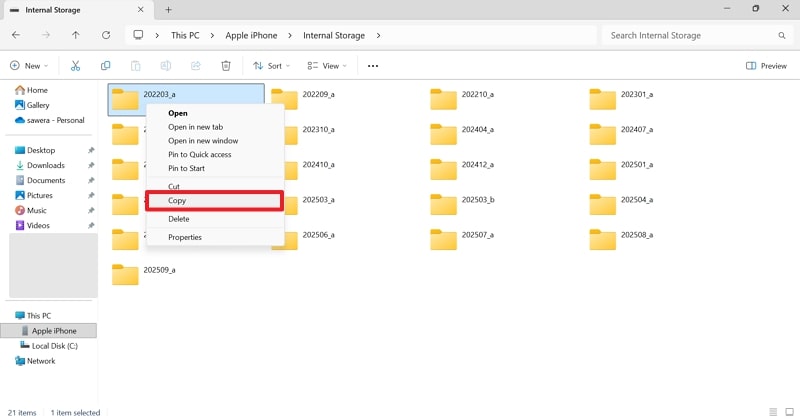
The first way that come up to your mind must be using a USB cable to connect your iPhone and move your desired photos. Once connected, your iPhone appears in File Explorer, allowing easy access to the DCIM folder. This method is secure because it requires you to trust the computer in order to start the transfer. Thus, navigate to the steps below to understand how to copy photos from an iPhone to a PC Windows 11:
Step 1. Connect your iPhone to the computer and select the photos folder via File Explorer > Right-click > Copy.
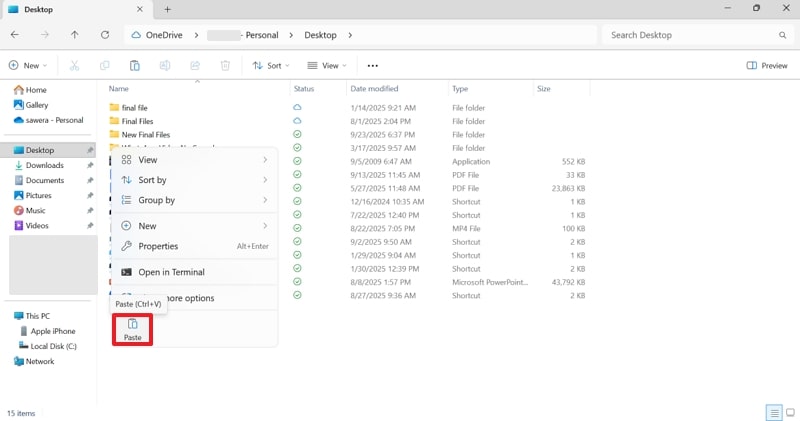
Step 2. Navigate to your PC's storage and right-click on an empty area to choose the Paste option.
Limitations
- Some HEIC files are unreadable on Windows.
- Only local photos transfer, not iCloud.
Method 3: iCloud Photos
It is another flexible option that keeps your media updated across devices automatically. After signing in with your Apple ID, you are allowed to access all photos and videos from your Windows. Plus, changes made on your iPhone appear on the PC, and uploads from your computer sync back to your iPhone. So, take guidance from the steps to find out how to import photos from an iPhone to Windows 11:
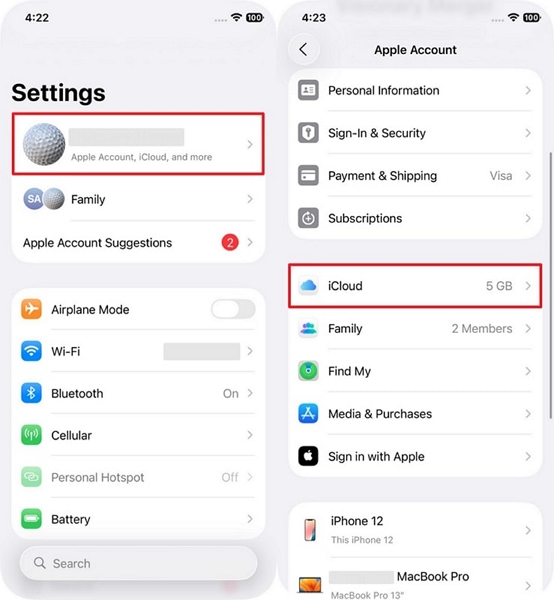
Step 1. Tap the Apple Account on your phone's settings and head to the iCloud section.
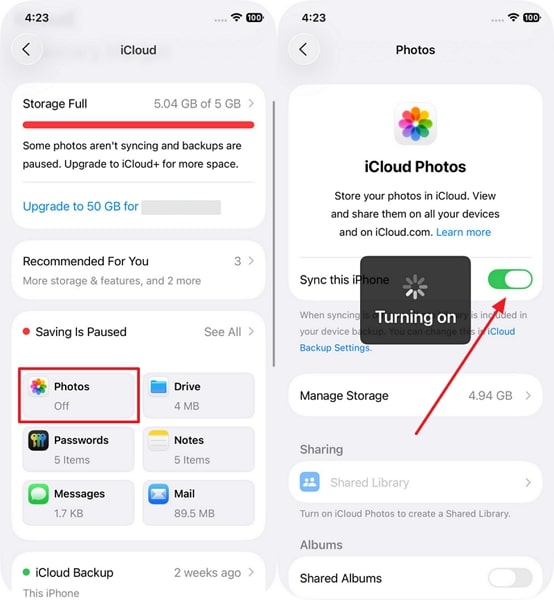
Step 2. Choose the Photos app and turn on the Sync This iPhone toggle.
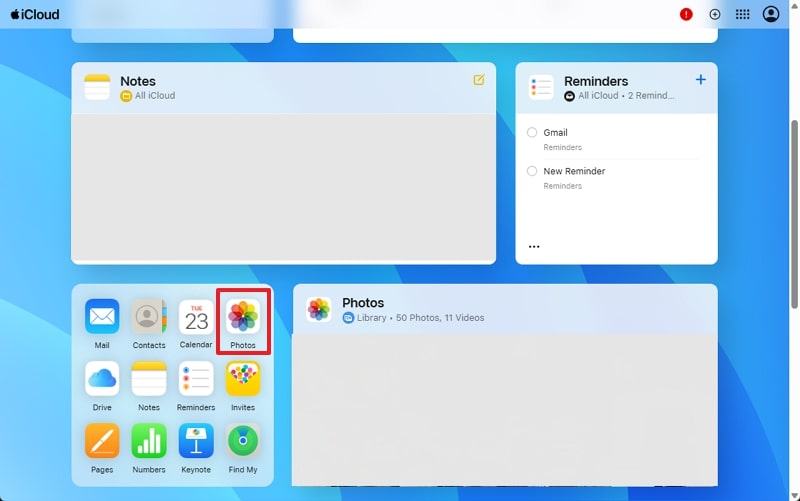
Step 3. Sign in with the same iCloud account on your PC and click the Photos app.
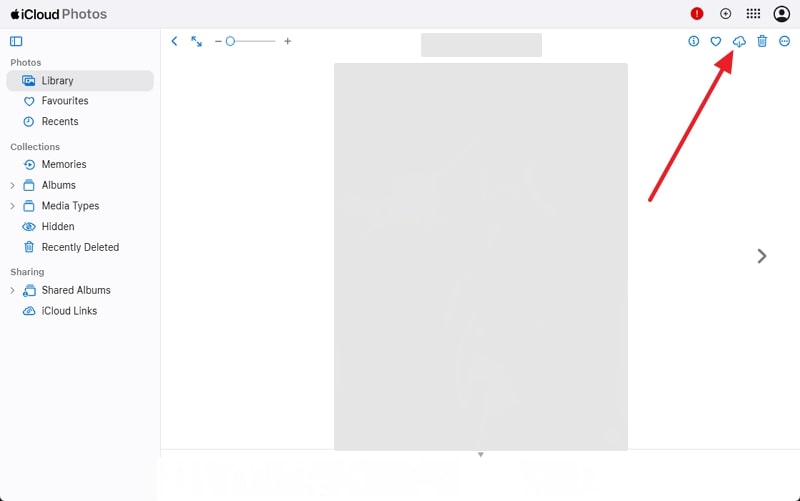
Step 4. Choose your desired photo and press the Download icon.
Limitations
- Offers only 5GB of free space.
- Apple ID sign-in is mandatory always.
Method 4: Email
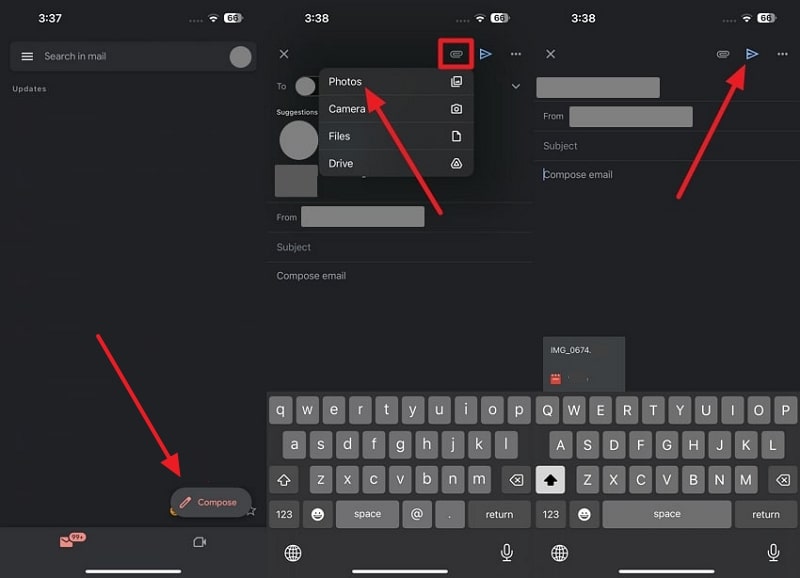
Another solution to send iPhone photos directly to your computer is to use an email platform like Gmail. Photos can be attached inside the Mail app and sent easily to yourself. Once received, you can download them directly to your chosen folder on Windows. This method usually converts files into a widely supported format, ensuring smooth viewing. Hence, let's explore how to download photos from iPhone to Windows 11 through Gmail:
Step 1. Press the Compose button and opt for the Attachment icon > Photos > Add Photo > Send.
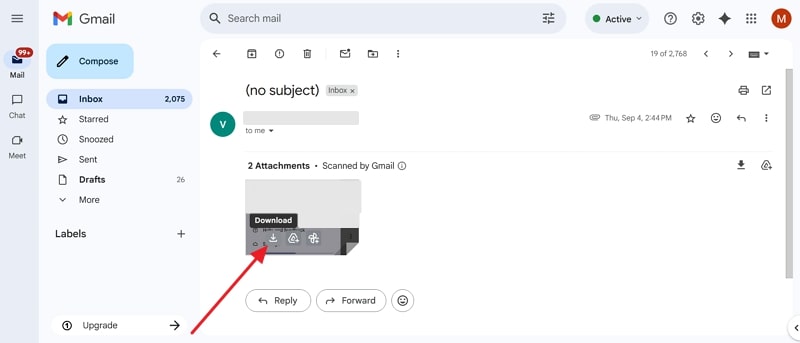
Step 2. Access the sent email on your computer and click the Download icon.
Limitations
- Attachment size limited to about 25MB.
- Manual selection is required for every upload.
Method 5: Google Photos
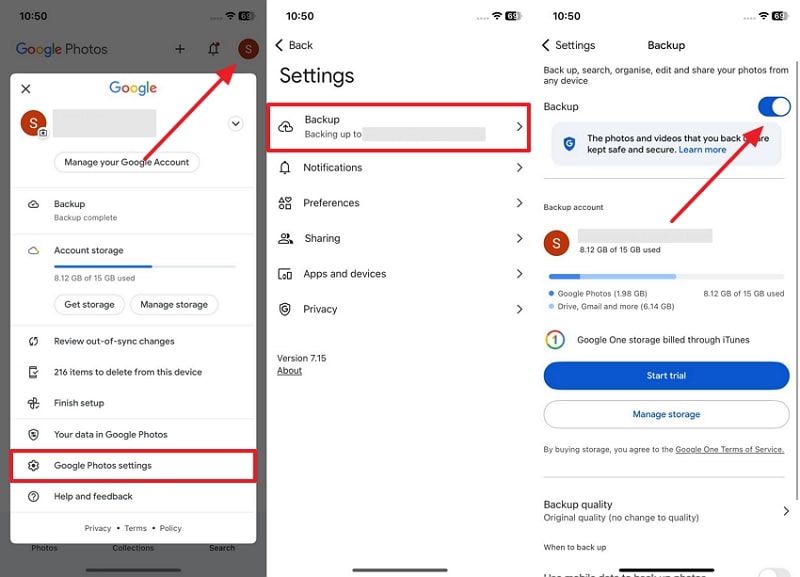
Google Photos offers an easy way to access your iPhone pictures online. It automatically saves images and videos to your Google account using Wi-Fi or data. The platform keeps your pictures organized and viewable across multiple devices. It also supports many file formats and lets you choose between HD compressed or original storage options. Review the steps to understand how to transfer photos from Windows 11 to an iPhone or vice versa:
Step 1. Tap the Profile icon > Google Photos Settings > Backup > Backup Toggle.
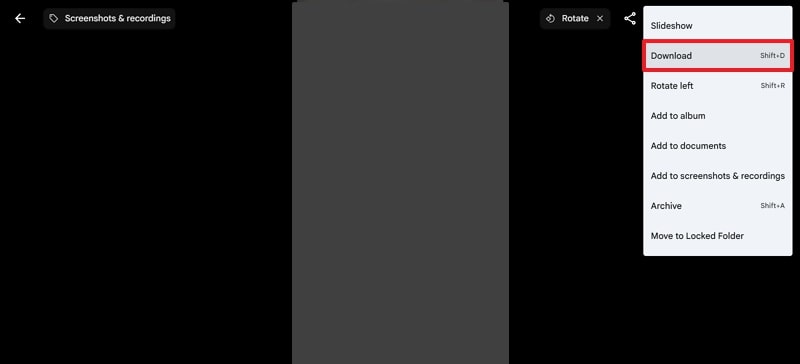
Step 2. Upon accessing the desired image on Google Photos on your PC, click Three Dots > Download.
Limitations
- Free storage is limited to only 15GB.
- Some metadata or Live features may be lost.
Method 6: Dropbox
Dropbox is another useful option for moving iPhone photos to your Windows 11 computer. You can also manually upload specific albums or pictures when needed. Photos remain in their original quality, and large files transfer smoothly. The app can also automatically back up photos and videos to the cloud for safe storage. So, go through the steps below to learn how to transfer photos from iPhone to Windows 11:
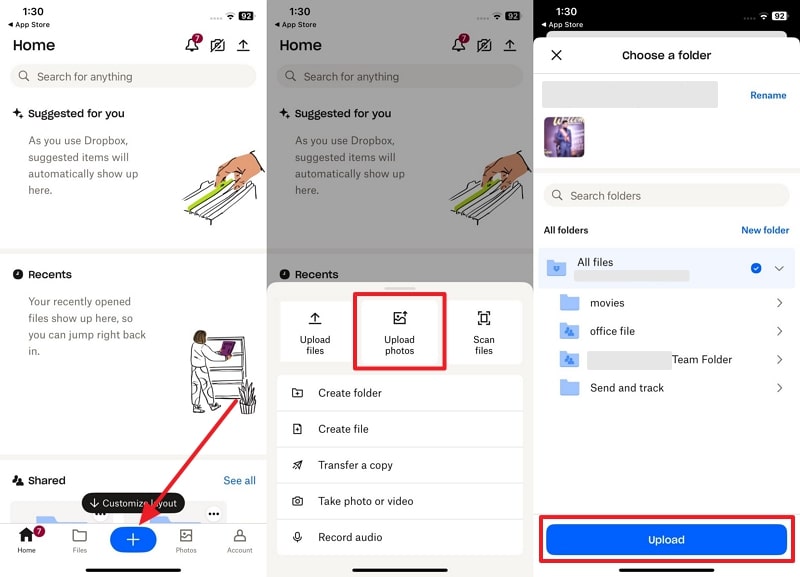
Step 1. Press the + button on the Dropbox main screen and tap Upload Photos > Choose Photos > Upload.
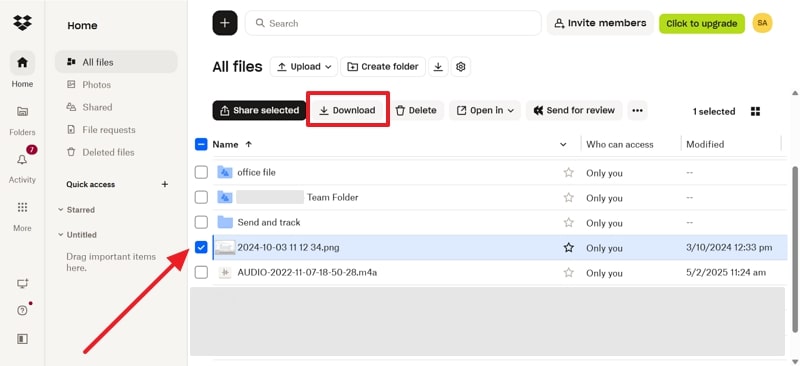
Step 2. On your computer's Dropbox, choose Photo and press the Download button.
Limitations
- Free accounts offer only 2GB of storage.
- The desktop app can be resource-heavy during large syncs.
Method 7: Messaging App
Using a messaging app like WhatsApp is a quick way to move photos from your iPhone. You can send them to your own chat or any contact for easy access later. On a Windows 11 computer, WhatsApp Web or the desktop app makes downloading simple. It works well for sharing a small number of photos to multiple contacts simultaneously. Let's learn how to download photos from iPhone to Windows 11 via WhatsApp:
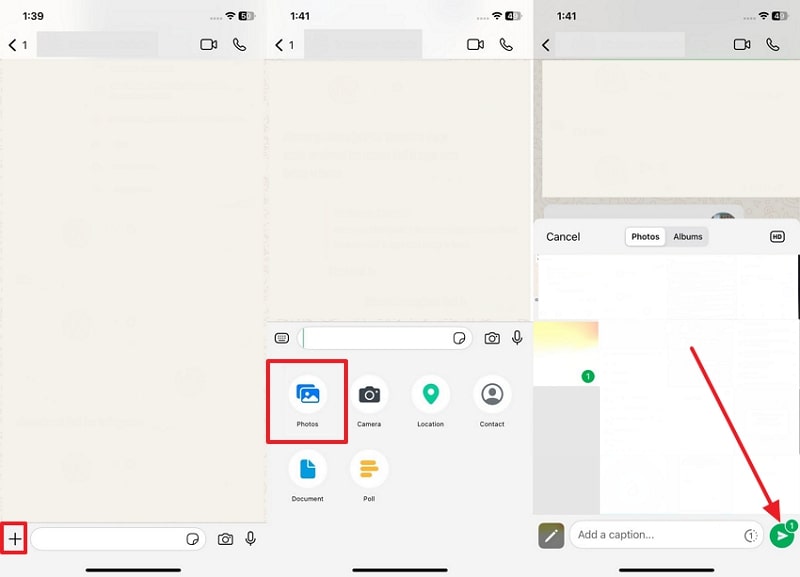
Step 2. In the WhatsApp chat screen on your iPhone, tap + > Photos > Select Photos > Send button.
Step 2. Click the newly sent photo on the WhatsApp Web on your computer.
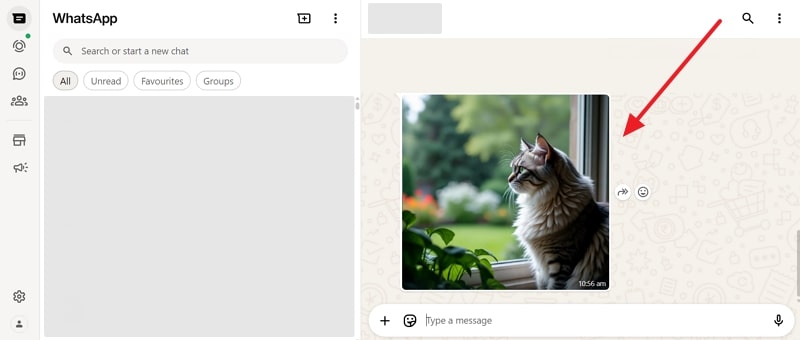
Step 3. Press the Download icon to save the iPhone photo.

Limitations
- Images lose quality due to strong compression.
- Photos may disappear if chat history clears.
Conclusion
To conclude, transferring photos ensures your memories stay safe and your iPhone storage never runs out. This article has provided multiple methods you can try, including built-in features and cloud solutions. Still, many people find these methods limited or slow for larger collections of photos. So, if you are unsure about how to transfer photos from an iPhone to a PC Windows 11, MobileTrans can become the perfect tool to simplify everything.


