


 TL;DR:
iTunes successfully backs up photos taken directly from your iPhone camera, but it strictly excludes any images already synced to iCloud or downloaded from a computer.
● Native iTunes backups automatically store photos in hidden, unreadable MobileSync folders on your Mac or Windows system, preventing you from directly viewing the image files.
● To bypass this security restriction and selectively view or extract specific images to a computer without restoring the entire device, you must use a third-party recovery tool like Dr.Fone to scan the backup file.
● Users who prefer a readable photo backup process without iTunes sync restrictions, or who need to transfer content directly between iOS devices, Android devices, and computers, should use MobileTrans instead.
Ask AI for a summary
 ChatGPT
 Perplexity
 Gemini
 Claude
 Grok
Grok
“So, tell me, does iTunes backup photos?”
The question given above is pretty similar and mostly asked about iTunes backup of photos. Well, it’s not the only one. You can find various other queries such as “Where does iTunes store photos?”, “What does iTunes backup include?” and so on.
Keeping in mind all such queries, we tasked ourselves to create this all-rounder kind of post on iTunes backing up photos. We’ll also discuss alternatives to iTunes backup of pictures and how to view photos in iTunes backup. This article, as a complete guide, mentions every aspect of iTunes photo backup in the designated sections given below.
So, let’s start and read how to backup iPhone photos to iTunes.
Part 1: Does iTunes backup photos?
It is quite an important question to ask if you are an iPhone user and have a bulk of photos on your device since taking care of all those valuable moments becomes a priority of yours. You cannot make any decision in an impulse as that will result in more worry, than solving the issue.
In this stride, whether iTunes backup photos or not might arise. Although iTunes is an excellent resource to perform the backup action, still a pre-confirmation will always be beneficial to the issue. Now, the simple answer to the question lies in the following points:
- • iTunes can back up almost all data from the iPhone device, including photos.
- • It can back up only those photos that get captured directly from the camera of the iPhone device.
- • iTunes does not back up photos of the iPhone if downloaded from either the system PC or another source.
- • Users primarily noted that iTunes does not back up those photos that are already synced by your end to another source, like iCloud.
- • Also, iTunes will not support the backup of the photos already backed up or saved in iCloud.
Thus, it becomes a significant step to identify your iPhone’s photos before proceeding to do a backup with iTunes. If you simply check by keeping the points mentioned above in mind, you will be safe while performing the backup process with iTunes.
With this valuable information, let’s move ahead to learn further processing related to backing up iPhone photos with iTunes.
Part 2: How to backup photos to iTunes?
If we speak of ordinary, or you can say, not-so-professional methods, then iCloud and iTunes are the ones to be used to back up photos. Well, iCloud provides you with the most comfortable option to do so. You can access both videos and pictures with the help of iCloud photos from iPad, iPhone, iPod touch, Apple TV, or Mac on iCloud’s official site.
Steps to follow before iCloud backup photos
- • Update your iPhone device to the latest iOS version.
- • The next step is signing in to iCloud with the same Apple ID on all other devices.
- • You can either download iCloud for Windows or manually set up iCloud.
- • Ensure your continuous Wi-Fi connection. Turn on iCloud Photos!
- • Go to Settings>iCloud>Photos. Then, activate the Photos button.
In this way, any latest shots will get automatically uploaded to the iCloud. It will also remove the Videos and Photos synced from iTunes.
Here’s another way with iTunes to manually sync photos.
How to backup iPhone photos to iTunes?
Follow the steps given below and sync photos manually via iTunes.
Step 1: Download the latest iTunes version.
Step 2: Now, open iTunes on your PC.
Step 3: Connect your iPhone with your PC via a USB cable.
Step 4: Tap the device icon, as shown below.

Step 5: Here, click Photos on the sidebar.

Step 6: Tick the box next to ‘Sync Photos.’ Again we are mentioning that if you have already turned on iCloud photos, there is no need to sync them via iTunes.
Step 7: Choose the folder or app from which you want to sync photos. Select syncing all photos and selected albums.

Step 8: You can also choose IncludeVideos.
Step 9: Confirm Apply.
Part 3: Where does iTunes store photos?
During backup, iTunes will store your photos in a backup folder that is not viewable, meant for security reasons. Also, the pics do not get regularly synced or saved to your computer device. Instead, you have to import them on the computer and include them in the computer's backup.
Here are the three places iTunes may backup your photos depending on the OS:
For Mac: Library>Application Support>MobileSync>Backup
For Windows XP: Documents and Settings>username>Application Data>Apple Computer>MobileSync>Backup
For Vista and Windows 7: Users>username>AppData>Roaming>Apple Computer>MobileSync>Backup
Part 4: How to view photos in iTunes backup?
It is quite easy to save or backup iPhone photos to iTunes. However, you should also understand that iTunes backup photos are not viewable because of security concerns. So, be alert and use the software only for legitimate purposes. Situations might arise that you want to recover some or all the pics from the backup. The software Dr.Fone has made a great way if you wish to view photos in iTunes backup.
Dr.Fone is said to be designed for such purposes as seeing iTunes backup, whether it is messages, photos, contacts, call logs, or other stuff. It can do any job of data recovery that you accidentally deleted but now want to extract it to the computer.
Look at the steps given below to restore photos from iTunes backup.
Step 1: Install Dr.Fone on the PC
First of all, install Dr.Fone on your laptop, PC, or Mac from their official website. It will just take you a couple of minutes to complete downloading. Then, click StartNow.
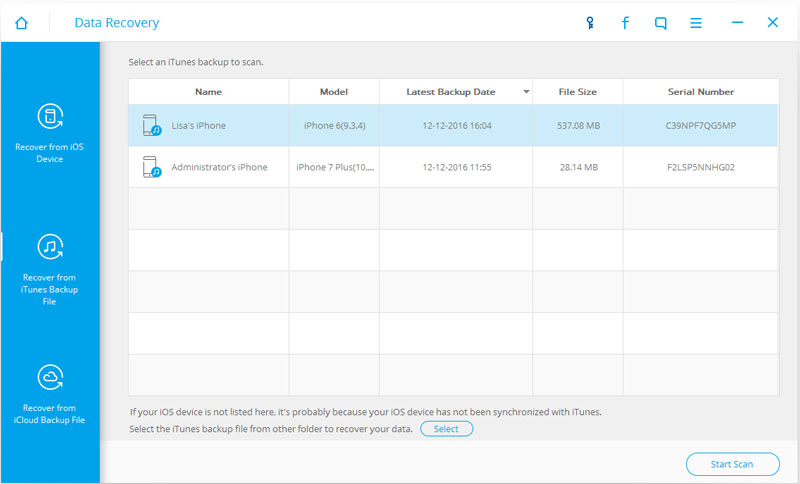
Step 2: Start Recovering iTunes backup photos
Select Recover from the iTunes backup file button present on the screen's left-hand side. Then, all your created backups will get automatically scanned. You just need to choose a particular file for recovery. After selecting the file, start the scan.
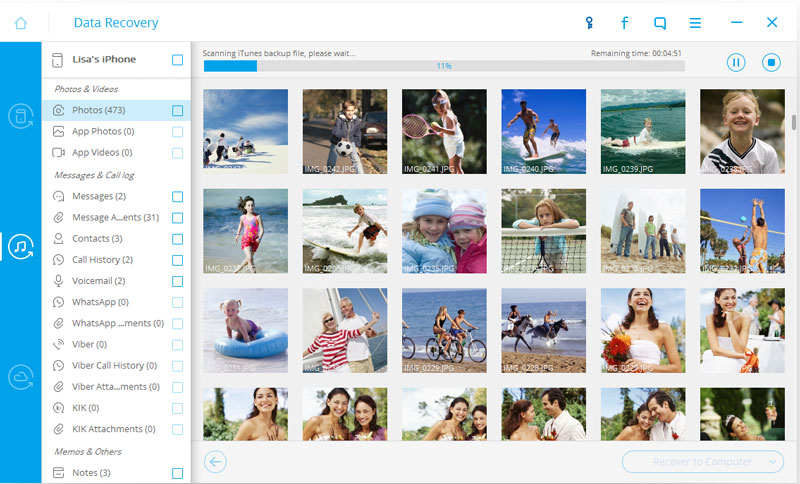
Step 3: Review Scanning Progress
It will take you a few minutes to complete the scanning progress. The progress can be noticed in the top bar, as shown below.
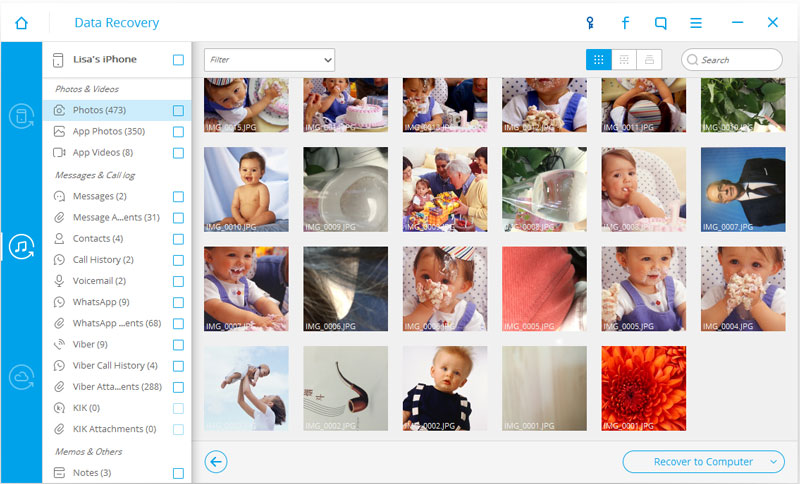
Step 4: Extract photos from iTunes backup
As of now, you can view all the photos present in iTunes backup. If you’re not able to see them, click the Photos icon on the left-hand side and mark the images you want to extract with a tick. Also, choose the Recover to Computer button shown below.
That's it, following a few quick steps using Dr.Fone you can not only see iTunes backed-up photos but also restore them to your system with a single click. It is easy to back up photos to iTunes and comfortable to restore them using Dr.Fone.
Part 5: Alternative to iTunes backup photos – MobileTrans – Backup
The MobileTrans iTunes backup feature allows seamless transfer of data from iTunes backups to mobile devices. With user-friendly functionality, it enables selective data transfer, ensuring ease and efficiency. This feature is ideal for restoring data from iTunes backups to new devices, simplifying the data migration process for users.
In case you are also looking for a quick method to backup your iPhone data to PC or Mac, just consider the steps given below. You can use this software in both Windows and Mac operating systems. It’s a quick, easy, and efficient way to backup photos to your computer device.
Steps to backup iPhone photos to computer
Step 1: Launch MobileTrans and connect iPhone
After launching the MobileTrans officially, you need to connect your iPhone device with a computer. Then, run the Backup module on the main window itself.

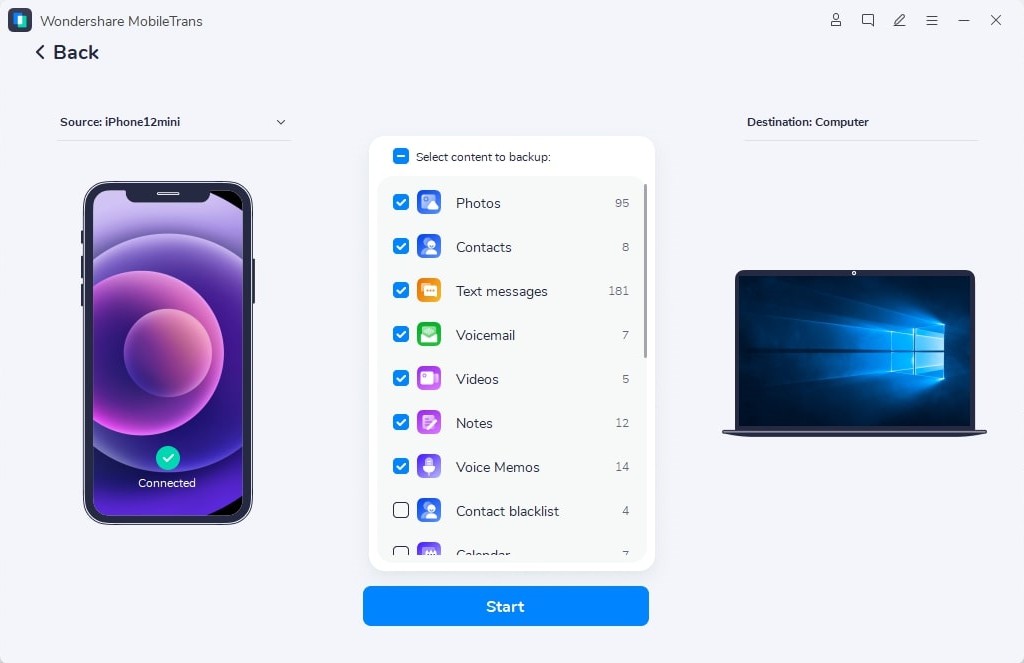
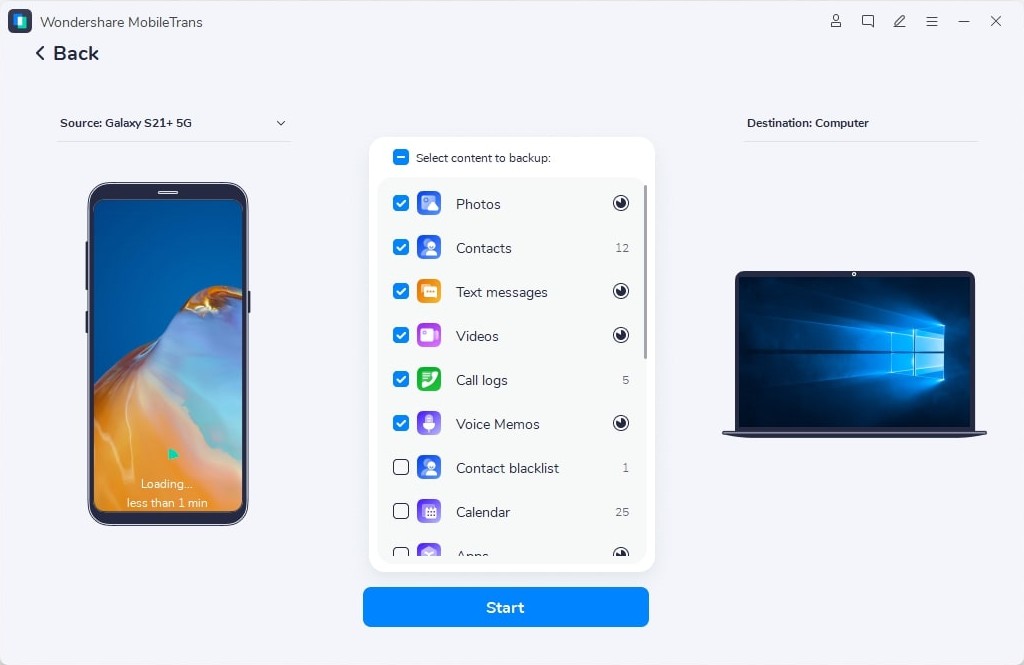
Step 2: Select files for backup
In the Backup module, MobileTrans will automatically upload all the supported files. You just need to select the images for backup and click the Start button.
Given below are supported files for iPhone devices.
And, the files given below are for Android devices.
Step 3: Complete Backup
Keep devices connected until the backup completion. View the backup file from the Restore module in the MobileTransbackupfile.
Conclusion
Thus, we almost solved all your common queries regarding the iTunes backup of photos in the article above. Even we spoke about the best iTunes iPhone backup photo methods wherein we mainly discussed two renowned software i.e., Dr.Fone and MobileTrans. You can use Dr.Fone to view backup content via the recovery method. It is also commonly known as Backup Viewer.
On the other hand, MobileTrans is best suitable for mostly backup, restoration, and transfer of content between iPhone and Android devices to or from the computer. So, go through the above tutorial once again and extract photos from iTunes backup quickly.
New Trendings

Top Stories
All Categories


Axel Nash
chief Editor