


 TL;DR:
You can transfer data between iPhones without iCloud by using Quick Start during initial device setup, iTunes or Finder for full computer-based backups, AirDrop for selective post-setup sharing, or MobileTrans to migrate content without erasing an already configured phone.
● Quick Start wirelessly migrates all data during initial setup but strictly requires both devices to run iOS 26 or later, whereas AirDrop handles selective post-setup file sharing but cannot transfer apps, full backups, or system settings.
● iTunes or Finder is the best option for users needing to bypass wireless instability, utilizing a PC or Mac and a USB cable to fully back up and restore all files, including micro-settings like app layouts and wallpapers regardless of storage size constraints.
● MobileTrans allows for post-setup migration of over 18 data types across devices from iOS 6 to iOS 26 at speeds up to 30MB/s without overwriting existing data, though complete functionality is limited to the paid version; all transfer methods recommend updating both phones to the same iOS and maintaining at least an 80% battery charge to prevent interruption.
Ask AI for a summary
 ChatGPT
 Perplexity
 Gemini
 Claude
 Grok
Grok
A lot of individuals find it tricky to move their data when switching to a new iPhone. As we know, iCloud is the most common method to cater to this need, but not everyone wants to use it. Alongside that, some individuals may have limited iCloud space, poor internet, or just prefer other methods. Therefore, learning how to transfer data from iPhone to iPhone without iCloud is helpful.
Fortunately, there are several quick and easy methods that let users migrate their data, even when their new iPhone is already set up or not. Thus, this guide will show you the best options to move your data without using iCloud. It includes a dedicated transferring app, followed by some built-in tools to move your data. You will also discover each method’s uniqueness by exploring its features, along with its limitations.
In this article:
Part 1. How to Transfer Data from iPhone to iPhone After Setup: MobileTrans [Best Choice]
Best For: Individuals looking for a fast and secure data transfer approach across iPhones after setup.
Among the best options, MobileTrans stands out, as it offers a one-click solution for phone-to-phone transfer. Unlike many tools, it works even if your new iPhone is already in use, and it won’t erase your existing data. This advanced software also supports over 18 types of data and works with more than 6000 devices, including the latest iOS 26 version.
Moreover, it gives you a preview of the data before moving it, so you know exactly what’s being transferred. MobileTrans is also much faster than using Bluetooth or other cloud-based apps to cater to this need. So, when you want to learn how to transfer data from iPhone to iPhone, this dedicated program even ensures everything stays safe and private during the transfer.


As you find the top capabilities that MobileTrans offers, you ultimately need to use them. Thus, take guidance from the steps below to understand how to transfer data from iPhone to iPhone without hassle:
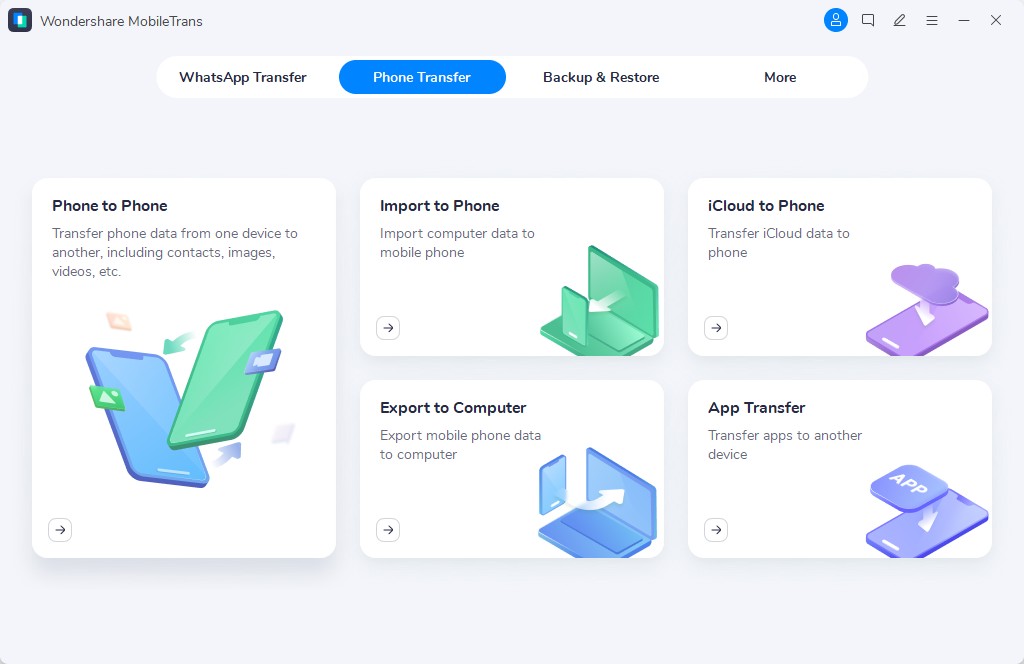
Step 1. Open MobileTrans to Transfer Data from iPhone to iPhone
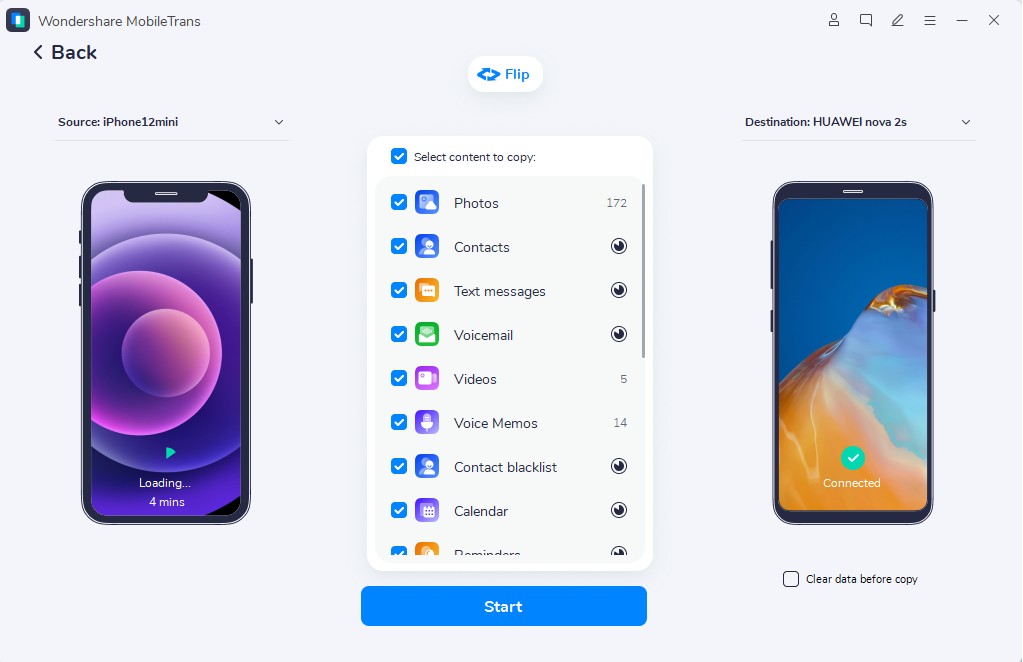
Run “MobileTrans > Phone to Phone” and connect both your iPhones. Select the devices, choose your desired data types, and press "Start."
Step 2. Wait to Transfer Data from iPhone to iPhone
You will see a transferring progress display during the process.
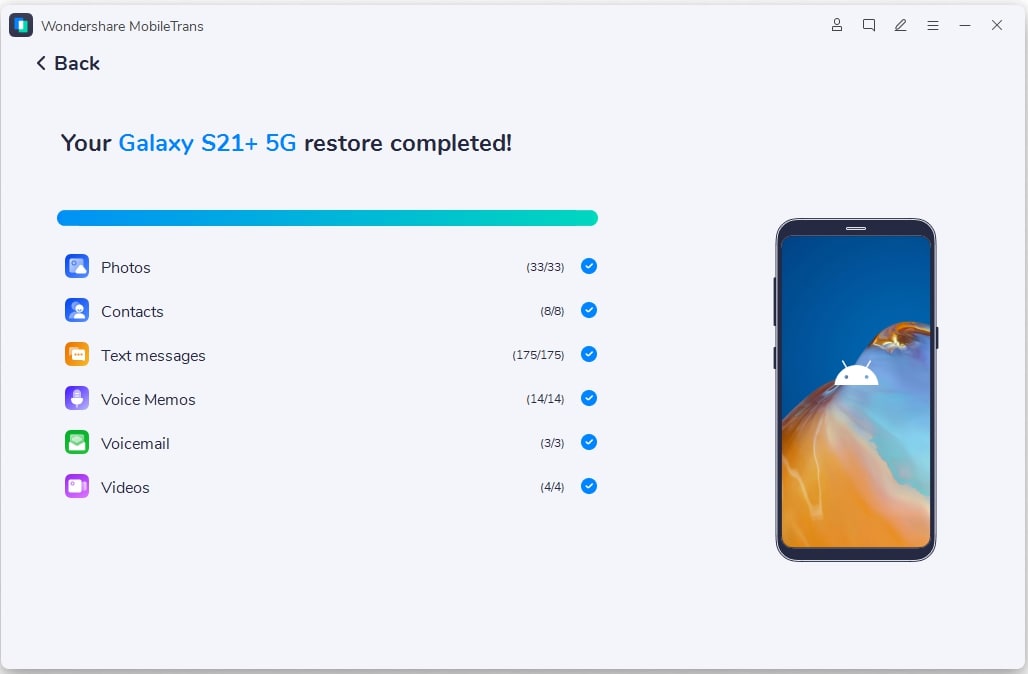
Step 3. Transfer Data from iPhone to iPhone Completed
When it completes, it will show a confirmation display.
Apart from the software, you can try the MobileTrans App for quick phone-to-phone transfers without any brand limits. The app lets you move data, such as multimedia files or contacts, even across Android and iOS. Plus, it is perfect for large files like videos or full backups, with speeds up to 30MB/s, which is 200 times faster than Bluetooth.
Part 2. How to Transfer All Data from iPhone to iPhone with Quick Start
Best For: Individuals who want to wirelessly migrate all data between phones during the initial setup with minimal effort.
Another easy way to move your phone's data is by opting for Apple's Quick Start feature. As long as both your phones run iOS 26 or later, you can migrate your entire data effortlessly. Moreover, this specific feature basically works by using Bluetooth, along with the same Wi-Fi connection, to transfer data. Anyhow, adhere to the steps below to learn how to transfer everything from iPhone to iPhone without iCloud:
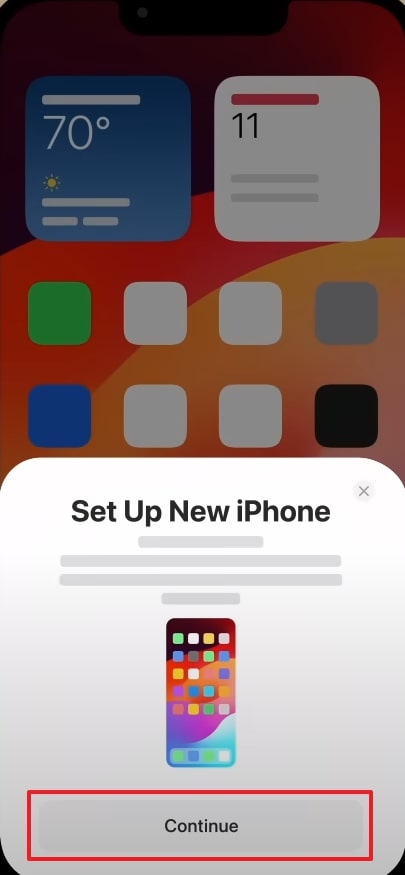
Step 1. Turn on Bluetooth and Wi-Fi on both iPhones and keep them nearby. Tap "Continue" on the old iPhone and follow the instructions.
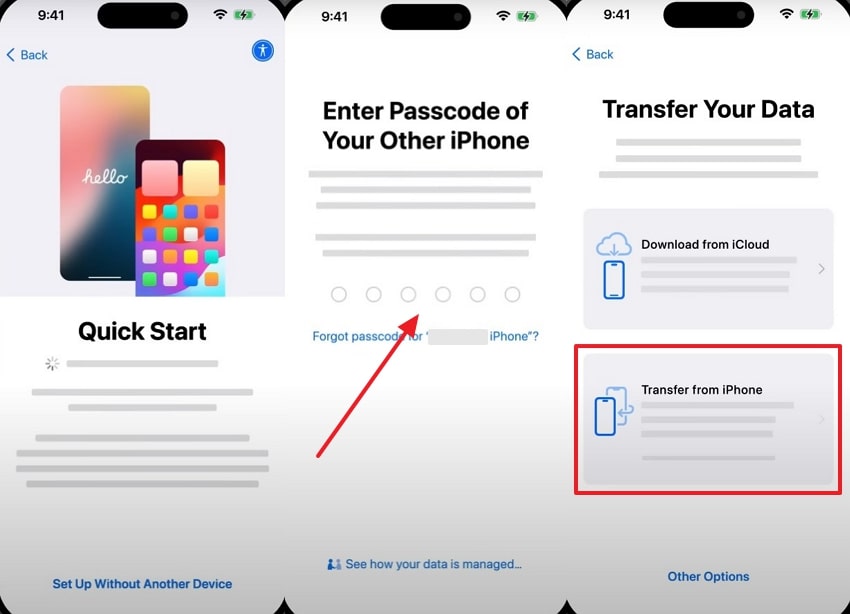
Step 2. On a new iPhone, enter your old device's passcode. Go ahead and select "Transfer From iPhone."
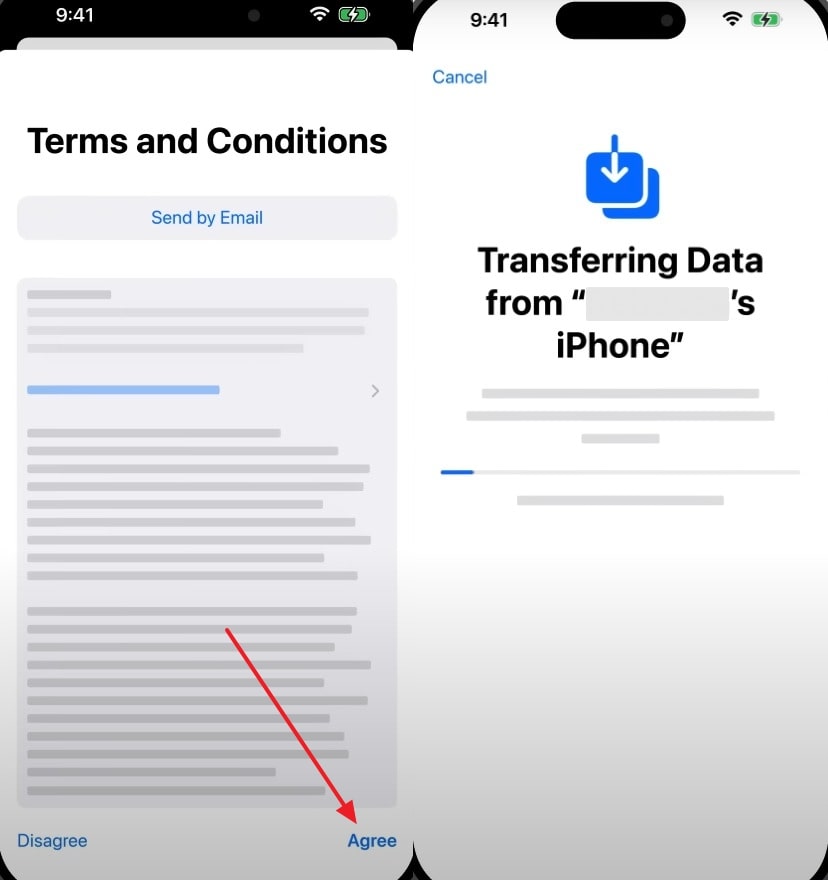
Step 3. Tap “Agree” in the “Terms and Condition” screen. Your data will start transferring.
Part 3. How to Transfer Data from iPhone to iPhone: iTunes or Finder
Best For: For those who want to restore data using a computer to avoid iCloud and wireless methods.
When you prefer using your computer, iTunes or Finder is another trusted way to migrate data. This method actually creates a full backup of your old smartphone, including apps and even the phone’s settings. Upon doing this, users can effortlessly restore all the backed-up data to their new phone. Thus, go through the quick steps to find out how to transfer an iPhone to iPhone without iCloud:
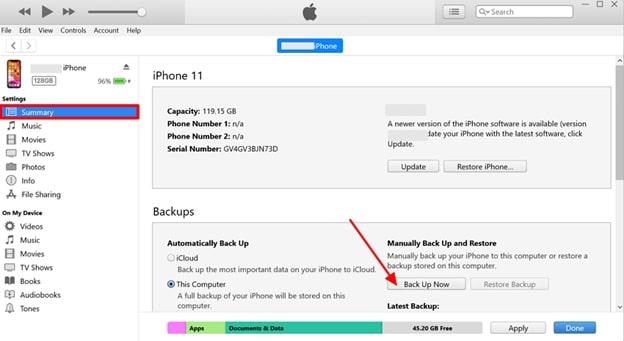
Step 1. Launch iTunes and connect your old iPhone to your PC. Click the "Mobile" icon. Under "Backups," enable "This Computer" and hit "Back Up Now."
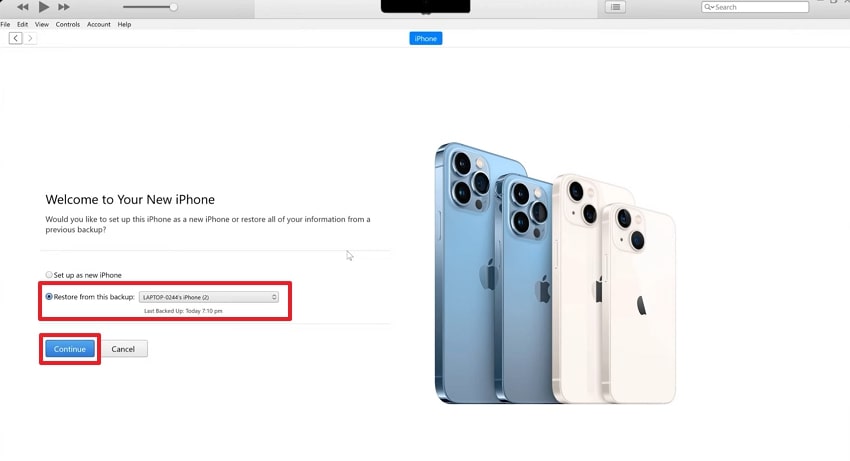
Step 2. Connect your new iPhone to your PC. Choose "Restore From This Backup > Continue" after selecting the latest backup.
Part 4. How to Transfer iPhone to iPhone Without iCloud Using AirDrop
Best For: Users who want to quickly send selected files between nearby iPhones after setup without using iCloud or cables.
This method also lets you wirelessly send multimedia files and documents between iPhones without using cables. You have to turn on Bluetooth, Wi-Fi, and AirDrop to move your desired data file from one phone to another. Plus, it is built into all modern iPhones, so you don't need to install or download anything. Hence, let's dive below to understand how to transfer data from iPhone to iPhone after setup:
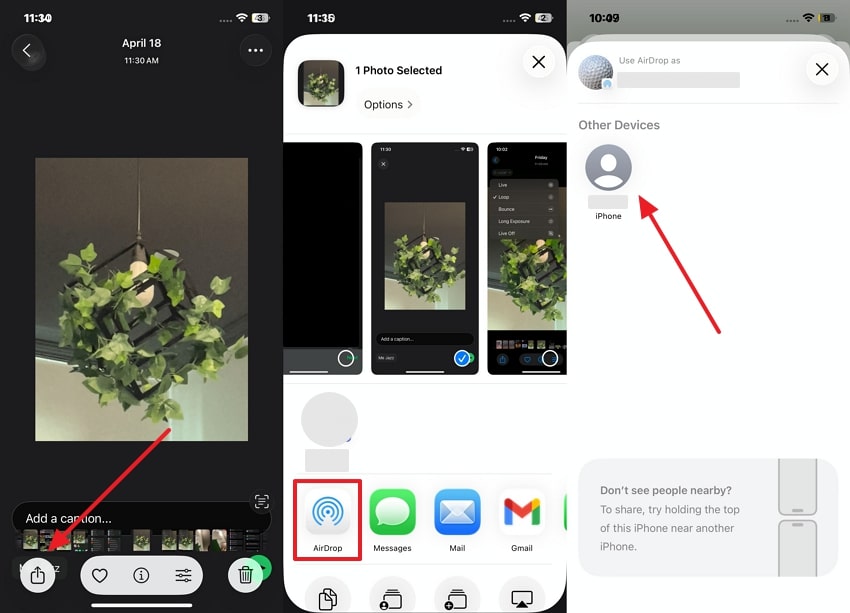
Step 1. Choose an image or other data, and tap "Share > AirDrop." Opt for the device that appears nearby.
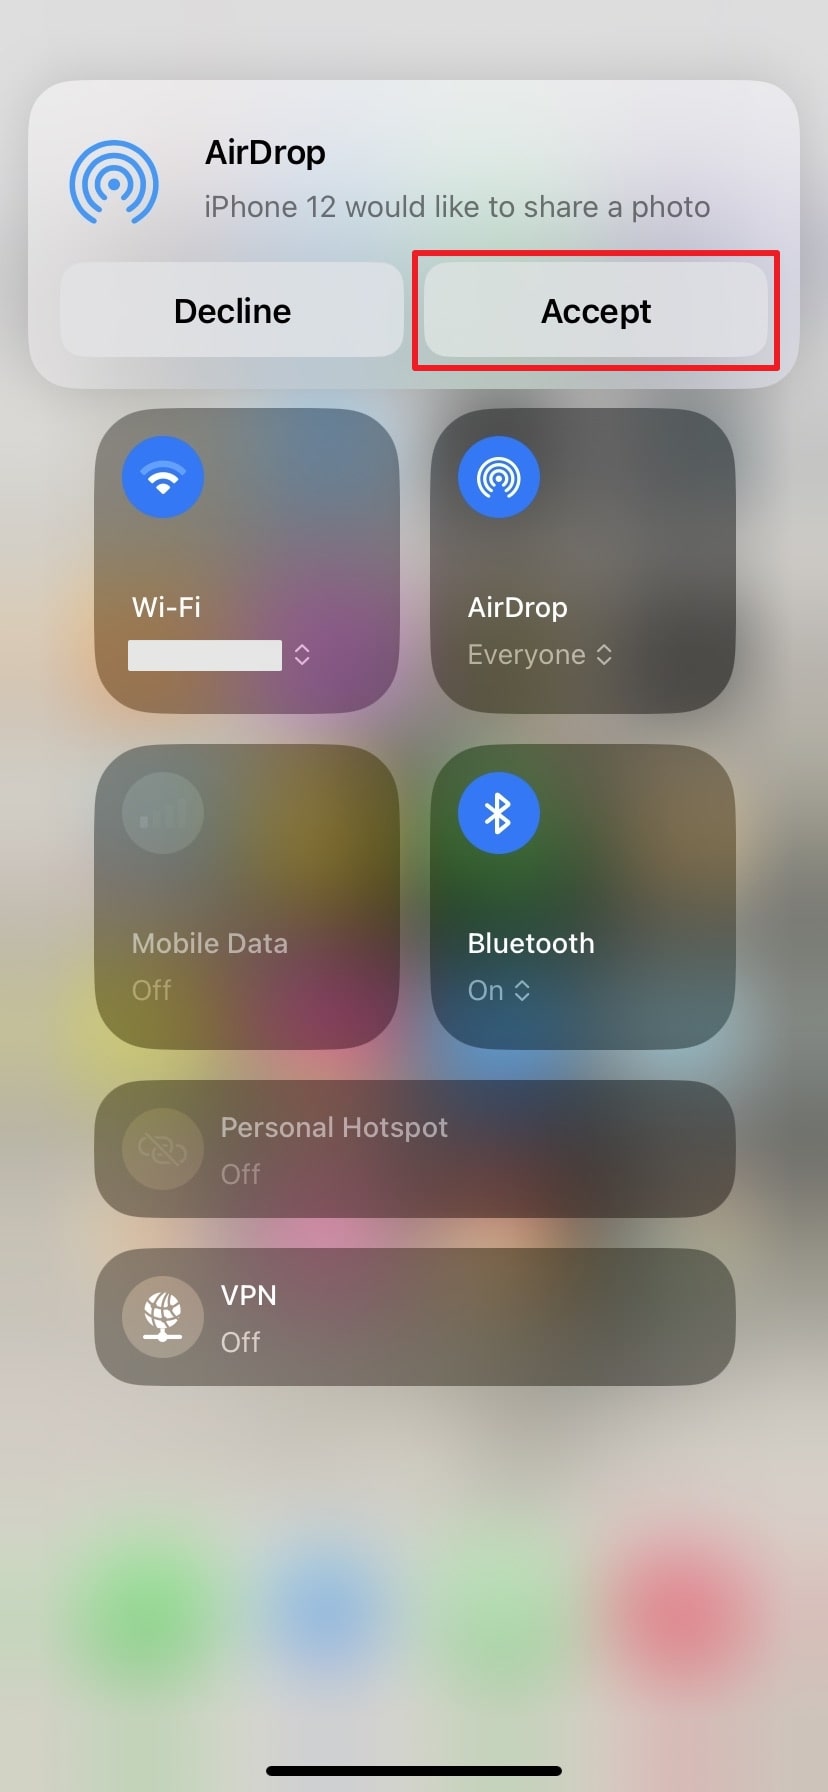
Step 2. When you see an alert on your new phone, press the “Accept” button.
Part 5. 5 Tips to Get Your iPhone Content Transferred Without Facing Any Loss
To avoid losing important data files from your phones, you should follow some tips that ultimately help you move data safely:
- Store Data: You have to create a full backup using iTunes/Finder or even MobileTrans to protect it. This way, when anything goes wrong while you transfer data from iPhone to iPhone, you can restore it.
- Charge Both Phones: A Low battery during migration can interrupt the process and prevent data from moving completely. Thus, ensure both smartphones have at least 80% battery before you commence the transferring task.
- Update Both Mobiles: Running the same iOS version helps avoid software issues or other problems during the data transfer process. Plus, it gives you the latest performance improvements and makes your new device run more smoothly.
- Deleted Needless Data: You should remove unnecessary files or apps from your old phone to speed up the data transfer process. This also helps you keep your new phone clean and free of clutter from the very beginning.
- Label Uploaded Folders: When opting for Google Drive or other cloud services, naming folders keeps everything neat and easy to find. It ultimately saves time when you download your desired data files on your new phone.
Conclusion
In summary, migrating your preferred or entire data between iPhones is easy, even without iCloud. This article has explored several methods that you can opt for according to your needs. Even when your iPhone is already set up or new, you can still move your content without much trouble. When you want the smoothest way to learn how to transfer data from iPhone to iPhone without iCloud, try MobileTrans today.
FAQs
-
Q: Does Apple Quick Start work if my new iPhone is already set up?
A: No, it only works when the new phone is on the setup screen for the first-time configuration. When you have already set up your phone, you have to apply the “Erase All Content and Settings” feature to regain access to the setup screen. Thus, this method is not ideal for everyone, especially if your phone contains important apps and data.
-
Q: Is there a free tool to transfer data from iPhone to iPhone?
A: Apple offers free tools like Quick Start and AirDrop to transfer data between iPhones without extra cost. Quick Start helps move everything during the initial setup, while AirDrop is good for sending selected files after setup. Yet, these tools have certain limitations, such as setup requirements and a lack of full data backup.
-
Q: What is the best way to transfer everything from an old iPhone after setup?
A: The effortless method to migrate all data from one phone to another is to use dedicated software known as MobileTrans. It works with over 6,000 phones, including iOS 6 to iOS 26, for maximum compatibility and ease. This tool even supports 18+ data types to transfer without deleting or replacing your new iPhone’s content.


