How to Back Up iPhone Photos to an External Hard Drive - The Ultimate 2026 Guide

Written By Axel Nash |

As time passes, we tend to gather many photos and multimedia files on our iPhones, leaving very little space. Consequently, when our phones display the message "storage full," the only solution is to transfer the photos to a personal computer or another device. We can offer some helpful tips if you're attempting to transfer photos from iPhone to an external hard drive to free up space.
This article will discuss all possible ways to transfer photos from an iPhone to a hard drive. So, let us begin:

You can learn the video tutorial below:
Part 1: Transfer Photos from iPhone to External Hard Drive with MobileTrans
While there are many other ways to transfer data from your iPhone to an external hard drive, MobileTrans is the most sought-after choice. This is one such software that streamlines the way we transfer data from iPhone to any other device.
Wondershare MobileTrans
Transfer iPhone photos to an external hard drive with a few clicks!
- • Export photos from Phone to PC (Windows & Mac) and hard drive.
- • Backup 18+ data types from Android and iPhone to PC (Windows & Mac).
- • Supports transfer 18+ types of data between 6000+ devices.
- • Support transfer of WhatsApp data between Android and iOS devices.

 4.5/5 Excellent
Check how to move photos from iPhone to hard drive with MobileTrans
Step 1: Launch MobileTrans
First, connect the iPhone and hard drive to your computer. Once the connection is established, click the “Phone Transfer” option. From there, select the “Export to Computer” option.

Step 2: Select Photos to Transfer
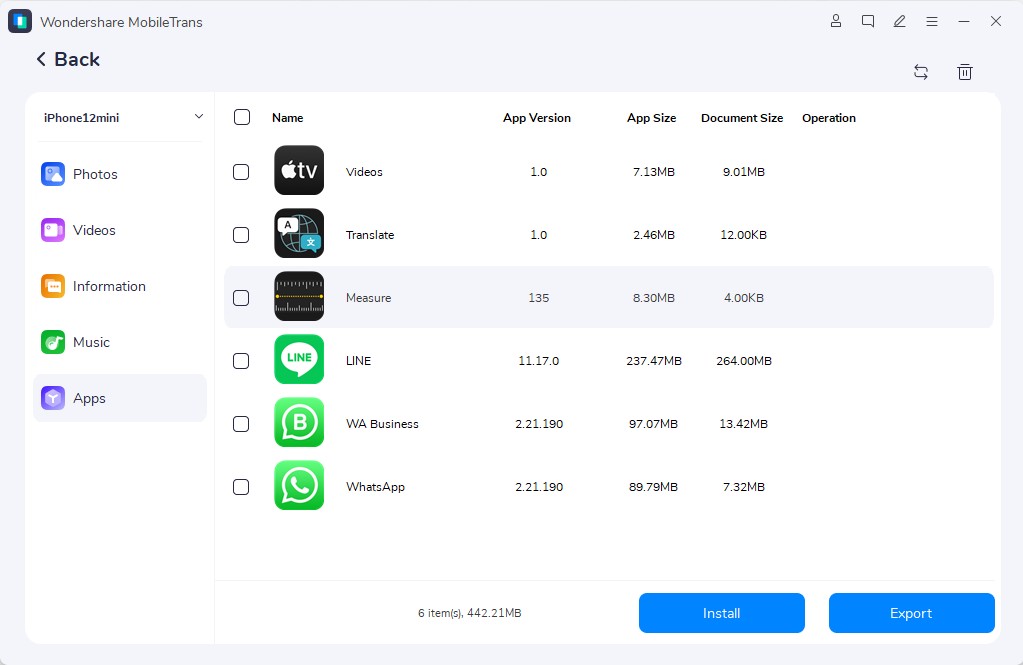
Once you have completed the first step, a window will appear displaying all the data types that can be transferred from your iPhone. Choose the photos you want to transfer to connected hard drive from the many options. If you cannot find certain photos, you can check out the hidden photos on the iPhone.

Step 3: Export Photos to Hard Drive Directly
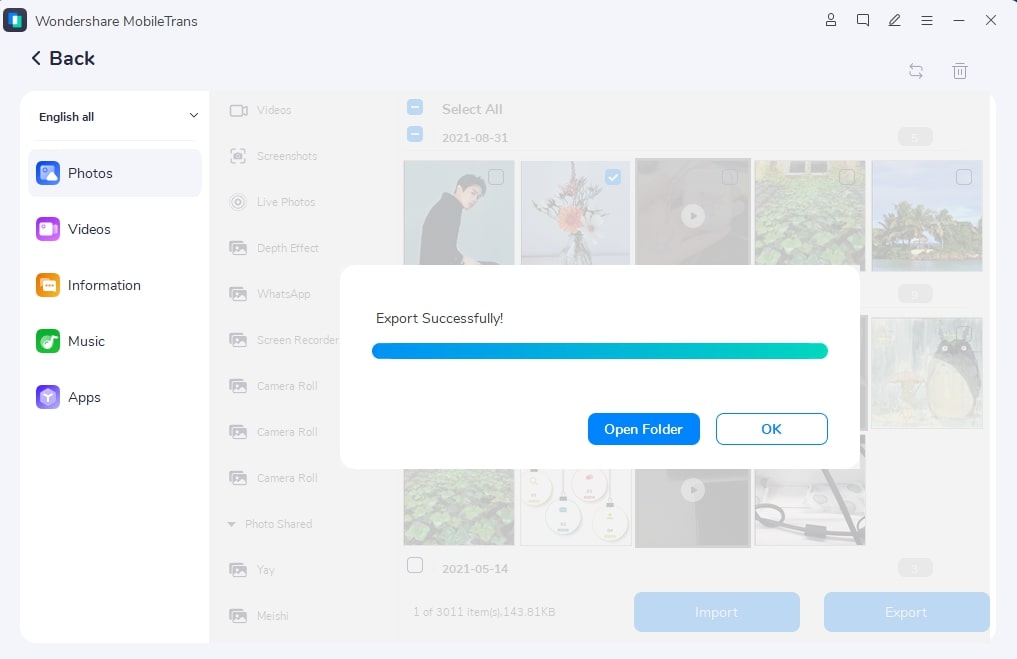
After that, just click on the Export button to proceed. A pop-up window will appear, giving you the option to select a location where you want to transfer the file. Choose to save your iPhone photos to the connected hard drive.

Step 4: Transfer Completed
That's it! Once the data has been exported, you can notice that all your photos are saved on the external device now.
Part 2: Move Photos from iPhone to External Hard Drive on Windows PC
Method 1: Transfer iPhone photos to an external hard drive with Windows Photo

One of the easiest and the go-to methods to transfer pictures from iPhone to external hard drive is using the Photos app that comes with your Windows. The process is quite simple, and you just need to follow these steps:
- Using a USB cable, plug the iPhone into the PC and launch the Photos app once the connection is established. The photos app can be accessed from the Start menu of your Windows
- Once the app has appeared, click on the import option in the top right corner
- The next step would be to select the images that you want to import.
- Now make sure that the external hard drive you want to transfer the image has also been connected to the PC.
- Proceed with the import process, and select the external hard drive as the saving space to start the transfer.
Method 2. Move iPhone photos to the external hard drive via File Explorer

If you are wondering how to transfer images from iPhone to external hard drive using file explorer, then follow these steps:
- Like the previous methods, the first is to ensure your iPhone is connected to your PC using a USB cable.
- Next plugin the external hard drive to the computer
- When you connect the iPhone, you will receive a prompt asking you to approve the iPhone. Grant the permission and in case you missed the prompt, launch the Windows Explorer by clicking on the start menu.
- Inside the Window Explorer, go to the PC and select Apple iPhone’s internal storage. From there you go to DCIM. This is where you'll find all the images.
- Now copy these images and paste them directly into the external drive
Method 3: Backup Photos from iPhone to hard drive with iCloud

One easy way to copy your photos from iPhone to an external drive is using an iCloud. To complete the process, follow these steps:
- First, enable "iCloud Photos" on your phone and then go to the iCloud site on your computer.
- Sign in with your apple Id and click on the image section.
- Now select as many photos as you want and download them.
- Either change the download location to your external device or download the image to your PC and then copy it to the drive.
Part 3: How to Transfer Photos from iPhone to External Hard Drive on Mac
Method 1: Save iPhone photos to external hard drive using Image Capture

The procedure for backing up your photos on Mac differs slightly from what you can do on Windows PC. Apple has its photo apps and wants you to leverage them. You can import photos from iPhone to Mac and then transfer them to an external hard disk. And here's how:
- First, connect your iPhone to your Mac. You can do it using either a Lightning or a USB cable.
- Just as you create a connection between your Mac and iPhone, you will receive a question asking if you can trust the computer. If yes, then go ahead and confirm.
- Browser your Mac for the “image capture” app. You can do so by directly searching “image capture” in the search bar.
- In the left portion of the image capture app, select the iPhone and within it the images.
- Next, select the location where you want to save the photos.
- Select the photos and click on the import button. Once the data has been imported, you can transfer the data to the external device.
Method 2: Transfer Photos from iPhone to External Device via Photos

Another method that you can use to transfer images from iPhone to your external drive via MAC is using the photos app. The process is quite similar to Windows. And the steps are as follows:
- Open MAC Photos, and while it's running, connect your phone, and it will start showing the device in the sidebar.
- From here, you can import the data into the photo library and then export the images to the external drive.
Part 4: How to Transfer iPhone Photo to External Hard Drive without Computer
Another question that we are continuously asked is how to transfer images from your iPhone to an external hard drive without the use of a computer.

The process is very easy; you just need a portable external device like SanDisk that can be connected to your iPhone directly. This feature is available for all devices with iOS 8 and above. To successfully transfer the data follow the steps mentioned below:
- Use the lightning or a USB cable to connect the iPhone to an external hard drive.
- Check if the connection is established and open the Photos app to select all the images that you want to transfer.
- Tap Share button and select Export Unmodified Original. Select the hard drive to which you want to save your photos.
Even though there are many other ways to transfer data from your iPhone to an external hard drive, MobileTrans is the most preferred choice. This is one such software that streamlines the way we transfer data from iPhone to any other device. So, if you want to transfer data to an external device, use any of the above-mentioned methods.
Part 5: FAQs About External Hard Drive Transfer
1. Can I connect my iPhone directly to an external hard drive
No, iPhones do not support direct connections to external hard drives. However, you can use a wireless external hard drive that connects to your iPhone over Wi-Fi or use a Lightning to USB adapter to connect certain types of external storage devices.
2. How many photos can 1tb hold?
The number of photos a 1TB hard drive can hold depends on the size of the photos. As an estimate, with an average photo size of 5MB, a 1TB hard drive can hold around 200,000 photos.
3. Does USB-C work on iPhone?
Yes, recent iPhone models support USB-C for charging and data transfer. However, a USB-C to Lightning cable is typically needed to connect USB-C accessories to an iPhone.
New Trendings
Top Stories
All Categories


Axel Nash
staff Editor