One of the best ways to ensure the safety of the data on the Xperia phone is to back up all the data on the device. For Android devices like Sony Xperia, you have numerous ways to back up all the data saved on it. Other than backing up the device on Google Drive, you can also create a backup file that you can save on to your computer.
In this guide, we take a look at 3 of the most effective ways to secure the data on your Sony Xperia. These solutions will help you back up all the photos, music, documents, videos and even in some cases the apps on the device. Let’s get started.
Back up and Synchronizing with a Google Account
This is one of the easiest ways to backup all the data on your device since you can easily transfer data such as photos, contacts and more to a device by synchronizing it with a Google Account.
To backup and synchronize the device with a Google Account, follow these simple steps;
Step 1: Open the Settings on the device]
Step 2: Then, depending on the version of Android running on the device, do one of the following;
Android 9 & Above: Tap on “System > Backup”
Android 8: Tap “System > Automatic Backup and then turn on the switch to enable the backup.
Android 5, 6 or 7: Tap “Backup & Reset > Xperia Backup & Restore > Automatic Backup
Backup Xperia with Mobile-Trans Backup
Alternatively, you could also choose to backup all the data on the device to the computer. When you try to simply connect the device to the PC and move one type of file after the other, you will quickly discover that this method is tedious, slow and very ineffective.
This is why we recommend you use a third-party tool designed to take all the files on your Sony Xperia and neatly back them up into a single backup file that you can then restore to the device in the future. This solution is MobileTrans-Backup, and its main advantage, other than it is very easy to use is that it can backup all data on the device in a single click.
To use MobileTrans to back up the data on your device to PC, download and install the program to your computer and then follow these simple steps;
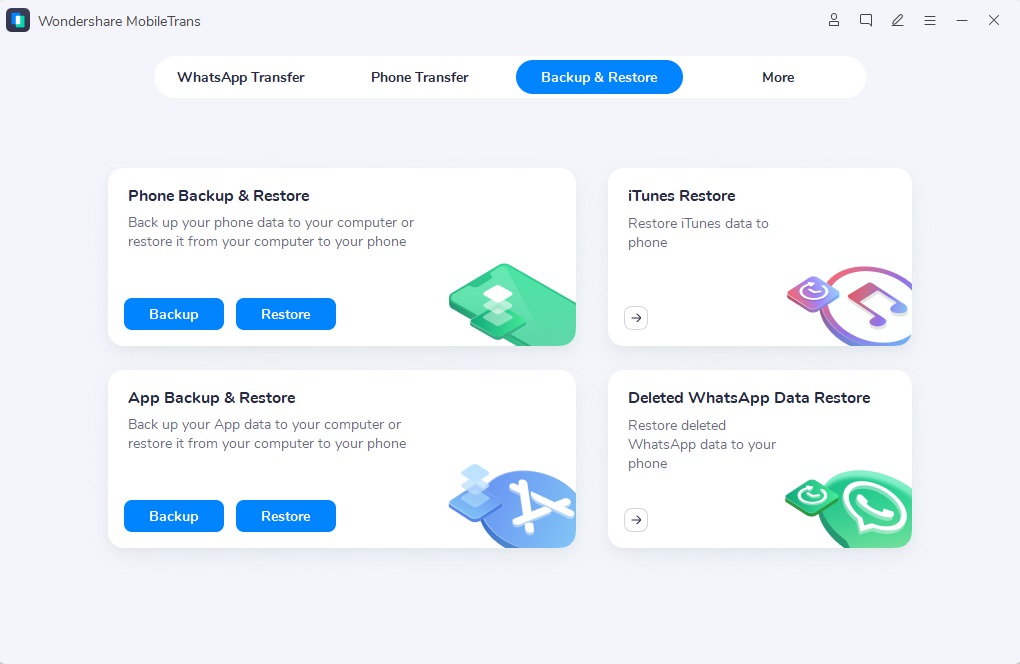
Step 1: Run Mobile-Trans backup on your computer after successful installation and select “Backup” in the main window. Then connect the Sony Xperia to the computer using USB cables. You may need to enable USB debugging before the program can detect the device.

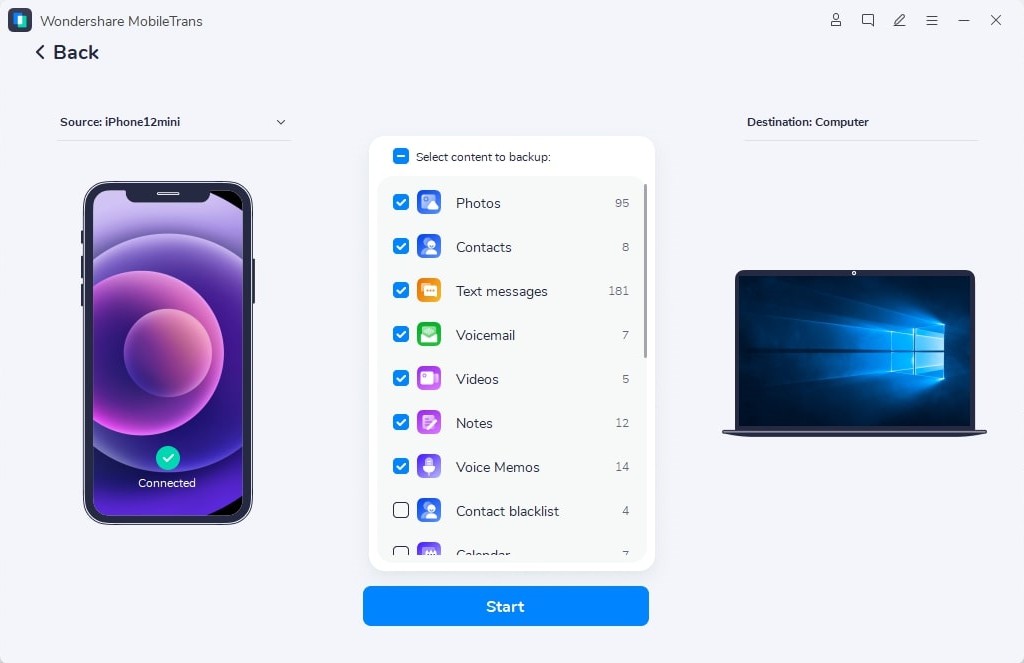
Step 2: As soon as the program detects the device, you will see a list of all types of files available on the device. Select the type of data that you would like to transfer and then click “Start” to begin the process.

Keep the device connected to the computer until the program notifies you that the process is complete. You should be able to access the backup file on your computer once the process is complete and you can use the same tool to restore the backup back on to your device.
Backup Xperia with Google Account
Other than synchronizing the device with a Google Account, you can also choose to backup all the data on the device to the Google Drive. To do that, follow these simple steps;
Step 1: On the device’s Home Screen, tap on the “Apps” icon and then select “Settings.” In the settings, tap “Backup & Reset”
Step 2: Tap on “Backup My Data” and make sure that this option is turned on. If this option is disabled, existing backups are deleted from Google Servers.
Step 3: Tap on “Backup Account” and then select the account that you would like to use. When you add the Google account to your phone, previous backups may be restored automatically.
You can than tap on the “Automatic Restore” switch to turn it on or off depending on whether you want to restore the backup automatically to any device associated with the device.
Well, the solutions above are all effective when you want to backup the data on your device. But while synchronizing and backing up the device using your Google Account could be effective and very convenient, you may find it safer to backup the data on your computer. This way, it will be quite impossible to lose all the data in the backup as a result of a system glitch or when you forget your Google Account password and you’re unable to recover it.
New Trendings
Top Stories
All Categories


Axel Nash
staff Editor