


 TL;DR:
Vivo device users can store their data online using the native Vivo Cloud app or create an offline local backup on a computer using Wondershare MobileTrans to avoid potential cloud service fees.
● Backing up data to Vivo Cloud requires registering a Vivo Account and enabling specific sync settings through Google Server and Google Photos.
● Restoring information through the Vivo Cloud app allows users to retrieve specific data categories like Contacts, SMS, and Notes directly to their device.
● MobileTrans provides a secure local alternative for users who are skeptical of internet-based storage and prefer to save their device files directly to a PC.
Ask AI for a summary
 ChatGPT
 Perplexity
 Gemini
 Claude
 Grok
Grok
With a range of exciting tech gadgets such as the very much anticipated V20 Smartphone of the Vivo series, it would be wise to be well-versed with the Vivo Cloud Back Up service. If this feature seems new to you, today's article will guide you on what we intend and how to backup data using Vivo Cloud Back Up. Also, get a chance to find out the other backup method with which your fear of losing data gets vanished!
Part 1: Vivo Cloud Introduction
“So, what is Vivo Cloud, and how is it useful?”
Vivo Cloud is a backup service provided by the Communication Technology Company Vivo. Like many other backup services, this one is the premier and top tier as compared to others. It is a cloud backup service, which is the data is stored on the internet via computer onto servers that store the data. If you talk about security and privacy, Vivo cloud backup is entirely safe with full protection guaranteed. With Vivo Cloud Back-Up, you get one of the most secure ways to store data.
Another point to note concerning Vivo Cloud Back-Up is that Vivo Cloud helps with surveillance for the CCTV cameras apart from file storage. Additionally, Vivo Cloud Retail helps build customized counting reports to help streamline businesses.
Part 2: How to Backup Vivo to Vivo Cloud
Learn how to Vivo Cloud Back-Up photos or backup any other data such as messages, contacts, or even documents with the below manual.
Step 1: Start by installing the Vivo Cloud app on the phone if you haven't previously. It is freeware, and you can find it on the App Store.

Step 2: Open the VivoCloud app and register for a Vivo Account to back up the data.

Step 3: Navigate to the "Settings" tab on the app, then "Accounts and Sync" that will help you to access the sync interface of the respective Google Account.
From the displayed data, select the data that you wish to make a back-up.

Step 4: For Vivo Cloud Back-Up photos, you need to open the "Photos" app or "Google Photos" and then navigate to the "Menu," which is the three vertical lines at the upper left corner.
Now, go to "Settings," then turn on the "Back Up and Sync" option and the photos will automatically back up.
Step 5: To back up other data, execute “Settings> More settings> Back up and reset> backup data> Google Server.” Finally, select "Back Up My Data" to save and back up the remaining data.

Part 3: How to Restore from Vivo Cloud?
While this is almost the reverse of Backing up data, the procedure may be a bit different, and with guided steps, here is how to restore data from VivoCloud.
Step 1: Launch the VivoCloud app. Once open, select the type of data you wish to restore, for instance, whether "Contacts," "SMS," or "Notes."

Step 2: Once selected, tap the "Restore" option that will restore the data.
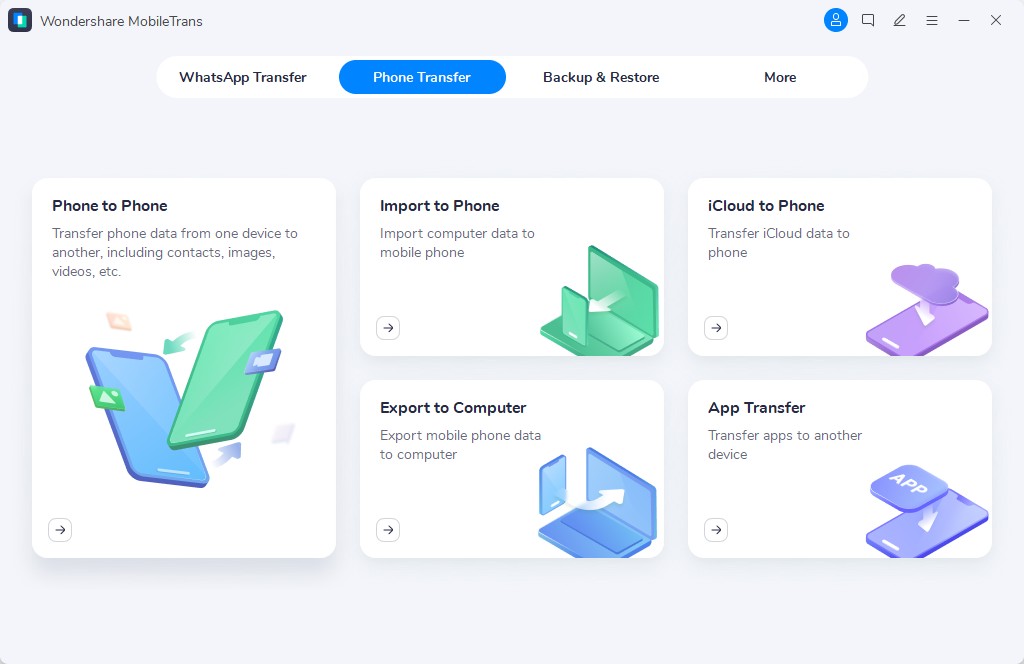
Part 4: Vivo Cloud Alternative: Backup your Vivo to PC with MobileTrans
MobileTrans is a trusted and reliable software from Wondershare that is a perfect alternative for Vivo backup. At ease, you can perform phone to phone transfer, back up data, and restore data. While some are still skeptical about cloud services, one great alternative to cloud services like Vivo Back-Up could be to create a local backup of your data. Also, you can backup the data from their Vivo account to have a local standby backup. Creating a local backup of your data is easy if you have MobileTrans handy. Below is a guide to help one make a backup of their data using MobileTrans.
Creating a Back-Up Using MobileTrans
Step 1: Install & download the MobileTrans application on your PC. Once done, launch, and open it.
From the primary window, choose the “back-up” option to make a data backup of data from the target device.
Step 2: Now, connect the target Vivo device or any iPhone to the computer and establish a connection. The source and destination will appear on the screen.
If placed wrongly, you can shuffle the places of the devices.
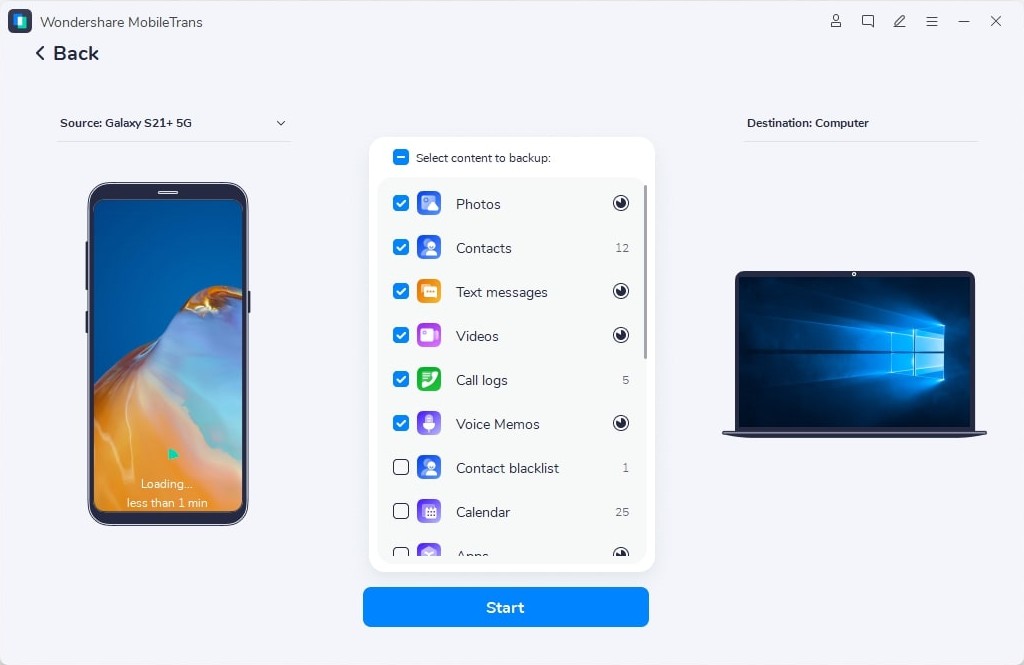
The target device's data will appear where you can select the required or desired files from the list.
Step 3: After selecting the data to be backed up, hit the “Start” button and wait a while as MobileTrans will create a back-up of the data to the PC.
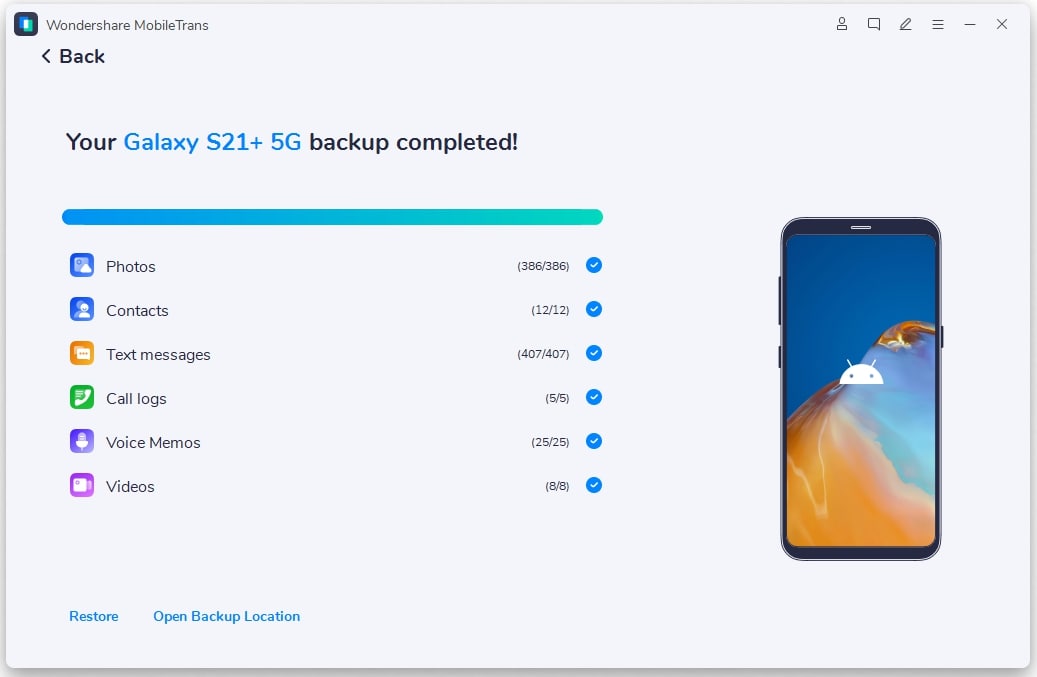
The backup status or progress will appear on the screen to keep the devices connected until it is 100% complete.
Conclusion
Many have now become accustomed to Cloud Service Back-Up options such as the Vivo Cloud Back-Up. It is all safe, though you may have service fees. Thus, for this reason, it would be better to have a local back-up of data where MobileTrans will be the best solution when it comes to data backup & restore!
New Trendings

Top Stories
All Categories


Axel Nash
chief Editor