WhatsApp users choose to send photos to emails for various reasons. Android or iOS users can be worried about Google Drive or iCloud unwittingly deleting the previous important conversations, images, and videos, which can be regrettable.
When transferring backup from android to iOS or vice versa, WhatsApp users can be motivated to share the photos to an email. Lastly, a need to share your exported backup with other people can motivate users to send it through email.
With that said, you can implement different photo export procedures; therefore, you need to have a working email. Read on to learn how you can send pictures from WhatsApp to email. This will be helpful if you are careful about having a backup of your photos.
Part 1: Send photos from WhatsApp to Email (iOS)
Typically, WhatsApp users tend to share their entire conversation attached with different media when sharing to email if they don’t know how to send only photos. It is possible to send multiple WhatsApp photos without the chat history or other media to your email from your iPhone. The following steps will help you to share photos from WhatsApp on iPhone to email
Step 1: Open the WhatsApp application from your iPhone. Go to the chat thread with the photos you want to share. Tap on the photos to view the share icon from the list that will pop up.

Step 2: Choose the share option from the popup window. A list of options will appear to which you can share the selected photo. Select the mail option and the app will create a new mail. Simply enter the email address to which you intend to send the photos.

Step 3: The photos will be sent to the email immediately. Ensure there you have a stable internet connection to ensure the photos are mailed to the address instantly.
Part 2: Send photos from WhatsApp to Email (Android)
Android WhatsApp application made the media sharing procedure simple for its users. The app comes with a reliable inbuilt sharing feature. You need to ensure you have signed in to your email address on the android device. The following steps will help you to send photos from WhatsApp on android to email.
Step 1: Launch WhatsApp application from your android device. Open the conversation with which the photos were shared. Find and select the photos you want to send to the email. Select the photos by tapping and holding for few seconds until highlighted.
Step 2: After a successful selection of the images, click on the three dots line located on the WhatsApp window's right upper corner. A list of options, including ‘Share,’ will appear. Click on share.

Step 3: An app list to which you can share the selected photos will appear after taping on the share option. Open the email option from the list and wait for it to open.
Step 4: A new window will pop up composing a new email. Enter the receiver email address on the field provided. Hit the send button after giving the target email. The action will allow you to send photos to other people or even your email to keep them as a backup.

Part 3: Send photos from WhatsApp to Gmail
For iOS
When you intend to send WhatsApp photos specifically to Google mail, the procedure is identical to the above described. You only need to have the receiver's Gmail address, and this can also be your account. Follow these steps to carry out the transfer process successfully.
Launch the WhatsApp app and open the chat containing the images you want to send.
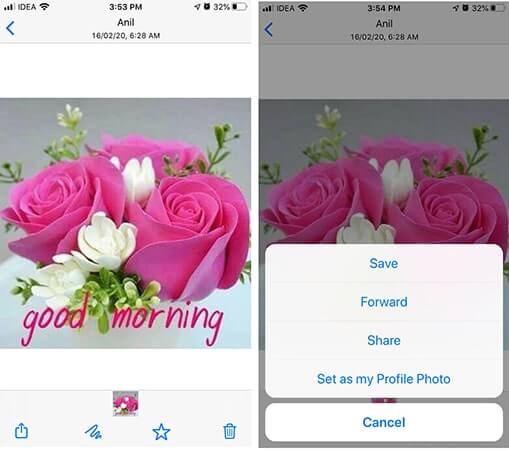
Tap on the images, and a window will pop up showing a list of options, including save, Forward, Share, and Set as my Profile Photo. Tap on the share option.
Under the share panel, a list of apps will appear, including email. Click to view a pop-up window for composing the email. Add a working Google Mail address to which you want to share the selected images. The images will be transferred immediately if the internet connection is steady.

For android
You can choose to share your photos from WhatsApp directly to Gmail from the application's share tool. Similarly, you can select the images from the WhatsApp folder from your local android storage and share them with Gmail. Follow these steps to send photos from WhatsApp to Gmail.
Launch the WhatsApp application on your android phone.
Open the chat with the photos you want to send.
Tap and hold the photos you want to select. After highlighting, tap on the three dots appearing on the right upper corner of the screen
Select the share option from the list provided.
Select the Gmail icon from the app list that appears under the share panel. Once the application opens the compose window, enter a working Gmail address and hit send.
Alternatively, you can go to the WhatsApp images folder to select the photos you sent or received in a WhatsApp chat. Long press the photos and select the share icon and choose Gmail. When the Gmail app launch, enter the receiver address correctly.
Part 4: How to send photos from Mail to WhatsApp
WhatsApp comes with incredible functions to help users to communicate, share and secure their content from loss. It is easier to forward chats, media contacts, location, and documents to other platforms such as via mail. However, there are no direct criteria for sending photos from mail to WhatsApp. You need to download the photos to your local storage then share to WhatsApp contacts or group manually.

Pro tip: How to transfer/backup WhatsApp with different devices
WhatsApp provides an inbuilt feature to transfer WhatsApp to another device. Android WhatsApp users use the Google Drive cloud service as the default location to backup and restore the data when needed on a new device. On the other hand, the iPhone uses iCloud or iTunes as the default cloud storage for WhatsApp backups.
For android:
If you are looking to transfer android WhatsApp to your new device, the following steps will complete the task successfully.

- Open WhatsApp messenger on your android device.
- Tap on the menu icon to access the setting panel
- Tap on the ‘Chats’ options listed on the settings panel
- Tap on the chat backup option
- Choose the account to which the backup will be stored. Create a Google drive if you don’t have one.
- If you want to include the video files in your chats, check the ‘include videos’ box.
- Tap on the ‘Back up’ option to allow the chats and media to transfer to your Google Drive account.
Now you have a backup of the WhatsApp chats, including the media on your Google Drive. To restore the data to a new phone, follow these steps.
- Install WhatsApp on the new device and launch it
- Verify your phone number when prompted. Ensure you use the same number on your older phone to allow restoration of the conversations.
- Once you verify the number with the code sent to your phone, the app will ask whether you want to restore your backup. Tap continue to get the backup from Google Drive.
- You should ensure the new phone is linked to the Google account on the older device to access the WhatsApp backup automatically.
- Tap on the account and tap on the Restore button.
- Once the process is complete, tap Continue to proceed. You would have transferred your WhatsApp to the new android phone.
For iOS:
The following steps will help to transfer WhatsApp to another iPhone. Before that, you should ensure the iPhone is signed with iCloud and WhatsApp has access to it.
- Open the Settings app on iPhone
- Tap your name to access iCloud. If not signed in already, enter your credentials to log in
- Tap on the iCloud Drive and turn it on
- Scroll down to check whether WhatsApp is turned on
The following steps will back up WhatsApp to the iCloud account:
- Open WhatsApp and tap on the Settings option
- Tap ‘Chats’ then go to ‘Chat Backup.’
- Tap on ‘include videos’ if you want to back them up
- Tap on the ‘back up now’ option

The WhatsApp data will be transferred to your iCloud account. Now it is time to transfer the backup to another iPhone. Here are the steps to follow.
- Sign up with your iCloud and WhatsApp account on the new iPhone
- Open WhatsApp and verify your number. Beware that the number used in the previous WhatsApp is what’s required on the new phone.
- Tap on the ‘Restore Chat History’ option and tap next to proceed. The WhatsApp content will be transferred.
An easier way: MobileTrans – WhatsApp transfer
As much as you can use the inbuilt feature on WhatsApp to transfer and backup the messages and media files, third-party apps can help make the process easier. In this case, the app can be a great tool to reduce the hassle of complicated procedures when transferring or backing up your WhatsApp to different devices.
Wondershare MobileTrans is compatible with iOS and Android devices. This means you can share your WhatsApp from Android to iOS or vice versa.
Let’s check the steps:
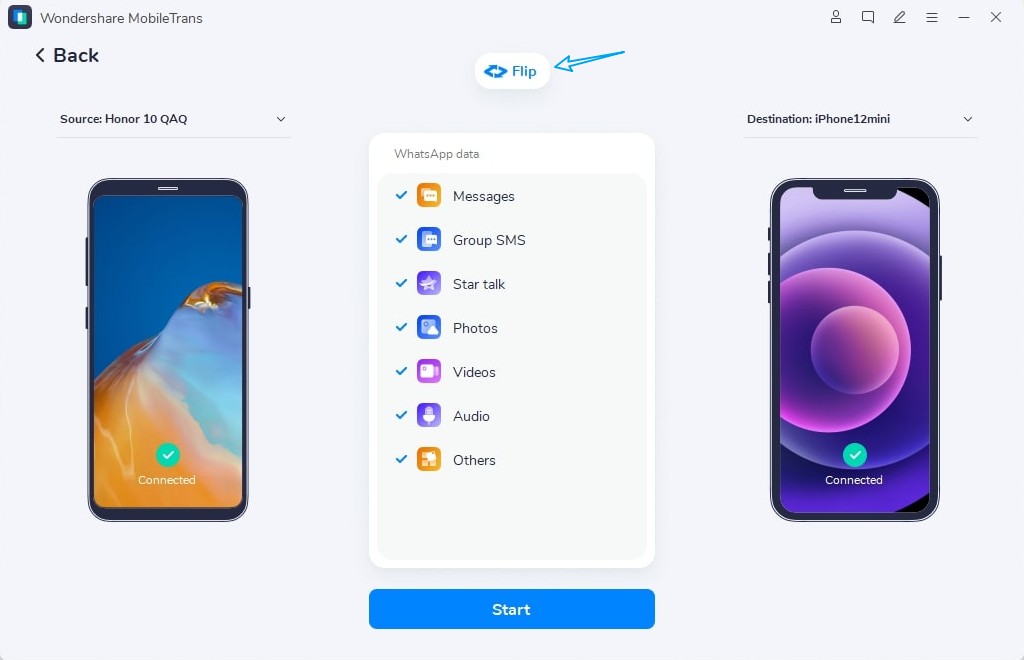
Launch the MobileTrans app on your computer and click on the "App Transfer" module from the main window. Choose the ‘WhatsApp’ option. Select "Transfer" or "Transfer & Merge" to start.

-
- Connect your both phones to the computer to load the messages and attachments before backup. Select the data you want to transfer and click the start button.

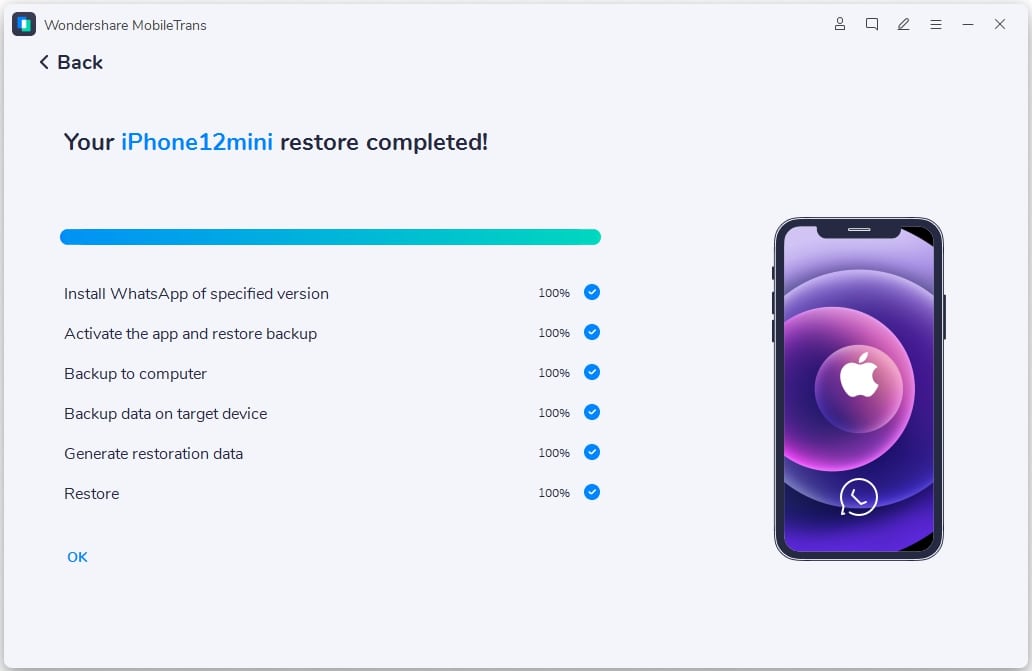
- Keep the phones connected throughout the transfer process. The software will notify you when WhatsApp data is transferred successfully.
Conclusion
The WhatsApp messenger app's sharing feature is significant for sending messages or media such as photos to other platforms like email. The process is seemingly simple and straightforward. When sending photos to email, the above procedure can get you through the process without a hassle. It is essential to send your WhatsApp photos to email to avoid losing them to unforeseen situations that might lead to loss.
New Trendings
Top Stories
All Categories


Axel Nash
staff Editor