


 TL;DR:
For stable and fast iPhone-to-PC file transfers without the restrictions of iTunes, use dedicated offline USB software like MobileTrans for all-in-one data, CopyTrans Photo for images, or WinX MediaTrans for music.
● Devices running iOS 26 or later require you to unlock the screen and tap "Trust This Computer" upon connection, and you must temporarily disable iCloud Photos to ensure the transfer tools can access locally stored files.
● Free software versions contain strict usage limitations, with MobileTrans capping the total number of free transfers, WinX MediaTrans enforcing daily limits, and CopyTrans Photo restricting bulk image selection.
● Completely close iTunes before launching third-party transfer software to avoid file access conflicts, and prevent memory freezes by exporting media in batches of 100 to 200 photos or 1 to 2GB of video.
Ask AI for a summary
 ChatGPT
 Perplexity
 Gemini
 Claude
 Grok
Grok
Transferring files from iPhone to PC can be a frustrating task, especially if you're stuck with iTunes. It’s bulky, slow, and often restricts access to your data. That’s why in 2025, more users are ditching iTunes for faster, free software that makes iPhone to PC transfers quick and hassle-free.
Whether you want to move photos, videos, music, or documents, this guide covers the best free iPhone to PC transfer software for every file type. You’ll learn which tools are ideal, how to use them, and what mistakes to avoid.
In this article
Part 1: Why Use iPhone to PC Transfer Software Instead of Apps
You might be wondering: why not just use an app for iPhone to PC transfer?
Apps typically rely on Wi-Fi, and while that sounds convenient, it often results in unstable transfers, reduced speed, and limits on what files you can access. Transferring large videos or music collections can stall midway—or worse, fail.
Here’s where free software comes in.
When you use desktop-based software, especially those connected via USB, your transfers are faster, more stable, and you get full access to your iPhone’s data—something apps can't always provide.
Software = Stable, USB-Based Transfers
Connecting via USB gives you the most secure and direct access to your iPhone’s storage. Unlike cloud-based or wireless apps, USB doesn’t rely on internet speed, router performance, or battery drain.
Apps = Often Wi-Fi-Dependent and Limited
Apps like AirDrop or cloud services are useful for quick transfers, but they don't work well when moving large files, full albums, or multiple formats. They’re also prone to disconnection and can’t access certain types of iOS data, such as app files or system messages.
If you care about speed, security, and complete file access—especially when moving large batches of files—using free iPhone to PC transfer software is your best bet.
Next up, let’s dive into the best software options based on file type.
Part 2: Best Free Software by File Type
Different file types require different solutions. Some tools excel at photos, while others handle music or offer all-in-one capabilities. Here’s a closer look at the best free iPhone to PC transfer software by use case.
Best All-in-One Tool: MobileTrans by Wondershare
Want to transfer more than just one file type? MobileTrans handles photos, videos, contacts, music, messages, and more—all in one place. Designed for simplicity and speed, it connects via USB and works without iTunes.
This is crazy: Most free tools give you one file type, maybe two. MobileTrans lets you move everything without complicated steps or bloated software.
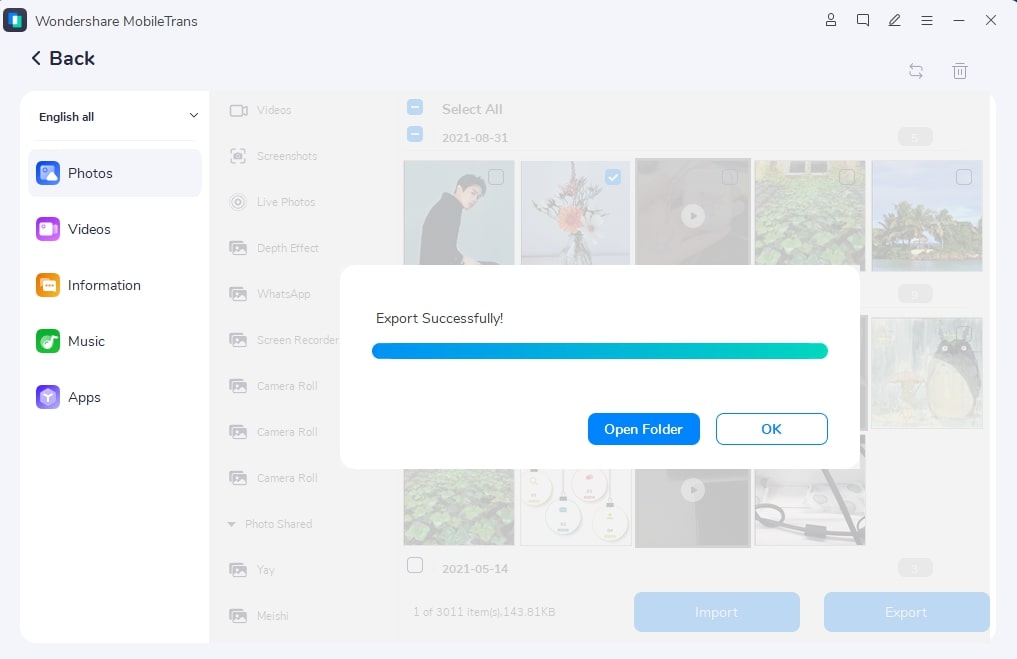
How to Use MobileTrans for File Transfers:
Step 1: Download and launch MobileTrans on your PC.
Step 2: Connect your phone to the computer first. And after starting MobileTrans, select Phone Transfer > Phone to PC.

Step 3: Choose data types from the left-hand sidebar. Next, select whatever files you wish to export to your PC.

Step 4: Maintain a phone connection, and the export will finish soon. Additionally, these files may be imported to your phone as needed.
Want to know the best part? MobileTrans works entirely offline—no Wi-Fi, cloud storage, or internet connection required.
Best for Photo Transfer: CopyTrans Photo (Free Version)
If you mainly transfer images from your iPhone to your PC, CopyTrans Photo is a solid pick. Its drag-and-drop interface makes it user-friendly, even for beginners. You can browse and export entire albums or individual images.
Best for Music Transfer: WinX MediaTrans (Free Trial)
Music lovers, take note. WinX MediaTrans allows you to transfer songs and playlists without using iTunes. You retain metadata, including album art, and the transfer speed is notably fast.
Part 3: Quick Steps to Transfer Files from iPhone to PC
Now that you’ve chosen your software, here’s a streamlined process to follow when transferring files:
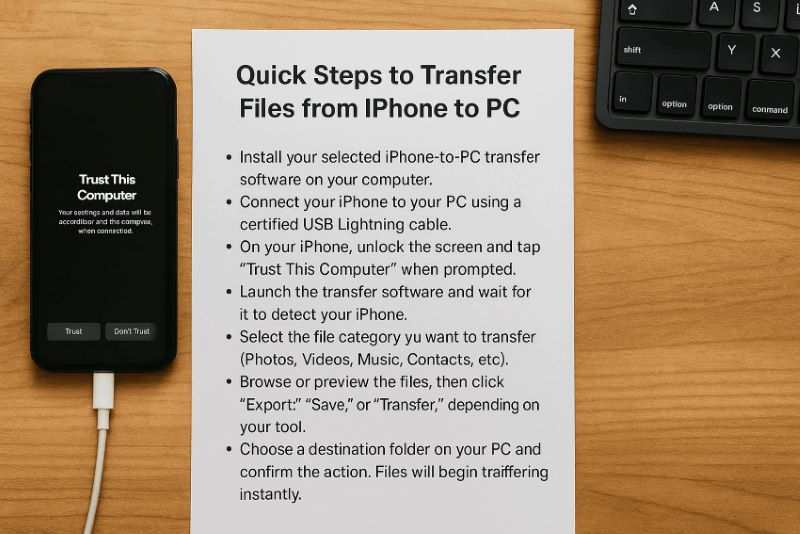
- Install your selected iPhone-to-PC transfer software on your computer. Connect your iPhone to your PC using a certified USB Lightning cable.
- On your iPhone, unlock the screen and tap "Trust This Computer" when prompted.
- Launch the transfer software and wait for it to detect your iPhone.
- Select the file category you want to transfer (Photos, Videos, Music, Contacts, etc).
- Browse or preview the files, then click “Export,” “Save,” or “Transfer,” depending on your tool.
- Choose a destination folder on your PC and confirm the action. Files will begin transferring instantly.
Pro Tip: For a smoother experience, disable iCloud sync temporarily so your iPhone storage is fully visible to the transfer tool. This is particularly important when exporting photos and messages.
Part 4: Tips for Smooth Transfer
Want to know the best part about using dedicated iPhone-to-PC transfer software? You can optimize the entire process by applying a few smart tricks that make file transfers faster, safer, and more reliable. Here are the most effective tips you should follow every time you move files from your iPhone to your PC.
Tip 1: Use Certified USB Cables
Not all lightning cables are created equal. Using unofficial or low-quality cables can result in intermittent connections or failed transfers. Always opt for the original Apple cable or MFi-certified alternatives. They ensure stable communication between your iPhone and PC.
Tip 2: Keep Your iPhone Unlocked
iPhones running iOS 26 or later require you to unlock the screen and tap “Trust This Computer” when connecting to a new PC. Failing to do so can block access to your files or cause your software to hang. Always unlock your device before launching the software.
Tip 3: Disable iCloud Sync (Temporarily)
If you’re transferring photos, make sure iCloud Photo Library is disabled. When it’s enabled, many photos are stored in the cloud rather than your local storage, and transfer software may not access them. Here’s how:
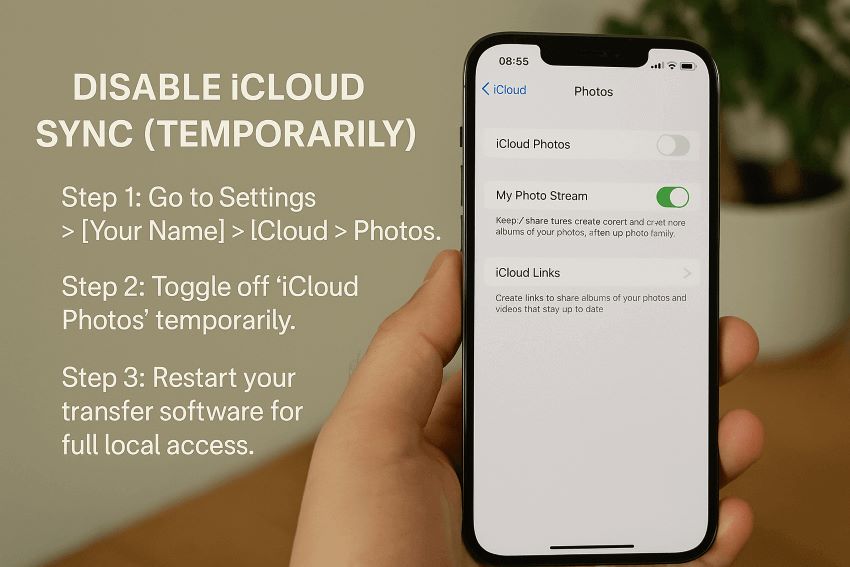
- Go to Settings > [Your Name] > iCloud > Photos.
- Toggle off “iCloud Photos” temporarily.
- Restart your transfer software for full local access.
Tip 4: Close iTunes Before Launching Your Tool
iTunes can interfere with third-party transfer software by locking file access. If it launches automatically, exit it before connecting your iPhone. This gives your transfer tool full control without software conflicts.
Tip 5: Update Software and iOS Regularly
Running the latest version of your transfer tool ensures maximum compatibility. Likewise, outdated iOS versions may cause communication problems. Before transferring:
- Check for PC software updates
- Make sure your iPhone’s iOS is current
Tip 6: Don’t Overload the Transfer Queue
Trying to move thousands of files in one go can strain both your iPhone and PC memory, leading to freezes or partial transfers. Instead, transfer files in manageable batches. If you’re moving media, try 100–200 photos or 1–2GB of video at a time.
Tip 7: Organize Files Before Transfer
Sorting files into albums or folders on your iPhone makes it easier to locate and move them. Many transfer tools reflect your phone’s internal organization, so categorizing ahead saves time and prevents mistakes.
Tip 8: Clean Junk Files First
Some tools struggle to access your files if your device is cluttered with cache, system logs, or temporary app data. Before a big transfer, consider using a cleanup app or restarting your phone to refresh memory and system performance.
Tip 9: Check Your Destination Folder Permissions
Sometimes, a transfer fails not because of your phone, but because your chosen PC folder doesn’t have write permissions. Always select a destination where you have full access, such as Downloads or Desktop.
Tip 10: Backup Before Transfer
Even with reliable software, it’s good practice to back up your iPhone using iCloud or iTunes before initiating large transfers. If anything goes wrong, you won’t lose important data.
Tip 11: Use Preview Mode If Available
Tools like Dr.Fone or MobileTrans offer preview modes so you can select specific files instead of transferring everything. This saves time and avoids cluttering your PC with unwanted files.
Tip 12: Keep Power Connected
Large file transfers can drain your iPhone battery. Connect your iPhone to a power source if you’re planning to move gigabytes of data. Low battery interruptions can corrupt file transfers.
Tip 13: Use File Naming Consistency
Before transferring, rename files with consistent and identifiable names (especially videos and documents). This helps you sort and use them quickly after transfer.
You can turn a messy, slow transfer into a fast and smooth experience just by applying these tips. While the software does most of the work, optimizing your setup ensures the process runs without hiccups.
In the next section, we’ll talk about what not to do when transferring files from iPhone to PC—mistakes that can slow you down or put your data at risk.
Part 5: What to Avoid When Transferring iPhone Files to PC
Now that you know how to make transfers smooth, it’s equally important to understand what not to do. These common mistakes can waste time, corrupt files, or interrupt your transfer process altogether.
Mistake 1: Relying Only on Wi-Fi-Based Apps
Many users opt for Wi-Fi-only apps, thinking it will be more convenient. But here's the catch: Wi-Fi transfers often drop connections, fail mid-way, or reduce speed dramatically when moving large files.
Avoid this by choosing a reliable USB-based tool like MobileTrans, which ensures stable and consistent file movement.
Mistake 2: Not Trusting the Computer
When you connect your iPhone to a new PC, you’ll see a prompt to “Trust This Computer.” Failing to confirm this will block data access.
If you miss it, unplug and reconnect your device. Make sure the screen is unlocked and tap Trust.
Mistake 3: Saving Files in Protected System Folders
Trying to export files to restricted PC locations (like Program Files or System folders) can lead to failed saves or permission errors. Stick to folders like Desktop, Downloads, or Documents.
This ensures full read/write access and avoids system conflicts.
Mistake 4: Failing to Check File Format Support
Some free software to transfer files from iPhone to PC only supports standard file types like JPG, MP4, or MP3. If you're moving RAW images, third-party app files, or formats like MOV or HEIC, verify that your tool supports them.
MobileTrans and CopyTrans, for example, support a wide range of formats.
Mistake 5: Trusting Unknown or Shady Tools
If a tool doesn’t come from a reputable developer or asks for strange permissions, skip it. Free doesn’t always mean safe.
Always download iPhone to Windows file transfer software from official websites or trusted platforms. Never give tools access to sensitive settings like VPNs or your Apple ID.
Want to know the best part? By avoiding these pitfalls, you’ll streamline every transfer, protect your files, and save time.
Conclusion
The best way to transfer files from an iPhone to a PC is by using free, reliable desktop software that gives you full control.
Tools like MobileTrans offer an easy path to move photos, music, and documents without breaking a sweat. Combine them with smart practices—like using original USB cables, previewing before transfer, and avoiding Wi-Fi tools—and you’ll never run into trouble.
Wondershare Repairit helps restore damaged video, audio, and documents with minimal effort.
FAQs
-
What is the best free software to transfer iPhone files to a PC?
MobileTrans is one of the top free tools, offering simple USB transfers for photos, videos, and more with full iOS support.
-
Can I transfer photos without iTunes?
Yes. Use MobileTrans or Dr.Fone – Phone Manager for direct photo access without iTunes.
-
Are these free tools safe?
Absolutely. Just make sure to download them from their official websites. They work offline and don’t require Apple ID logins.
-
Why can’t my PC detect my iPhone?
You might have missed the "Trust This Computer" prompt. Reconnect your device, unlock the screen, and confirm trust.
-
Will I lose image quality when transferring files?
No. Tools like MobileTrans preserve original quality, especially for high-res photos and videos.
-
Can I move contacts and messages, too?
Yes, MobileTrans supports full data transfers—including SMS, WhatsApp, and contact syncing.
-
What formats do these tools support?
They work with JPG, PNG, HEIC, MP4, MOV, MP3, PDF, DOCX, and more. Just confirm compatibility if your file is rare.
-
Do I need the internet to use these tools?
No. Most of them work offline via USB, so your data stays private and transfers remain stable.


