


 TL;DR:
You can sync music from Mac to iPhone wirelessly through close-proximity tools like AirDrop, cloud platforms like iCloud Drive, or subscription-based automatic syncing via Apple Music, though users avoiding wireless limitations can use Wondershare MobileTrans for direct wired transfers.
● Free wireless methods like iCloud Drive are restricted by a 5GB storage cap and consume local device space, while email transfers are hindered by strict file size restrictions that prevent bulk sharing.
● Relying on Apple Music for automatic cross-device library synchronization requires an active paid subscription, whereas remote desktop tools like TeamViewer demand manual technical setup and a stable internet connection.
● Wondershare MobileTrans serves as the recommended wired alternative to bypass internet dependency and cloud storage limits, utilizing a direct USB connection to execute lossless batch transfers of entire music playlists.
Ask AI for a summary
 ChatGPT
 Perplexity
 Gemini
 Claude
 Grok
Grok
Although Apple users can sync their music files through a wired connection, they usually find it time-consuming and challenging because they have to arrange a USB wire. Fortunately, this operating system facilitates wireless music sync across different devices, which is becoming a go-to transfer approach.
While going through this guide, you can learn different methods on how to sync music from Mac to iPhone wirelessly. In this way, you get to manage your favorite tracks and keep your playlists updated across all your devices.

In this article
-
- Method 1. Transferring Music from Mac to iPhone via AirDrop
- Method 2. Using a Cloud-Based Platform for Transferring Music
- Method 3. Consuming a Remote Desktop Service
- Method 4. Trying iCloud for Transferring Music from Mac to iPhone
- Method 5. Sharing Music via Email
- Method 6. Syncing Music from Mac to iPhone through Apple Music
Part 1. How to Transfer Music from Mac to iPhone Wirelessly [Basic Methods]
As discussed, users can opt for multiple methods to transfer music across devices without the need for a wired connection. To learn how to sync music from Mac to iPhone without cable, explore the top 6 wireless music transfer approaches below:
Method 1. Transferring Music from Mac to iPhone via AirDrop
One of the easiest ways to move music from between Apple devices is through AirDrop. This method enables you to move music files without needing a USB cable. Since this feature is built into both devices, it eliminates the need for additional apps or software for music file transfers. Learn how you can use AirDrop to migrate music from Mac to iPhone by following the guide below:
Step 1. Firstly, you need to enable the AirDrop on your iPhone and press it to open a small menu. Here, select “Everyone for 10 minutes” to make your phone discoverable to Mac devices for music file transfer.

Step 2. After that, locate the music file on your device and tap the “Share” option from the newly accessed drop-down menu.

Step 3. From the share menu, pick the “AirDrop” option and choose your iPhone from the list of available devices.

Step 4. On your iPhone, a notification will appear asking if you want to accept the file transfer. Tap “Accept” to receive the transferred music files from the Mac to the iPhone.

Method 2. Using a Cloud-Based Platform for Transferring Music
Another way to transfer music across devices is through cloud platforms like Google Drive. This simple method allows you to upload your music to the cloud and then access it on your mobile without needing a physical connection. To understand how to transfer music from Mac to iPhone wirelessly, go through the following stepwise instructions:
Step 1. Start by accessing the cloud platform website on your Mac and clicking the “+ New” button. From the newly appeared menu, select “File Upload” and add the music file that you want to transfer to the phone.

Step 2. Now, access Google Drive on your iPhone and find the recently added music file from your Mac. Press the horizontal “Three Dots” icon at the right side of the file and tap the “Download” option from the pop-up menu to save it on your phone.

Method 3. Consuming a Remote Desktop Service
Remote desktop services, such as TeamViewer, AnyDesk, or AnyViewer, offer a unique way to transfer videos from Mac to iPhone. These tools allow you to access and control your Mac device from your iPhone to easily manage music files. You can also use this setup to open your music library on Mac and transfer specific songs or playlists to your iPhone via supported file-sharing apps.
These remote desktop platforms make the process seamless with secure connections and real-time file sharing. Once connected, you can navigate your Mac’s interface on your iPhone, locate your music files, and initiate transfers. Moreover, this ensures that your files are safe from unauthorized access or theft. Learning how to sync music from Mac to iPhone without cable is ideal for users who prefer a controlled and direct transfer process.
Method 4. Trying iCloud for Transferring Music from Mac to iPhone
iCloud Drive is one of the easiest and most reliable ways to understand how to transfer music from Mac to iPhone without cable. You only have to upload your favorite tracks to iCloud Drive using the web browser or Finder. This will help users ensure all their music is available on all Apple devices. Track the steps below for a better understanding:
Step 1. Initiate the process by getting access to the web version of your “Drive” on your MacBook and then click it to move to the next step.

Step 2. Now, at the Drive interface, hit the “Upload” icon represented by a cloud and upload music files of your choice.

Step 3. Once you have uploaded music to your Mac, shift to your iPhone device and ensure you have the same Apple ID logged in as the Mac device. Navigate to the “Settings” screen and tap the “Apple Account” information. Next, at the “Apple Account” interface, hit the “iCloud” option.

Step 4. Then, locate “Drive” in the “Saved to iCloud” section and tap on it. Finally, turn on the “Sync this iPhone” toggle to get the music files to your mobile device.

Method 5. Sharing Music via Email
Other than the cloud storage options, sending music via email is a simple and accessible way to transfer tracks without any extra software. This method is especially helpful for users who only need to move a few songs quickly without setting up complex syncing tools. You can learn how to transfer music from Mac to iPhone wirelessly using email from these steps:
Step 1. On your MacBook, access the mailing app through any browser and press the “Compose” button. Next, provide the email address of the recipient and press the “Attachment” icon to select the music file. After importing the music file from your storage, press the “Send” button to complete the process.

Step 2. Moving forward, simply open the email on your iOS mobile and press the audio attachment to preview it. After this music file opens, you need to tap the “Share” icon at the top of the screen. From the menu that appears, select the “Save to Files” option. When it takes you to the device’s storage, select a suitable folder and press the “Save” button at the top to store the file there.

Method 6. Syncing Music from Mac to iPhone through Apple Music
Out of all the methods discussed, using Apple Music for syncing your music is the best option. This method is useful to eliminate the need for manual transfers, keeping playlists and albums updated automatically. With cloud storage, users can enjoy their favorite tracks without worrying about physical file transfers or device limitations. The following steps explain how to transfer music from Mac to iPhone wirelessly using Apple Music:
Step 1. After opening the “Music” app on your MacBook, tap the “Music” button from the top menu to access a drop-down. Once the drop-down appears, you need to select the “Settings” option to change the syncing settings.

Step 2. Within the “General” window, ensure to enable the “Sync Library” option. After enabling the syncing option, press the “OK” button to save the settings.

Step 3. Now, access the “Settings” of your iOS device and scroll down to the “Apps” option. When it opens in a new tab, locate and tap the “Music” app to make changes to its settings. On the next screen, simply toggle on the “Sync Library” option to sync music.

Part 2. Transfer Music from Computer to iPhone With a Better Solution
After exploring various basic methods on how to sync music from Mac to iPhone wirelessly, you might find some limitations. To overcome these challenges, we recommend you use Wondershare MobileTrans, a professional tool that can be the best solution. The following section explored various ways to transfer music across devices using different methods.
Wondershare MobileTrans (Import to Phone)
Apart from learning how to transfer music from Mac to iPhone wirelessly, Wondershare MobileTrans is a more secure and efficient method. Unlike the above methods, it works via a direct USB connection to ensure a fast and uninterrupted transfer. It lets users move entire playlists between platforms and devices by eliminating the need to recreate.
Alongside that, you can back up your favorite music playlists to ensure safety and protect them from losing it. After backing up, you will be able to restore them anytime, which makes it a reliable solution for long-term data security. Beyond music, MobileTrans also supports moving essential app data, including WhatsApp and Line, without any risk of data loss.
Key Features
Wondershare MobileTrans
Transfer Your Data from Computer to Phone Easily
- • Cross-Platform Support: Data transfer between different operating systems without compatibility issues.
- • Various Data Support: Support transferring files, photos, videos, apps, contacts, etc.
- • Lossless Quality Transfer: You can maintain the original audio quality and prevent compression or distortion.
- • Batch Transfer: Move multiple songs or entire albums at once to save your precious time.
- • No Internet Required: Being a versatile software, it transfers files without relying on Wi-Fi, mobile data, or cloud storage.
 4.5/5 Excellent
Comprehensive Guide to Use MobileTrans to Transfer Music from Mac to iPhone
Follow the comprehensive instructions below to learn how to migrate your playlist from your macOS device to your iPhone using this tool:
Step 1. Access MobileTrans on Your Mac
To inaugurate, download this dedicated tool on your Mac and launch it. Upon seeing the main interface, navigate to the “Phone Transfer” tab and select the “Import To Phone” feature. Then, you need to make a secure connection between your iDevice and Mac using an Apple-certified USB cable.

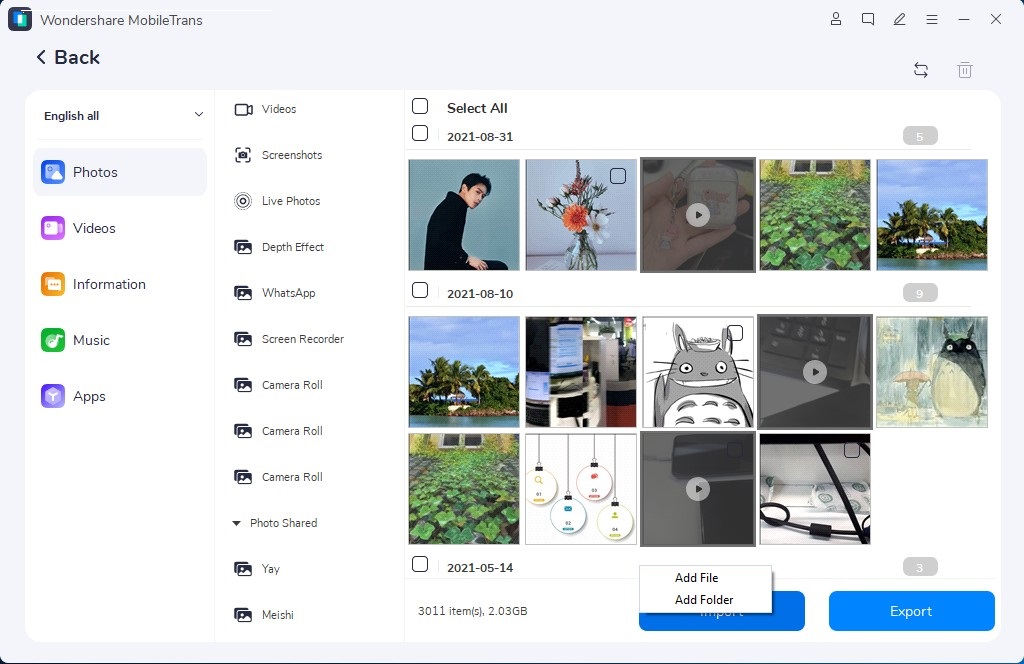
Step 2. Import the Music on Your iPhone
Afterward, click the “Import” button to “Add File” to your iPhone once your smartphone is detected on MobileTrans.
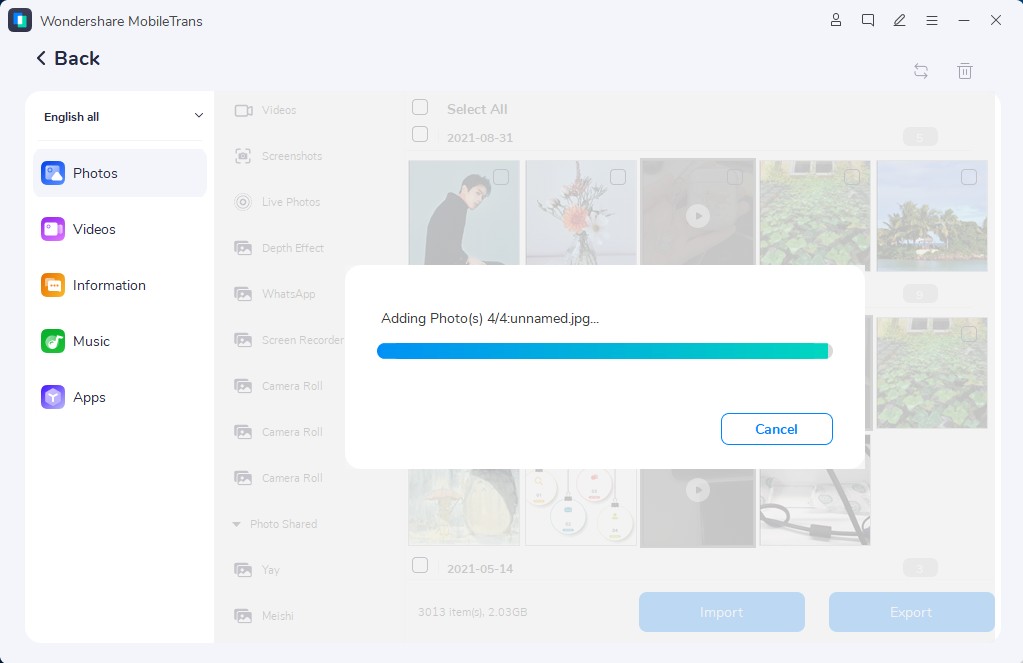
Step 3. Sync Music from Mac to iPhone
Once all the desired music files are successfully imported to your iPhone, you will see a confirmation display on your tool’s interface.
Conclusion
In essence, this article has explored the best methods on how to sync music from Mac to iPhone wirelessly and wired. These methods were explained with comprehensive stepwise guides alongside their limitations. Considering how each method contains certain cons, we can turn our attention to another seamless method. Above them all, Wondershare MobileTrans is the most recommended for music transfer due to its advanced and safe transfer technology.


