


 TL;DR:
You can transfer files from an iPhone to a Mac wirelessly using AirDrop or cloud drives for small to medium files, or via a direct USB connection using Finder, iTunes, or MobileTrans for large, stable transfers without internet.
● AirDrop is the quickest built-in option for local transfers of photos and documents without cables, provided both devices have Wi-Fi and Bluetooth turned on and are within close range.
● For offline transfers, connecting via a USB cable allows you to use Finder on macOS Catalina and later or iTunes on earlier versions, though these native Apple tools limit the specific types of files you can move.
● If you need to bypass native file type restrictions or move massive datasets like apps and contacts rapidly, MobileTrans supports comprehensive USB transfers but requires a paid upgrade to remove free version limitations.
Ask AI for a summary
 ChatGPT
 Perplexity
 Gemini
 Claude
 Grok
Grok
Have you ever thought about how to move files from your iPhone to your Mac?
Many people often ask how to move files from iPhone to Mac. It's essential for keeping your data safe and accessible. Today, we'll discuss how to transfer files from iPhone to Mac in a straightforward way.
But why transfer files at all? Transferring files can help you free up space on your iPhone, keep your files organized, and make them accessible for editing on a larger screen. Transferring files from iPhone to Mac is crucial for managing your data efficiently.
In this article, we'll explore various methods on how to transfer a file from iPhone to Mac. Whether you prefer wireless options like AirDrop or using cloud services like iCloud Drive, there's a method that will suit your needs.
In this article
Part 1: Why Transfer Files from iPhone to Mac?
Transferring files from iPhone to Mac is essential for maintaining efficient data management and ensuring file safety. It allows you to back up important files, access and edit them on a larger screen, and free up space on your iPhone.
By transferring files, you can keep your data organized and easily shareable between devices, making your workflow smoother and more productive.
- To back up important files.
- To free up space on your iPhone.
- To access iPhone files on Mac for editing.
- To share files between devices.
- To keep your files organized.
- To use iPhone files in Mac applications.
- To ensure file safety.
- To manage files more efficiently.
Part 2: How to Transfer Files from iPhone to Mac
There are several ways to move files from iPhone to Mac.
You can use software, built-in features like AirDrop, cloud services like iCloud Drive and Google Drive, or even email. In this part, we will look at different ways to transfer files from iPhone to Mac. We will compare the pros and cons to help you pick the best one for your needs.
Let’s learn how to move file from iPhone to Mac:
| Method | Pros | Cons | Best For |
| MobileTrans | Easy, fast | Paid | Large file transfers |
| AirDrop | Wireless, quick | Needs Wi-Fi, Bluetooth | Quick, local transfers |
| iCloud Drive | Syncs, access anywhere | Needs internet | Cloud storage and access |
| Google Drive | Easy, free storage | Internet, limited space | Cross-platform access |
| Email Transfer | Simple, no extra apps | File size limit | Small, quick transfers |
| Finder/iTunes | Direct, no internet needed | Needs cable | Stable, direct transfers |
Method 1: Use MobileTrans to Transfer Files From iPhone to Mac
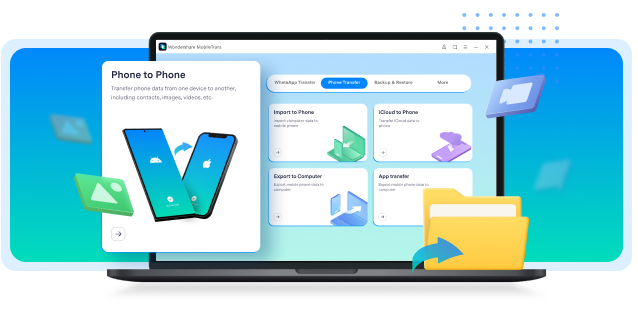
MobileTrans is designed to make file transfers straightforward for users. It has an intuitive interface that guides you through the process, making it easy even for those who aren’t tech-savvy. The tool supports various types of files, including photos, videos, contacts, messages, and more. This versatility makes MobileTrans an excellent choice for transferring different types of data between your iPhone and Mac.
Another great feature of MobileTrans is its speed. It can handle large files quickly without compromising on transfer quality. You don't have to worry about long waiting times or data corruption during the process.
Additionally, MobileTrans offers robust security, ensuring your files are transferred safely and securely. Whether you’re transferring data for personal use or business, MobileTrans provides a reliable and efficient solution.
Wondershare MobileTrans
Transfer Your Data from Phone to Computer Easily
- • No data loss. No data leaks.
- • Support various data, including files, photos, videos, apps, contacts, etc.
- • Compatible with thousands of device types acorss Android and iOS.
 4.5/5 Excellent
Here are the steps:
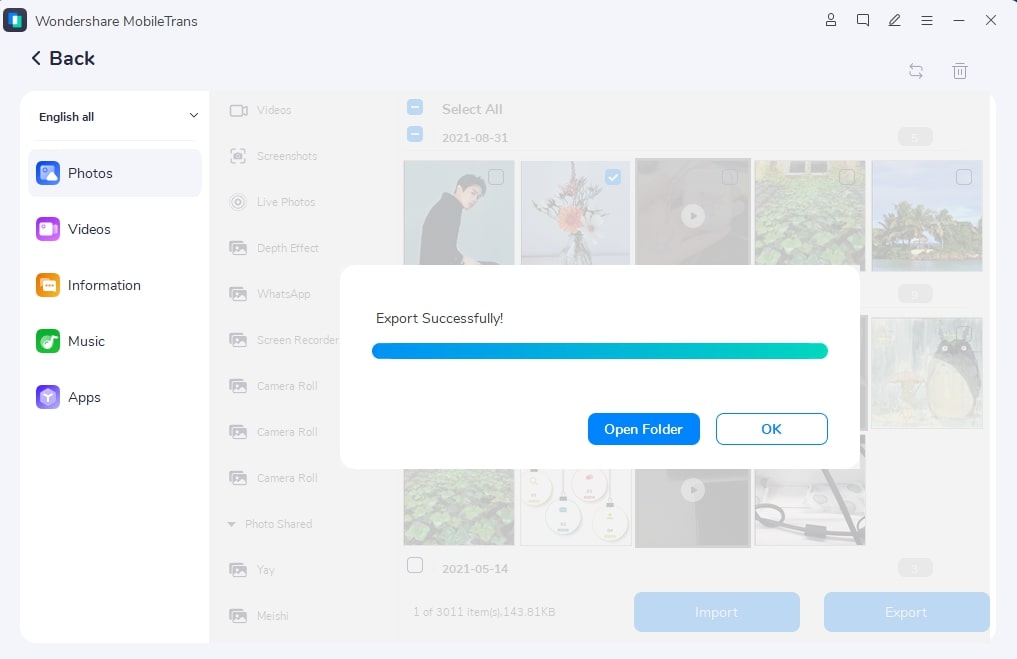
- Install MobileTrans on your Mac. Download the tool on Ma. Follow the installation instructions. Use a USB lightning cable to connect iPhone device to your Mac. Launch MobileTrans on your Mac. Wait for it to detect your iPhone. Choose the Phone Transfer option from the main menu. Select Export to Computer.

- Choose the files you want to transfer like videos, photos, music, apps and so on.

- Click the "Export" button.
Method 2: Use AirDrop to Transfer Files
AirDrop is a convenient feature that comes pre-installed on Apple devices. This built-in tool enables the seamless transfer of files wirelessly. You don't need any cables or additional software to use it. It utilizes both Wi-Fi and Bluetooth to create a peer-to-peer network between your iPhone and Mac, allowing for fast and efficient file transfers.
With AirDrop, you can transfer a variety of files, including photos, videos, documents, and more. The process is straightforward and user-friendly.
Here are the steps:
- Go to Settings. Turn ON AirDrop (On both your iPhone and Mac). On your iPhone, swipe up to open Control Center and tap AirDrop. Now open Finder on Mac. Select AirDrop. Make sure both devices are set to "Everyone" to ensure they can see each other.

- Pick the files you want to transfer on your iPhone. Tap the "Share" button. Choose AirDrop.

- Choose your Mac from the list of devices. Confirm the transfer on your Mac.

Method 3: How to Transfer Files from iPhone to Mac with iCloud Drive
iCloud Drive allows you to store various types of files, such as documents, photos, and videos, in the cloud. This means your files are saved on remote servers and can be accessed from any device with internet access. iCloud Drive is integrated with iOS and macOS, making it easy to use on your iPhone, iPad, and Mac.
Here’s how to transfer files from iPhone to MacBook:
- Enable iCloud Drive on your iPhone. Go to Settings, tap on your name, select iCloud, and turn on iCloud Drive. Upload the files you want to transfer to iCloud Drive. Open the Files app, select the files, and move them to iCloud Drive.

- Access the files on your Mac via iCloud Drive. Open Finder, click on iCloud Drive in the sidebar and download the files.

Method 4: Use Google Drive
Google Drive is a popular cloud storage service provided by Google. It allows you to store various types of files online, including documents, photos, and videos. These files are stored on Google's servers, making them accessible from any device with an internet connection.
This means you can access your files from your computer, smartphone, or tablet, anytime and anywhere.
Here are the steps:
- Install Google Drive on your iPhone. Download the app from the App Store and sign in with your Google account. Upload the files you want to transfer to Google Drive. Open the app, tap the "+" button, select "Upload", and choose your files.

- Access the files on your Mac via Google Drive. Open your web browser, go to the Google Drive website, sign in, and download the files.
Method 5: Email Transfer
Email is a straightforward and commonly used method for transferring files. Most people are already familiar with how to use email, which makes it a convenient option. To transfer files via email, you simply compose a new message on your iPhone, attach the files you want to send, and address it to yourself or the recipient. Once sent, you can open the email on your Mac and download the attachments.
Here are the steps:
- Compose an email on your iPhone. Open your email app, create a new message, and address it to yourself. Attach the files you want to transfer to the email. Send the email.

- Open the email on your Mac and download the attachments.
Method 6: Use MacOS Finder/iTunes
Using Finder or iTunes is a direct and reliable way to transfer files from your iPhone to your Mac. Finder, available on macOS Catalina and later, integrates iPhone management directly into the macOS interface. For those using earlier versions, iTunes serves the same purpose.
To start, connect your iPhone to your Mac using a USB cable. Your device should appear in Finder under the "Locations" section or in iTunes as an icon on the top left.
Here are the steps:
- Connect your iPhone to your Mac using a USB cable. Open Finder or iTunes on your Mac. Select your iPhone from the list of devices.

- Choose the files you want to transfer. Copy the files to your Mac by dragging and dropping them.
Part 3: Pro Tips to Transfer Files from iPhone to Mac
Transferring files can be easy and efficient with a few smart tips. Here are some pro tips to help you transfer files from iPhone to Mac smoothly:
- Regular Backups: Back up your important files regularly. This ensures you have copies in case of data loss.
- Multiple Methods: Use different methods for various file types. Some methods work better for specific files.
- Sufficient Storage: Ensure you have enough storage on both your iPhone and Mac for the transfers.
- Software Updates: Keep your iPhone and Mac software updated. This helps with compatibility and smooth transfers.
- Organized Files: Label and organize your files. This makes it easier to find and manage them after transfer.
- Strong Security: Secure your devices with strong passwords. This protects your data during transfers.
- Stable Connections: Use a stable Wi-Fi or a reliable cable for transferring files. This minimizes interruptions.
- Check File Sizes: Be aware of file size limits for methods like email. Choose appropriate methods for large files.
By following these tips, you can ensure a smooth and efficient transfer of files from your iPhone to your Mac.
Conclusion
Transferring files from iPhone to Mac is easy. Choose the best method for you. Whether it's using MobileTrans, AirDrop, iCloud Drive, Google Drive, email, or Finder/iTunes, there's a method that fits your needs. Keep your files safe, organized, and accessible.
Choosing the best method depends on your specific needs and preferences. Each method offers unique advantages. It's about finding what works best for you. With the right method, you can keep your files safe, organized, and always within reach. Your data will be secure, and your workflow will be smooth and efficient.


