


 TL;DR:
Safely migrating data to the OPPO Find X9 or Find X9 Pro requires fitting all files into its internal storage due to the lack of microSD support, which can be executed offline via the OPPO Clone App, wirelessly through Google Backup, or selectively across platforms using MobileTrans.
● The official OPPO Clone App is ideal for direct, offline device-to-device transfers, but it requires manually granting all media permissions and keeping both phones powered on throughout the migration process.
● MobileTrans is best suited for cross-platform iOS to Android switching or moving large files, as it supports selective encrypted transfers and bypasses the 15GB free storage restriction and internet dependency of Google Drive.
● Google Backup restricts automated data restoration to the initial device setup phase using the identical Google account, while manual PC transfers demand a reliable OTG-compatible USB-C cable to prevent connection instability and missing files.
Ask AI for a summary
 ChatGPT
 Perplexity
 Gemini
 Claude
 Grok
Grok
Many people feel nervous about moving data when they get a new OPPO Find X9 Pro. They worry about losing memories and essential files during the migration process. Yet, multiple quick methods are available to move data without feeling stressed. Thus, this guide helps you understand every simple step for safe transfer. You'll learn easy ways to copy your old data smoothly to the new device.
In this article

Part 1. OPPO Find X9 Pro Transfer Setup: Check Storage, Connectivity, & Permissions
Before transferring data, check the storage on your OPPO Find X9 Pro. The device comes with 256GB, 512GB, and 1TB internal storage, enough for most users. Unlike some phones, it does not support microSD cards, so all data must fit on the internal storage. For phone-to-phone transfers, the Clone Phone app creates a direct Wi‑Fi connection without using mobile data.
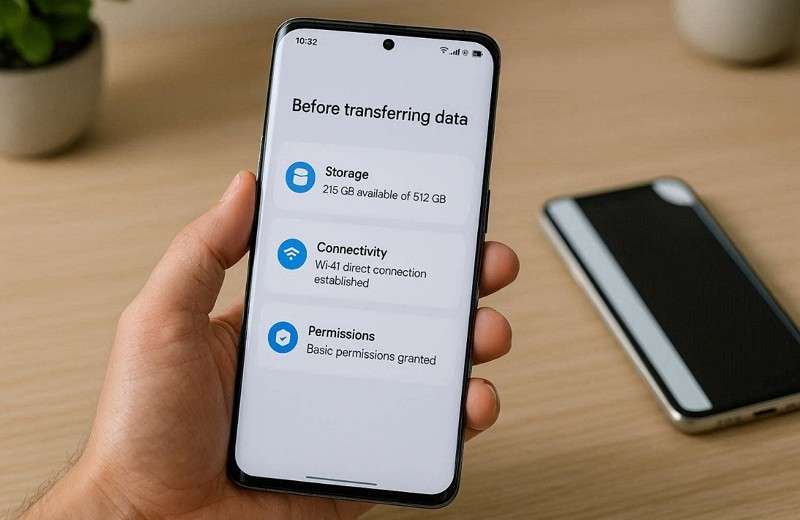
When using a PC or Mac, use a USB‑C cable that supports OTG compatibility. This helps maintain a stable connection throughout the process and prevents data loss. Also, review your permission settings and allow access for storage, contacts, and media. This ensures data can move smoothly between devices without restrictions.
Part 2. Official Way to Transfer via OPPO Clone App: Step-by-Step Guide
The official Clone Phone app enables safe, complete data transfer to the OPPO Find X9. It's an official OPPO tool that ensures complete and secure data migration. Users can easily transfer all data, including essential contacts and even apps. It requires no internet connection, saving data while ensuring fast and secure file transfer. Thus, go through the following guide to learn how you can use this app to move data:
Step 1. In the OPPO Find X9's app, tap This is the new device > Other Android to open the QR code screen.
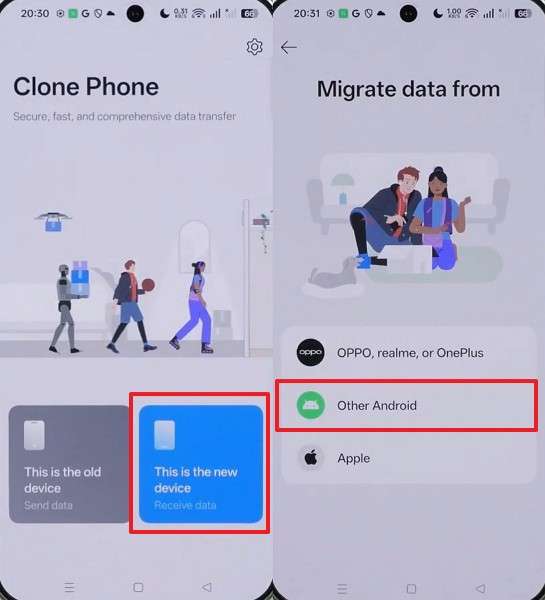
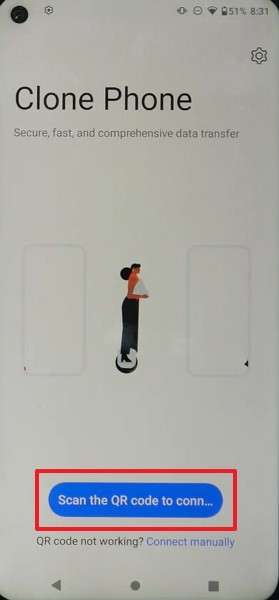
Step 2. When you open the app on your old phone, press Scan the QR Code to connect both phones.
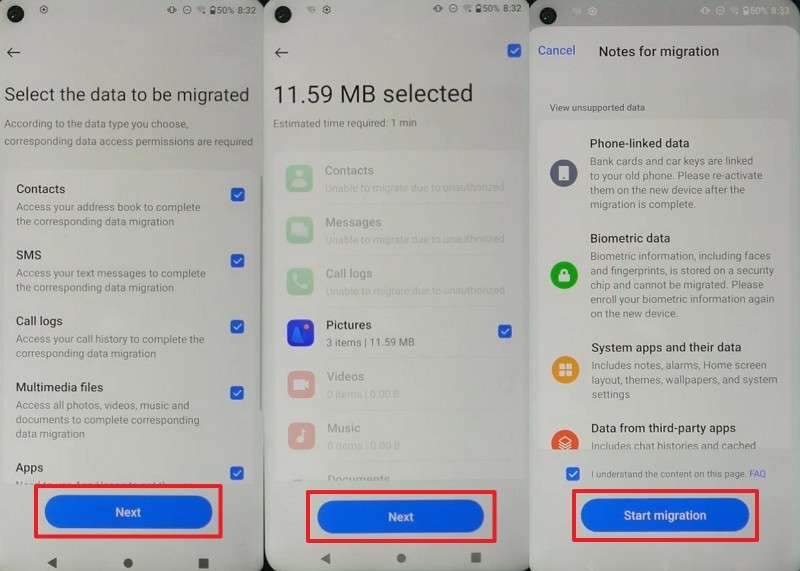
Step 3. After connecting, choose your desired data > Press Next > Next > Start Migration.
- Users must manually grant all permissions, which may be confusing.
- Requires both phones to stay powered on throughout the transfer.
For faster, hassle-free transfers, the MobileTrans App is a great alternative. It delivers blazing speed, allowing large files to move within seconds. Plus, the app works 200 times faster than Bluetooth, saving valuable waiting time. You can transfer every file type, including multimedia and essential contacts, between phones. Apart from that, even WhatsApp chats and calendar events are transferred securely and without delay.
Part 3. MobileTrans: A Smarter Alternative to Traditional Transfer Methods for OPPO Find X9
MobileTrans is an excellent choice for users upgrading to the Oppo Find X9. It supports transferring over 18 file types, including photos and contacts. In addition, the software works with more than 6,000 Android and iOS devices. While moving data, MobileTrans lets you pick specific files instead of migrating everything. All data transfers remain secure with military‑grade, end‑to‑end encryption throughout the process.
Key Features
- Fast Optimization: Uses intelligent routing and parallel processing to deliver industry‑leading transfer speeds.
- Photo Quality: Maintains full resolution and metadata of every image during transfer.
- Large Files: Easily transfer GB‑sized videos without lag or stalling.
- Offline Function: Performs transfers without relying on the cloud or an internet connection.
- App Migration: Moves complete applications, including their in‑app data, automatically during setup.


Guide to Transfer Complete Data to OPPO Find X9 via MobileTrans
Adhere to the comprehensive guide given below to transfer the old phone’s data to OPPO Find X9 using this tool:
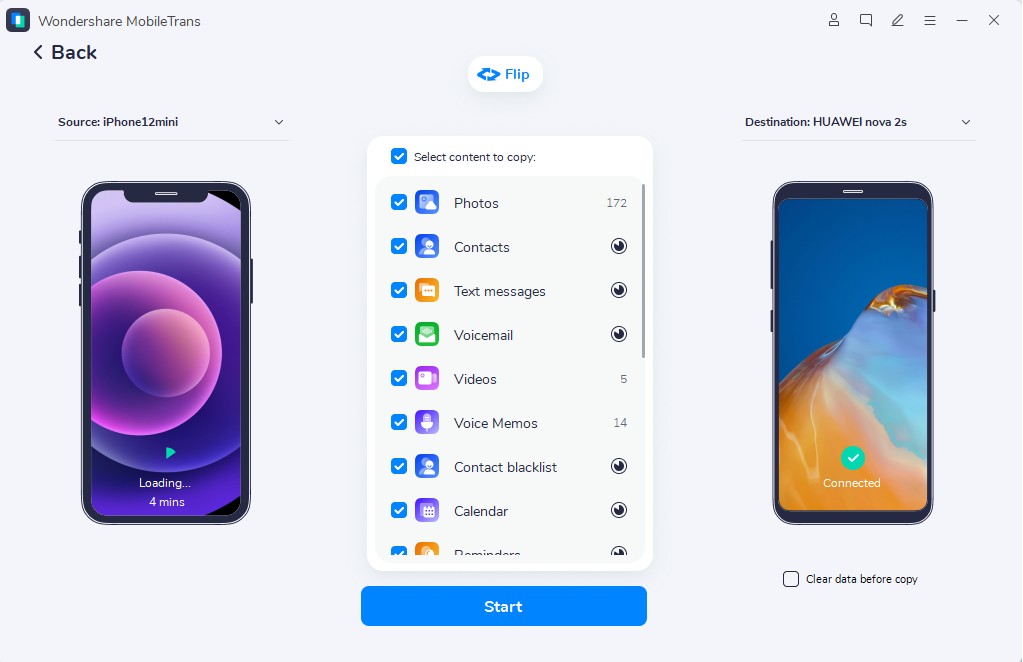
Step 1. Open Phone to Phone in MobileTrans > Connect both phones > Select Data > Click Start.

Step 2. A live progress screen will appear, displaying the ongoing transfer to your OPPO Find X9.
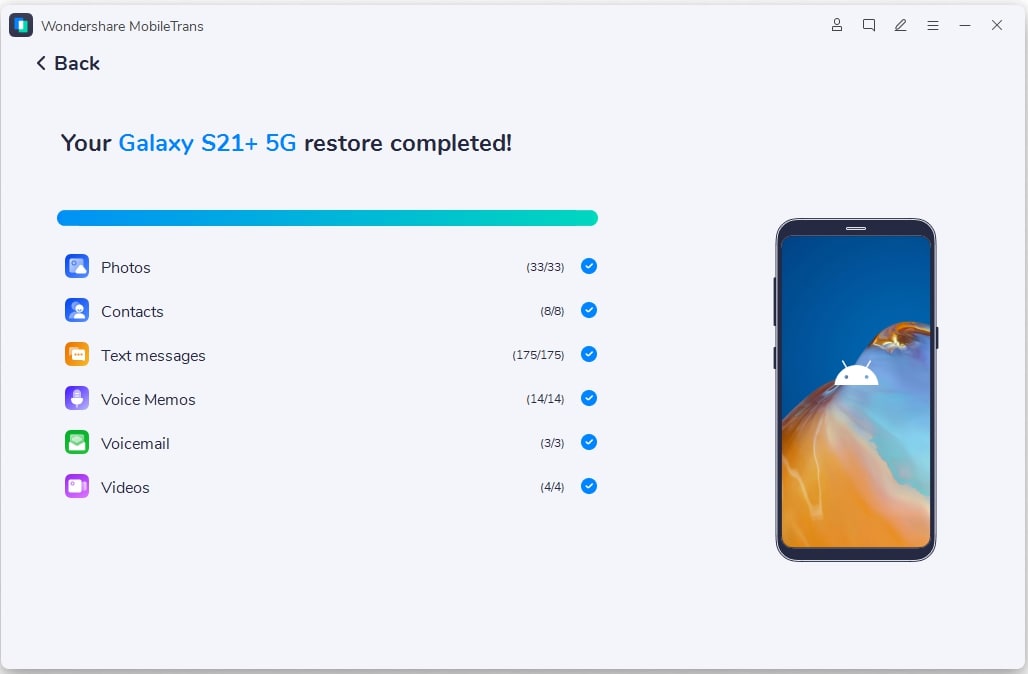
Step 3. Once completed, the tool will display a confirmation message indicating all data was transferred.
Why Choose MobileTrans
MobileTrans is trusted by many users because it makes phone data transfer simple. Below are a few common benefits of using this advanced tool for data migration needs:
- Fast Performance: The transfer process finishes, saving valuable time during phone setup. It works efficiently even with large videos or thousands of pictures without delays.
- Selective Transfer: You can even pick only the data you need to move to OPPO Find X9 Pro. This saves storage space and prevents unwanted data from being stored on your new device.
- Safe Encryption: Advanced encryption keeps your files protected from privacy risks during transfer. It ensures that no one accesses or views your content during migration.
- Cross Compatibility: This dedicated tool transfers data between Android and iOS devices without issue. Such flexibility allows effortless switching between different operating systems and phone brands.
- Quality Retention: Your images and videos maintain original clarity and sharp details. No compression or distortion happens to ensure your memories appear as they did before.
Part 4. How to Transfer Data to OPPO Find X9 Using Cloud Storage
Using cloud storage is another simple and secure way to move your data. Google Drive offers easy access from any device, making transfers convenient anytime, anywhere. This method automatically syncs photos and files without needing cables or extra software. Moreover, it ensures your data stays available and organized on your new Oppo Find X9. Thus, take guidance from the steps below to move your data through cloud storage:
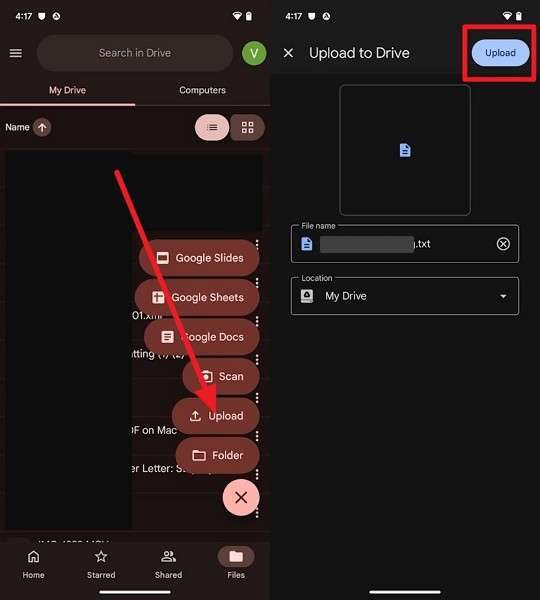
Step 1. On your sending device, access Google Drive > Tap + > Upload > Choose Data > Press Upload.
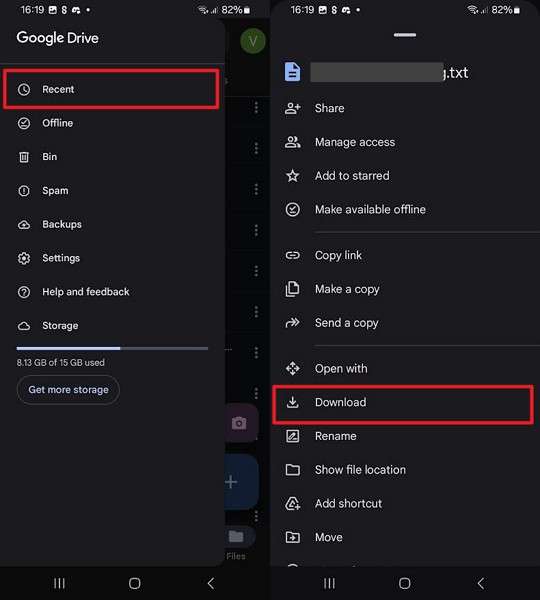
Step 2. When you access the same Google Drive account on your OPPO Find X9, tap Recent > Three Dots > Download.
- Includes 15GB of free storage space, which fills quickly when migrating HD media.
- Users need a stable internet connection to upload and download large files.
Part 5. How to Move Data to OPPO Find X9/X9 Pro via Google Backup
Google Backup also offers a convenient way to restore your old phone’s data. It automatically saves almost all data types, like contacts and apps, to your Google account. This ensures quick setup and smooth data recovery while setting up your new OPPO Find X9 Pro. Plus, all content restores effortlessly without manual copying. Hence, review the steps below to move your data through the backup file:
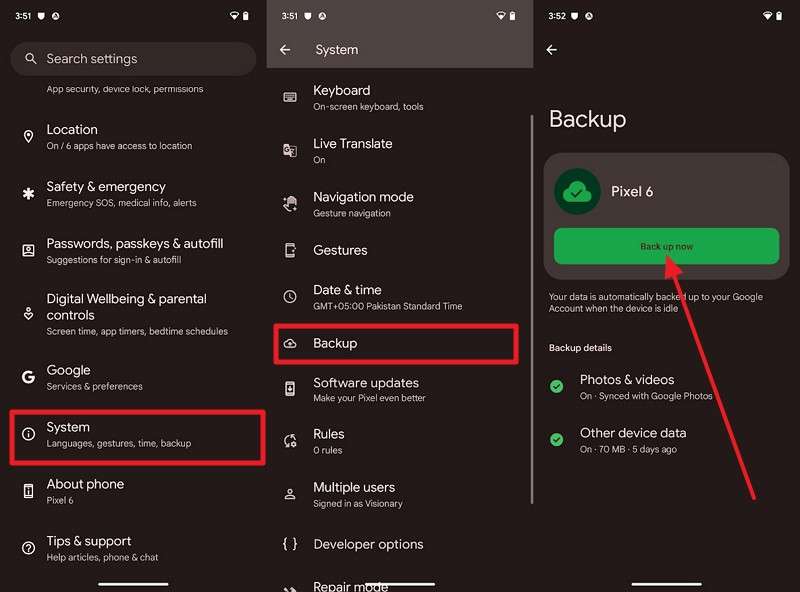
Step 1. Access the System’s settings on your old phone > Tap Backup > Back Up Now.
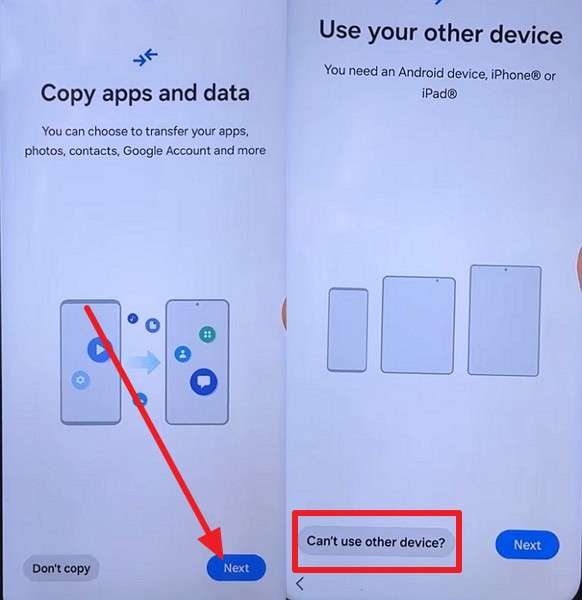
Step 2. While setting up your new OPPO Find X9, tap Next > Can’t Use Other Device and log in with the same Google Account.
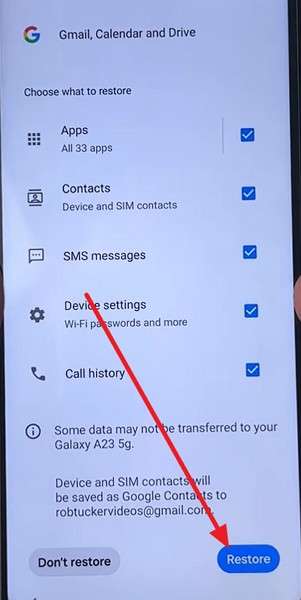
Step 3. When you find your backed-up files, select the latest one > Choose the Data for migration > Press Restore > Done.
- Requires signing in with the same Google account for restoration.
- Large backups can take hours, delaying setup on the OPPO Find X9 Pro.
Part 6. How to Migrate Data to OPPO Find X9 Using Your PC
You can also migrate data to the OPPO Find X9 via a PC with file management capabilities. It allows direct data copying between folders without installing any special apps. This method works well for large media files and personal documents stored locally. To do this, you can adhere to the steps below to migrate data from your PC to your new phone:
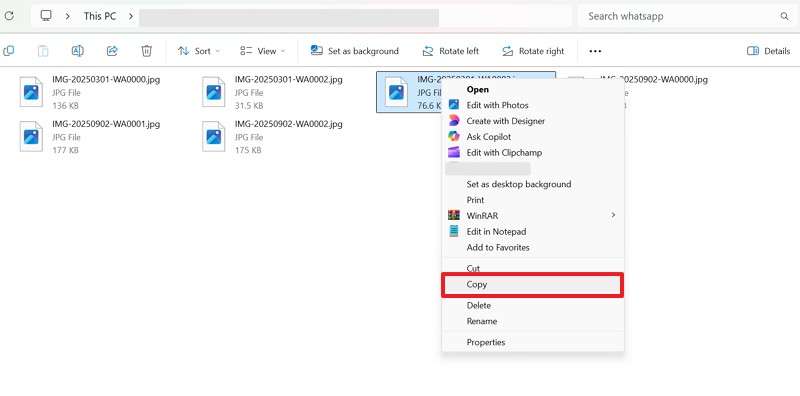
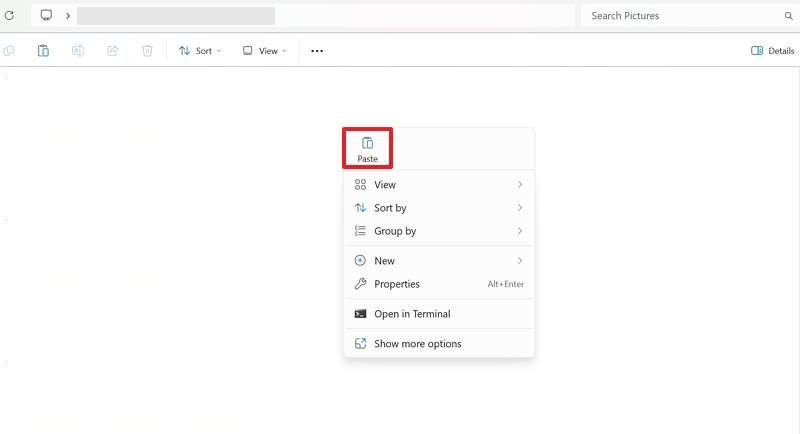
Step 1. When you connect the OPPO Find X9 to the PC, right-click on the transfer item and choose Copy.
Step 2. Access your OPPO Find X9 storage > Right-click it > Select Paste.
- Requires a USB cable, and poor-quality cables cause unstable connections.
- Manual copying increases the risk of missing files or incorrect placement.
Conclusion
To conclude, transferring data to a new phone becomes simple when the proper methods are chosen. Each option offers different benefits and flexibility for various user needs. Plus, understanding these approaches helps prevent data loss and setup delays. However, users seek faster control and a ber protection solution. Therefore, MobileTrans delivers encrypted and efficient migration without unnecessary complexity for OPPO Find X9.
FAQs
-
Should I back up data before transferring to the OPPO Find X9?
Yes, regular backups reduce risk by preserving data before any transfer process begins. Backups allow recovery if interruptions or permission errors occur during migration. This step is constructive for beginners moving files to new phones without stress. -
Can I move only selected files instead of everything?
Selective transfer with MobileTrans helps avoid clutter and saves storage on new phones. While migrating, you can choose specific photos or contacts instead of complete backups. This approach is ideal for users who want faster, cleaner migrations. -
What should I do if the transfer stops unexpectedly in the middle?
Restart both devices and ensure sufficient storage before attempting transfer again. Check permissions and connection stability to avoid repeated interruptions. Moreover, using reliable software like MobileTrans helps resume transfers without restarting.


