PC to iPhone Transfer
- Transfer photos from your PC to iPhone without iTunes.
- No technical expertise required.
- Transfer photos in bulk or select specific photos.
9 Ways to Transfer Photos from a Windows PC/Laptop to iPhone

Written By Navkiran Dhaliwal |


 TL;DR:
You can bypass the sluggish performance and data-overwriting risks of iTunes when transferring photos from a Windows PC to an iPhone by using direct USB methods like File Explorer and MobileTrans, or wireless alternatives including Bluetooth, email, and cloud services.
● MobileTrans is optimized for transferring entire photo collections while keeping album structures intact without deleting existing iOS data, whereas Windows File Explorer is best for copying small amounts of photos at original quality directly into the iPhone's DCIM folder.
● Wireless cloud options like iCloud, Google Photos, Dropbox, and OneDrive eliminate the need for cables but require an active internet connection and only yield good photo quality rather than retaining the original resolution provided by USB and Bluetooth.
● If you want to transfer images wirelessly without losing quality or relying on iTunes synchronization, you can install the Simple Transfer app from the App Store and upload photos through a local PC web browser address.
Ask AI for a summary
 ChatGPT
 Perplexity
 Gemini
 Claude
 Grok
Grok
“I recently purchased an iPhone 17 and now wish to transfer my files from my computer to the phone. How can I do this?”
iTunes is designed to work seamlessly with an Apple account. The app provides access to various files, including audiobooks, podcasts, music, TV programs, and other content from the App Store. You can transfer photos from PC to iPhone using iTunes. And if you’re using the latest iPhone 17 with iOS 26, you’ll also discover updated wireless transfer options that make sharing photos across devices faster and more secure than ever.
However, iTunes may not support certain file types or devices, it can be slow and resource-intensive. And sometimes you can encounter the issue "You Account Has Been Disabled in iTunes." Thus, many users are still learning how to transfer photos from a PC to an iPhone without using iTunes. Luckily, many options are available for this course. All 9 methods in this guide work perfectly for transferring files from a Windows laptop (Dell, HP, etc.) or desktop PC to an iPhone. The steps are identical.

Part 1: How to Transfer Photos from PC to iPhone Without iTunes (3 Best Ways)
Wondering how to transfer photos from PC to iPhone without using iTunes? Due to the limitations of iTunes, many users are looking for more flexible and efficient alternatives. This guide will introduce several methods, including dedicated software, direct USB connection, and Bluetooth transfer. These methods are faster, more convenient, and won't overwrite existing data, ensuring your photos can be moved safely and seamlessly from your computer to your iPhone. Below, we will detail the steps for each method.
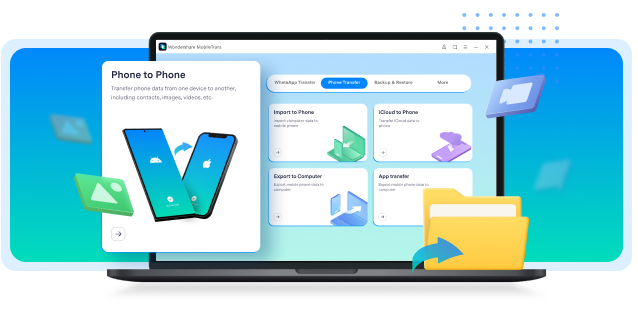
Method 1: MobileTrans (Easiest & Fastest Method)
First in line is to transfer photos from computer to iPhone without iTunes with this versatile tool, MobileTrans. This software works earnestly for both the non-tech-savvy and the professional users. It also supports up to 18 types of data like photos, contacts, notes, music, and many more. MobileTrans is compatible with mobile phone systems like iOS and Android. It also works with Mac OS and Windows 7/8/10/11/Vista, and XP.
Main Features of MobileTrans
- Transfer photos from PC to iPhone without selecting.
- Easily transfer WhatsApp files from phone to phone and also back up WhatsApp to your computer.
- The app will restore backup files to your phone, including iTunes.
- Transfer your files safely without resetting your device or deleting existing data on your iPhone.
 4.5/5 Excellent
A step-by-step guide to transferring photos to iPhone with MobileTrans
This is how to transfer pictures from a computer to an iPhone without iTunes via Mobile Trans. The app works at a fast speed to perform a direct transfer of your photos to your phone.
Step 1. Launch MobileTrans
Open the MobileTrans app on your computer then choose the file transfer > import to phone feature.

Step 2. Connect your phone
Connect your phone to the computer using a USB cable and wait for the computer to recognize your phone.
Step 3. Select file type to transfer
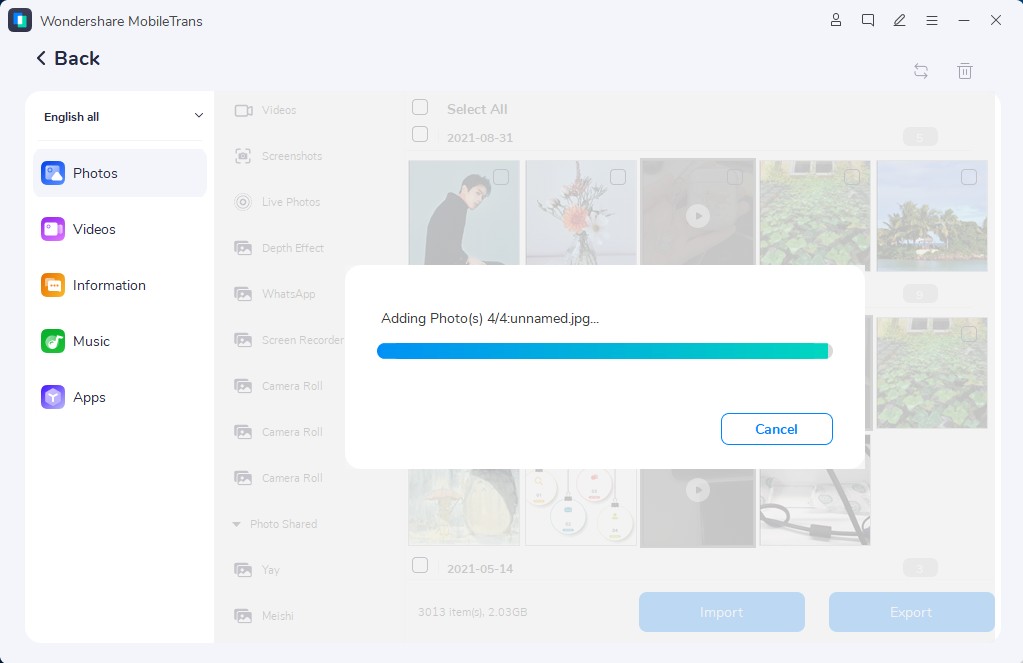
Next, choose “photos” as the file type to transfer from your computer. Then click on the “Import” button and the system will begin to add them to your phone.
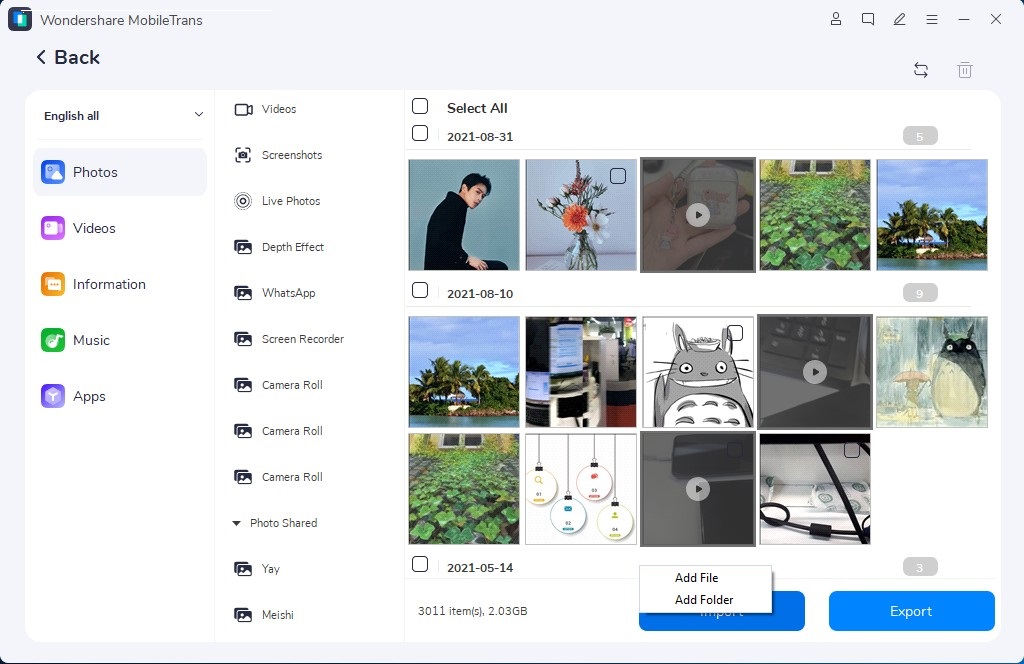
Step 4. Access your photos
MobileTrans will immediately begin to transfer your photos. To access them, check the “transferred” folder in your phone to easily access and manage your photos.
Method 2: Using File Explorer (Direct USB)
Windows File Explorer is another quick way to copy photos from PC to iPhone without iTunes. Here, you’ll access your iPhone’s internal storage from your PC then copy the photos to the designated photo’s folder on your phone.
Step 1. Use a USB cable to connect your iPhone to your PC.

Step 2. You’ll then be required to unlock your iPhone device and “trust this computer”.
Step 3. Go to your “PC” and click the “Internal Storage” > “Photos’ folder”. This is mostly indicated as “DCIM”. Locate which photos you wish to transfer then copy and paste from your computer to the folder.
Step 4. Finally, access your photos from the “Photos” app on your iPhone.

Method 3: Using Bluetooth
The fifth method is to enable PC to mobile transfer send files anywhere with Bluetooth.
Step 1. First, enable Bluetooth on your PC. To do so, click on the “Start” button and choose the “Settings” tab. Then go to “Devices” and move the slide bar to the right under the “Bluetooth” icon. This will turn on Bluetooth on the PC.

Step 2. Turn on Bluetooth on iPhone. Just go to “Settings” > “Bluetooth” and move the slide bar to the right to turn it on.

Step 3. Connect your phone to the computer via Bluetooth. You need to wait for the two devices to detect. A message will then prompt from your PC device, asking if the passkey is matched with your phone’s passkey. Click “Yes” if it is matched. Finally, your phone can now communicate with your PC, enabling you to send photos from PC to phone via Bluetooth.
Part 2: How to Transfer Photos Wirelessly via Cloud Services
For a convenient, cable-free way to transfer photos from PC to iPhone, cloud services are an excellent choice. This wireless method uses the internet to sync your pictures, letting you upload from your computer and access them on your iPhone anytime. Cloud storage also provides a secure backup for your photos. This section covers how to transfer photos from PC to iPhone wirelessly using popular services like iCloud Photos, Google Photos, Dropbox, and OneDrive. We'll show you how to use these platforms for easy photo management across your devices.
Method 4: Using iCloud Photos
Apple and Microsoft have enabled easy syncing of the photos library from PC to iPhone via the iCloud app. Simply create folders in the iCloud menu via the File Manager then upload them to the service.
Step 1. First, go to the Microsoft Store on Windows and download the iCloud app.
Step 2. Sign in to iCloud with your Apple account details.

Step 3. Available choices to synchronize data with PC will be availed like contacts, mail, and bookmarks. Just choose the “Photos” option then click on the “Apply” button.

Step 4. It will then prompt you to upload PC photos to iCloud. Click on the “Done” option to move your photos. Better still, create a folder in the iCloud Drive section then copy your photos to it. Now, easily access your photos using the “Files” app on your iPhone.
Method 5: Using Google Photos
With Google Photos, you get unlimited free storage space for your photos and videos.
Step 1. Firstly, go to “Google Photos” and then sign in using your Google account.

Step 2. Click on the “Upload” tab and choose the “Computer” option. This will enable you to upload your photos to the cloud.
Step 3. Then download and install the “Google Photos” application from the “App Store”. Next, sign in to the Google Photos app with the same account that you use on your computer.
Step 4. Head to the “Photos” section in Google Photos, to view and access your photos that have been moved from your computer.

Method 6: Using Dropbox
Are you tired of the back-and-forth tango between your PC and iPhone in an effort to get your photos where you want them? Thanks to Dropbox, syncing your images just got a whole lot easier. Here's a step-by-step guide on getting your photos from a PC to your iPhone using Dropbox.
Step 1: Set Up Dropbox on Your PC and iPhone
Install Dropbox on your PC and sign in. Then, download the app on your iPhone and do the same. Ensure you're using the same Dropbox account on both devices for seamless transitions.
Step 2:Organize Your Photos on Your PC
It's a good practice to create a new folder specifically for the photos you wish to transfer. Keep it organized, as the same structure will carry over to your iPhone.
Step 3:Step 3: Upload Photos to Dropbox from PC
Locate the folder you've prepared. Drag and drop your photos into the Dropbox app or web version to begin the upload process.
Step 4:Step 4: Sync Photos to Your iPhone
That's it! You've successfully transferred your photos from your PC to your iPhone using Dropbox. Next time, it'll be a breeze.
Method 7: Using OneDrive
Transferring photos from your PC to your iPhone can be a seamless process with the help of OneDrive. Follow these simple steps to effortlessly sync your images:
Step 1: Install OneDrive on Your PC: Begin by downloading and installing the OneDrive app on your computer. Sign in with your Microsoft account or create a new one if needed.
Step 2: Upload Photos to OneDrive: Open the OneDrive app on your PC and upload the photos you want to transfer. Organize them into folders for easy access.
Step 3: Access OneDrive on Your iPhone: Install the OneDrive app on your iPhone from the App Store. Sign in with the same Microsoft account used on your PC.
Step 4: Download Photos to Your iPhone: Navigate to the folder where your photos are stored in OneDrive on your iPhone. Select the photos you want to download and tap the download icon.
Step 5: Enjoy Your Photos on Your iPhone: Once the download is complete, you can now access and view your photos directly on your iPhone, synced seamlessly from your PC via OneDrive.
Method 8: Using Email
Another direct way is to use your email to transfer photos from PC to iPhone without iTunes. Just add your photos as an attachment to send and access them on phone.
Step 1. You’ll need two email accounts. First, create a new email address with your name and password.
Step 2. Then log in to your old email account.
Step 3. Compose mail from your old email account and enter your new email address as the recipient.
Step 4. Choose the photos you wish to transfer. You’ll add them as attachments while sending the email to your new account.
Step 5. Use your phone to log into your new email address then check the “Inbox” section. You’ll find the incoming mail from your old email account. Download the photos attachments to your iPhone to finally access them.
Part 3: How to Transfer Photos Using iTunes (The "Official" Way)
Do you wish to move your photos from PC to iPhone with iTunes? It might be a little complex, but is still a useful and safe way to transfer your data. Here are the steps for iTunes photo transfer.
Tip: You can also Backup iPad to iTunes. Read and learn more!
Step 1. Open iTunes on your PC. You can quickly install it if it has not yet been installed. Just go to “Apple.com” to download and install the iTunes app.

Step 2. Then connect your iPhone to the computer via a USB cable then click on the “iPhone” icon. It is better to enable the “Automatically” sync option when this iPhone is connected. If you did so, then your iPhone will be automatically synced to the PC. If not, just hit the “Sync” button to sync the phone to PC.

Step 3. You can choose to backup your iPhone by clicking the “Back up now” button. You have the options to back up to PC or iCloud. Choose your preference.
Step 4. Your computer and phone are synced and you can finally move photos from PC to your phone.
Even though you can use iTunes for data transfer, many users admit that iTunes is not a perfect choice. It is not flexible and will sluggish. Likewise, it is likely to cause data loss of the existing files on your iPhone by overwriting. You don’t have to rely on the application to transfer your files. You can move photos from your PC to your iPhone in various ways as discussed in the next section.
Recommended reading: You can also factory reset iPhone on iTunes, or transfer voice memos from iPhone to PC. Read and learn more!
To help you decide, the following table compares the key features of each method discussed in this guide.
| Speed | Internet Connection | Cable | Photo Quality | Best For | |
|---|---|---|---|---|---|
|
iTunes |
Medium |
Good |
Transfer small files |
||
|
MobileTrans |
Fast |
Original |
Transfer all photos and keep the albums |
||
|
iCloud |
Medium |
Good |
Sync photos with cloud |
||
|
Google Photos |
Medium |
Good |
Sync photos with cloud |
||
|
Dropbox |
Medium |
Good |
Sync photos with cloud |
||
|
OneDrive |
Medium |
Good |
Sync photos with cloud |
||
|
File Explorer |
Fast |
Original |
Transfer small amout of photos |
||
|
Bluetooth |
Medium |
Original |
Transfer small files quickly |
||
|
|
Medium |
Good for limited photo size |
Transfer to other people |
FAQs
These are some common questions about file transfers.
1. How do I transfer photos from laptop to iPhone using USB?
To transfer files, you need a USB cable for connection.
- Connect our laptop and your iPhone via USB cable.
- Wait for the laptop to detect your phone for accessibility.
- Then locate the photos that you wish to transfer from your computer.
- Right-click on the photos folder then move the cursor to the “Send to” option. Choose “iPhone” as the destination to send photos to.
- Access the photos from your phone.
2. How to transfer photos from PC to iPhone without losing quality?
You can use the “Simple Transfer” app to move your photos without losing quality. The photos will maintain full resolution.
- Download the “Simple Transfer” app from the “App Store” on your iPhone.
- Open the Simple Transfer app on your iPhone and you’ll see an address that is displayed on the main interface.
- Then open a web browser on your PC and type in the address that was displayed earlier.
- Check the “Camera Roll” album to find the “Upload Device” button. Then choose the photos you want to add to your iPhone.
- Click on the “Upload” tab. You should see a notification appear on your PC’s browser indicating the file was successfully transferred to your iPhone.
3. How do I transfer photos from laptop to iPhone without Internet?
You can use a USB cable to transfer your files without the internet.
- Just connect the two devices via USB cable.
- Then wait for your laptop to detect your phone.
- Choose the photos you want to transfer from your laptop to your phone.
- Drag and drop the “Photos” folder from the laptop to iPhone’s icon.
- Then safely remove your iPhone from the laptop and easily access your photos anytime.
The Bottom Line
These are detailed steps on how to transfer photos from PC to iPhone with iTunes or without iTunes. The steps are easy to follow and the results are amazing. You can employ the best tool, MobileTrans, to transfer your photos without deleting the existing files.
New Trendings

Top Stories
All Categories


Navkiran Dhaliwal
staff Editor