“How to transfer photos from iPhone to Windows? I have got a new phone, but I can’t seem to import photos from iPhone to Windows 10 now.”
If you have also got an iPhone and would like to transfer its data to a Windows system, then you might have a similar doubt. Since iOS devices don’t work like Android phones at times, some people can encounter these situations. The good news is that there are several ways to transfer photos from iPhone to Windows that anyone can try. In this post, I will teach you how to import photos from iPhone to Windows 10/11 via 4 hassle-free techniques.

Method 1: Perform a One-click Transfer of Photos from iPhone to Windows 10/11 (Feature-Rich Tools)
If you have a lot of photos to transfer, then you can just get assistance from MobileTrans – Photo Transfer. With just a single click, you can take an extensive backup of your iPhone on your Windows computer. Apart from your photos and videos, the backup will also include your contacts, messages, call logs, calendar, reminders, and other kinds of data. Here’s how to import photos from iPhone to Windows 10 in the simplest way:
Step 1: Launch MobileTrans - Backup
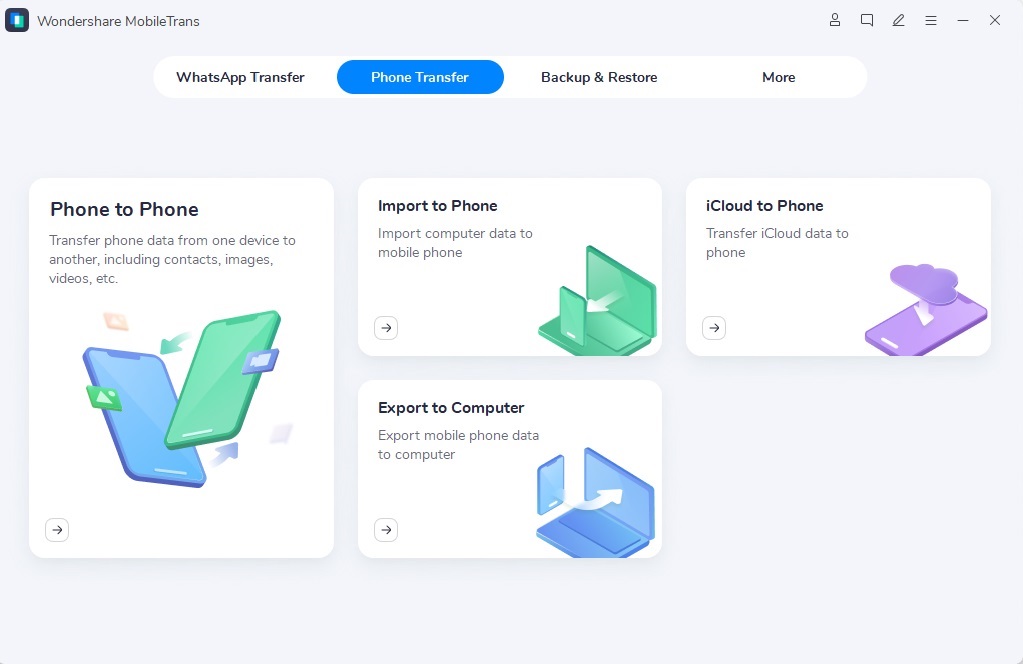
You can download and install MobileTrans. Afterward, launch MobileTrans and select the “Phone Transfer” feature from the list of options on its home page.

Step 2: Import photos from iPhone to Windows
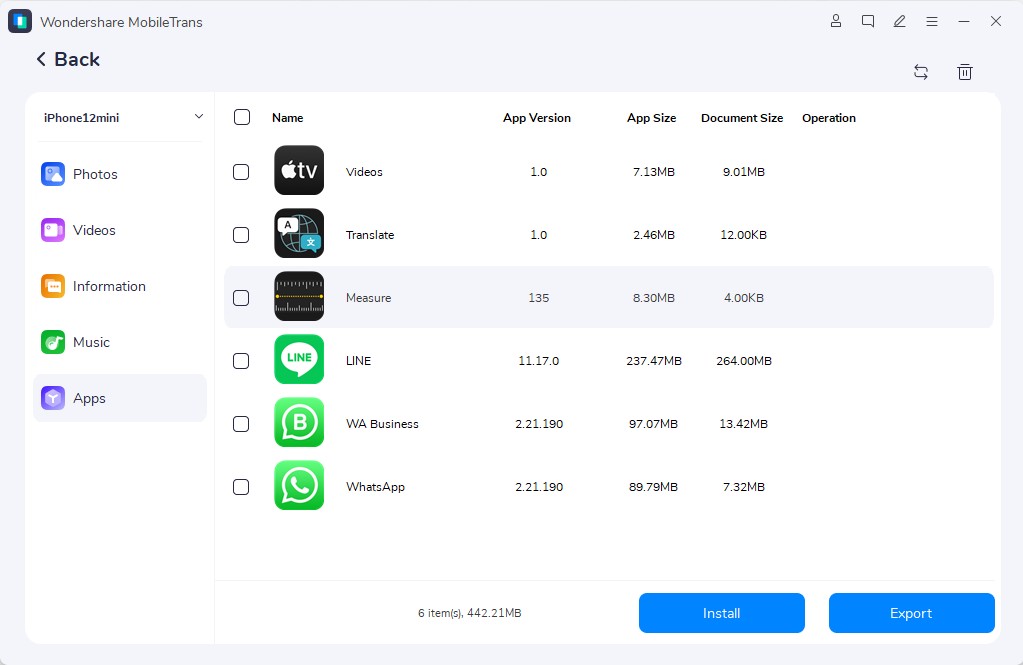
Connect your iPhone to the system and let MobileTrans detect it automatically. You can now view the snapshot of your device and see the types of data you can save. Select “Photos” or any other data type from here and click on the “Import” button.

That’s it! This will start the process to import your photos and will let you know once it is completed successfully so that you can remove your device.
Method 2: Import Photos from iPhone to Windows 10/11 Via File Explorer(Manual & Flexible)
Well, If you prefer manual control, File Explorer lets you browse your iPhone's photo folders and copy files like a flash drive. It's perfect for advanced users who want to select specific photos or folders. Then you can do it using Explorer. While it won’t let you transfer any other kind of data, you can directly import photos from an iPhone to Windows 10 in this way. The following steps can be taken to learn how to import photos from an iPhone to Windows 10.
Step 1: Connect your iPhone to the computer
To start, connect your iPhone to the system using a working Lightning cable. If you are connecting it for the first time, tap on the “Trust” button once you get a prompt on your device. Also, it allows the connected PC to access photos and videos on your iPhone.

Step 2: Transfer photos from iPhone to Windows
Now, launch Explorer on your Windows. From its home (This PC), you can see your iPhone’s icon under the External Devices section.

Just open the iPhone storage and browse to its Internal Storage > DCIM folder to explore the available photos and videos. You can now right-click, copy, and paste this content on your Windows storage.

Method 3: Import Photos from iPhone to Windows 10/11 with iCloud (Wireless & Automatic)
Since Apple provides only 5 GB of free storage for each iCloud account, you can use it to keep some of your photos safe. iCloud keeps your photos synced across Apple devices and can be accessed from a Windows PC. Once enabled, it allows automatic photo uploads and downloads via the cloud. Later, you can sync the iCloud Photo Library to your Windows 10 computer using its dedicated application. Here’s how to import photos from iPhone to Windows 10 with the help of iCloud.
Step 1: Sync iPhone photos with iCloud
The first thing to do is upload your iPhone photos to iCloud. To do that, go to Settings > Photos and turn on the “iCloud Photo Library” feature. This will upload your iPhone photos to iCloud. Just be sure that you have enough available space on your iCloud.

Step 2: Sync iCloud photos on Windows 10
Great! Once your data is uploaded to iCloud, you can import photos from iPhone to Windows. For this, you need to install and launch the iCloud application on your Windows system. Log-in to the same iCloud account that is synced to your phone and enable the syncing for Photos.

You can also click on the “Options” button adjacent to the Photos tab. Now, make sure that the sync feature for “iCloud Photos Library” is turned on. You can also select a location where you wish to save the synced photos on your computer here.

Method 4: Transfer Photos from iPhone to Windows 10/11 with the Photos App (Built-in & Simple)
Windows 10 users can also use the Photos app's assistance to transfer photos from iPhone to Windows. It is an inbuilt application to manage photos on Windows 10, but can also import photos from iPhone to Windows. To learn how to transfer photos from iPhone to Windows, you can follow these simple steps:
Step 1: Connect your iPhone
Firstly, you can just connect your iPhone to your Windows PC using working cables and trust it. Furthermore, you have to allow the system to access your iPhone photos and videos.

Step 2: Import photos from iPhone to Windows 10
Once your iPhone is connected, just launch the Photos app on your system from the Start menu. Here, you need to go to its top-right corner and click on the import icon.

Now, just choose your iPhone from the list of the connected media devices on your Windows. This will automatically display the thumbnail view of your photos so that you can select what you wish to import. After selecting photos, click on the “Continue” button and wait as your photos would be moved to your Windows system.

Method 5: Transfer Photos from iPhone to Windows 10/11 with OneDrive Auto Backup (Continuous Cloud Sync)
Install OneDrive on your iPhone and enable camera upload to sync photos directly to the cloud. It works in the background and keeps your photos updated across devices.
Steps:
Now that you know how to transfer photos from iPhone to Windows in four different ways, you can easily move your data to your computer. To make things easier, I have included steps to import photos from an iPhone to Windows 10 using native methods and other tools. You can wirelessly use iCloud to transfer a few photos, but if you have a lot of data to move, an application like MobileTrans – Phone Transfer would be an ideal choice.
New Trendings
Top Stories
All Categories


Axel Nash
staff Editor