


 TL;DR:
The most efficient way to transfer files between a Mac and an iPad depends on your specific needs: use AirDrop for quick wireless sharing, Finder for built-in cable management, or Wondershare MobileTrans if you need to migrate applications.
● Avoid using iTunes to sync files unless your iPad is entirely new, as this method is highly likely to overwrite and erase existing data on your device.
● AirDrop requires both Wi-Fi and Bluetooth to be active for local wireless sharing, while Finder transfers require a USB or USB-C cable connection, an unlocked iPad screen, and correct sidebar visibility settings.
● Cloud-based alternatives like Google Drive provide 15GB of free storage for wireless transfers outside the Apple ecosystem, but this requires installing a standalone application on the iPad and uploading files via a web browser on the Mac.
Ask AI for a summary
 ChatGPT
 Perplexity
 Gemini
 Claude
 Grok
Grok
Just as you can transfer iPad data to Mac in multiple ways, you have more options to transfer files between Mac and iPad than you think. They range from cloud-based services to local transfer solutions, such as iTunes. It's only a matter of finding one that satisfies your needs.
This article explores these options, explaining the steps to use each one. Discover a method to transfer data between the two devices with a click!
In this article
Transfer Files Between Mac and iPad In One Click
As mentioned, there are many ways to transfer files from Mac to iPad. But if you want the easiest and fastest method, go for the Wondershare MobileTrans - Phone Transfer. It also works for the reverse - from iPad to Mac.
Through its Phone Transfer feature, you can effortlessly move your data with a click. MobileTrans is secure since you're the only one with access to your data. It doesn't matter whether you're sending a few small files or large videos and photo albums. MobileTrans is fast and will get it done in nearly no time.
Wondershare MobileTrans
Move Your Data to Computer Easily
- • No data loss. No data leaks.
- • Support various data, including files, photos, videos, apps, contacts, etc.
- • Compatible with over 6,000 types of devices acorss Android and iOS.
 4.5/5 Excellent
Check out the steps for file transfer from iPad to Mac using MobileTrans - Phone Transfer:
- Download and install the MobileTrans software on your MacBook.
- Connect your iPad to the Mac using a USB data cable. The computer must detect the iPad.
- Open the MobileTrans software and click Phone Transfer from the home page. Next, choose the Export to Computer option.

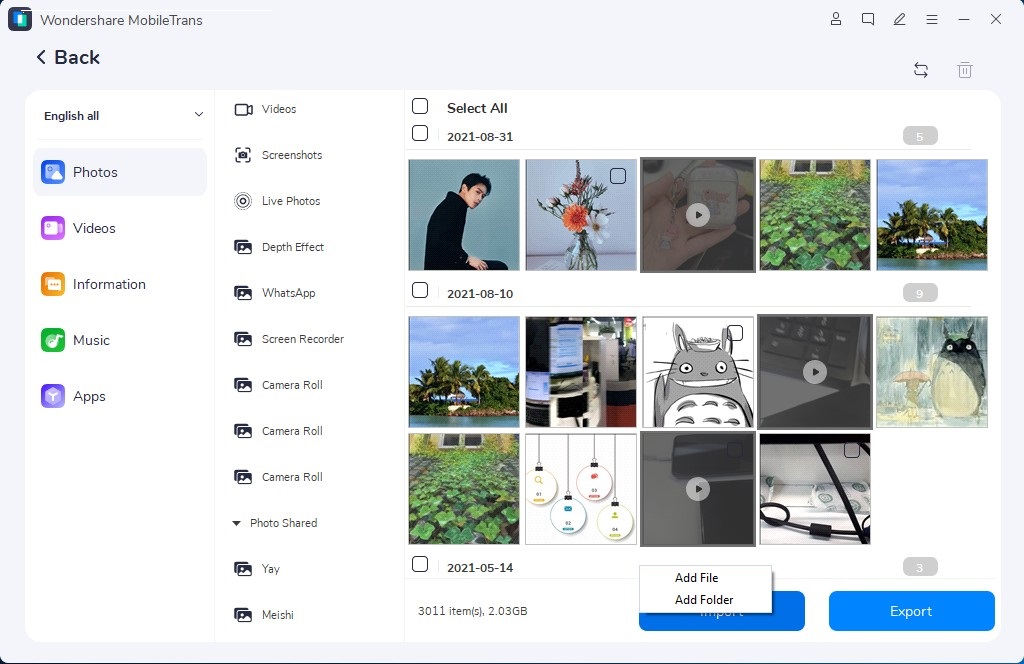
- MobileTrans supports up to 5 file types displayed on the left sidebar. Select the file types you wish to export to the Mac. After that, click Export.

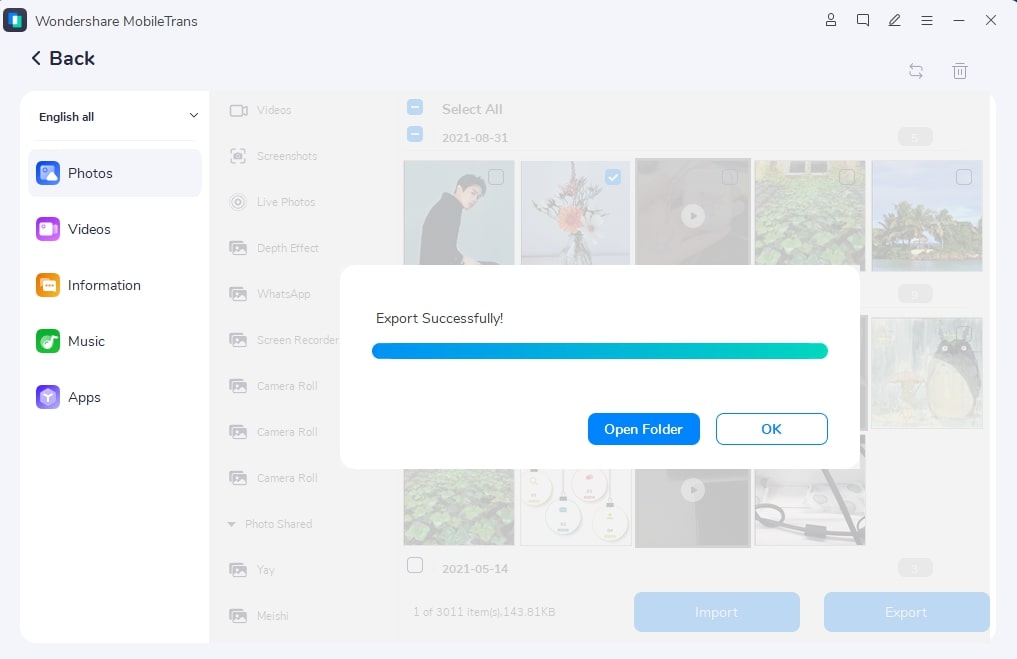
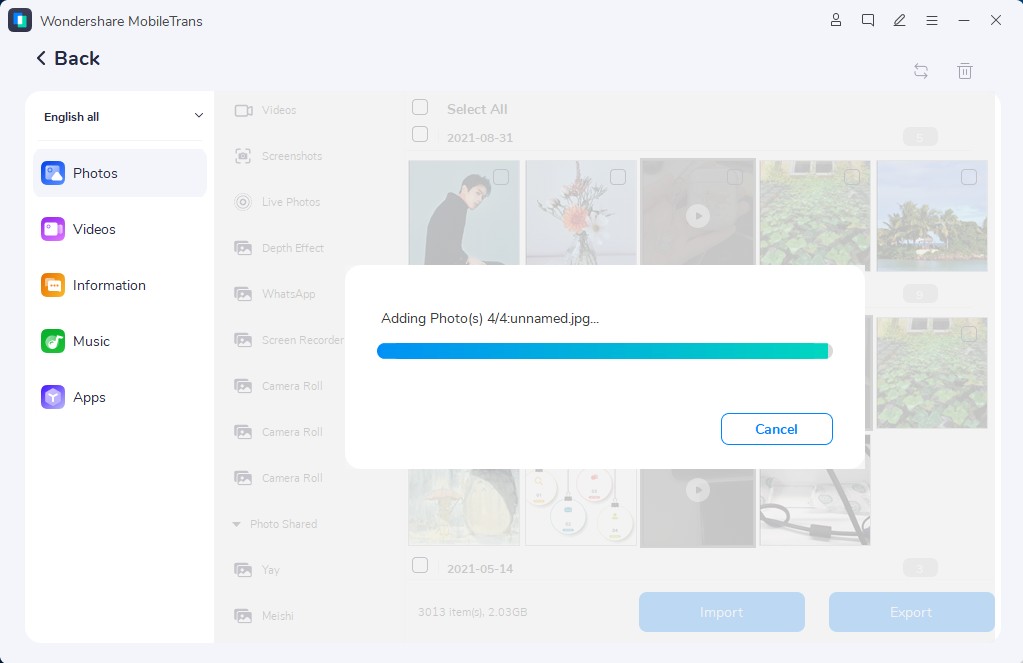
- MobileTrans will immediately begin copying files from the iPad to your MacBook. Keep the devices connected until the process is completed. Once the Export is completed, you can view the data on your computer.
Now you know how to transfer files from iPad to Mac. It's as simple as that! As stated, you can also import data from the Mac to the iPad with MobileTrans - Phone Transfer. Look at the following steps to learn how to transfer a file from Mac to iPad:
- Connect the iPad to your Mac using a USB cable.
- Open the MobileTrans software and click Phone Transfer at the top of the screen. Next, choose Import to Phone.
- Select files to import to your iPad from the left sidebar. Next, click Import to initiate the file transfer from Mac to iPad.
- MobileTrans will complete the process shortly. Keep the devices connected during the entire process. Once the Import is done, you can view the data on your phone.
Other Ways to Transfer Files Between Mac and iPad
You can also wirelessly copy files from Mac to iPad or vice versa using AirDrop. Or choose from several other methods discussed here. Check the methods out:
-
Transfer Files from Mac to iPad Wirelessly via AirDrop
AirDrop is convenient if you want to know how to transfer files between Mac and iPad. It uses Wi-Fi and Bluetooth, hence allowing wireless file-sharing. You can transfer most file types with this software. These include documents, map locations, photos (from the Photos app), and web pages.
Find out how to transfer files from Mac to iPad with AirDrop:
- On the iPad, swipe down from the top of the screen to open Quick Settings. Hold the box containing the Airplane Mode, Bluetooth, and Wi-Fi buttons. Tap AirDrop from the pop-up window. Next, tap AirDrop Receiving, then choose Contacts Only or Everyone.

- Open a Finder window on the Mac and choose Go from the top menu bar. Click AirDrop.

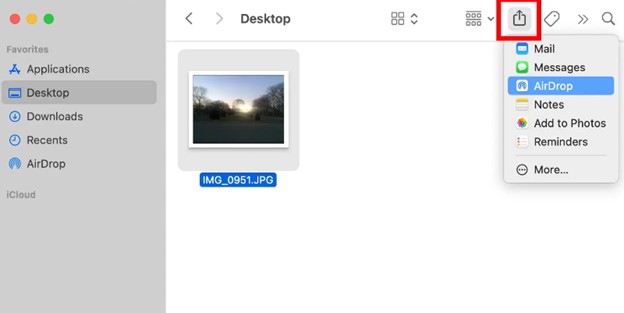
- To transfer files from Mac to iPad, drag and drop a file to your iPad's name on the AirDrop window.
Or open an app from which you wish to transfer a file to your iPad. Click Share. You can also control-click a file in the Finder, then click Share from the shortcut menu. Choose AirDrop, then select your iPad's name from the list. Click Done to copy a file from Mac to iPad.
You'll receive a prompt on your iPad to accept or reject the transfer. Tap Accept to complete the Macbook to iPad transfer.

Now you know how to wirelessly transfer files from Mac to iPad. To transfer from iPad to Mac with AirDrop:
- Turn on AirDrop on both devices. On the Mac, check the part at the bottom of the screen where it reads: Allow me to be discovered by. Choose Contacts Only or Everyone.

- Select a file to transfer on the iPad, then tap the Share button. Choose AirDrop, then tap your Mac's name.
- Accept the prompt on your Mac to save the AirDropped file.
-
Transfer Files from Mac to iPad with Finder
You can transfer files from Mac to iPad via USB or USB-C cable. The method allows you to move various data, including photos, videos, and documents.
- Connect your iPad to the Mac with a USB cable.
- Go to Finder on your Mac. The iPad should appear in the Finder sidebar. Click on it.

 Note: If you don't see the device in the sidebar, ensure you've correctly connected the cable. Check that the device is unlocked, and you can see the Home Screen. Lastly, check the Finder settings and ensure they are set to show your device in the sidebar.
 - Click the Files option in the button bar. A list of applications on your device that support file transfer will appear.
- Drag a file or more from a Finder window and drop it into an app name on the list. The transfer happens immediately.
- Click the arrow beside the app name. You'll find all the files that have been transferred to the iPad.
-
Transfer Using iTunes
iTunes also provides an easier way to transfer files from MacBook to iPad or vice versa. However, this method is ideal if your iPad is new and no data is saved. The iTunes transfer is likely to erase existing data.
If you don't have any data on your iPad yet, proceed as follows:
- Ensure you have the latest version of iTunes on your Mac. You can go to the App Store on the Mac and click Update if any is available.
- Connect the iPad to your Mac through a USB cable. Next, open iTunes on the computer.
- Click your iPad icon on the top-left of the home screen.

- Select the file type to transfer to the iPad. For example, send some songs. Click the Sync Photos checkbox on the right, then click Done. You can access the same music on iTunes through your iPad. Repeat the same for other data.

Alternatively, you can transfer files using the iTunes' File Sharing feature. The feature allows you to transfer files between Mac and apps that support file sharing on iPad.
Various file-sharing apps will appear under the Apps section. Choose the app you wish to use to share files to your iPad. For example, Photos. Click Add in the Documents list, then choose the file you desire from the Mac. Open the Photos app on the iPad, and you'll see the file sent from your Mac.
-
Use iCloud Drive to Copy Files from Mac to iPad.
You can upload your iPad data to iCloud and then access the same on your Mac from iCloud.com. Or upload from the Mac and access the data on your iPad. iCloud is a convenient way to wirelessly transfer files between Mac and iPad. These are the simple steps:
- Go to Settings on your iPad. Tap iCloud, then iCloud Drive.
- Go to System Preferences > iCloud on the Mac, then enable iCloud Drive.
- Open the Drive folder on the Mac. Next, drag and drop the files you wish to send to the iPad.
- Now open the iCloud Drive on the iPad. View the files that you just transferred from your Mac.
-
Use Google Drive to Transfer Files from Mac to iPad
Google Drive is another cloud service similar to iCloud. With up to 15GB of free storage, you have ample space to upload all the files you need. Once they are available on the cloud, you can access them across your devices.
It can be a great option to use something other than iTunes. To transfer files from Mac to iPad with Google Drive:
- Go to drive.google.com on your Mac. Log in to your Google account.
- Click the Add button (one with the plus sign) on the top-left. Choose File Upload, then select the files you wish to transfer to your iPad.

- Once uploaded, install the Google Drive app on your iPad. Log in to your account on the app. You can now get files from Mac.
Conclusion
You have learned how to transfer files between Mac and iPad differently. MobileTrans is the best method. It allows you to transfer up to five types of data. These include videos, photos, information, and music. You can even transfer apps.
In addition, we've also discussed other standard methods. These include AirDrop, the most popular way among users of Apple devices. We discussed iTunes and iCloud. But if you want to try something out of the Apple ecosystem, you can use Google Drive.
Indeed, one of the above methods will work for you. We leave it up to you to choose the best one that suits your file transfer needs. If the files you need to share include apps, we strongly recommend MobileTrans.
4.5/5 Excellent

