


 TL;DR:
You can transfer music from an iPhone to iTunes using the native iTunes application for purchased tracks, or utilize third-party tools like MobileTrans and TunesGo to bypass this restriction and move unpurchased downloads.
● The official iTunes sync method requires a lightning cable and limits transfers exclusively to purchased music, meaning any externally downloaded tracks will not be included in the sync.
● MobileTrans requires a two-step process where you first export both purchased and non-purchased music to your computer, and then manually sync those files into your iTunes library.
● TunesGo acts as a direct alternative that automatically rebuilds your iTunes library straight from the connected iOS device, transferring playlists, podcasts, and music without needing to use the iTunes interface.
Ask AI for a summary
 ChatGPT
 Perplexity
 Gemini
 Claude
 Grok
Grok
If you are new to the iOS ecosystem or haven’t used iTunes in a while, then you might encounter issues to transfer music from iPhone to iTunes. Since a lot of people use iTunes to manage their iOS devices, you should also know how to sync music from iPhone to iTunes. For this, you can just take the assistance of iTunes or even use a third-party application. In this post, I will let you know how to transfer music from iPhone to iTunes and will also discuss some smart tips to manage your device like a pro.

Part 1: How to Transfer Music from iPhone to iTunes: A Simple Solution
You can easily learn how to transfer music from iPhone to iTunes on Windows or Mac as the interface of the application is pretty same for every platform. Since iTunes is available for free, you can first download it on your computer from its website. Now, you can take its assistance to back up your iPhone, restore a backup, and manage your iTunes library. In the iTunes Library, you can include all kinds of videos, photos, music, and so on. To learn how to sync music from iPhone to iTunes, you can simply follow these steps:
Step 1: Connect your iPhone and launch iTunes
Firstly, you can just use a working lightning cable and just connect your iOS device to the system. Now, launch an updated version of iTunes on it that is compatible with your iPhone. If you are connecting your iPhone to your computer for the first time, then you will get the following prompt. You can tap on the “Trust” button and let iTunes detect your device.

Step 2: Sync music from iPhone to iTunes
Once your iPhone is connected, you can go to the devices icon and select it. Afterward, just go to the Music tab from the sidebar and enable the “Sync Music” option. From here, you can sync the entire music library or just select the albums, artists, or playlists that you wish to transfer. After making your selection, click on the “Apply” button to transfer music from iPhone to iTunes for free.

Cons: Only the purchased music can be transferred this way, those none-purchased ones are not included
Part 2: Transfer Music from iPhone to iTunes/Computer with MobileTrans
If you want to transfer both your purchased and downloaded music from iPhone to your computer and iTunes, you can turn to MobileTrans to get the job done.
MobileTrans is a trust-worthy tool for phone-to-phone and phone-to-computer data transfer. You can not only transfer music, photos and video between your phone and computer, but also transfer 18+ types of data to your new phone when switching phones.
Let's find out how to transfer music from iPhone to iTunes with MobileTrans.
Step 1: Launch MobileTrans
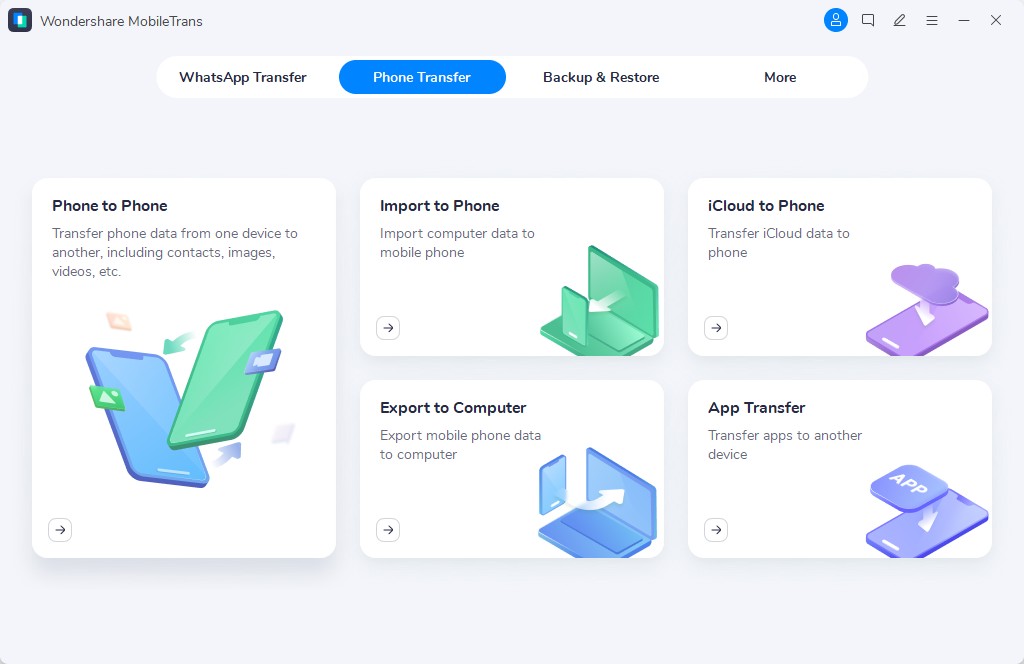
If you don’t have the application, then just install it on your computer, and launch it. Go to Phone Transfer > Export to Computer from the dashboard.
Step 2: Transfer Music to your Computer
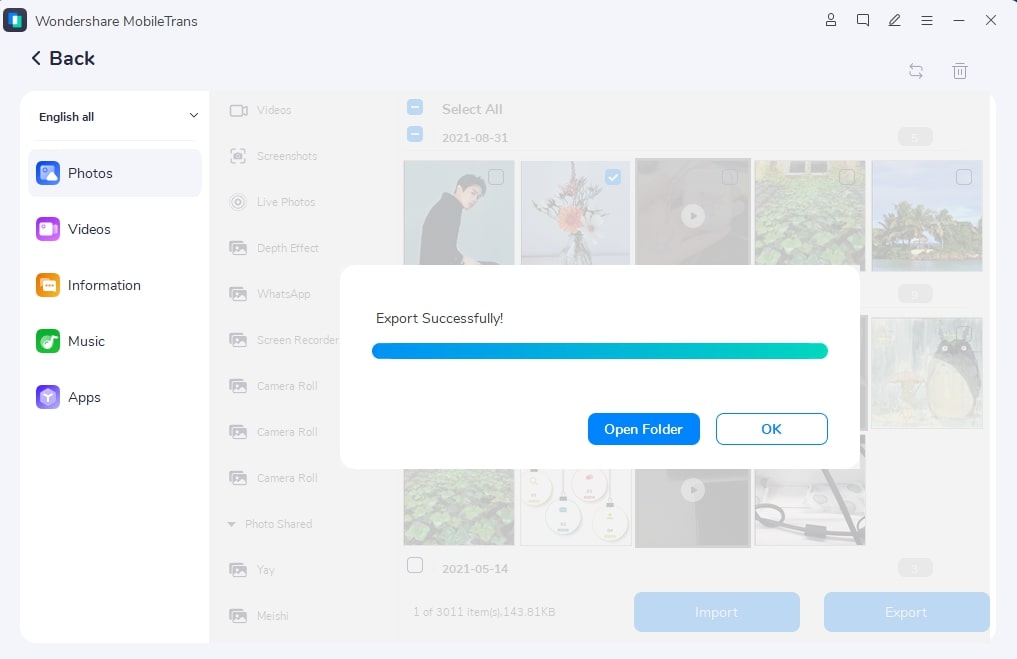
Choose Music from the left-side bar and select the music files you want to export to your computer, and then click on the Export button to save in desired position.

Step 3: Transfer Completed
Wait for the process to be completed and then disconnect your phone to computer.
Step 4: Sync Music from Computer to iTunes
Launch iTunes on your PC, and choose to sync music from your computer. That's it.
If you want to sync music from iPhone to iTunes to take a backup of your music and media files, you can also utilize MobileTrans to back up your music files on your iPhone.
Step 1: Launch MobileTrans – Backup
If you don’t have the application, then just install it on your computer, and launch it. From the listed options on its welcome screen, choose Backup & Restore > Phone Backup & Restore to continue. Also, you can connect your iPhone to the system using a working cable and trust the system.

Step 2: Back up the selected data types
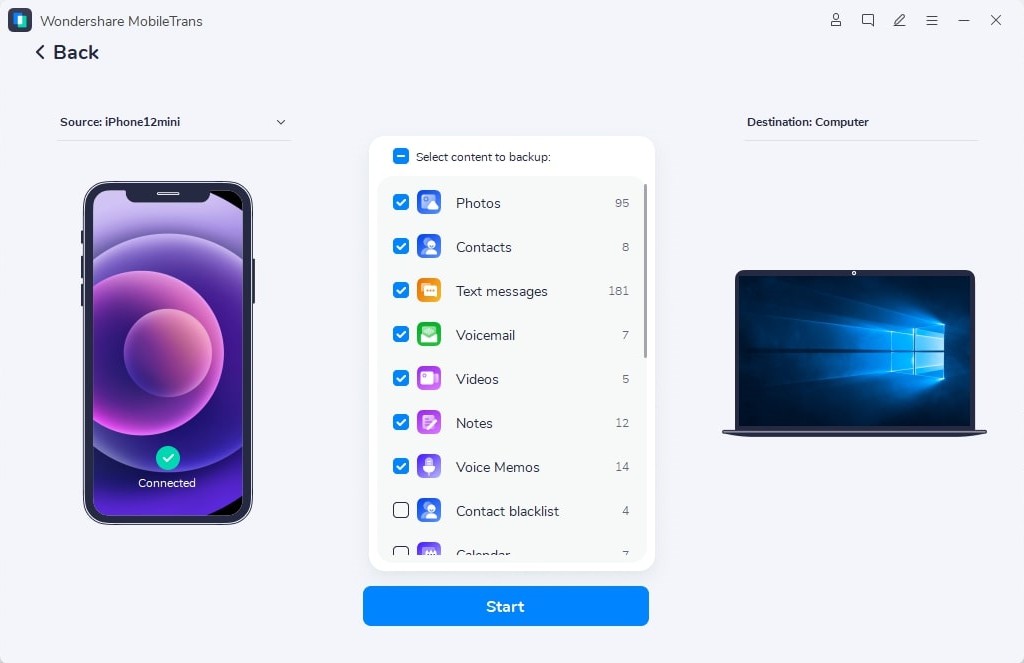
Click on Backup Button, and when your device is connected, the application will automatically display its snapshot. From the list of the supported data types, you can just select what you wish to back up (like music) and click on the “Start” button.
That’s it! This will simply transfer your music or any other selected data type from your iPhone to your computer. Later, you can use MobileTrans – Restore to extract the saved backup to the device of your choice.
Part 3: How to Sync Music from iPhone to iTunes with TunesGo
If you are looking for an alternative to transfer music from iPhone to iTunes, then you can also try TunesGo. It is a complete phone manager that will let you transfer all kinds of data between your system and iPhone. For instance, you can move your photos, audios, videos, messages, documents, etc. between your computer and iOS devices seamlessly.
Besides that, the application can also let us rebuild your iTunes library from your iOS device without using iTunes. You can transfer data from iTunes to your device as well. To learn how to transfer music from iPhone to iTunes, the following steps can be taken:
Step 1: Connect your iPhone and launch TunesGo
Firstly, just connect your iPhone to the computer using a working cable and launch TunesGo on it. On its home, you can see a snapshot of your iOS device after it would be detected. Now, from the provided shortcuts on its welcome screen, just click on the “Rebuild iTunes Library” button.

Step 2: Choose what you wish to transfer
The application will display a prompt to automatically detect the media files stored on your iPhone. You can just click on the “Start” button and wait as your music and other media files are extracted.

Once the media and other files on your iPhone are detected, the application will display different categories to sync. From here, you can just select what you wish to transfer (like playlists, podcasts, music, etc.) and click on the “Start” button.

Step 3: Complete the media transfer
That’s it! You can now just wait for a while and make sure that your device stays connected to the system till the process is completed. Once it is done, you will be notified so that you can safely remove your iPhone and access the transferred media on iTunes.

Conclusion
I’m sure that after reading this post, you would be able to transfer music from iPhone to iTunes. Though, if you find iTunes a bit complicated to use, then you can try TunesGo instead. Also, to back up your music from iPhone to computer, you can use MobileTrans – Backup, which is an extremely resourceful tool. Go ahead and try these solutions and share this guide with others to teach them how to sync music from iPhone to iTunes in a jiffy.
New Trendings

Top Stories
All Categories


Axel Nash
chief Editor