To keep up with the latest technology advancements, upgrading phones has become a common practice for many. However, no matter how many smartphones you upgrade, your contacts remain consistent and crucial parts of each switch.
Cloud storage is the popular choice for saving data, including contacts, on modern Android devices. The traditional method of saving contacts to a SIM card is also important. It is helpful to transfer them to another phone easily. Therefore, read through the article to find out different ways to save contacts to your SIM on an Android device.
In this article
Why Do You Need to Save Contacts to SIM Card?
Here are some of the main reasons to save contacts to a SIM card:
- Back up contacts to SIM card: Saving contacts to a SIM card offers an efficient way to take backup. When your phone is damaged or runs out of battery, you can access the contacts by inserting a SIM into another phone.
- To transfer: It is very easy to transfer your contacts to a new phone via SIM card.
- Less cloud storage: If you are running out of storage space on your free cloud storage plans. Saving contacts to your SIM card can be a better alternative to save cloud storage space.
- Better security: The cloud storage is generally secure. However, with contacts saved to a SIM card, it will be an additional offline security.
- Older phone compatibility: Since older mobiles or basic phones cannot transfer contacts via cloud storage, contacts on a SIM card are the only way.
- Separate contacts: If you have two SIM cards, one for professional and personal use. Storing professional contacts to a work SIM and personal to another SIM will help separate contacts.
How to Save Contacts to SIM Card on Android?
You can save contacts to your SIM card on Android in a few different ways. Here are simple methods to learn how to save contacts to sim card on Android:
How to Save Android Contacts to SIM Cards Using the Contacts App
Each Android phone comes with a built-in Google Contacts app supporting various features. However, it does not support the feature of exporting contacts to your SIM card. Also, new Android devices prefer cloud storage backups to transfer contacts from one phone to another.
Fortunately, you can save contacts to a SIM card using the Contacts app on Samsung phones. Along with its calling features, the app provides an easy way to transfer contacts from an Android phone to a SIM card. With a few simple steps, you can easily move or copy saved phone numbers to a connected SIM card.
Follow the below steps to save Android contacts to a SIM card using the Contacts app:
Step 1: Launch the “Contacts” app on your Android phone. Often, it is available on the home screen or apps menu. It resembles an icon with a person.
Step 2: Tap on the three dots menu button and select the “Manage contacts” option.
Step 3: Choose the “Import/export contacts” option from the Manage contacts list.
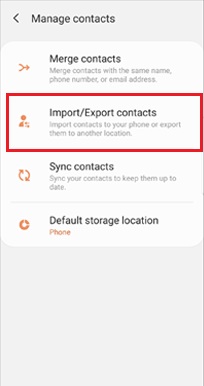
Step 4: Tap on the “Export” option on the next screen to save contacts.
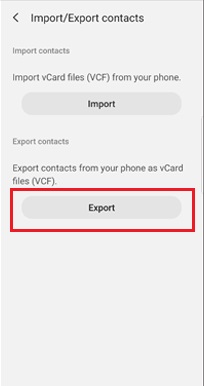
Step 5: Choose the “SIM card” option as the destination and select the “Export” option at the bottom.
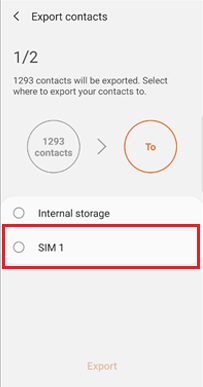
Step 6: Select the specific contacts or select all contacts to export.
Step 7: Tap on the “Done” button to begin the process.
Step 8: Tap on the “OK” option on the popup message.
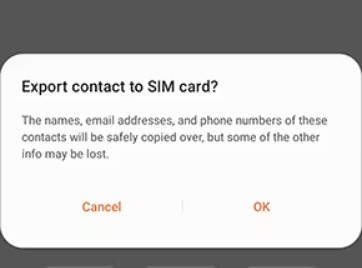
After finishing the process, you can verify by checking the SIM card contacts.
How to Save Android Contacts to SIM Cards Using the Export Feature
Although using the built-in Contacts app on the Android device does not allow saving contacts directly to the SIM card. However, it offers an Export option in the VCF file format that can be used to import your contacts into other devices.
This feature is especially useful if the Android device is not from Samsung. This method of how to save contacts to SIM card might vary slightly depending on your specific Android device and operating system version.
Follow these steps to save Android contacts using the Export feature:
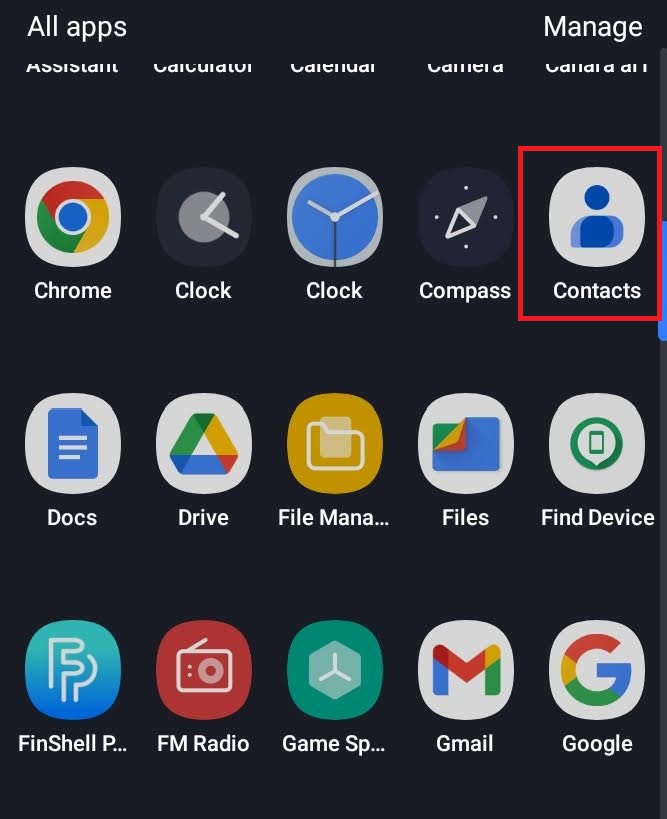
Step 1: Launch the “Contacts” app from the home screen or apps menu. Typically, the app has a white icon with a blue person.
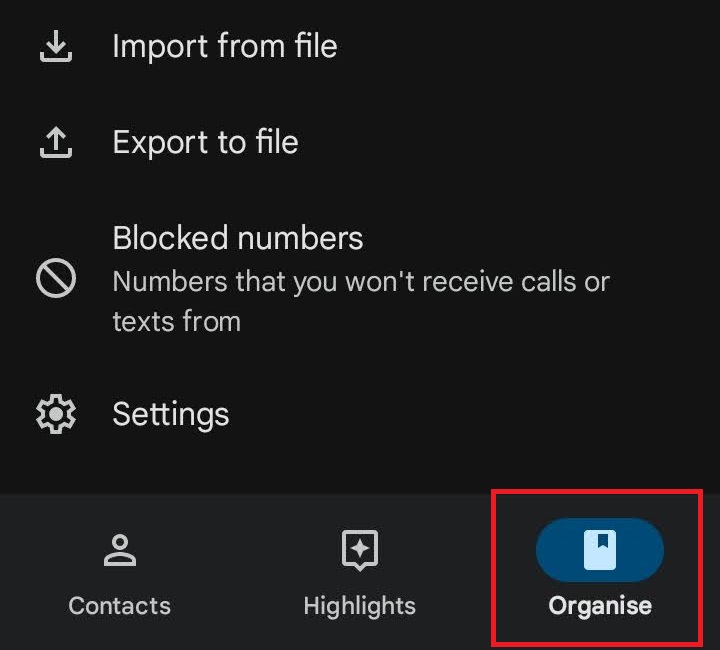
Step 2: Tap the “Organise” option at the bottom right corner.
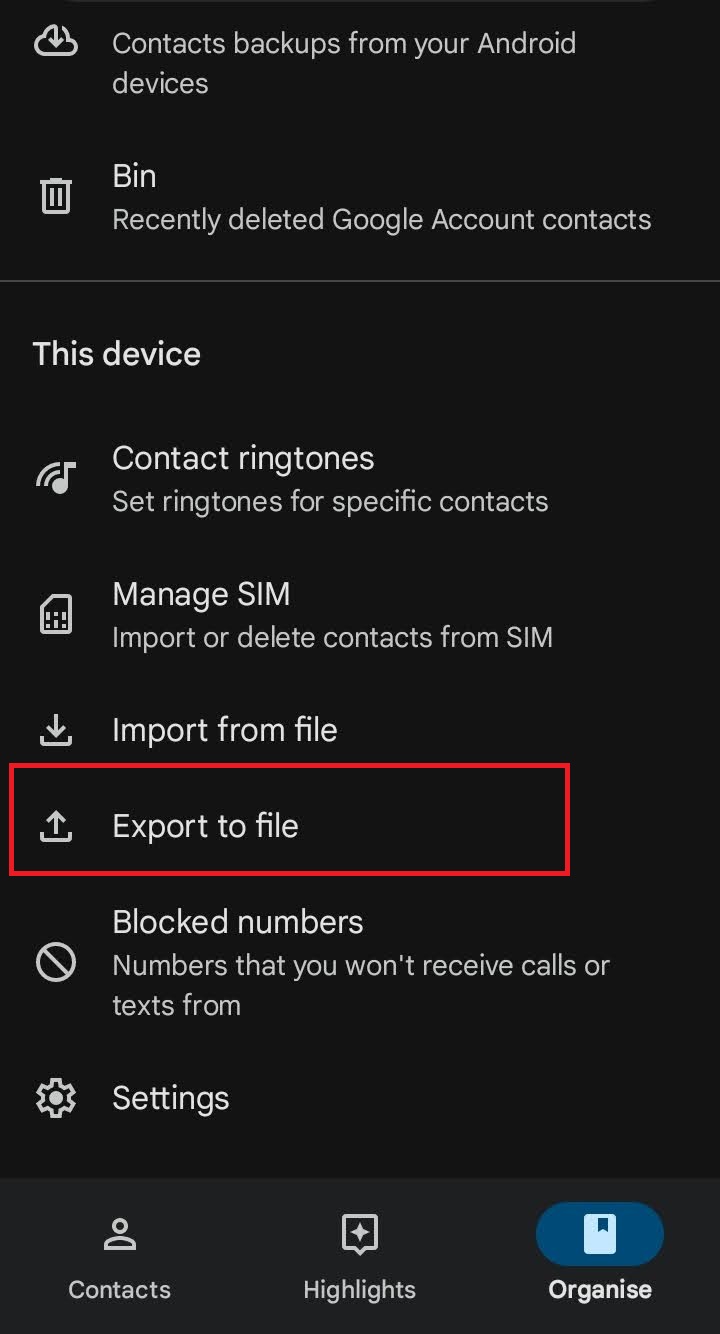
Step 3: Scroll down to locate and tap on the “Export to file” option in the list.
Step 4: If you have multiple Google accounts on your phone, then select the account to export contacts from. Select the “Export” option at the bottom.
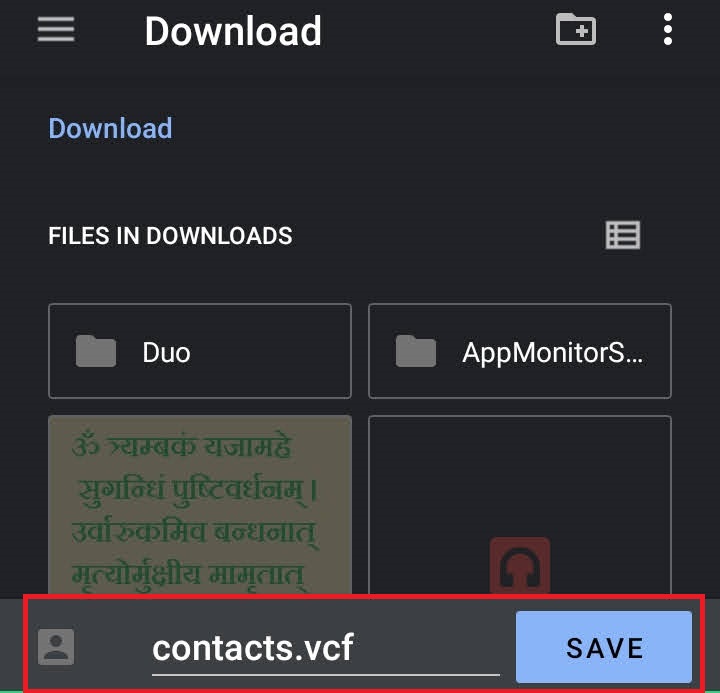
Step 5: Lastly, provide a Image name or keep the default name. Then select the “Save” option.
The exported file will be saved in the downloads folder of the phone. You can transfer the file to another phone or device from here.
How to Save Android Contacts to CSV file on Computer
While not directly saving to the SIM card, this method allows you to export your contacts to a computer and potentially import them to your SIM card on another phone (if supported). Although you can export the contacts using the Contacts app, the exported file will be in VCF file format. Unfortunately, most devices do not support this file format to save the contacts to a SIM card.
However, you can easily transfer your Android contacts to your computer using the Wondershare MobileTrans - Contact Management feature. Not only does it help you take backup of your contacts on a computer, you can save the file in CSV format.
MobileTrans - Contact Management
Best Tool to Manage Your Contact!
- • MobileTrans lets you merge duplicate contact entries without any hassle
- • Quickly import and export contacts in the form of CSV/vCard files
- • It works perfectly fine with both iOS and Android ecosystems
- • It can backup contacts to a PC to make it more secure and protected

 4.5/5 Excellent
To save your Android contacts to a CSV file on your computer, follow these steps:
Step 1: Start by downloading, installing, and launching Wondershare MobileTrans on your computer.
Step 2: Now, connect your Android phone to the computer via a USB cable. Click the "More Tools > Contact Management" option.
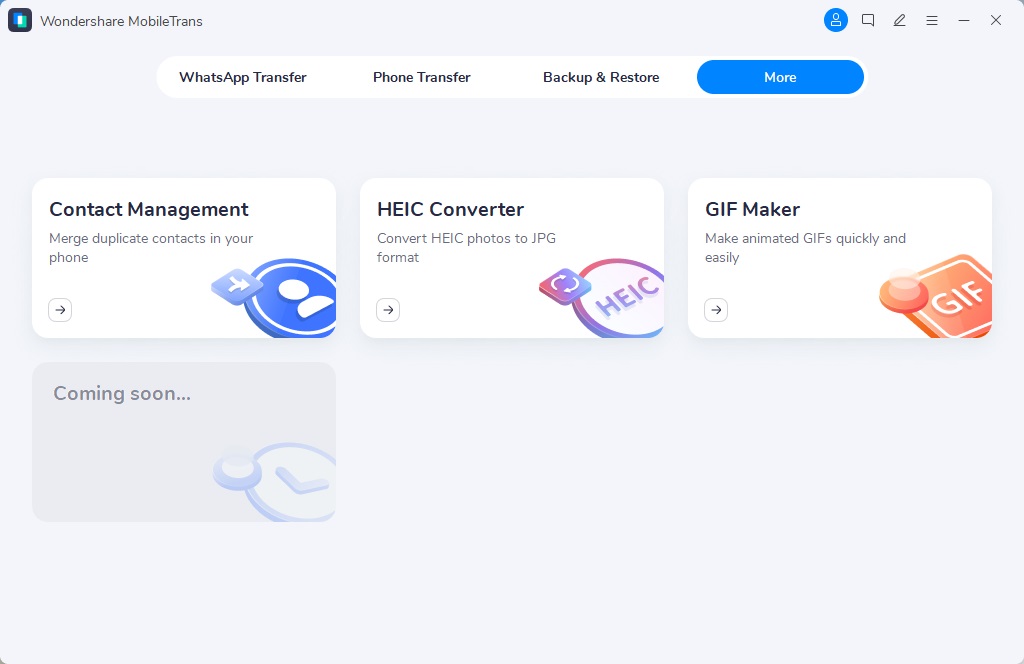
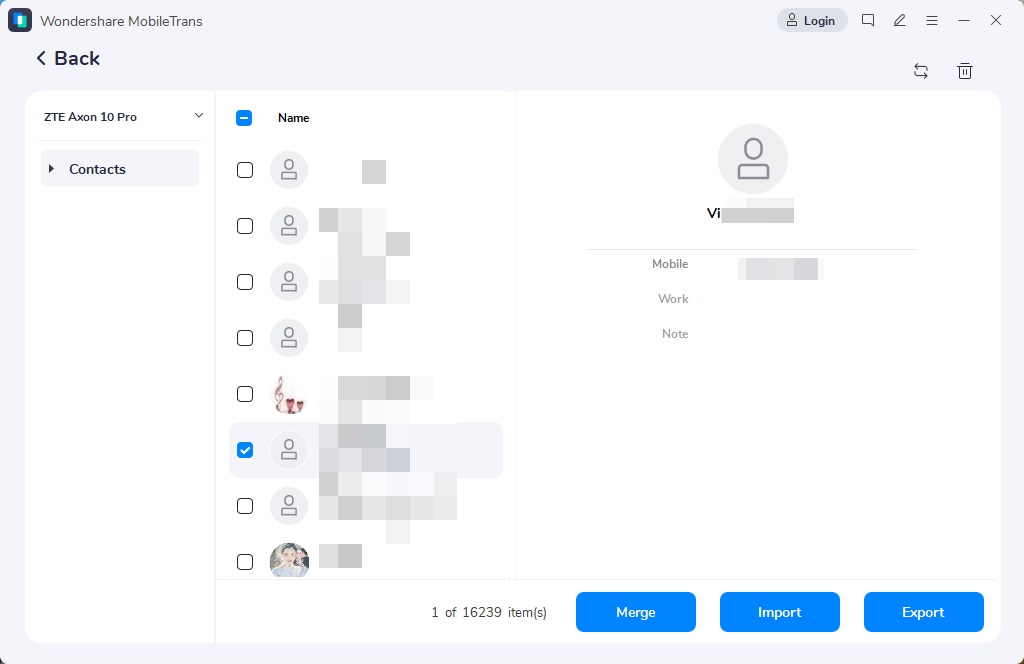
Step 3: Now, choose the “Contacts” option on the left side panel. You can manually select the contacts you want to save to your computer or click on the “Select All” option to save all.
Step 4: Lastly, click the “Export” button at the bottom and choose the “To CSV File” option from the list.
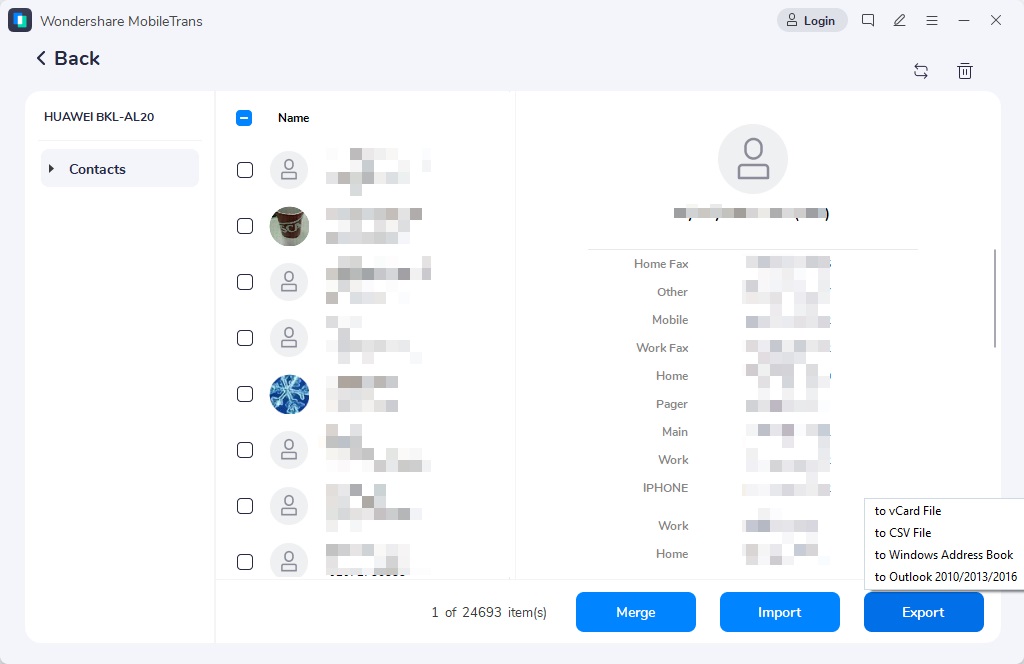
After the export process, all your selected Android contacts will be saved on your computer in CSV format. When needed, you can transfer them to the SIM card later.
[Bonus] How to Transfer Contacts to New Phone Easily via MobileTrans App
Saving contacts to a SIM card on an Android phone offers many advantages, such as switching between phones. But, for a more comprehensive and easy method to transfer your contacts to a new phone, you can consider using a mobile data transfer app like MobileTrans App.
This app can transfer various data, including contacts, photos, and videos. You can also transfer data between two Android devices or two iPhones or between Android and iPhone.
Follow the below steps to transfer contacts to the new phone using the MobileTrans app:
Step 1: Download MobileTrans App on your phone.
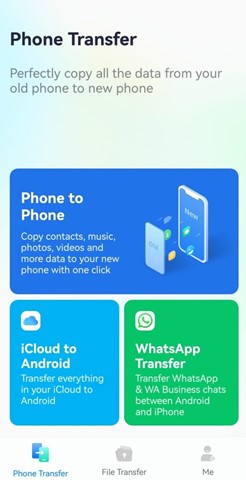
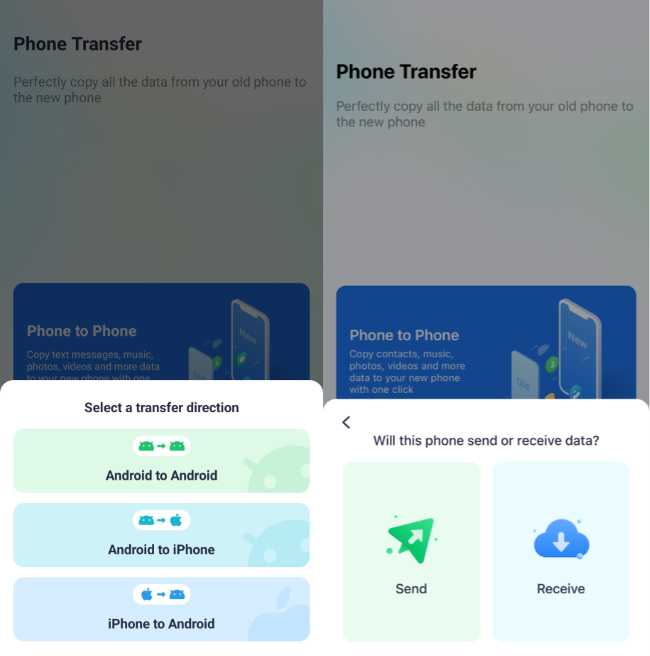
Step 2: Tab "Android to Android" as your transfer direction. Tab "Send" in your old phone and "Receive" in your new phone.
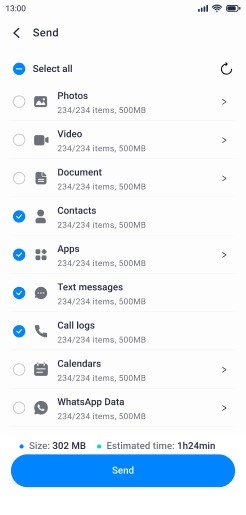
Step 3: Select the data you need to transfer.
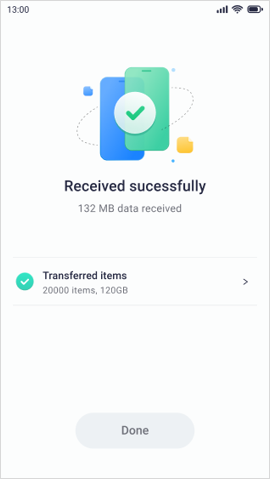
Step 4: The process is to be completed within seconds.
Conclusion
Now you know how to save contacts to sim card on Android phone. Your contacts will be readily available each time you switch phones. Also, you can save contacts to a SIM card to back up your contacts.
Even though saving contacts on cloud storage offers more convenience, SIM cards have better reliability. Depending on your requirements, choose the method that best fits you to save your contacts safely on a SIM card.
In addition, you can benefit from the MobileTrans app to effortlessly transfer your contacts to your new device. Or, you can use the desktop version of MobileTrans to save your contacts to a computer as a backup.
FAQs
-
How to save everything to a SIM card on Android?
Unfortunately, you cannot save everything to a SIM card on Android. Since SIM card comes with small storage space, it is hard to store anything more than phone numbers. That’s why, you cannot save photos, videos, apps, documents, or files on a SIM card. However, you can save contacts to your SIM card on Android. Follow the above-given methods and choose the best fit for your requirements. -
Should I save contacts to SIM or phone?
Saving contacts to a SIM card or phone depends on various factors. If you know how to save contacts onto sim card, it will come in handy when the phone is damaged or is not functioning. Also, it will be easy to transfer your contacts to a new phone. On the other hand, if you save contacts on the phone, it will be beneficial when you swap SIM cards. Additionally, you can add more details to a contact on the phone, such as email and address.


