


 TL;DR:
To save images from Google Photos to your local Android or iPhone storage, open the app, select the desired pictures, tap the three-dot menu, and choose the Save to Device option.
● For computer imports, you must log into the Google Photos web interface via a browser, select the files, and click Download from the menu to transfer them directly to your local downloads folder.
● The Wondershare MobileTrans desktop software provides an alternative offline method requiring USB cables to migrate photos between an iPhone, iPad, or Android source device and a Mac or PC destination using its Phone Transfer feature.
● Maintaining both applications is not mandatory because native device galleries manage local offline storage, whereas Google Photos functions specifically as a cloud-based backup service for 16-megapixel images and 1080p videos.
Ask AI for a summary
 ChatGPT
 Perplexity
 Gemini
 Claude
 Grok
Grok
Google Photos is one of the best services Google provides, where you can save all your photos and videos. For your information, Google Photos lets you save images of 16 megapixels and videos of 1080p resolution.
Also, there’s no fear of losing your data with Google Photos as it protects your data the best way. That said, Google Photos offers a satisfying storage for your photos at any time. However, it's also essential to have your photos readily available on your device. Therefore, this guide provides a comprehensive step-by-step process to move your pictures from Google Photos to your device's gallery, ensuring you can enjoy your memories whenever and wherever you want.
In this article
Part 1: Transfer Pictures from Google Photos to Gallery on Android
Transferring photos from Google Photos to your Android device's gallery is a convenient way to access your pictures offline and manage them locally. The following steps guide you through this process.
Step 1: Go to Google Photos, and select photos that you want to transfer.
Step 2: Tap the three vertical dots at the top right corner after selecting the photo.
Step 3: Select the Save to device option from the drop-down menu.
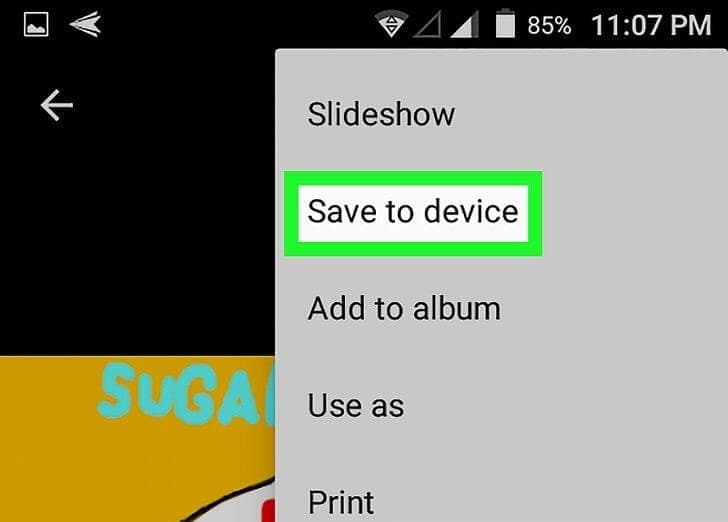
This will download all selected photos from Google Photos to your phone.
Part 2: Transfer Photos from Google Photos to Gallery on iPhone
Transferring photos from Google Photos to your iPhone gallery is simple. If you're using an iPhone and wish to move your Google Photos to your device's gallery, follow the steps below:
Step 1: Open the Google Photos app.
Step 2: Log in with your Google account.
Step 3: Pick the photo you want to move and tap the three dots in the top right corner.
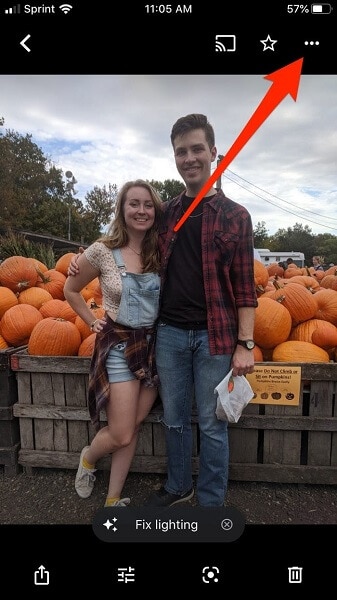
Step 4: Select Save to Device.
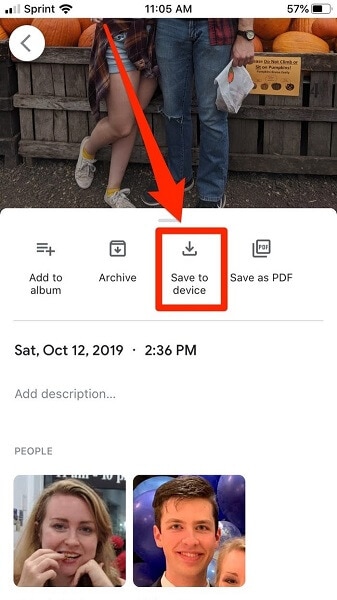
Now enjoy your favorite pictures anytime, even offline, and keep them within easy reach.
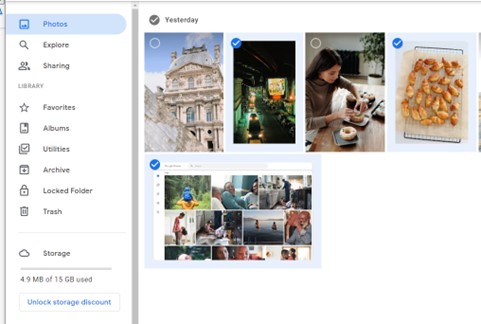
Part 3: How to Import Google Photos to Gallery on Computer
Importing photos from Google Photos to your computer is a smart move. It stores your pictures on your computer so you can edit or save them. Furthermore, it’s helpful for local storage and editing on your computer. Here's how to do it.
Step 1: Open a web browser and go to Google Photos. Sign in to your Gmail account that is connected with Google Photos.

Step 2: Select the photos you want to transfer.
Step 3: Click the three dots (menu) and choose Download.
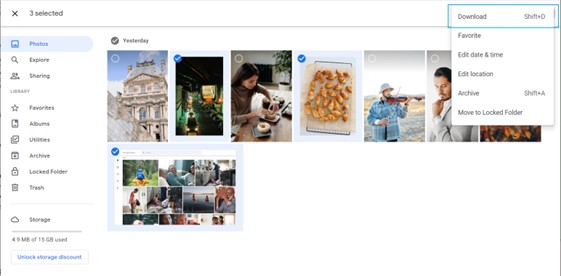
Step 4: The photos will be saved to your computer, typically in your "Downloads" folder or a location you specify during the download.
By following these steps, you can easily complete backups, offline sharing, and editing on your computer. Your memories are right there for convenient access, giving you more control over your photos.
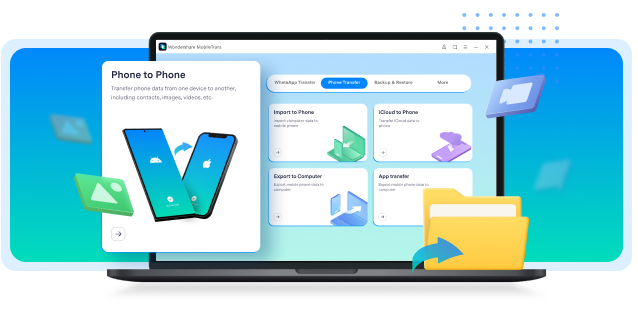
Transfer Between Devices with Ease: An Efficient Solution
One simple way to transfer data between devices is by using Wondershare MobileTrans. It’s a handy tool that makes transferring data between phones convenient. With its easy-to-use interface, you can move your contacts, messages, photos, and more from one phone to another without any hassle.
 4.5/5 Excellent
The Phone Transfer feature is a real lifesaver. It allows you to switch from your old phone to a new one seamlessly. Just connect both devices, select what you want to transfer, and click a button. Your data will be on your new phone in no time.
The Backup & Restore feature is equally fantastic. It helps you back up your data safely, so you never have to worry about losing important information. If you ever need to restore it, MobileTrans makes that process quick and painless.
That said, here’s how you can use MobileTrans Phone Transfer feature.
Step 1: First, download and install MobileTrans on your computer. After the installation, launch the software on your computer.
Step 2: Use USB cables to connect your devices. In the MobileTrans main menu, click on "Phone Transfer." On the next screen, pick your source device (iPhone/iPad/Android) and the destination device (Mac or PC) by clicking "Flip" if needed.
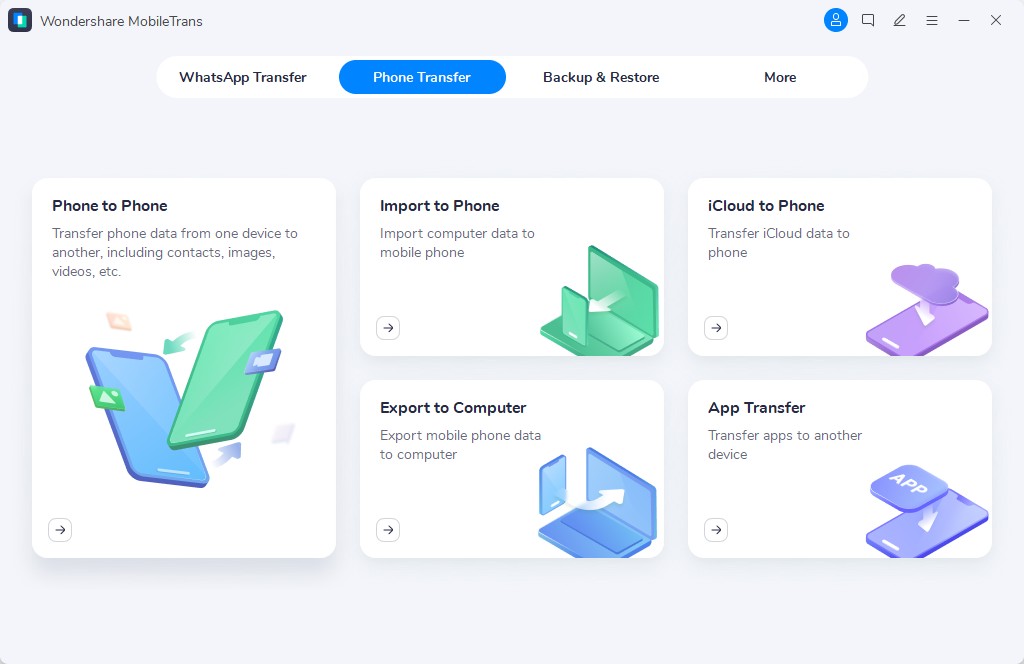
Step 3: Choose the "Photos" category from the list of data types to transfer. Then, click "Start" to begin the transfer. MobileTrans will start moving your photos from one device to another.
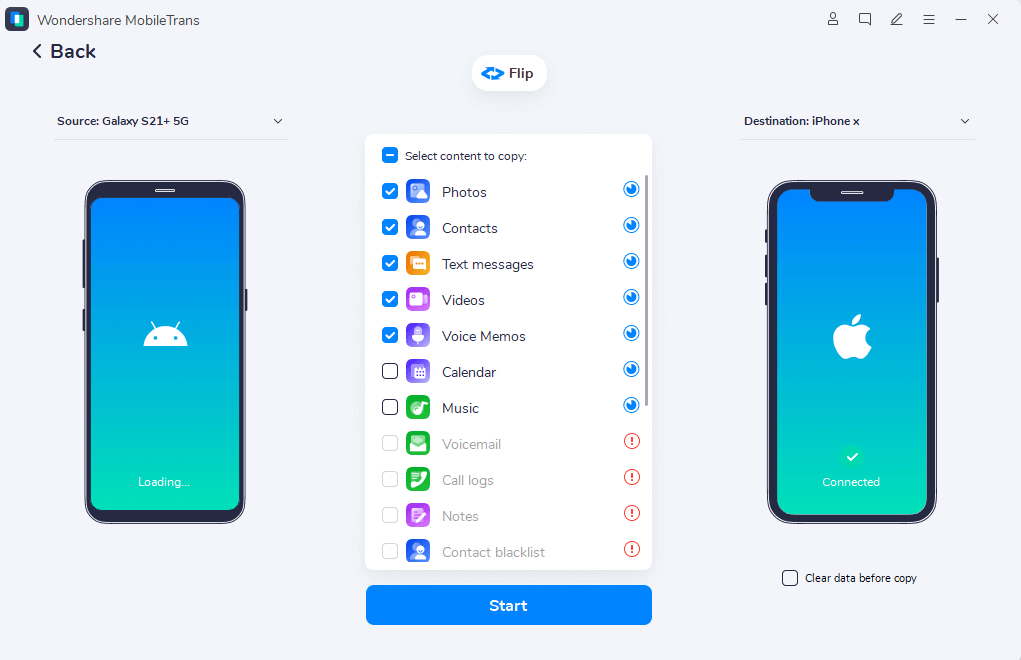
Step 4: Once it's done, you'll get a notification. Your photos are now safely shared and accessible on your Mac or PC.
In short, Wondershare MobileTrans is your go-to solution for managing your data. Its user-friendly design and efficient features make it a must-have for anyone changing phones or wanting to keep their data secure.
Final Verdict
You've just learned how to move Google Photos to your Android, iPhone, and computer's gallery. The steps are clear and straightforward. If you ever wondered about this, now you have the answer right here.
And when it comes to transferring data between devices, don't forget Wondershare MobileTrans. It's incredibly user-friendly. Phone Transfer effortlessly switches data between devices, while Backup & Restore secures it. MobileTrans is your go-to for hassle-free data management.


