How do you ensure your iPhone data stays safe and accessible? Accidental data loss, device damage, and iCloud storage capacity are common worries among users on Apple Support Communities, Quora, and Reddit. The need for trustworthy data backups is highlighted by situations like upgrading devices, troubleshooting software problems, or getting ready for fixes. For anyone looking to keep their information safe, backing up to a Mac is a crucial practice.
This piece focuses on guiding you through the steps involved to back up iPhone to Mac computer. The advantages of local backups, step-by-step instructions, and tips to avoid common pitfalls will all be covered in this article. This guide will keep your data safe and easy to access, whether you are new to this or just want to find faster ways to do things.
In this article
Part 1: Why should you back up your iPhone?
To ensure that your data remains safe and accessible, backing up your iPhone is essential for several reasons. Losing important information can be heartbreaking, given the growing reliance on smartphones for professional and personal use. A backup safeguards against accidental deletions, device malfunctions, or unexpected data loss, whether it's important contacts, photos, or documents.
One effective way to secure your information is to back up your iPhone to Mac. With this method, you can make a full copy of your device on your computer, which will keep your data safe. When you backup iPhone to Mac, you can easily restore your information if you ever need to reset your device or switch to a new one. In contrast to storing your data in the cloud, which may be susceptible to private security breaches, local backups ensure that your data remains private.
Regularly backing up also helps you keep your digital life organized. It ensures that all of your apps, settings, and personal data are preserved and enables seamless transfers when upgrading to a new iPhone. In the long run, adopting this habit will not only save you time but will also give you peace of mind, knowing that your important memories and information are safely stored. So, safeguard your digital assets right now through backup iPhone to Mac.
Part 2: How to back up your iPhone on a Mac?
Concerned about how to backup iPhone to Mac? To keep your data safe on your Mac, this guide will show you simple steps. Backing up locally ensures that your data remains secure and easily accessible, whether you're getting ready for a software update, switching devices, or just staying safe from data loss. Now, let's look at how to keep your iPhone data safe.
Method 1. Backup iPhone to Mac with Wondershare Mobiletrans
Wondershare MobileTrans
Back Up Your Data to Computer Easily
- • No data loss. No data leaks.
- • Support various data, including files, photos, videos, apps, contacts, etc.
- • Backup WhatsApp data with one click.
- • Compatible with thousands of device types acorss Android and iOS.

 4.5/5 Excellent
Wondershare MobileTrans is here to make backing up iPhone to Mac computer easier if you're the type of person who enjoys trying out new things. Transfer, back up, and restore your iPhone data without hassle with this robust tool. MobileTrans speeds up the whole process, so even first-time users can do it without any trouble. Check out the steps below to learn how to effortlessly back up from iPhone to Mac using MobileTrans.
Steps:
Step 1: Launch MobileTrans and Connect Your iPhone
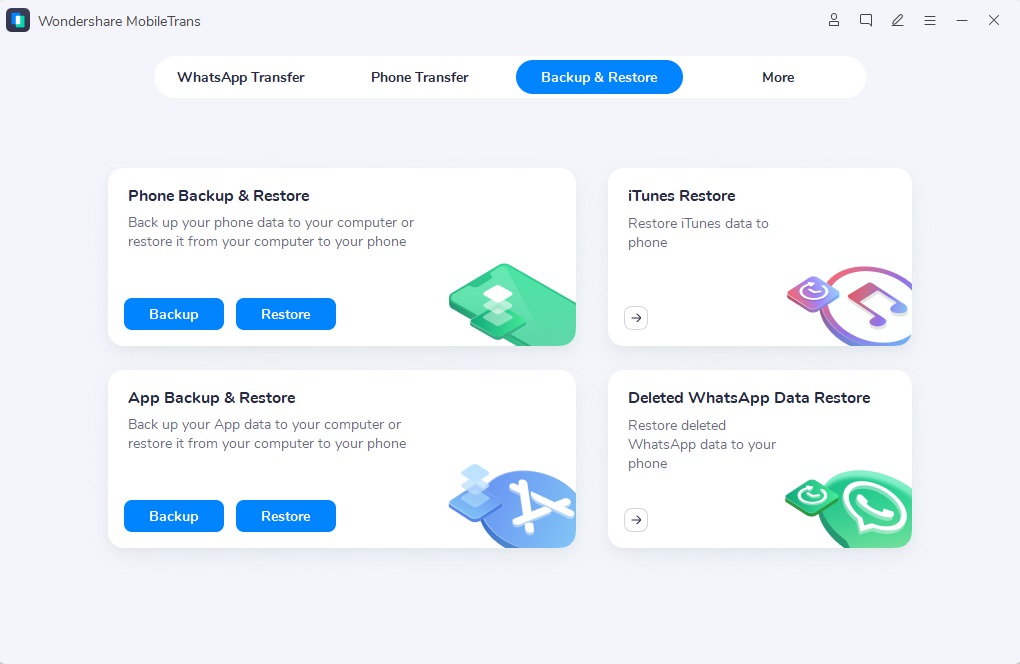
Download and open MobileTrans on your Mac. Use a USB cable to connect your iPhone to the Mac. Select the "Backup & Restore" option from the menu.
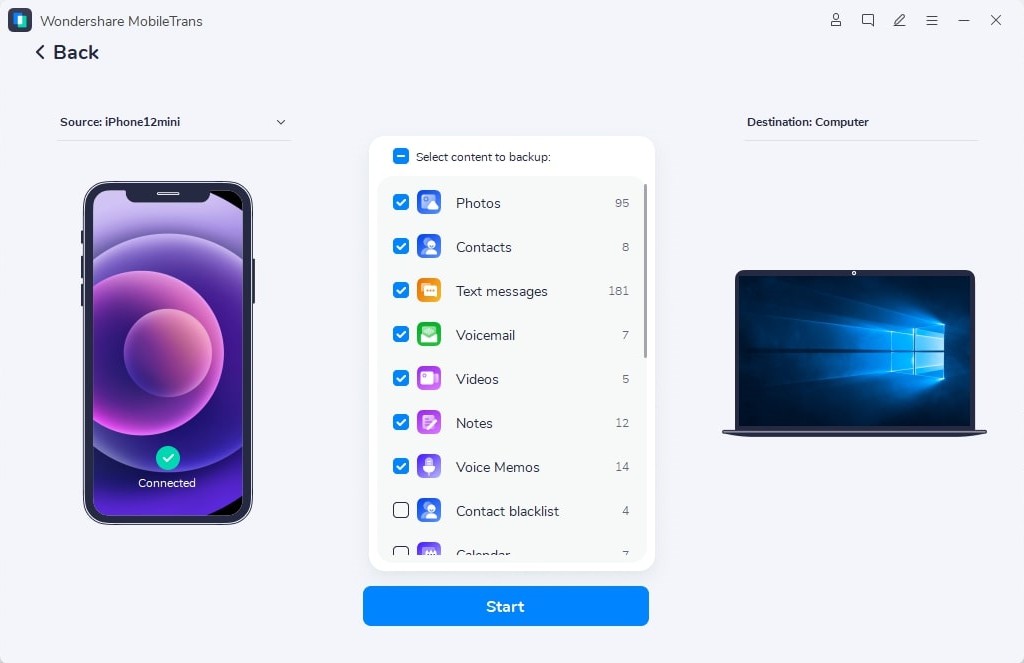
Step 2: Choose Files to Back Up
Browse the data available on your iPhone. Select the files you want to back up to your Mac. Once done, click the "Start" button to begin the process.
Step 3: Complete the Backup Process
MobileTrans will now transfer the selected data from your iPhone to your Mac. Ensure the devices stay connected until the backup finishes.
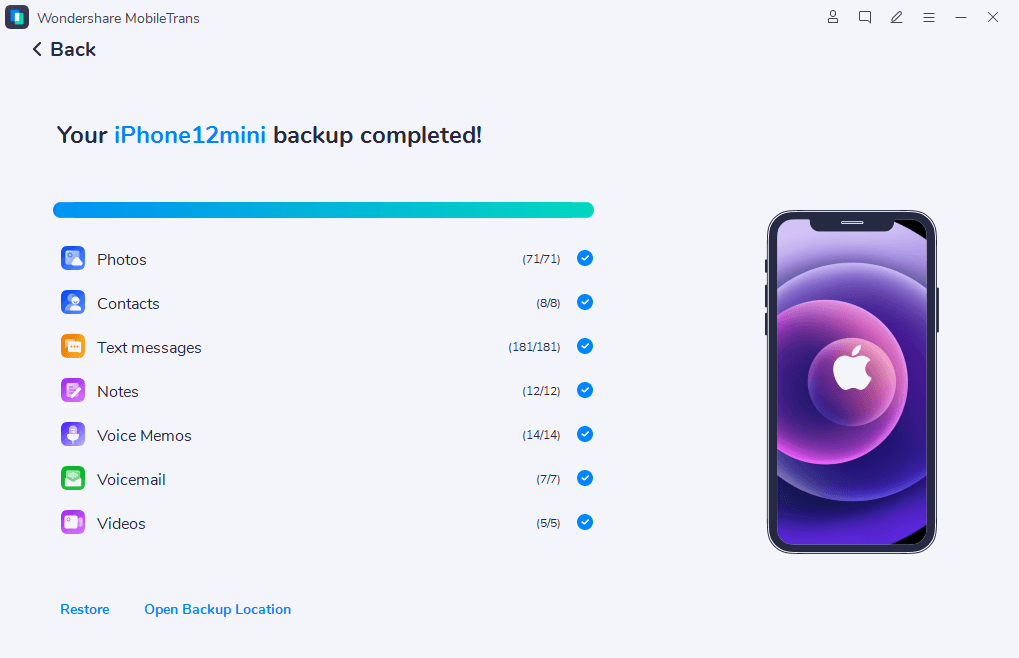
This simple 3-step approach makes backing up iPhone to Mac quick and reliable every time.
Method 2. Backup iPhone to Mac with Finder
With the release of macOS Catalina, Apple retired iTunes, leaving Mac users to wonder how to back up iPhone to MacBook. While Windows users can still use iTunes, Finder now handles the backup process on newer macOS versions. This built-in tool makes managing iPhone backups easy. Follow our guide below to learn where to find your iPhone backup on Mac and how to complete the process using Finder efficiently.
Steps:
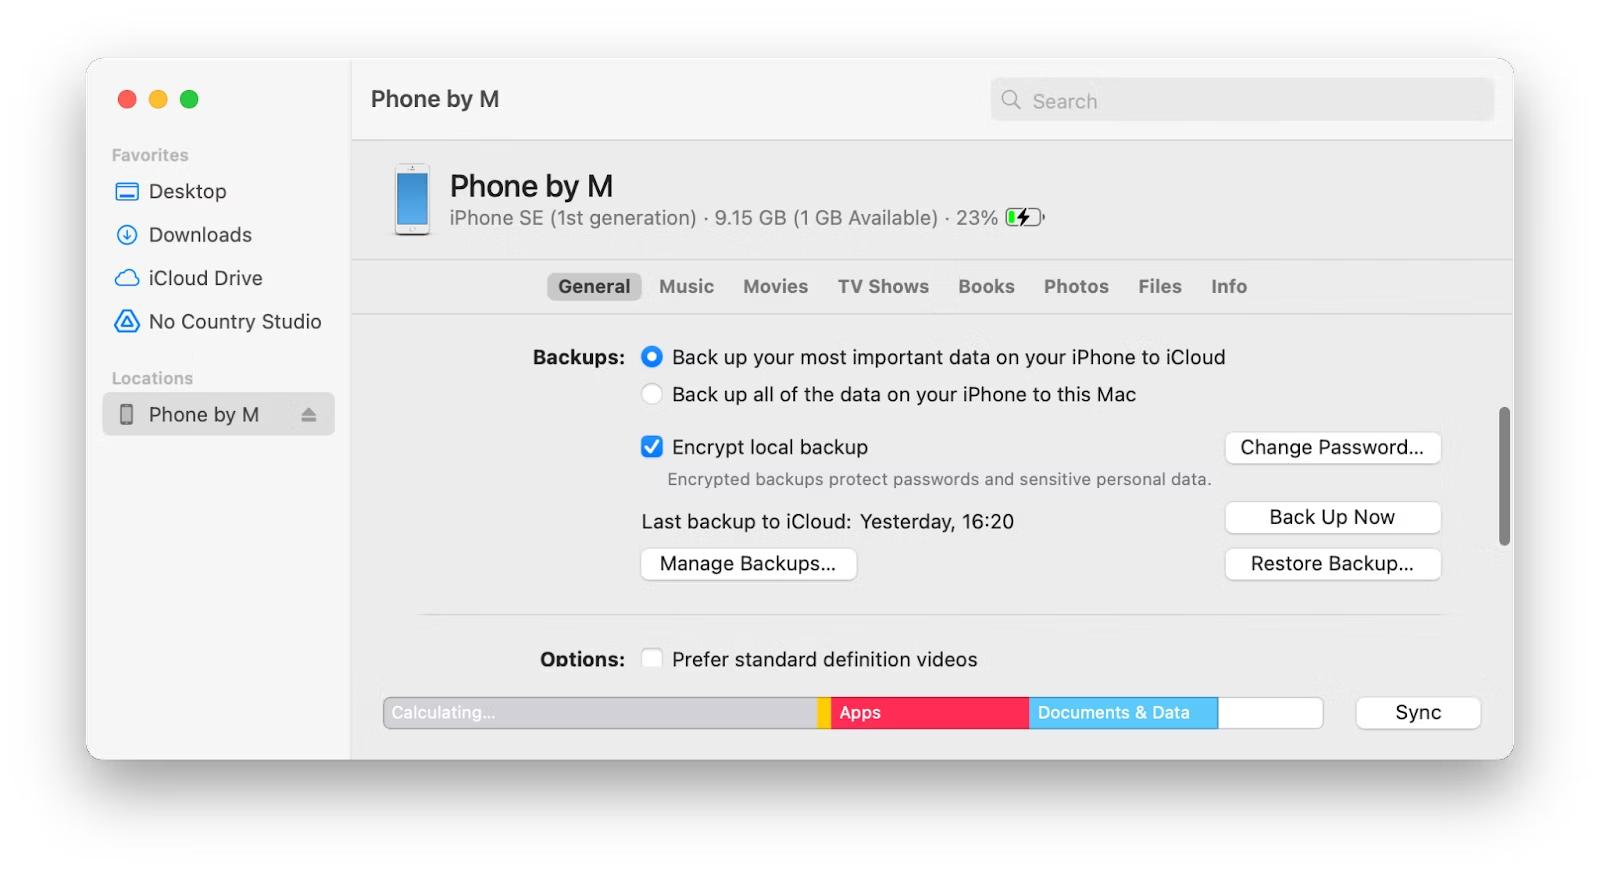
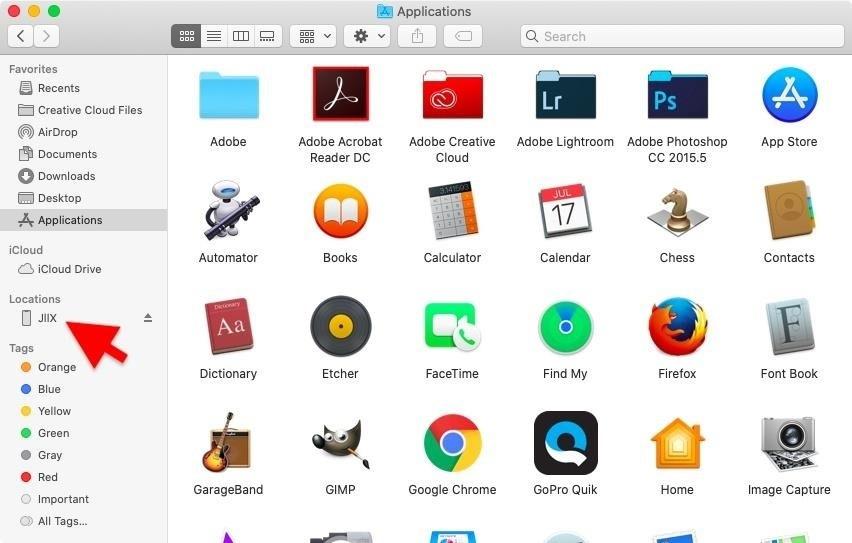
- Use a USB or USB-C cable to connect your iPhone to your MacBook, iMac, or Mac Pro. Alternatively, you can use Wi-Fi to connect. Your iPhone's name will appear in the Finder sidebar under "Locations." If prompted, click "Pair" on both devices and enter the passcode to establish the connection.
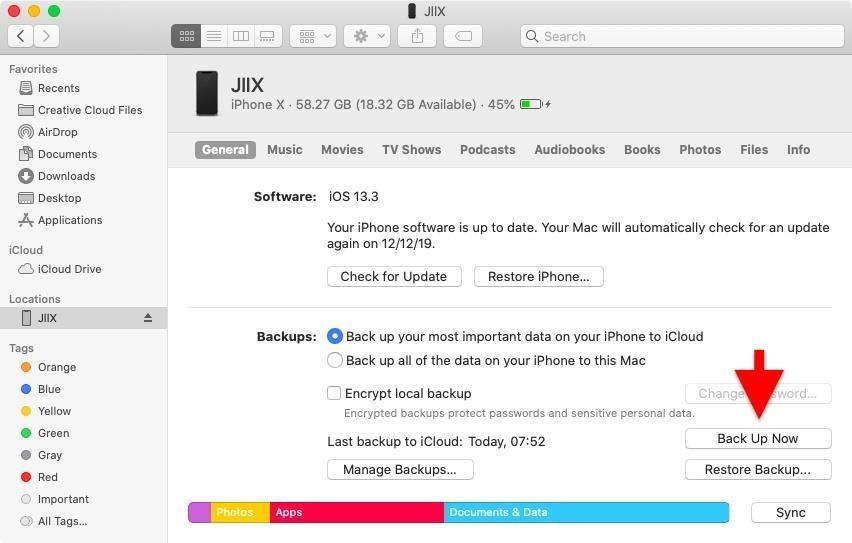
- In the Finder window, you'll see the summary screen with your iPhone's information. Under the "Backups" section, select "Back up all of the information on your iPhone to this Mac" for a full backup.
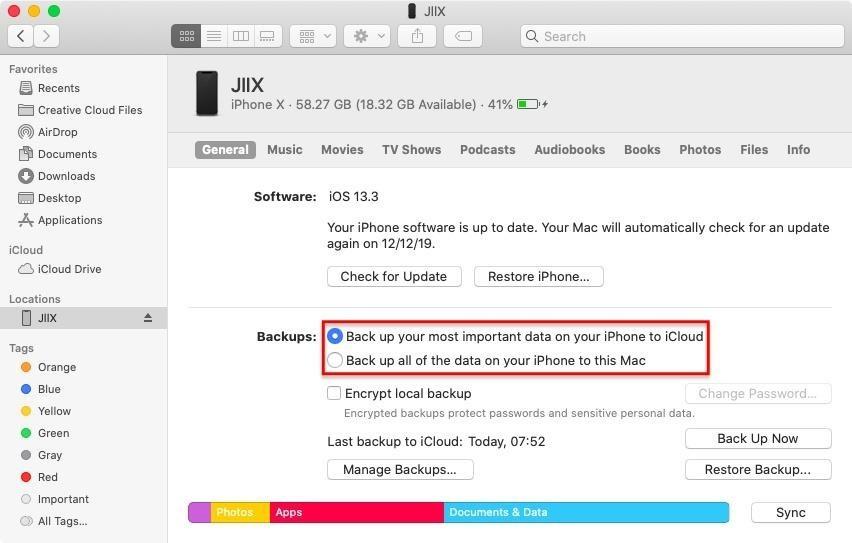
- If you want to encrypt your backup, check the "Encrypt local backup" box and enter a password. This step is optional but adds extra security to your data.
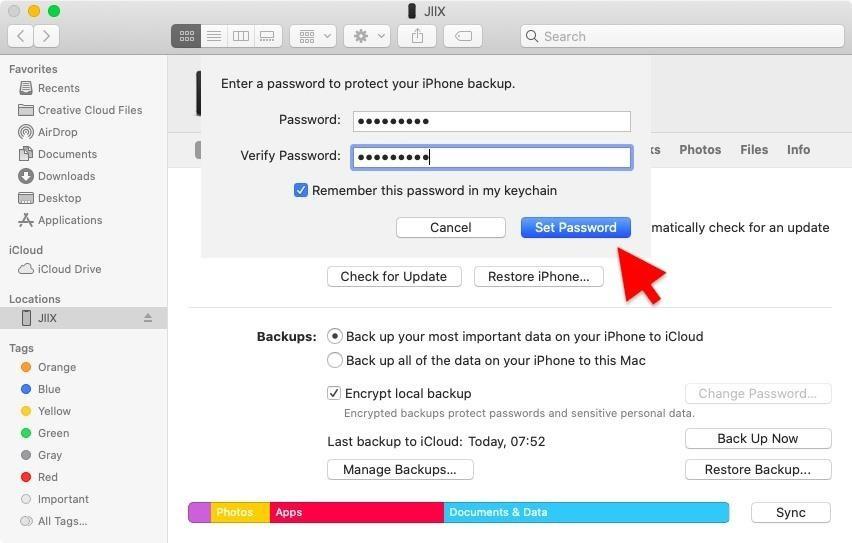
- Click the "Back up now" button to start the backup process. If you choose to encrypt the backup, enter the password when prompted. Your data will be safely backed up to your Mac.
Method 3. Backup iPhone with iTunes
Starting with macOS Catalina, Apple split iTunes into Music, TV, and podcast apps. However, if you're using macOS Mojave or earlier, iTunes remains available and provides a simple way to back up your iPhone. Wondering where are iPhone backups stored on a Mac? Follow the steps below to securely back up your data using iTunes and learn how to access the backup files on your Mac for easy management and restoration.
Steps:
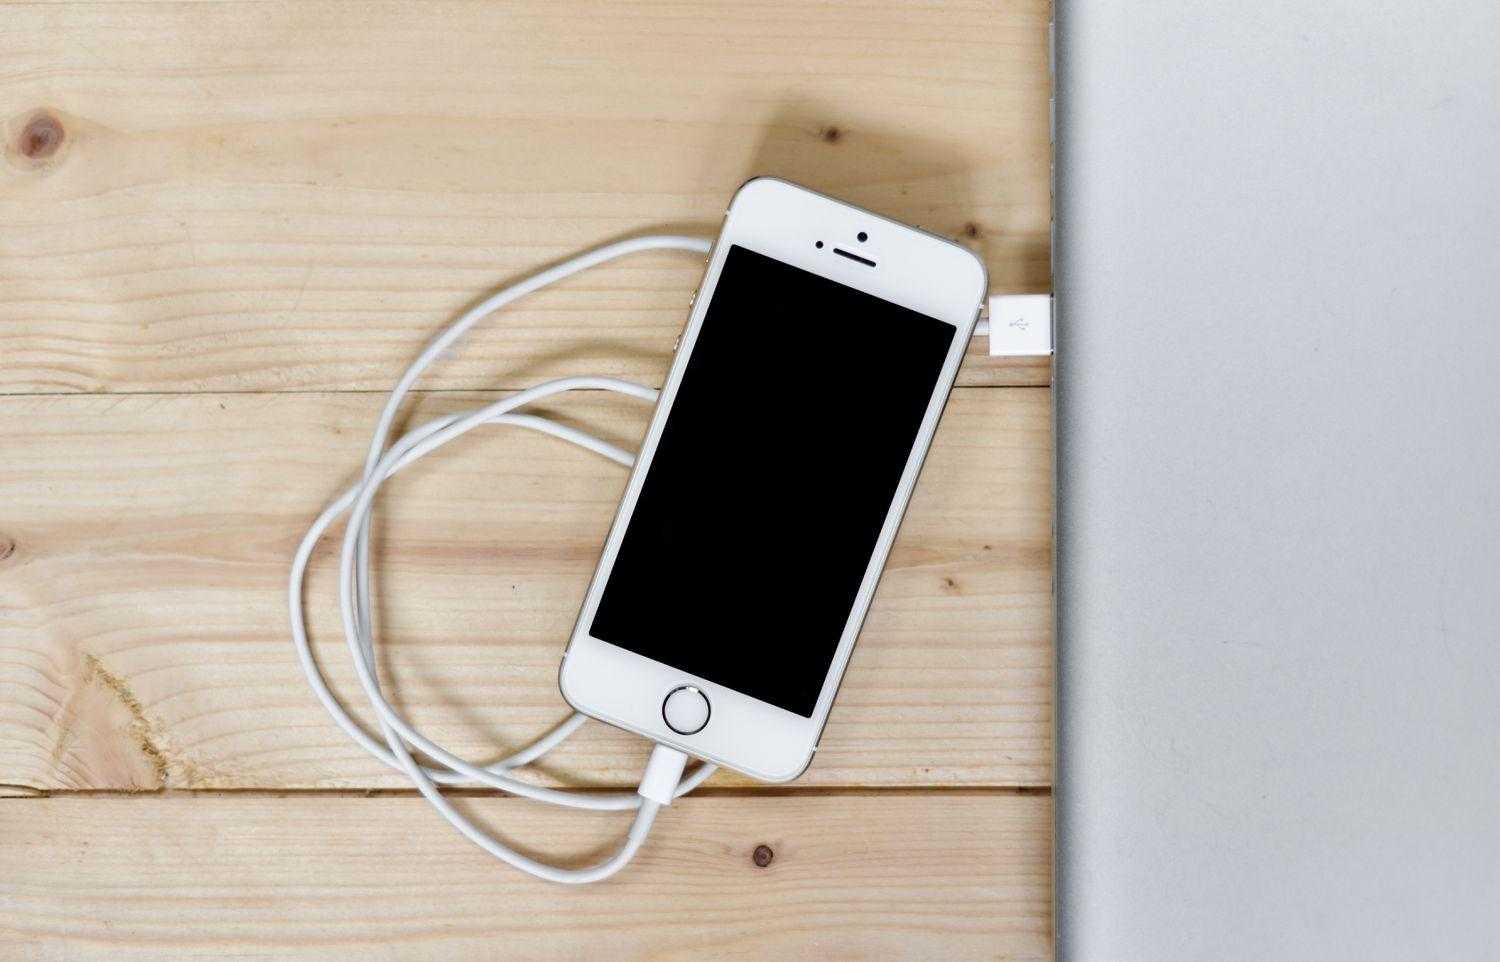
- Use a USB cable to connect your iPhone to your Mac. If prompted, enter your device passcode or select "Trust This Computer" on both devices.
- Launch iTunes on your Mac. Make sure your iPhone is detected; its name should appear in the iTunes window.
- In iTunes, click on your iPhone's icon near the top left. This will take you to the summary screen showing your device's details.
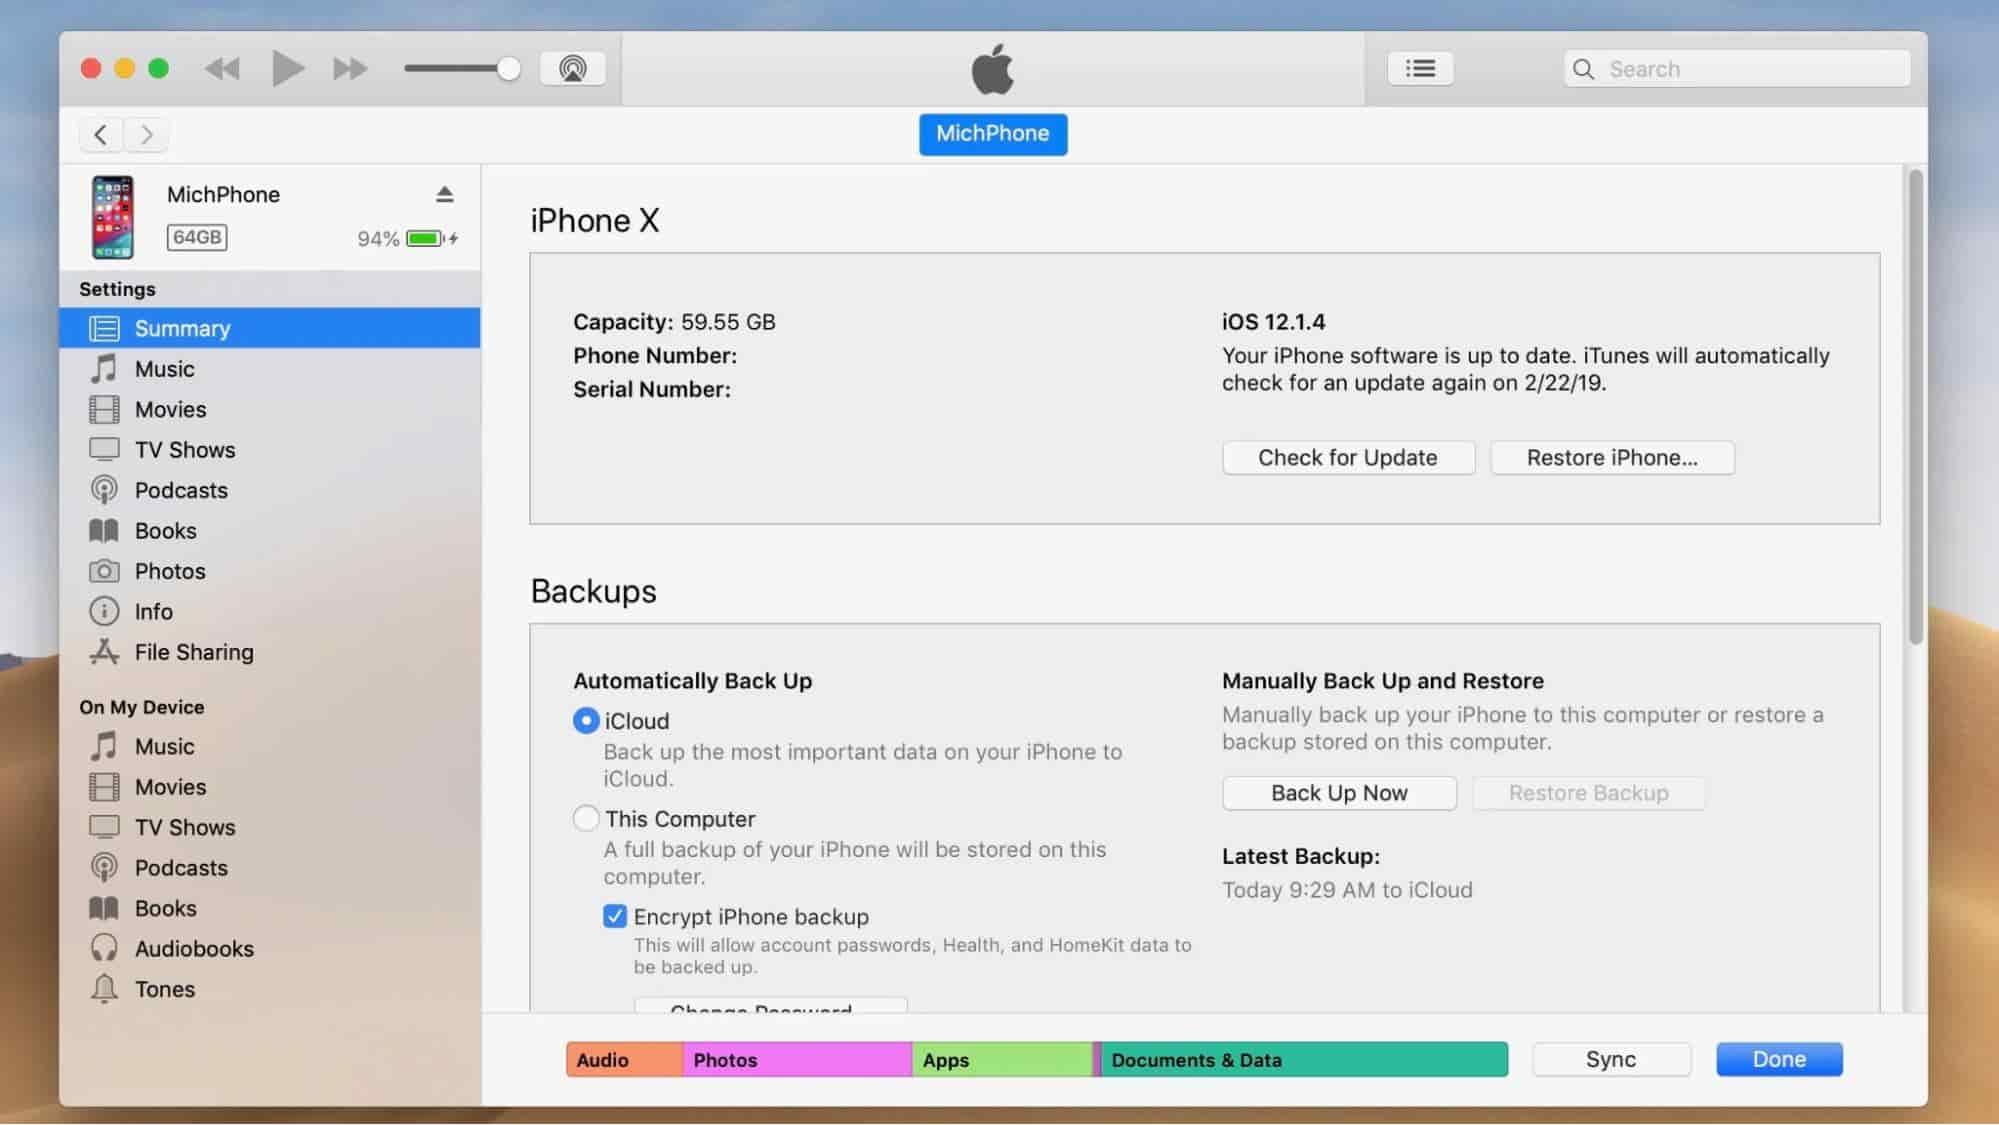
- On the summary screen, click the "Back Up Now" button to start the backup process. Wait for the backup to complete, and your data will be safely stored on your Mac.
Method 4. Backup with iCloud
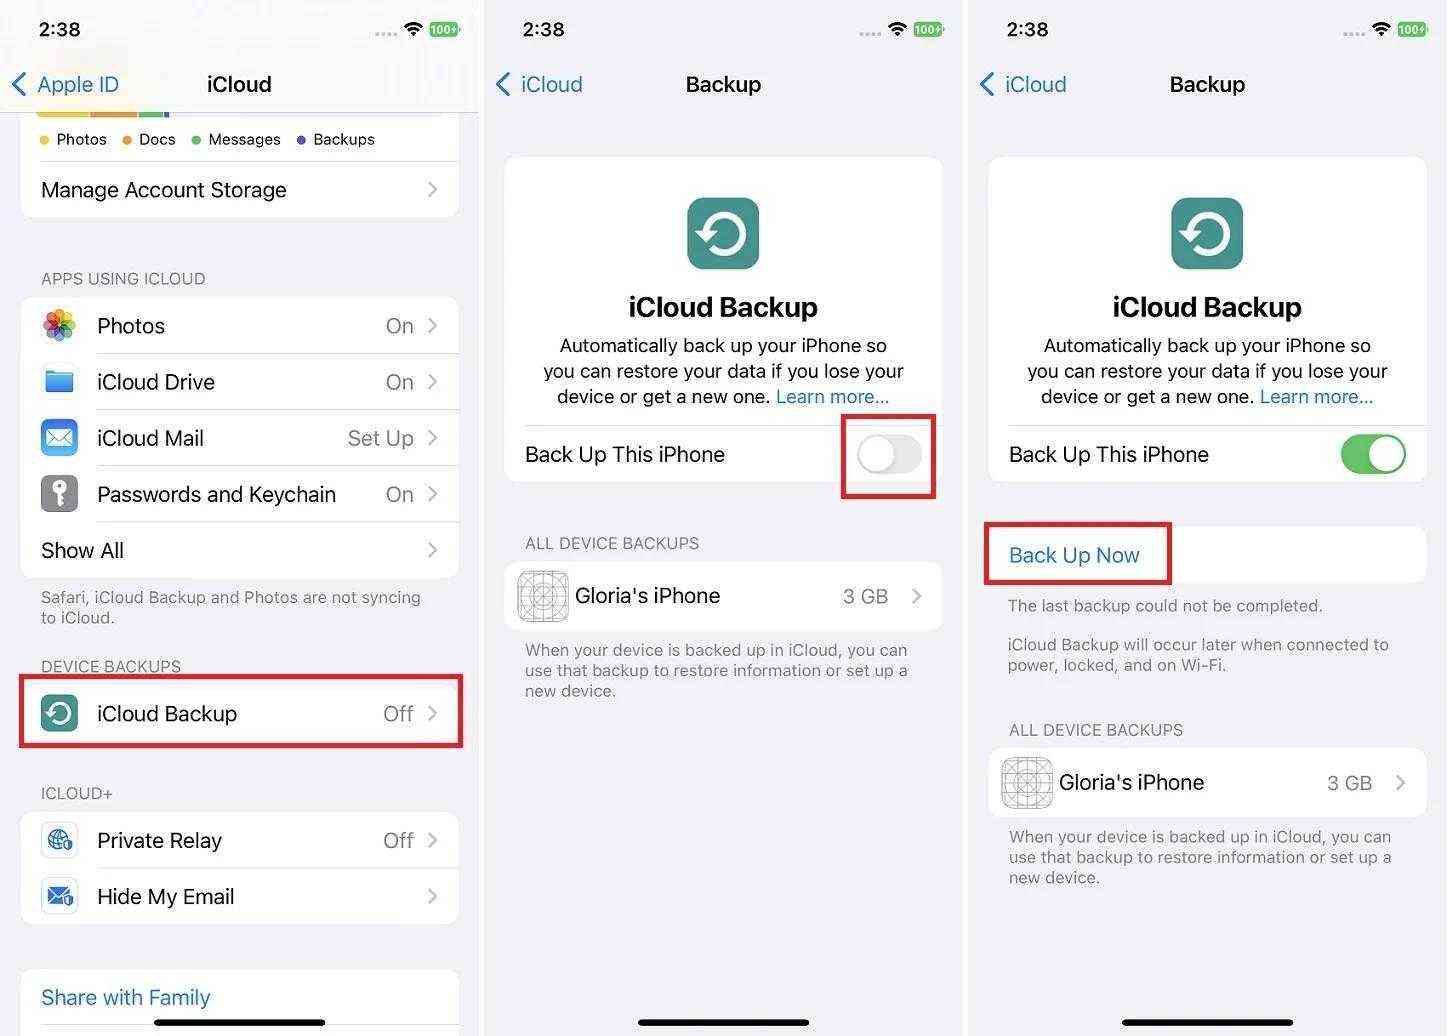
Make sure your MacBook, Mac, or MacBook Air is connected to Wi-Fi before you use iCloud to back up your iPhone to your Mac. iCloud offers a wireless way to store your data, keeping it safe and accessible across devices. To set up an iCloud backup account and sync your iPhone's important information, follow the instructions below.
Steps:
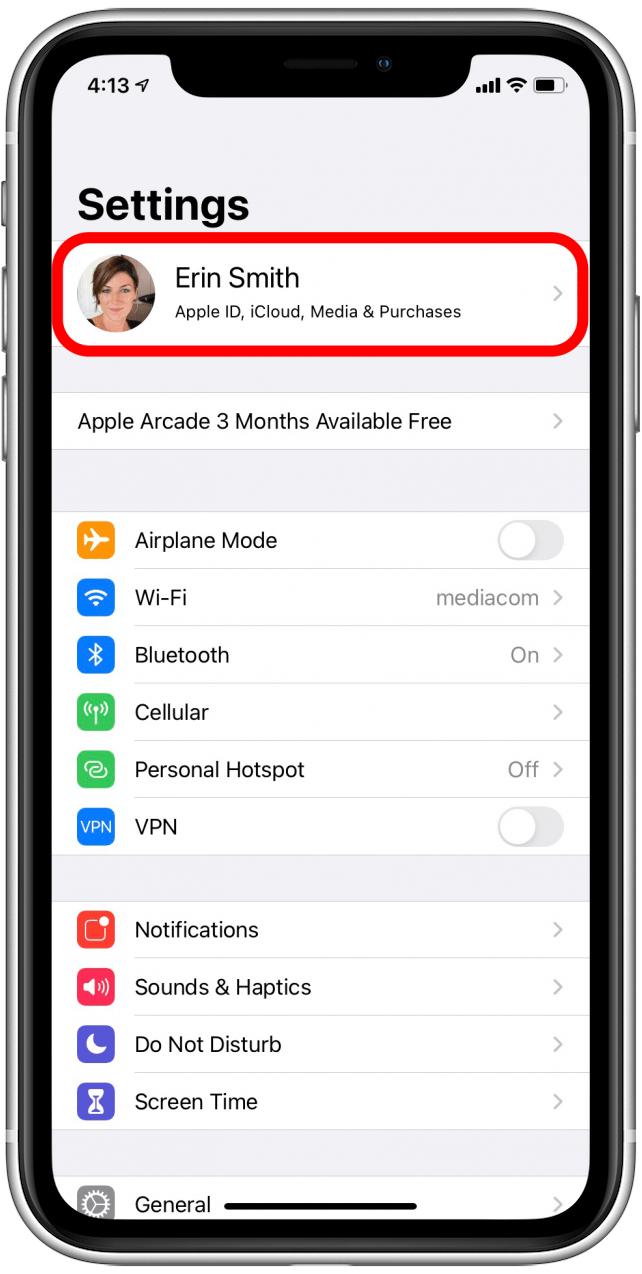
- Open Settings on your iPhone, tap your name and select iCloud.
- Tap Backup and toggle iCloud Backup to On. This ensures automatic backups when your phone is charging, locked, and connected to Wi-Fi.
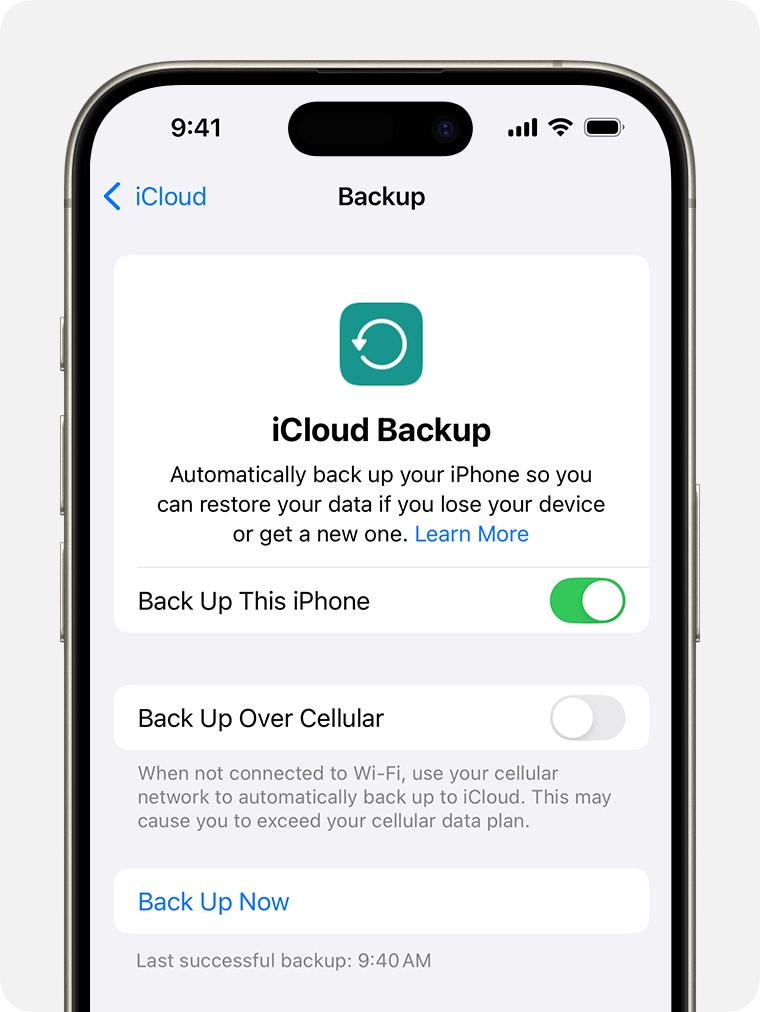
- On the same page, tap Back Up Now and stay connected to Wi-Fi until the process completes. You can check the time of your last successful backup right below the Back Up Now button.
Method 5. Back up locally on your Mac
If you prefer to keep your backups close at hand, backing up your iPhone to your Mac is a great option. With macOS 10.15 (Catalina) or later, you can easily use Finder to manage this process. In the following guide, we'll show you how to efficiently backup iPhone to Mac, ensuring your data remains secure and easily accessible.
Steps:
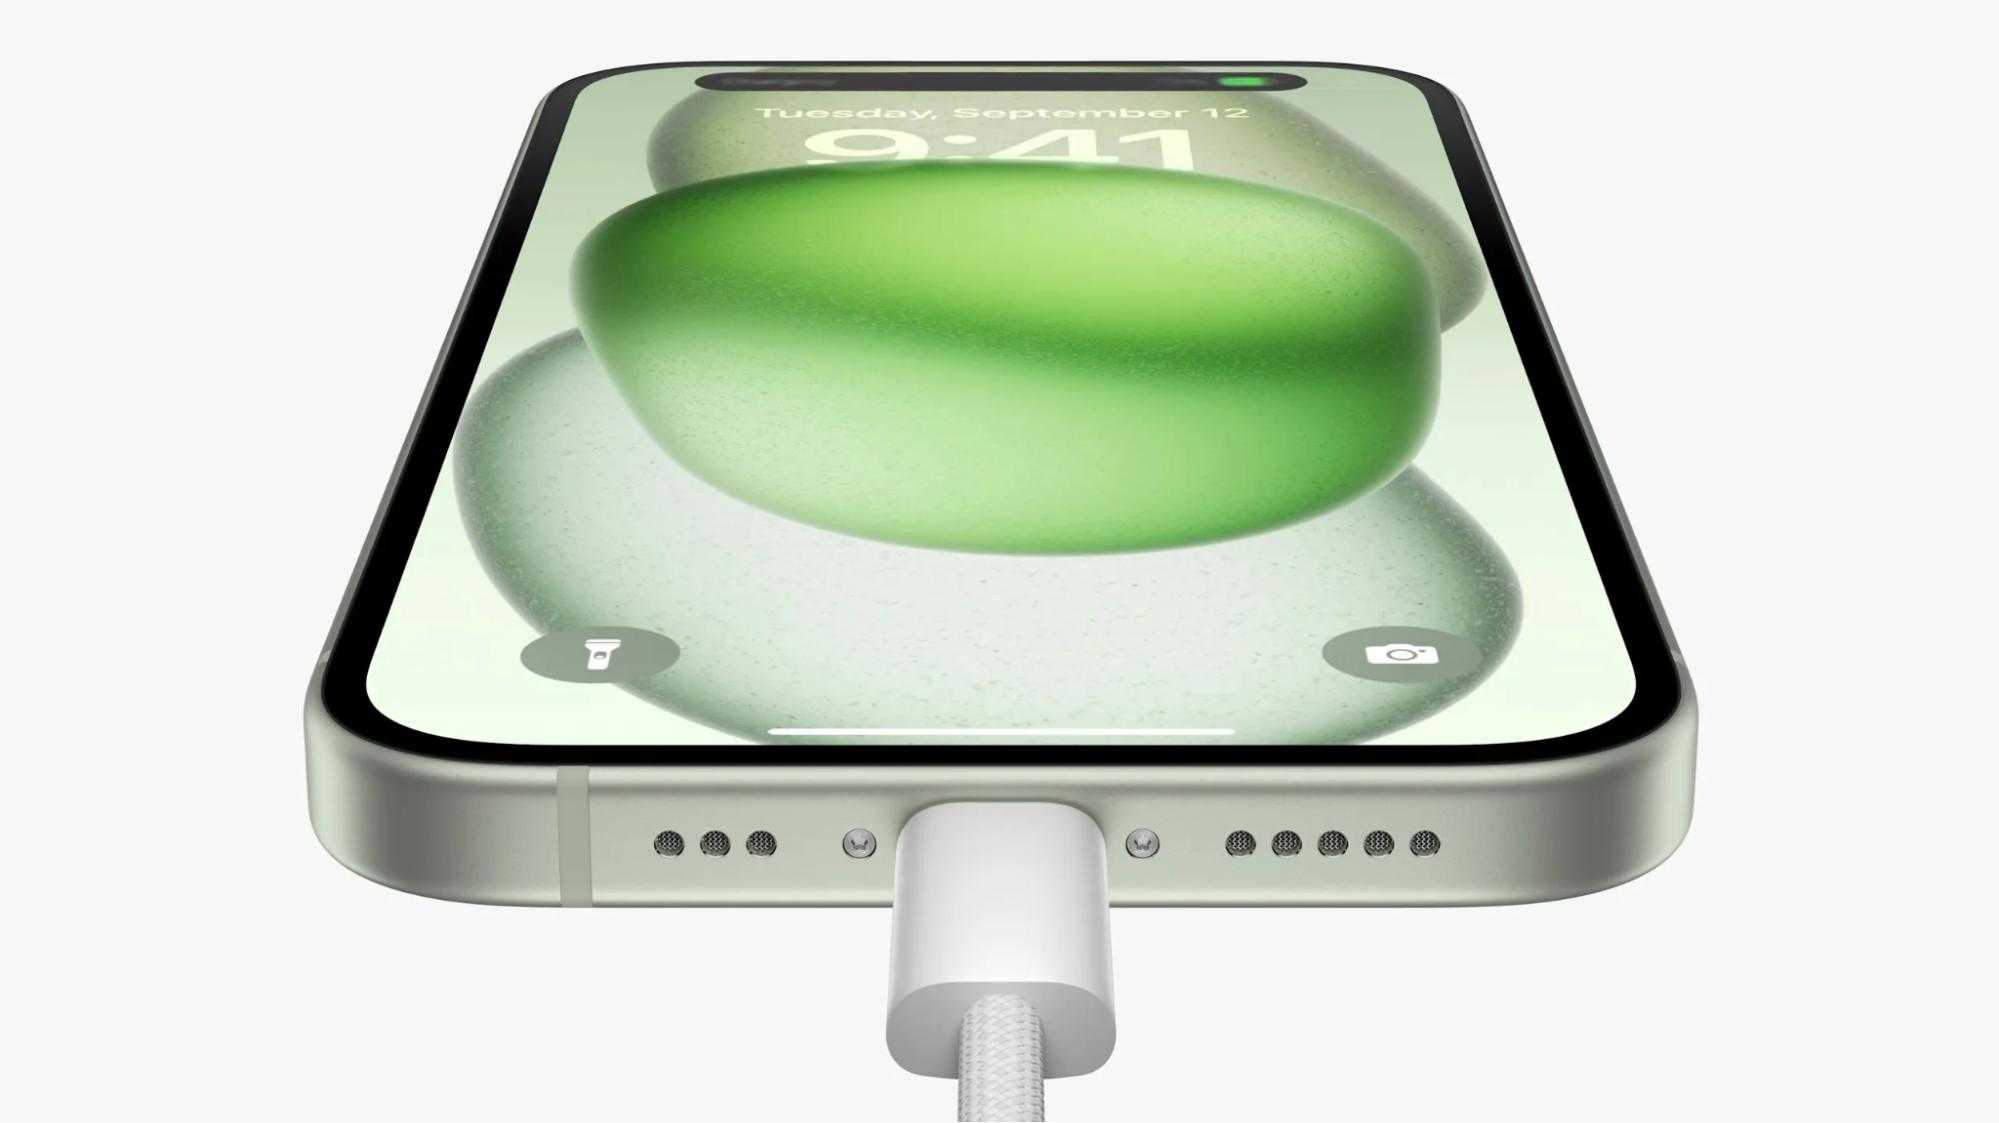
- Use a USB cable to connect your iPhone to your Mac or MacBook. Ensure that both devices are powered on and ready.
- In the Finder sidebar, locate and select your iPhone. This will open the device management options in the Finder window.
- At the top of the Finder window, click on the "General" tab. This will display the summary information for your iPhone.
- Under the "Backups" section, select "Back up all of the data on your iPhone to this Mac." If you wish to encrypt your backup, check the box for "Encrypt local backup" and enter a password.
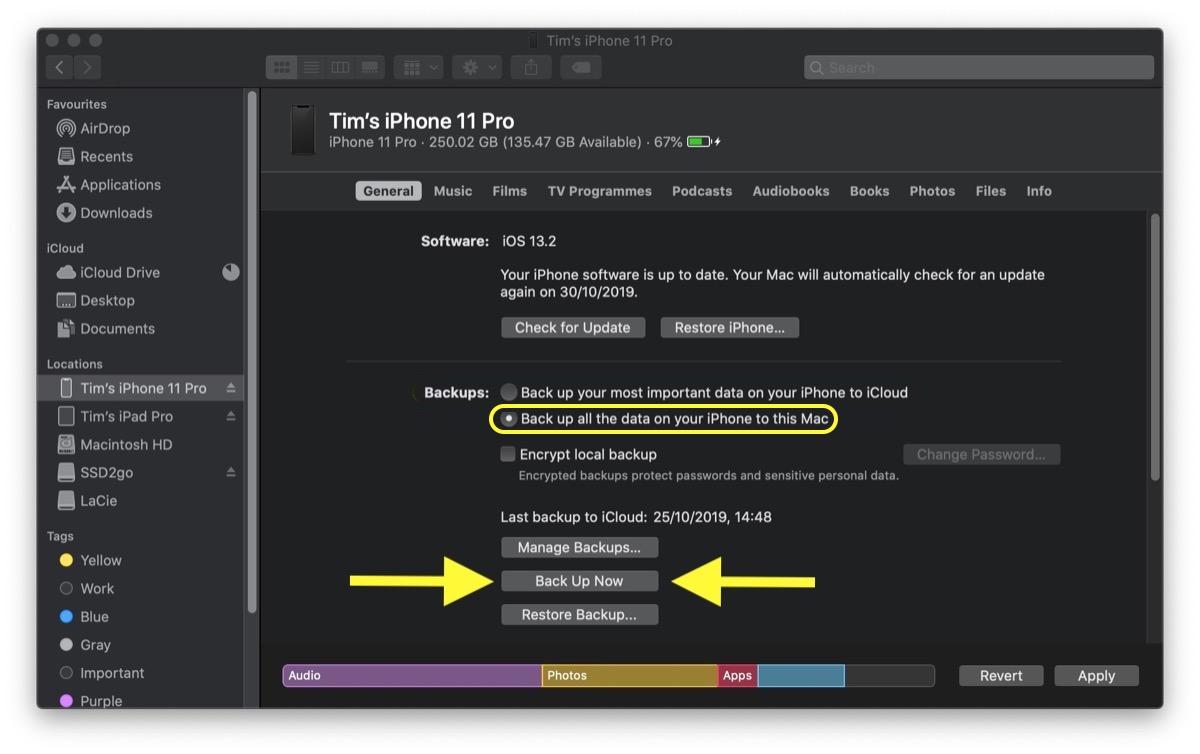
- Finally, click the "Back Up Now" button to initiate the backup. Wait for the process to complete, and your data will be securely stored on your Mac.
Method 6. Back up to with AirDrop
Transferring photos from your iPhone to your Mac using AirDrop is a quick and effortless way to create backups. Suppose you're wondering how to backup iPhone to Mac with ease; AirDrop provides a convenient solution. Follow these simple steps to ensure a seamless transfer of your cherished memories, keeping your photos secure and accessible on your Mac.
Steps:
- Make sure your iPhone supports AirDrop, which requires iOS 7 or later. Check that your Mac is also compatible with AirDrop.
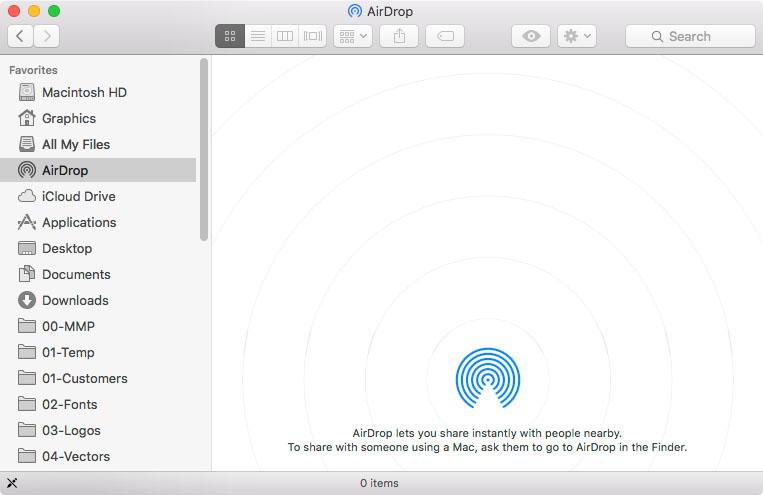
- On your iPhone, swipe down from the top-right corner (or up from the bottom, depending on your model) to access the Control Center. Tap the AirDrop icon and choose "Contacts Only" or "Everyone" to enable visibility.
- Open the Photos app on your iPhone, navigate to the album with the photos you want to back up, tap "Select," and choose the desired images.
- Tap the share icon (the square with an arrow), select AirDrop, and choose your Mac from the nearby devices list to start the transfer.
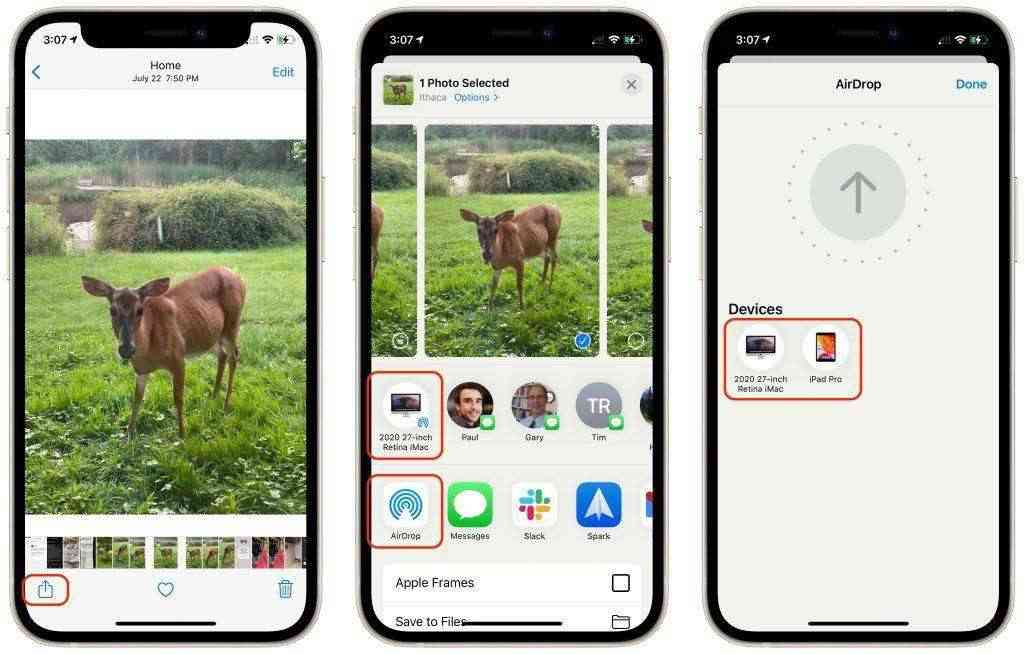
- On your Mac, accept the AirDrop notification to receive the photos. Once the transfer is complete, check your Photos app to ensure the images are now available.
Part 3: Where are iPhone backups stored on Mac?
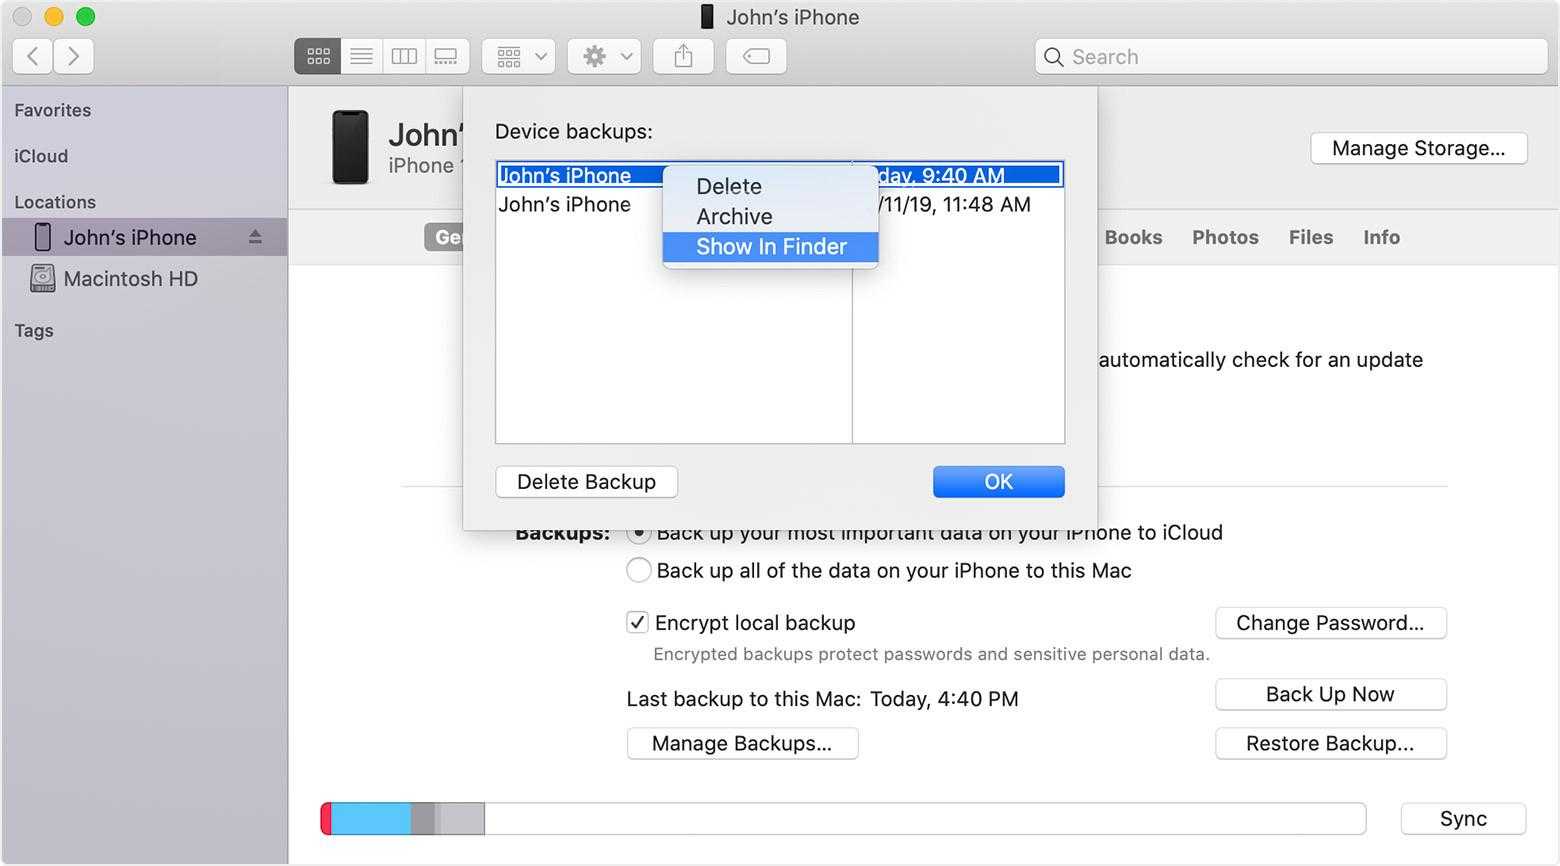
Where are iPhone backups stored on a Mac? When backing up iPhone Mac computer using Finder or iTunes, the backup files are saved in a specific folder that varies by operating system. You can copy these files, but moving or editing them might result in complications. Find out where on your Mac you can find backups of your iPhone by reading on.
Steps:
- In the menu bar at the top of your screen, click on "Go," then select "Go to Folder."
- Type the following path into the dialog box: ~/Library/Application Support/MobileSync/Backup/ and press Return.
- You will be directed to the Backup folder, where you can view your iPhone backups stored on your Mac.
Part 4: How do you know if your iPhone is backed up?
To make sure your data is safe, you need to know if your iPhone is backed up properly. If you're curious about how to back up iPhone to MacBook, there are several ways to verify your backup status. How to check if your iPhone is properly backed up is as follows:
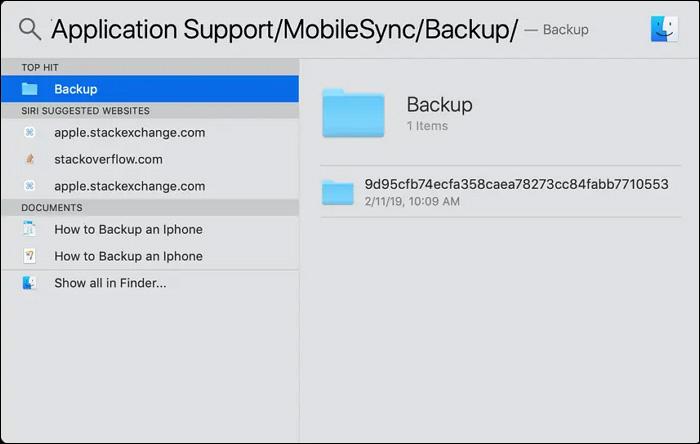
Step 1: Check the Backup Status in Finder (macOS Catalina or later)
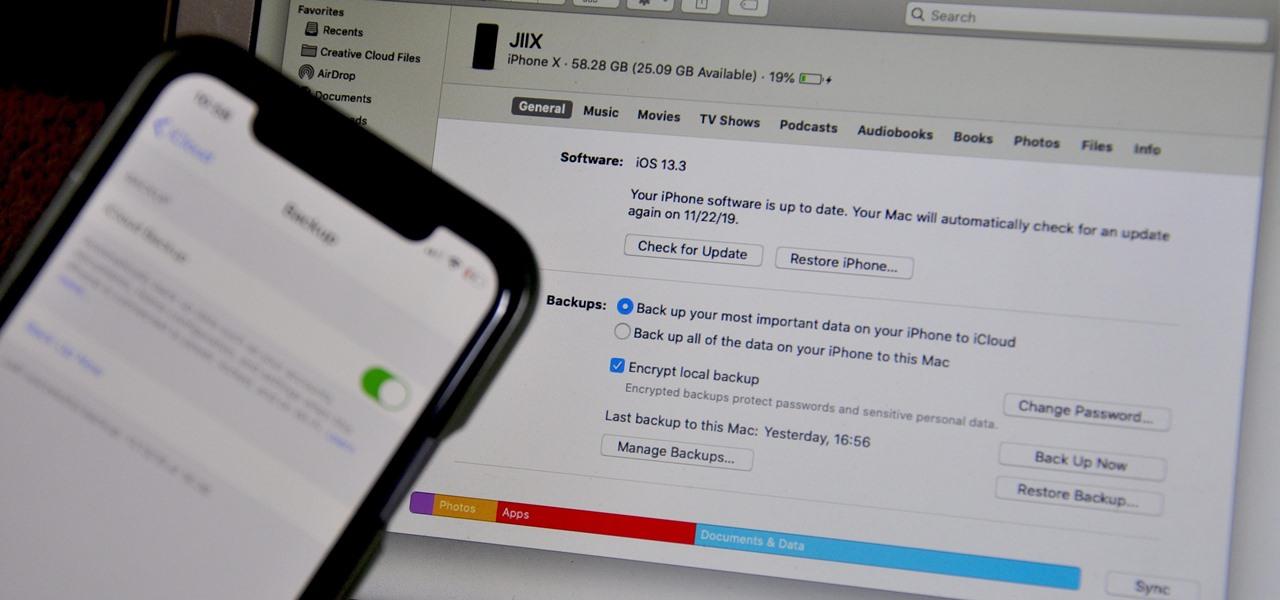
Use a USB cable to connect your iPhone to your MacBook. Select your device from the sidebar of Finder after opening it. Find the "Backups" area under the "General" tab. It will show you the date and time of the last backup, which lets you know if your iPhone is backed up.
Step 2: Check the Backup Status in iTunes (macOS Mojave or earlier)
Open iTunes and connect your iPhone if you have MacOS Mojave or are older. In the upper left area, click on the device icon. The most recent backup date and time can be seen in the "Latest Backup" part of the "Summary" tab.
Step 3: Use Settings on iPhone
Go to Settings > [Your Name] > iCloud > iCloud Backup on your iPhone. This page shows you if iCloud Backup is on and the date of the last good backup. This way lets you see both your iCloud and local backups.
Conclusion
In conclusion, backing up your iPhone to your Mac is a crucial step in keeping your data safe. Local backups can be quickly made using Finder or iTunes, ensuring the safety of your crucial information. You can protect your data better by checking your backups often, encrypting them, and picking the right backup way. Ultimately, adopting a proactive approach to backing up your iPhone to a Mac computer will help you maintain access to your vital files and memories without worry.
FAQ
-
Why can't I back up my iPhone to my Mac?
If you can't back up your iPhone to your Mac, ensure your software is up to date, check cable connections, and verify that your iPhone is trusted. -
Does backing up an iPhone to Mac save photos?
Yes, backing up your iPhone to Mac saves photos stored on your device. However, if you use iCloud Photos, your photos are not included in the local backup. -
How do you back up your iPhone to your Mac?
To back up your iPhone to Mac, connect your device via USB, open Finder (or iTunes for older macOS), select your iPhone, and click "Back Up Now." -
How long does it take to back up an iPhone to Mac?
The time it takes to back up an iPhone to Mac varies based on data size and computer speed, typically ranging from a few minutes to over an hour.


