


 TL;DR:
Organizing your iPhone photos to free up storage and improve searchability is best achieved by utilizing the native Photos app's sorting features, syncing across Apple devices via iCloud, or offloading files to a PC using Wondershare MobileTrans.
● Deleting images from your iPhone automatically removes them from iCloud storage across all synced Apple devices unless you manually toggle off iCloud Photos in your device settings before deleting.
● Transferring photos to a computer via Wondershare MobileTrans serves as an offline backup alternative that does not require a Wi-Fi or mobile data connection to process files.
● Within the native Photos app, you can free up space by managing recurring images in the Utilities folder and accelerate search times by assigning custom names to the People and Places tags.
Ask AI for a summary
 ChatGPT
 Perplexity
 Gemini
 Claude
 Grok
Grok
When your phone is packed with thousands of photos and videos, it is not an easy job to find a particular picture.
Now, if you have a lot of high-resolution images on your iPhone or you are running out of storage space, this task becomes every bit more tedious because pictures won’t load on time due to lack of storage. So, you have to pause for a few seconds after every swipe.
This daunting exercise could have been avoided if only you organized your iPhone photos. Don’t know how? Luckily, this guide reveals several easy methods to organize your iPhone photo library in no time.
You’ll also discover expert tips to organize and find iPhone photos using intelligent search features.
In this article
Why Should You Organize Photos on iPhone?
Organizing your iPhone photos has many benefits. First, you can easily find the pictures for which you are looking. When your iPhone photos are organized into folders or albums, it becomes easier and faster to find select pictures among thousands of images.
In addition, after you remove duplicate photos, it also frees up more phone storage to save more data and improve the system speed. Another benefit is that a clear organization of your photos will prevent accidental data loss, which can save you a lot of trouble.
Finally, organizing photos will make sure your photos are synced to the cloud so that you can locate them wherever you want.
Therefore, it is a good habit to frequently organize your photos on the iPhone.
Where to Organize iPhone Photos Easily
There are several places where you can organize your iPhone photos easily. Most of them are already embedded in your iPhone’s operating system.
Organize iPhone Pictures using the Photos App
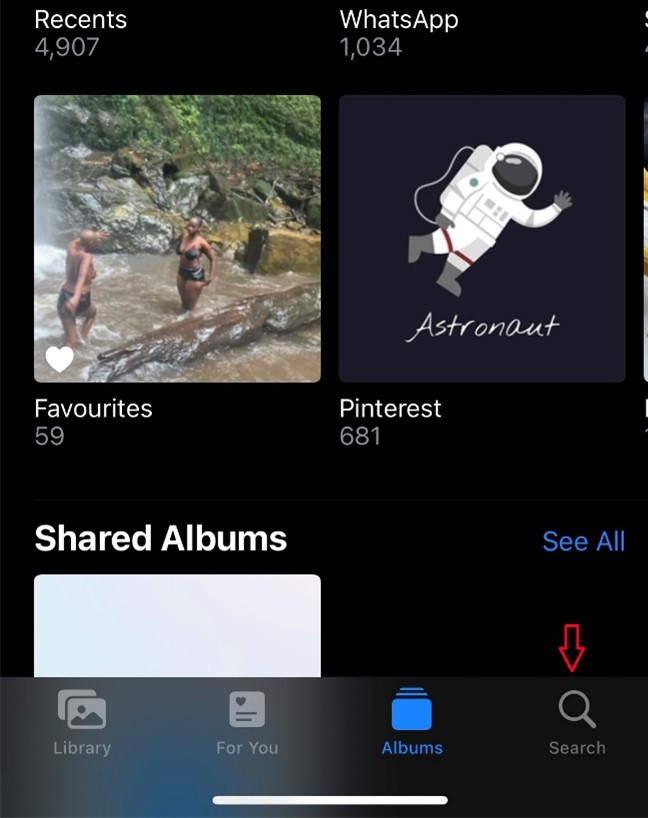
The Photos app is the default photo viewing and editing app on your iPhone. It is a great tool designed by Apple for users to organize images.

Through the Photos App, you can sort photos and memories according to dates and albums. So, you have your recent images, favorites, hidden, and even recently deleted images in case you want to restore a picture you accidentally deleted.
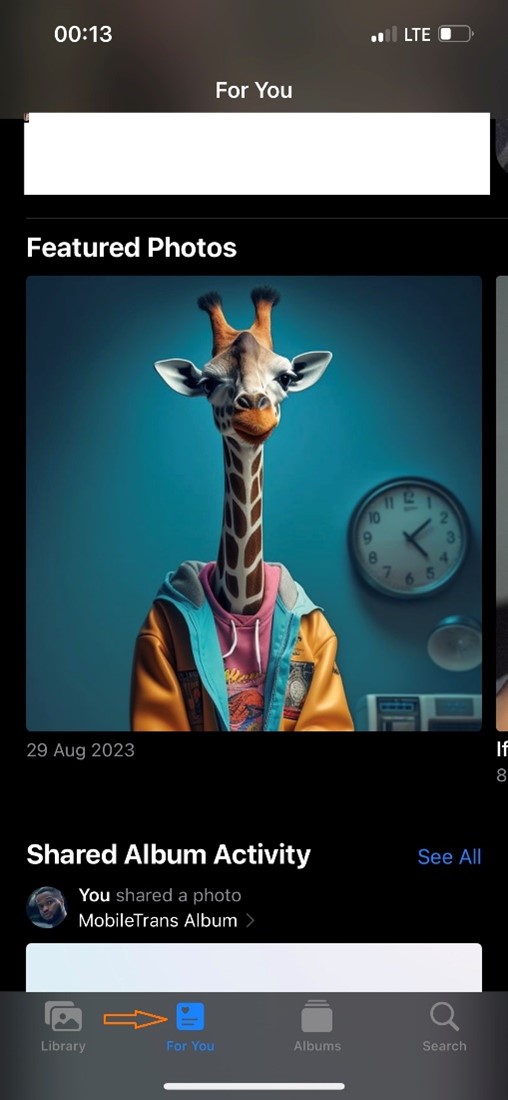
You can also enjoy a curated timeline of your images according to years, months, and days. The For You option allows you to view memories and photos in a personalized feed.
You can create new and shared albums using the Photos App. This makes it easier to share images and collaborate on pictures with your workmates.
The best feature of the Photos App is the intelligent search feature that you can use to find select images, people, and events within seconds. iPhone Photos App also gives you some editing features, so you can crop, rotate, resize, and adjust the lighting and contrast of your photos.
Back Up and Organize Photos on a PC
You can also back up and organize iPhone Photos on your PC to enjoy a safer user-end experience. It is better to save and organize iPhone photos on a PC because you will have more storage to work with.
Unlike your iPhone storage which can run out quickly, computers usually have more storage space, and you can expand the storage capacity using an external hard drive, allowing you to store as many high-resolution images and videos as you want.
You don’t need Wi-Fi or Mobile data for organizing iPhone photos via PC, unlike the iPhone Photos app which needs a Wi-Fi connection to back up and sync photos.
The best tool for backing up iPhone photos to your PC for organization is Wondershare MobileTrans – Backup & Restore.
backup & restore phone
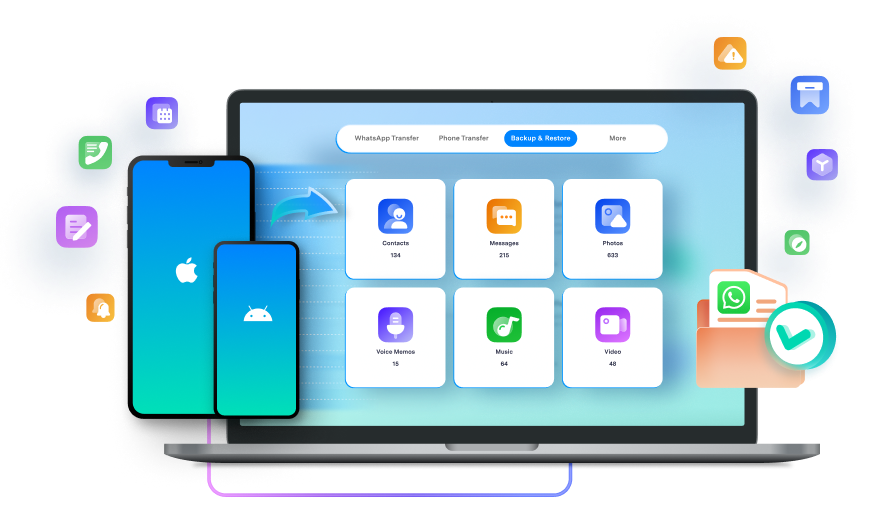
MobileTrans is a safe and user-friendly iPhone transfer tool that allows users to back up dozens of images and videos to a PC swiftly without a Wi-Fi connection or mobile data. MobileTrans is compatible with iPhones running the latest iOS versions.
 4.5/5 Excellent
Once you download and install MobileTrans on your PC, follow these steps to back up and organize your iPhone photos:
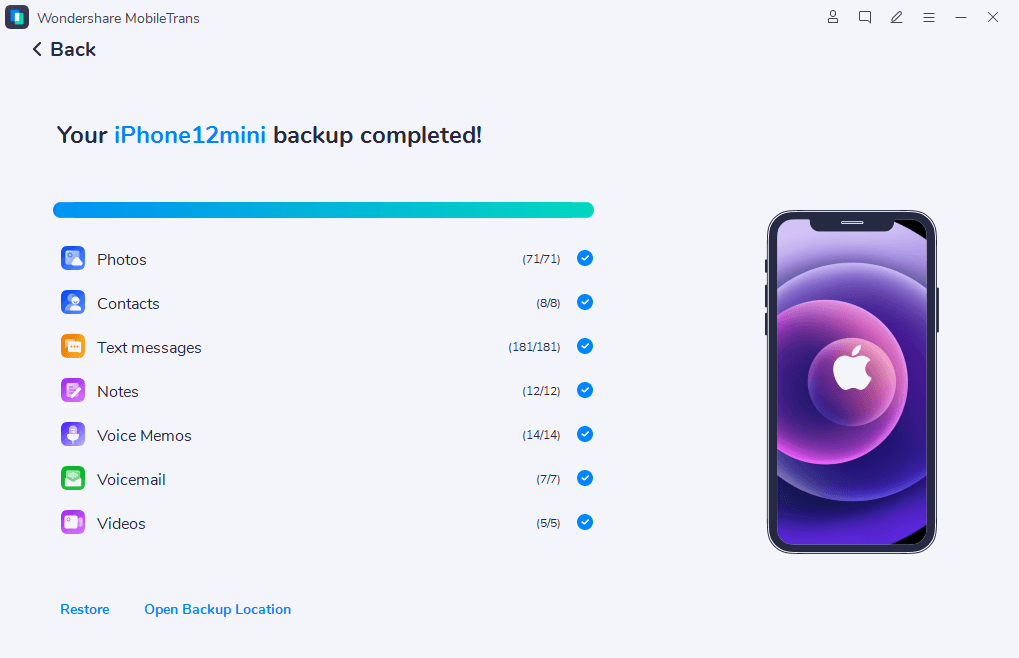
- Launch MobileTrans on your PC and select Backup & Restore from the MobileTrans Interface. Then select Phone Back Up and Restore.

- Next, open your iPhone images and select the photos you wish to back up. Then click on Start at the bottom of the screen to begin the iPhone photos backup.
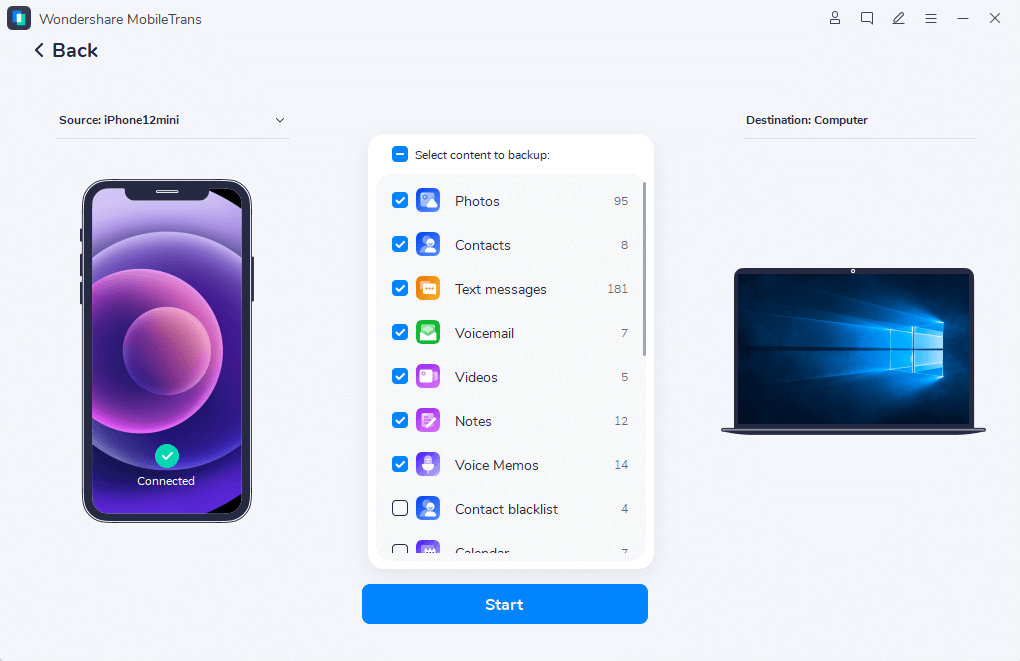
- MobileTrans will notify you once the photo backup is complete.
- Whenever you wish to import the images from your PC to another iPhone, you can use MobileTrans by selecting the Phone Import option.
Synchronize your iPhone Photos using iCloud Photos
iPhone photo syncing is a process of uploading all your recent images to iCloud and making each image available across all your Image nameed Apple devices, such as your Mac and your iWatch.
When you sync iPhone photos using iCloud Photos, your image library is kept up to date. Any changes you make to the iPhone photos on one device are automatically implemented on all other devices, giving you full control over your pictures and access wherever you are.
To synchronize your iPhone photos, you’ll have to enable iCloud Photos in settings. Here’s how to do that:
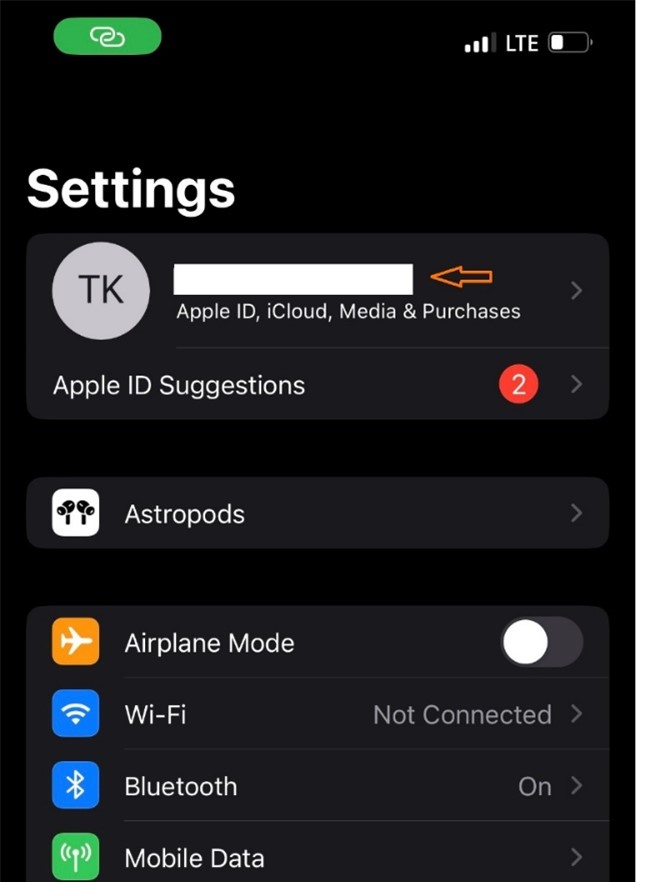
- Go to Settings on your iPhone and click on your Apple ID at the top of the screen.
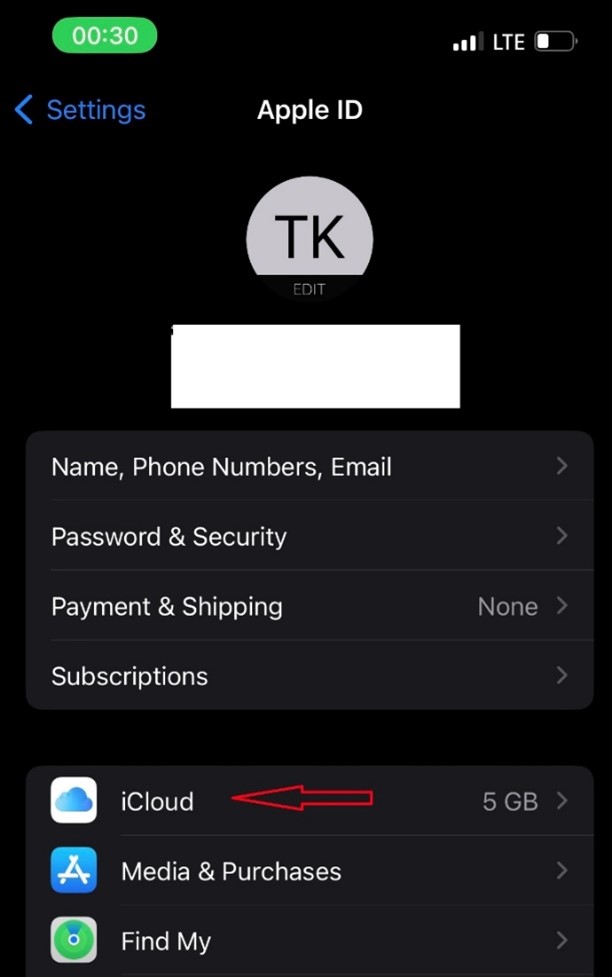
- Next, click on iCloud and select iCloud Photos.
- You’ll see a Sync this iPhone toggle switch. Click on it so the switch turns green.
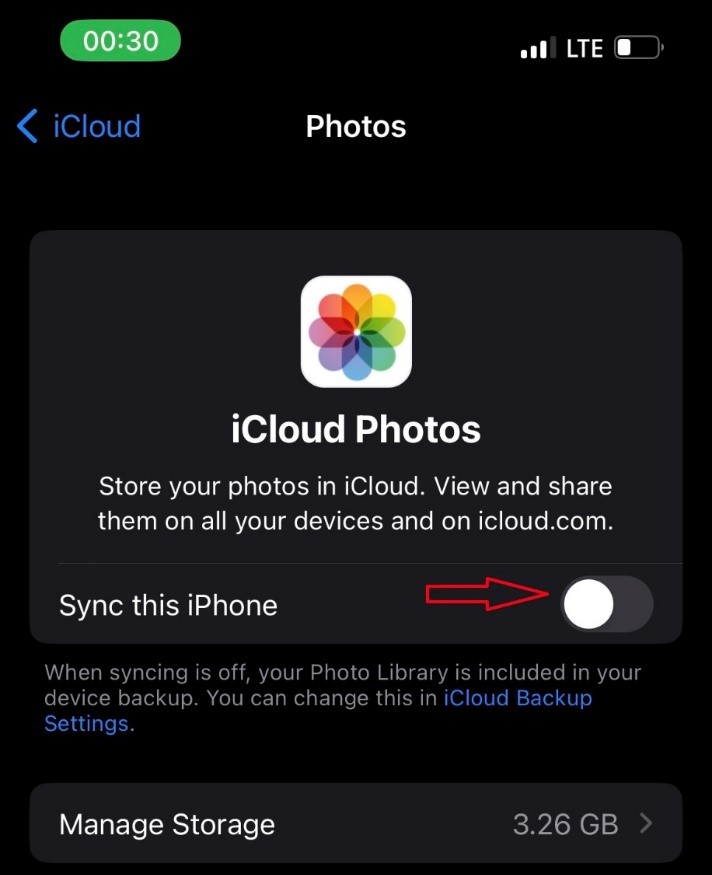
Now, whenever your iPhone is connected to a stable Wi-Fi, all your recent images will be backed up to iCloud and synced across all your Apple devices.
[Bonus] Tips on How to Organize Photos on iPhone
There are several actions that you can implement for you to have a better organization of photos. Here are some of them:
Delete duplicates and unwanted photos on iPhone
One way to organize your iPhone photo library is to delete duplicate and unwanted images. These are images that appear more than once on your iPhone and take up valuable space.
Why does your iPhone have duplicate images? Duplicate images may appear on your iPhone when you snap and download the same picture twice. Apple has made it very easy to delete duplicate images in your iPhone photo library using the following steps:
- Open your Photos App and scroll down the Albums to Utilities.
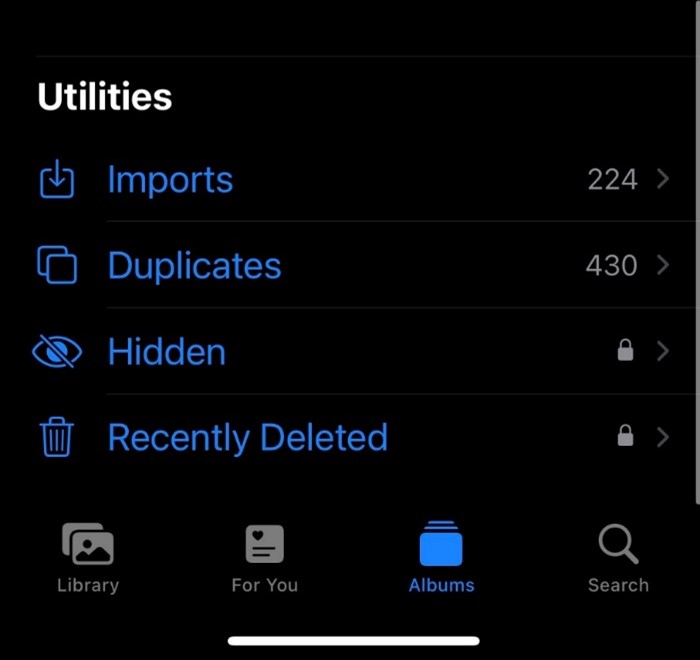
- You’ll see a folder marked Duplicates above the Hidden and Recently Deleted albums.
- Tap on Duplicates and you’ll see all the images and videos that appear more than once in your image library. You can decide to merge these duplicates or delete them.
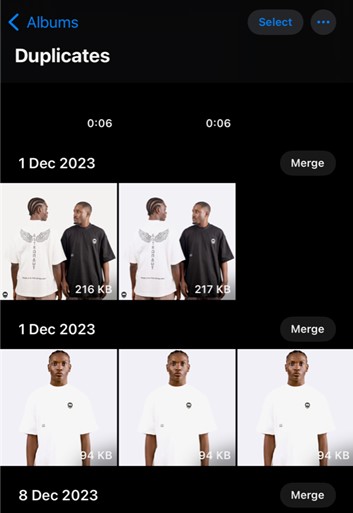
- If you want to merge the images, click Merge. If you want to delete the duplicates, select the duplicates and unselect the original files.
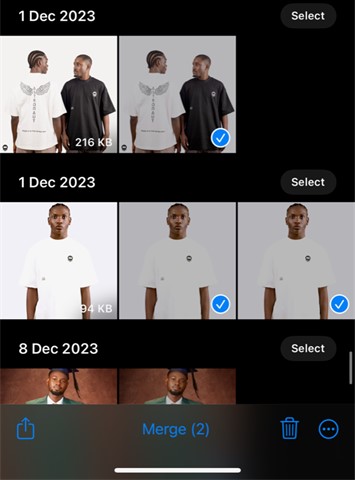
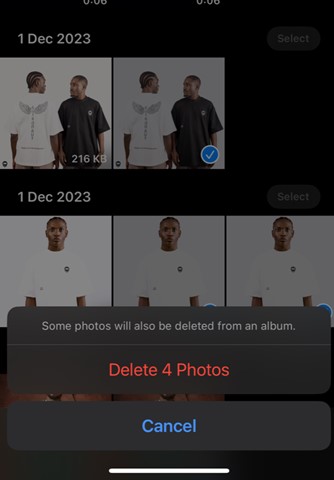
- Then tap Delete or the Bin icon to remove all duplicates and keep the original files.
Sort your iPhone Photos according to Albums
Sorting your iPhone photos according to albums is one of the best methods to organize iPhone photos. By default, the Photos app on your iPhone arranges your images under three album types:
- Media - where you have photos, videos, selfies, portraits, cinematic images, live photos, screenshots, screen recordings, animated photos, and so on.
- Source or origin photos – where you have Instagram photos for images downloaded from Instagram, Snapchat photos, WhatsApp media, and so on.
- Utilities – where you have Imports, duplicates, hidden images, and recently deleted photos.
However, you can create a new album to store select images. Follow these steps to create a new album on an iPhone:
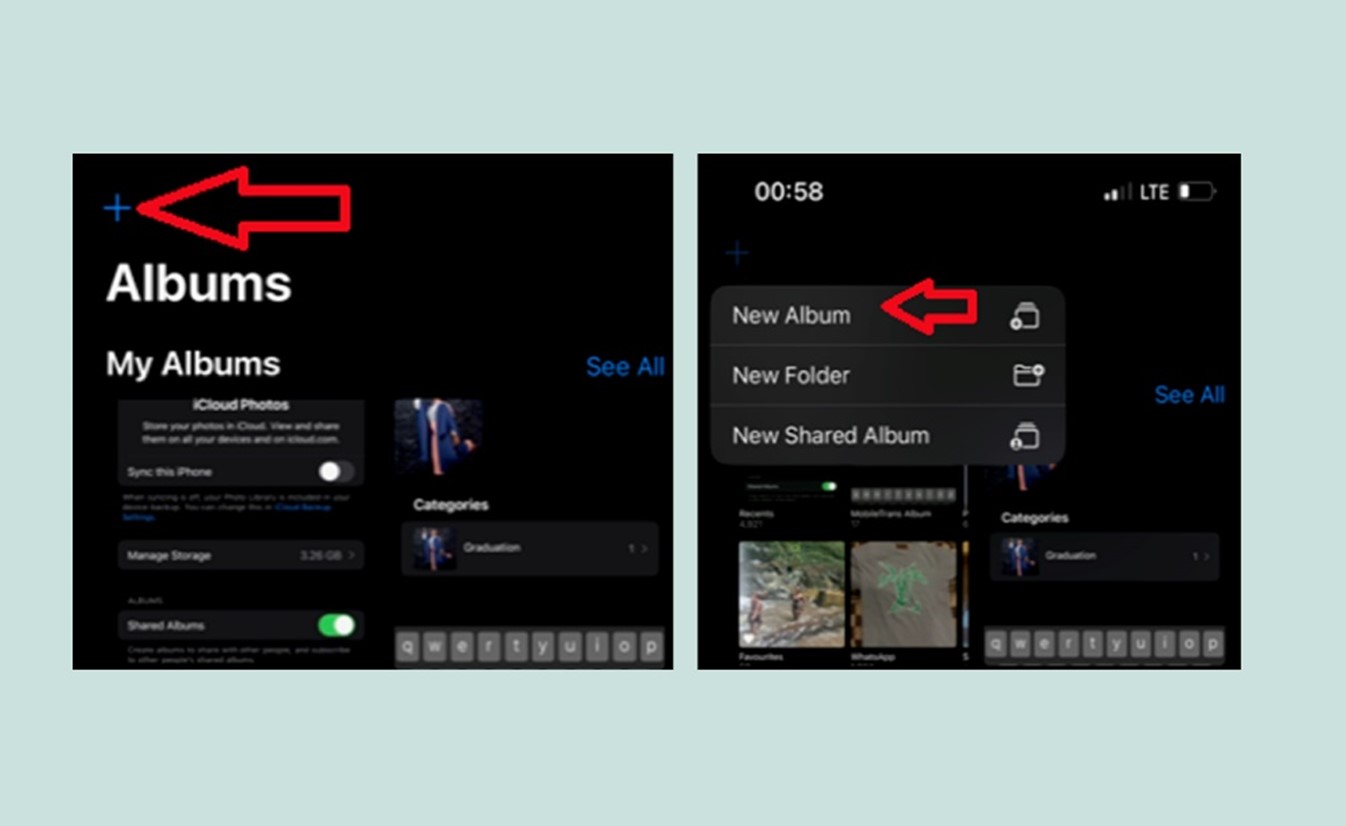
- Open the Photos App on your iPhone and go to Albums.
- Tap on the Plus icon or Add icon and select New Album.
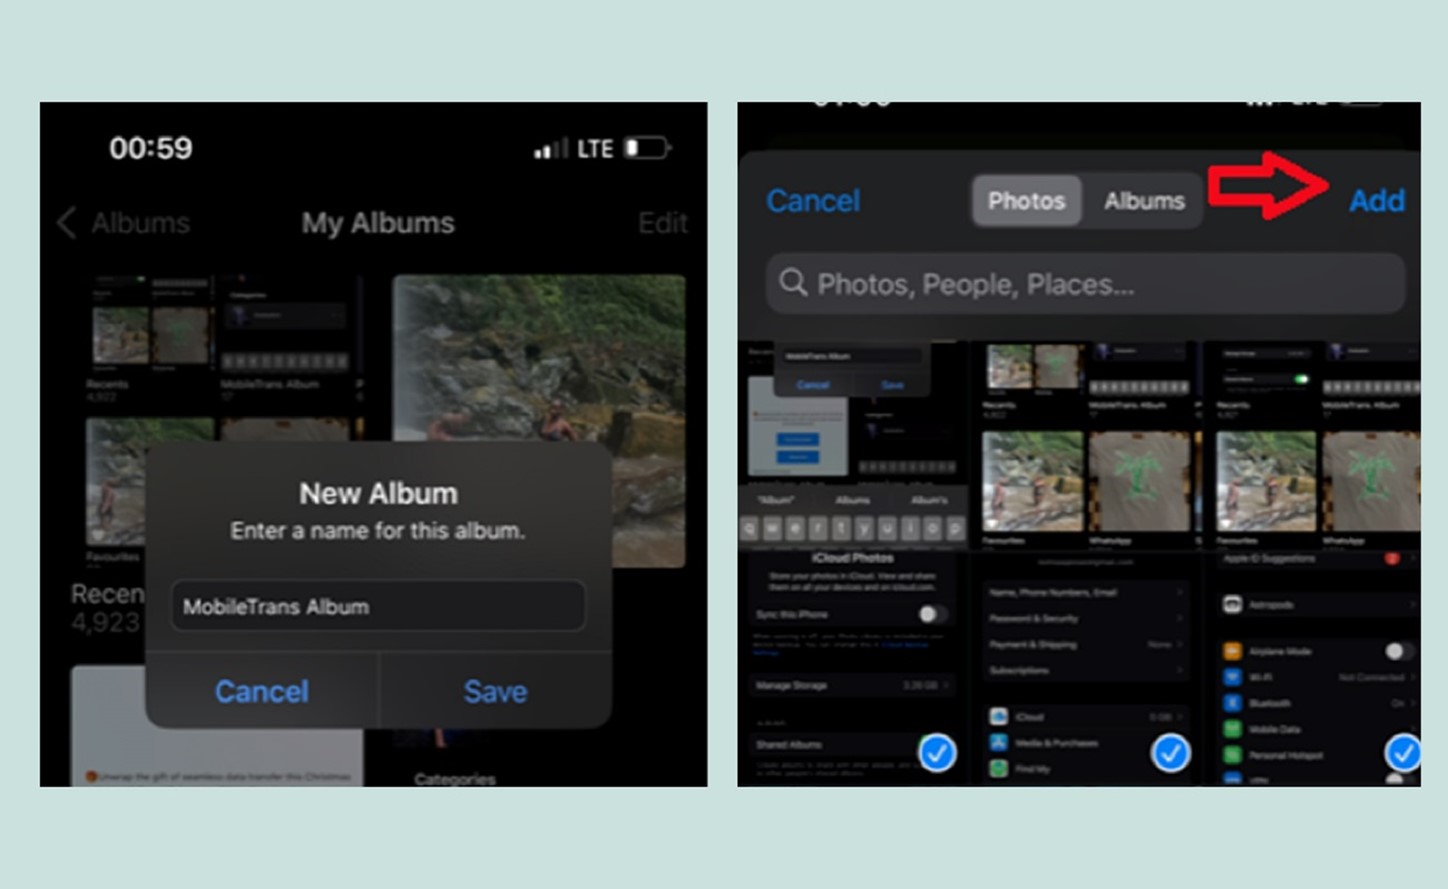
- Enter the name of the album in the text field and click Save. Then select the images and videos you want to save to the new album and tap Add.
Add Keywords and Photo Tags to important photos
When you go to the Photos App on your iPhone, you’ll see a category of images tagged people and places. The images here are grouped according to similar faces and locations.
You can add names to people’s faces, so whenever you type that name in the search bar, it will bring all images in your image library that have that person’s face in them including selfies and group photographs.
This works for locations as well. You can use the keyword “Vacation” for all images taken during your last family vacation. So, when you type in vacation photos, your iPhone will display all images taken during the family vacation.
This method allows you to find photos faster and enjoy a unique viewing experience since you only see similar photos.
Follow these simple steps to add keywords to images on your iPhone:
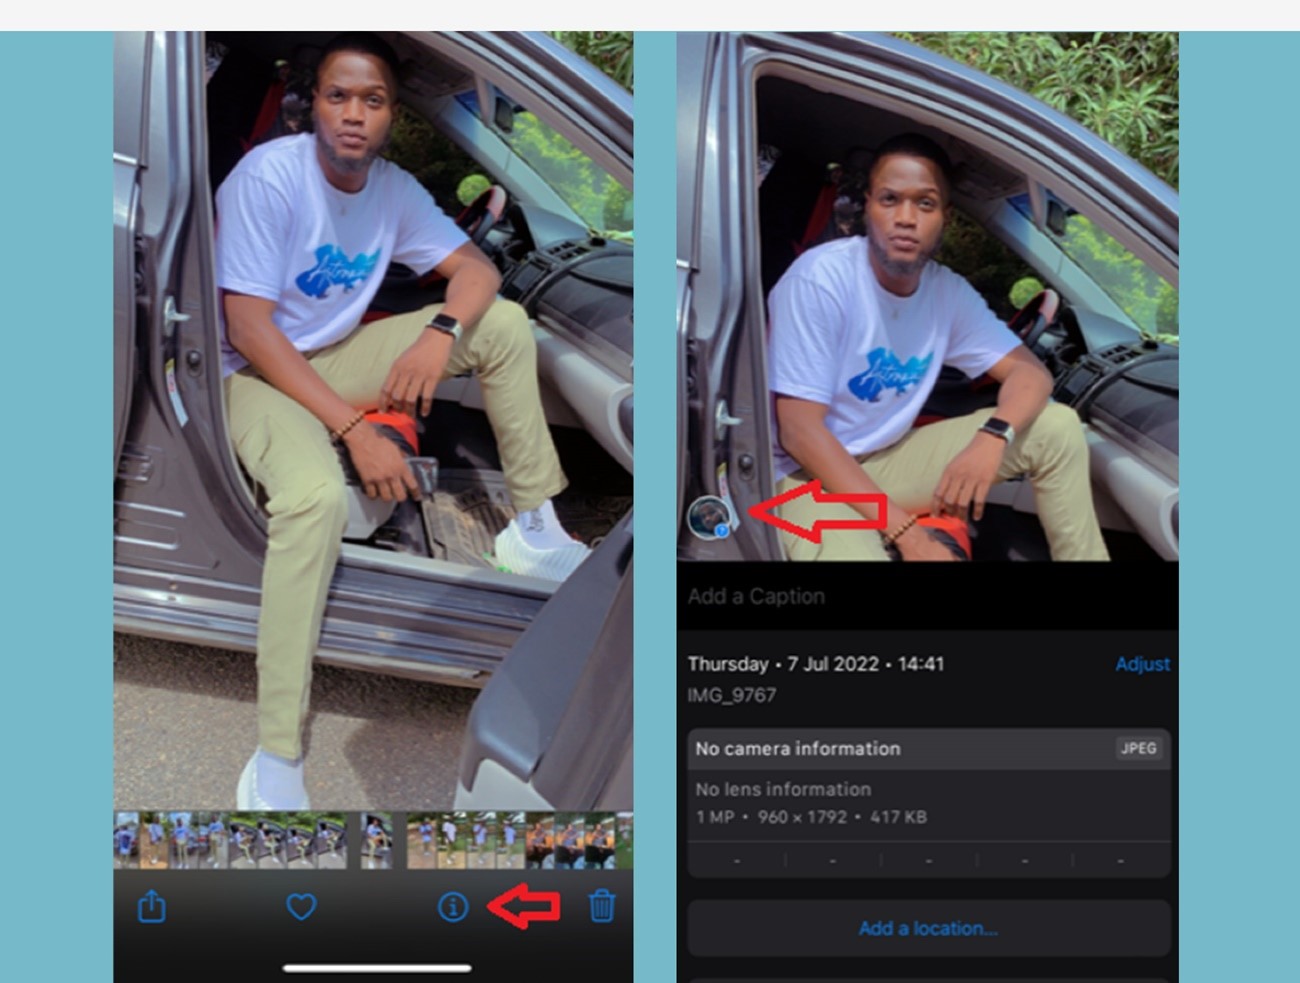
- Open the Photos App and select an image that includes a person’s face.
- Click on the info or “i" icon at the bottom of the picture and select the image of the person with a question mark tag at the left side of your screen.
- You’ll see an option to Tag with Name.
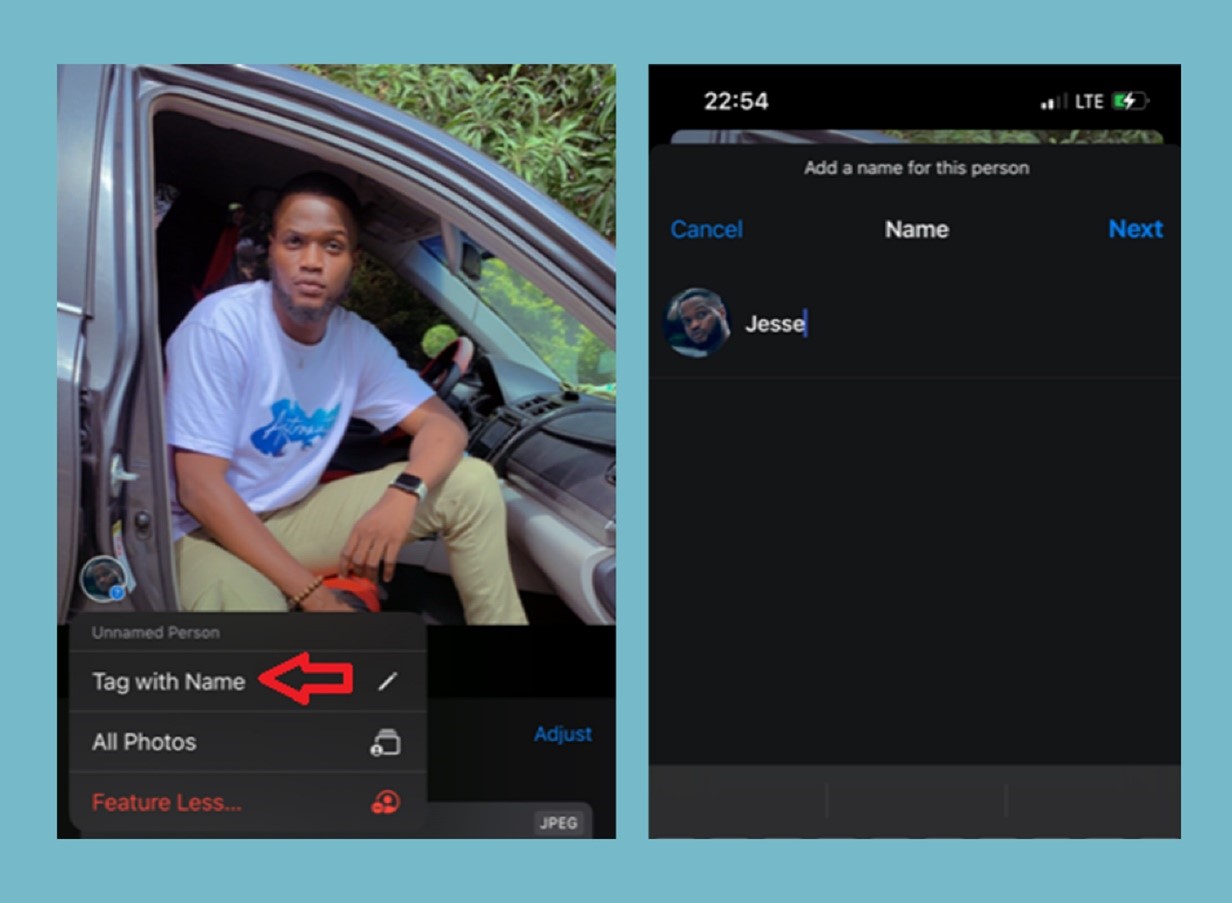
- Type in the person’s name in the text field and if you have the name stored in your contacts, you can just tap on the name.
- Click Done when you have finished and any image with that person’s face will automatically show up when you search their name.
You can follow the same steps to tag images according to places and events.
Final Words
In summary, organizing your iPhone photos is very important. Not only does this make it easier to find and share images but it ensures your photos are kept safe and prevent any case of accidental data loss. Organizing your iPhone photos also ensures all images are synced properly and made available across all your Apple devices.
You can arrange your iCloud photos using the Photos App, iCloud syncing, and third-party backup and restore tools. The best way to organize iPhone photos is to store them according to dates and by using keywords and photo tags. This way, you can use the intelligent search feature to find and access photos in a flash.
4.5/5 ExcellentFAQ
-
1. Will my iPhone photos be deleted from iCloud storage?
If you delete photos from your iPhone, the images are also deleted from iCloud storage, and the changes are synced across all your Apple devices. If you want to delete images from your phone and still keep them on iCloud, you’ll have to disconnect your device from iCloud before deleting the picture by turning off iCloud photos in settings. -
2. What is the best way to keep photos on iPhone?
The best way to keep photos on your iPhone is by using the iPhone Photos App. This app organizes your images according to years and albums and you can easily find any picture in seconds. The Photos app also allows you to share albums and recover accidentally deleted images within 30 days.


