Are you trying to download your iCloud photos to your iPad device? Having your photos available on the device is a much easier way to access your data without having to connect to the internet. This concise and informative guide will walk you through the process, ensuring a seamless experience. With clear instructions, you'll have your cherished memories stored on your iPad in no time.
In this article
Part 1: Download iCloud Photos to iPad via icloud.com
Step 1: Open a web browser on your iPad and go to the official iCloud website, https://www.icloud.com/.
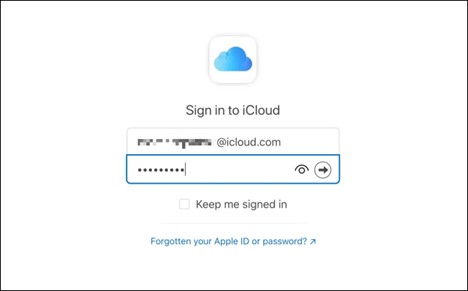
Step 2: Sign in to your iCloud account using your Apple ID and password.
Step 3: Once you are logged in, locate and click on the "Photos" icon.
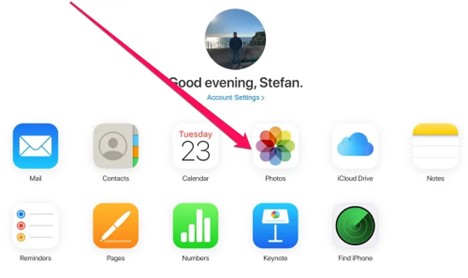
Step 4: You will find all your synced photos. Browse through your albums or use the search bar to locate specific photos that you want to download to your iPad.
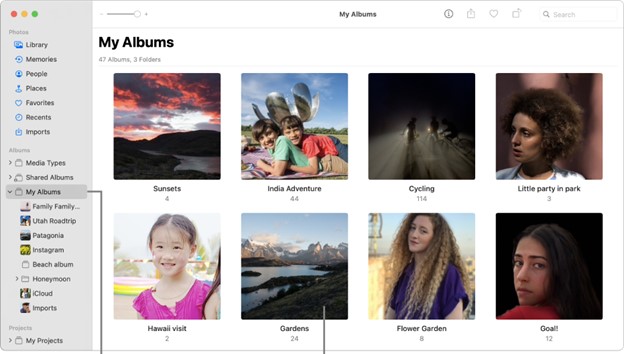
Step 5: Tap on “Select” on the top right and choose the photos that you want.
Step 6: After selecting the desired photos, click on “Download” located at the top-right corner of the screen to start downloading.
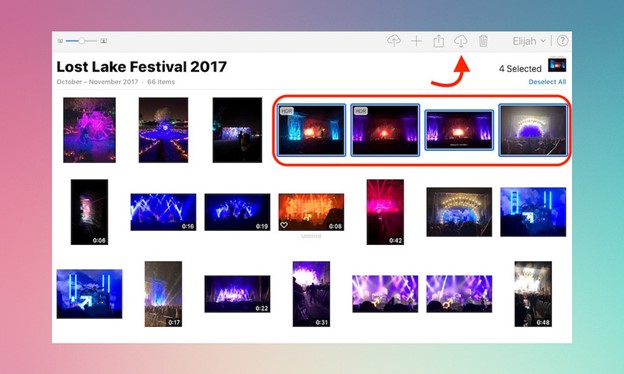
You have successfully downloaded iCloud photos to your iPad via icloud.com. Now you can enjoy your cherished memories directly on your device.
Part 2: Get Photos from iCloud to iPad via Settings
Step 1: Open the Settings app on your iPad.
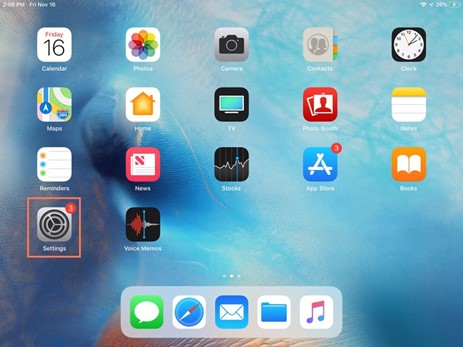
Step 2: Tap on your Apple ID at the top of the Settings menu.
Step 3: Select "iCloud" from the list of options.
Step 4: Scroll down and find "Photos" in the iCloud settings menu.
Step 5: Switch on "Photos" to enable iCloud Photo Library.
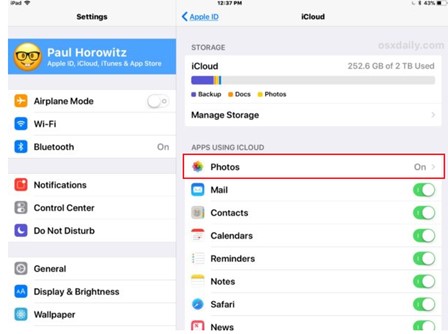
Step 6: Wait for your photos to sync with your iPad. This may take some time depending on the size of your photo library and internet connection speed.
Once all these steps are completed, you will have successfully retrieved and transferred your photos from iCloud to your iPad. Enjoy viewing and sharing them!
Part 3: Retrieve iCloud Photos to iPad from Shared Albums
Step 1: Open the Photos app on your iPad.
Step 2: Tap on the "Shared Albums" tab and choose the one you want.
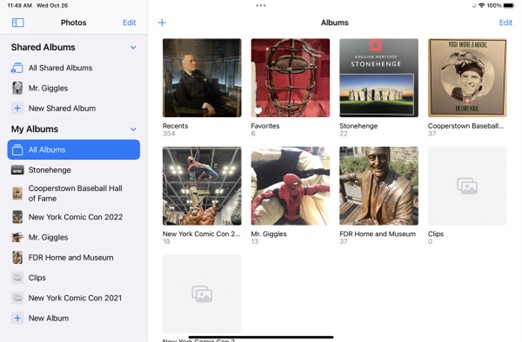
Step 3: Once inside the shared album, tap on any photo to view it in full screen.
Step 4: If photos are unclear, tap on them and wait for a while, as they will automatically download from iCloud to your iPad.
By following these steps, you will be able to retrieve your iCloud photos onto your iPad easily and conveniently.
Part 4: Retrieve iCloud Photos to iPad via My Photo Stream
Although My Photo Stream was discontinued on July 26, 2023, some people are still using it for photos. But if you have recently created an Apple ID, you might not have access to My Photo Stream. For those having access to Photo Stream, you can continue reading and follow the steps as follows:
Step 1: Open the "Photos" app on your iPad.
Step 2: Tap on the "Albums" tab.
Step 3: Go to “My Photo Stream” and find your photos.
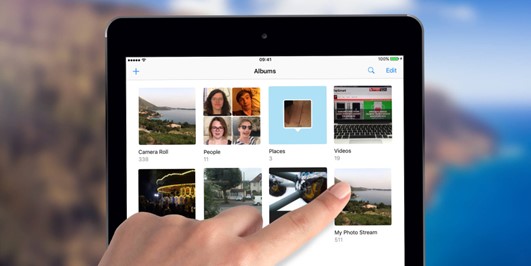
Step 4: If the photos are not clear, tap on them and wait for them to download to your iPad.
That's it! You have successfully retrieved your iCloud photos to your iPad using My Photo Stream. Enjoy your memories!
Part 5: Transfer Photos to iPad with MobileTrans
If you want to get photos from one device to your iPad, do not bother with iCloud, as it only offers 5 GB of free storage and has potential security issues. Try Wondershare MobileTrans instead.
There are several advantages to using the Phone Transfer feature of MobileTrans for transferring photos between iCloud and iPad devices:
1- Seamless transfer: MobileTrans ensures a smooth and hassle-free transfer of photos from one device to another. You can easily move your precious memories without any data loss or quality degradation.
2- Compatibility: Whether you're using an iPhone, iPad, or an Android device, MobileTrans supports all major platforms. It allows you to transfer photos between different operating systems effortlessly.
3- Ease of use: With a user-friendly interface, MobileTrans makes the process of transferring photos a breeze. It requires no technical knowledge or expertise, ensuring that anyone can use it with ease.
Thinking of how you can perform the iPhone-to-iPad or Android-to-iPad transfer using MobileTrans? Follow the steps below.
Step 1: On your computer, open MobileTrans and choose Phone Transfer.

Step 2: Use a USB or lightning cable to connect both your iPad and the other device to the computer. MobileTrans will automatically detect them.
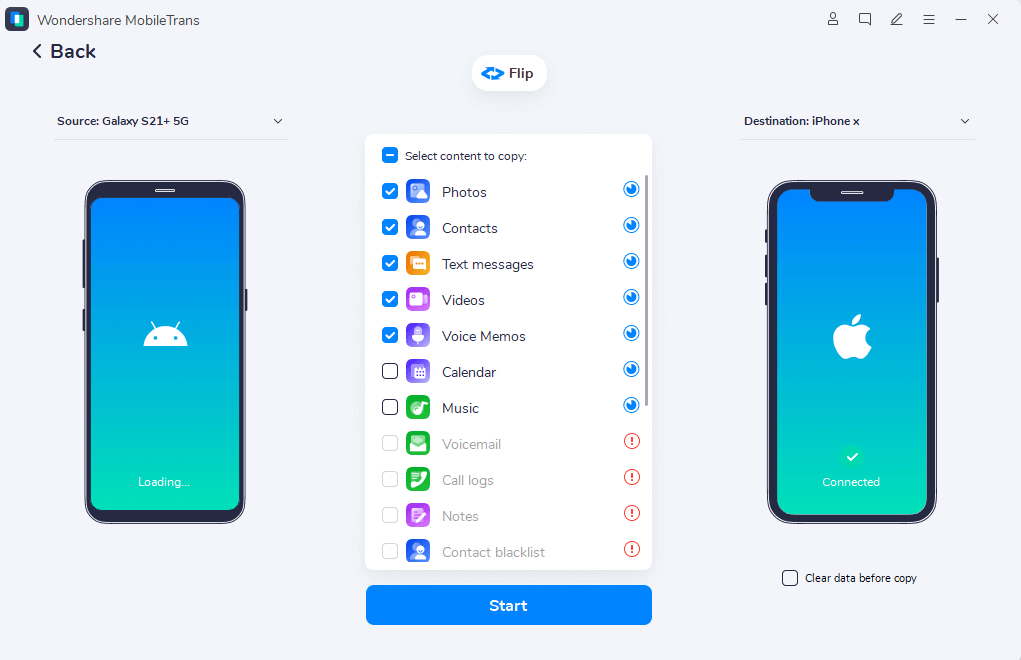
Step 3: Choose the data you want to click “Start”. Wait for a while for the process to finish.
Step 4: Then you can see your photos on your iPad.
In addition to the Phone Transfer feature, MobileTrans also offers a Backup & Restore feature that comes with its own set of advantages. You can back up your photos to your PC within minutes. Check it out on our website.
Final Verdict
After following the aforementioned methods, now you can navigate through your iCloud photos conveniently on your iPad, as you have successfully retrieved them from iCloud. Have fun!
FAQ
-
Why can't I see iCloud Photos on iPad?
Firstly, ensure that you are signed in to your iCloud account on both devices using the same Apple ID. Additionally, make sure that you have enabled iCloud Photos on your iPad. It's also worth checking your internet connection.
If you have recently taken new photos, give it some time to sync. Sometimes, it may take a while for all the photos to appear on your iPad.
-
How to move photos from iPhone to iPad without iCloud?
One option is to use AirDrop, which allows you to wirelessly transfer files between Apple devices. Simply open the Photos app on your iPhone, select the photos you want to transfer, tap the share button, and choose your iPad from the options.
You can also transfer iCloud photos to your computer.


