Ever had that moment when you open your iPhone's Notes app and your important notes are just... gone? We've all had that heart-drop moment. Thus, we need to find a way to get back those notes deleted by mistake. The stress hits, and we scramble on our device, hoping for a fix.
This guide will navigate you through how to recover notes on iPhone and offer easy, doable solutions. So, whether you unintentionally deleted your notes, lost them after backing up your iPhone, or simply can't locate them, we're here for you.
In this article
How to Recover Deleted Notes on iPhone
Option 1: Bring Back Deleted Notes within Notes App
You might mess up or delete meaningful notes on your iPhone. It’s scary. Yet, don't worry. It's easier to retrieve your notes than you expect. Here's how to bring back your lost notes using the ‘Notes’ app.
- Open the Notes app.
Start from your iPhone's main screen. Find the Notes app. It looks like a classic notepad.

- Next, head to the "Recently Deleted" and select the note you need to recover.
Once you're in the Notes app, Spot the "Recently Deleted" folder. It’s a virtual catch-all for your trashed notes. Then locate and select the note you wish to recover and tap on it.

- Tap "Move To" and select "Notes".
This will return the selected notes to their rightful place.

However, recovering recently deleted notes has its constraints. You can only retrieve notes erased within the 30 days. Therefore, act without delay once notes are missing. Furthermore, once a note is removed from the Recently Deleted section permanently, there is no way to recover it. In short, time is of the essence.
Option 2: Retrieve Notes from iCloud
iCloud provides an alternative way to access Notes that were recently stored in the cloud. While less widely used, this method allows retrieval of Notes lost within the past month directly from iCloud's website. However, this recovery option is time-limited, as Notes older than 30 days cannot be accessed through this route.
Here’s how to recover notes on an iPhone using iCloud.
- Log in to iCloud.
Sign into your account by launching any web browser, navigating to iCloud.com, and signing in with your Apple ID credentials.

- Click "Notes" and pick the Notes you need back.
Click the Email button, enter your email as who will get it, and send the Notes to yourself. Open the email on your apple device to download the Notes file attached.

Option 3: Check the "Recently Deleted" Folder
There is a chance your Notes still exist in the "Recently Deleted" folder inside the Notes app. This folder stores notes that have been removed recently, giving you a window to recover them if removed by accident. It's important to make an iCloud backup before wiping your device clean. If you don't back up your data, you may lose it forever when erasing your device.
Option 4: Recover Notes via iTunes
If you once said “accidentally deleted my notes on iPhone,” then the first way is iTunes recovery. Now you have a backup from iTunes, and you're prepared to access its ability to regain those valuable notes. Here are the steps:
- Connect iPhone to computer and open iTunes.
Connect your iPhone to your computer using a USB cable. Then open your iTunes software.
- Select the device and go to the "Summary".
In iTunes, locate and click the picture at the top left showing your device. This takes you to the "Summary" section—the main place for managing your iPhone.
- Click "Restore Backup" and choose the desired backup.
Selecting "Restore Backup" allows you to recover missing notes from a previous iTunes backup. Choosing the right backup will undo changes made since then, returning your iPhone to how it was at that point in time. iTunes uses the saved information from the selected backup to recreate your device's previous condition, restoring any missing notes or other content.
- Enter your password if the backup is encrypted.
If your backup is encrypted, iTunes will ask for your password. Enter it, and you're good to go.
However, there is a downside. iTunes completely replaces all data on the device with what was backed up, erasing anything new added after the date of the backup. The backup restores every file and setting as it was on that date. So you cannot pick and choose what to overwrite. It's restoring the full backup contents or nothing at all.
Know that everything from the chosen backup returns when using iTunes for backup restoration. However, there is a better option. Make regular local backups with tools like MobileTrans to pick what data returns while keeping recent files. Now informed, restoring notes through iTunes is simple.
Recovering Notes with 1-Click: MobileTrans
Whether you need a simple way to protect your notes or a strong program to back up iPhone notes, MobileTrans has a solution. Here are the simple steps to use it.
Wondershare MobileTrans
Backup Your Data Safely and Easily!
- • No data loss. No data leaks.
- • Backup 18+ types of data to computer including photos, messages, contacts.
- • Supports 6000+ mobile devices running iOS and Android system.
- • Backup WhatsApp, WhatsApp Business, Kik, Viber, WeChat and LINE data.

 4.5/5 Excellent
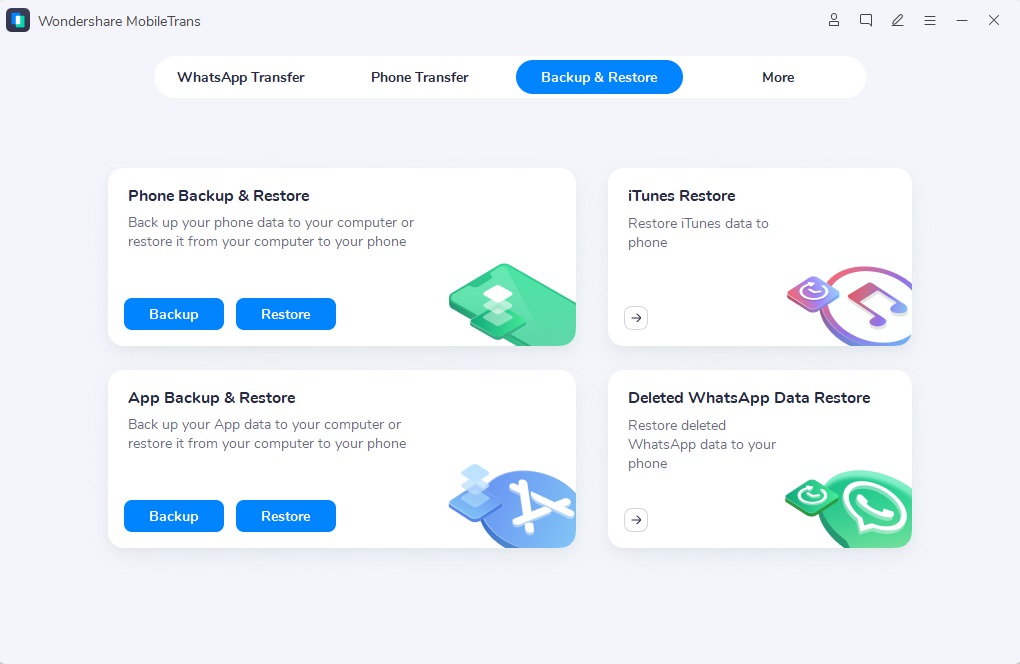
- Launch MobileTrans and select “Backup & Restore” from the home screen.

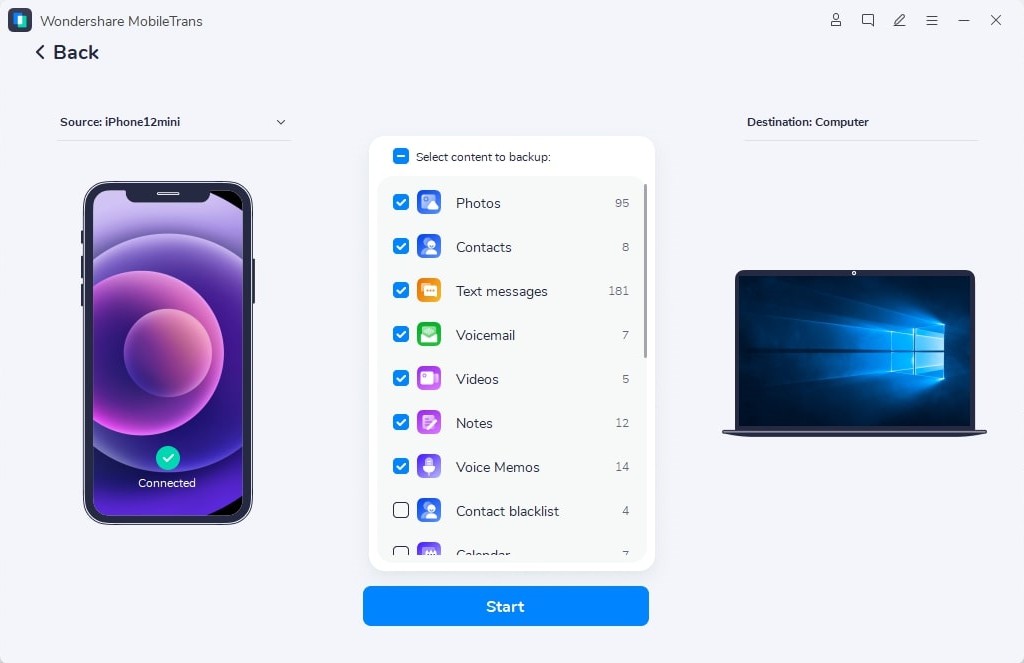
- Connect your iPhone to the PC and give it a moment to be detected. Select what you wish to save and click on “Start” to backup your iPhone data on the computer.

- Wait for the transfer process to complete, then safely disconnect your phone.
- If you want to restore any previous backup, reconnect your phone and select the “Restore” option. Select the files backups from the list displayed to begin restore.

MobileTrans gives you power over your data, letting you easily save your notes and get them back whenever needed. It changes the game in simplifying how you manage data, offering a reliable option instead of usual recovery methods. Ready to protect your notes? Let MobileTrans show you how!
Conclusion
Getting back your deleted iPhone notes is not difficult as you have available choices whether through the Notes app, iCloud, iTunes, or the helpful MobileTrans tool. Quickly retrieve recently erased notes within 30 days by using iCloud for cloud storage retrieval, or be careful with iTunes due to some limits. However, for a flexible and user-friendly way, think about MobileTrans.


