


 TL;DR:
To authorize a computer for iTunes or Apple Music, sign in with your Apple ID under the Account menu and navigate to Authorizations followed by Authorize This Computer.
● An Apple ID strictly limits you to five authorized computers concurrently, though you can use the Deauthorize All function once a year if you reach this cap and cannot access older hardware.
● Windows users experiencing authorization failures can resolve folder permission errors by navigating to %ProgramData%, revealing hidden items, deleting the SC Info folder inside the Apple Computer\iTunes directory, and restarting the PC.
Ask AI for a summary
 ChatGPT
 Perplexity
 Gemini
 Claude
 Grok
Grok
So, you've tried to play one of your songs, but instead, an unusual message appeared on the screen. It reads, "You must authorize this computer to use Apple Music or iTunes Match."
What's the meaning of this message? Find the answer below, plus a step-by-step guide on how to authorize a computer for iTunes.
In this article
What Does Authorizing a Computer for iTunes Mean?
How do I authorize my computer for iTunes? Before answering this answer, it is best to help you understand what that means. Authorizing a computer for iTunes means granting the PC permission to access and manage your iTunes Store.
This authorization system protects the copyrights of the purchased songs. In other words, it ensures that only a few computers can play or download your purchased content at any time.
You can authorize or deauthorize your computer at any time. With a single Apple ID, you can authorize up to five computers. However, the PC you initially purchase content with will be the first device of the five approved to play it.
So, how do I authorize a computer for iTunes? As detailed below, you must use your Apple ID and password.
Learn How to Authorize a Computer for iTunes in Easy Steps
You've learned what authorizing a computer means in the above section. It's time to answer the following: How do I authorize this computer for iTunes? The procedure is straightforward and a matter of a few seconds.
Follow these steps to learn how to authorize a computer for iTunes on Windows 10/11:
- Launch the iTunes app on the Windows PC you wish to authorize. Click Account in the iTunes menu bar and select Sign in.

- Type your Apple ID (the one you used to buy the items you wish to access) and password. Click Sign in.

- Once you're signed in, click Account again. Select Authorizations, then click Authorize This Computer.

- Re-type your Apple ID and the password once prompted, then click Authorize.
That's how I authorize my computer for iTunes. The computer should now be approved to access your iTunes music, videos, and other content.
If you're using a Mac PC, the steps differ slightly. This is how to authorize a Macbook for Apple Music:
- Launch the iTunes or Music app (it depends on the macOS version you're using) on your Macbook.
- Click Account from the Menu at the top of the app's window, then choose Sign in.

- Type your Apple ID and Password.

- Once you've successfully logged in, click Account again, then hover your mouse over Authorizations. Choose Authorize This Computer.

That's how to authorize iTunes on Mac. As mentioned, you can also deauthorize a computer any time you want. Deauthorizing can come in handy if you decide to sell your computer. It ensures the device isn't counted as one of your authorized devices. The following is a simple guide on how to deauthorize a computer for iTunes:
- Open the iTunes or Music app on your computer and click Account at the top menu bar.
- Select the Sign in option, then type your Apple ID and the correct Password to sign in to iTunes or Music.
- Click Account at the top menu in the iTunes window. Go to Authorizations, then choose Deauthorize This Computer.
Once you deauthorize a device, you can no longer listen to purchased content on that device. What if you forgot to deauthorize a PC you no longer own, and you have five authorized devices?
You can deauthorize all computers at once. Apple allows you to use this method once a year. Follow steps 1-3 above, but in 3, choose Deauthorize All. This option will only be available if you have five authorized computers.
Unable to Authorize a Computer for iTunes? How to Troubleshoot
A couple of things can cause you to be unable to authorize your computer when prompted. These are issues with account or SC Info folder permissions. Check how to fix each one:
How Do I Authorize Computer for iTunes: Fix Account Issue
To fix an account issue and authorize your computer for iTunes:
- Press the Windows or Ctrl + Esc keys on the keyboard.
- Click the search field and enter UserAccountControlSettings. Click AccountControlSettings and then choose Yes to allow the app to make changes.

- Move the slider to the bottom setting, then click OK. Click Yes again if asked to allow the app to make changes.
- Restart your PC and turn on User Account Controls again. Repeat steps 1-3, then move the slider back to the setting you want.
- Click OK, then restart the computer. After the restart, try to authorize your computer again.
Unable to Unthorize My Computer for iTunes: Fix Folder Permission Issue
iTunes requires the SC Info folder on your PC. You can remove this folder and allow iTunes to recreate it. Check the steps:
- Close iTunes and press the Ctrl + Esc keys on the keyboard.
- Click the search field or magnifying icon. In the search field, type %ProgramData% then hit the Return button.
- Click View and then choose Hidden Items to display hidden files.
- Launch the Apple Computer folder, followed by the iTunes folder.
- Right-click the SC Info folder, then select Delete from the pop-up menu. Restart the computer.
- Open iTunes and try to authorize your PC again.
[Bonus] Transfer Data From iPhone/iPad to PC With a Click
iTunes is undoubtedly a robust iOS Manager and music player. It's one of the best choices for iPhone/iPad and computer users. However, transferring data from an iPhone/iPad to a computer or vice versa may take time.
Wondershare MobileTrans - Phone Transfer can be faster and more effective. It can transfer even the most extensive files in a moment. The software is safe and easy to use for all users.
It works on both Windows and Mac. MobileTrans also supports almost all mobile phones running on Android and iOS. The software doesn't overwrite data during the transfer. It's an effective tool for all data transfer needs.
Wondershare MobileTrans
Transfer Your Data Between Devices Easily
- • No data loss. No data leaks.
- • Support various data, including files, photos, videos, apps, contacts, etc.
- • Compatible with thousands of device types acorss Android and iOS.
 4.5/5 Excellent
These are the simple steps to export data from iPhone/iPad to PC using MobileTrans:
- Install the Wondershare MobileTrans on your Windows or Mac computer. Next, connect your iPhone/iPad with a USB cable.
- Open the software and go to Phone Transfer > Export to Computer.
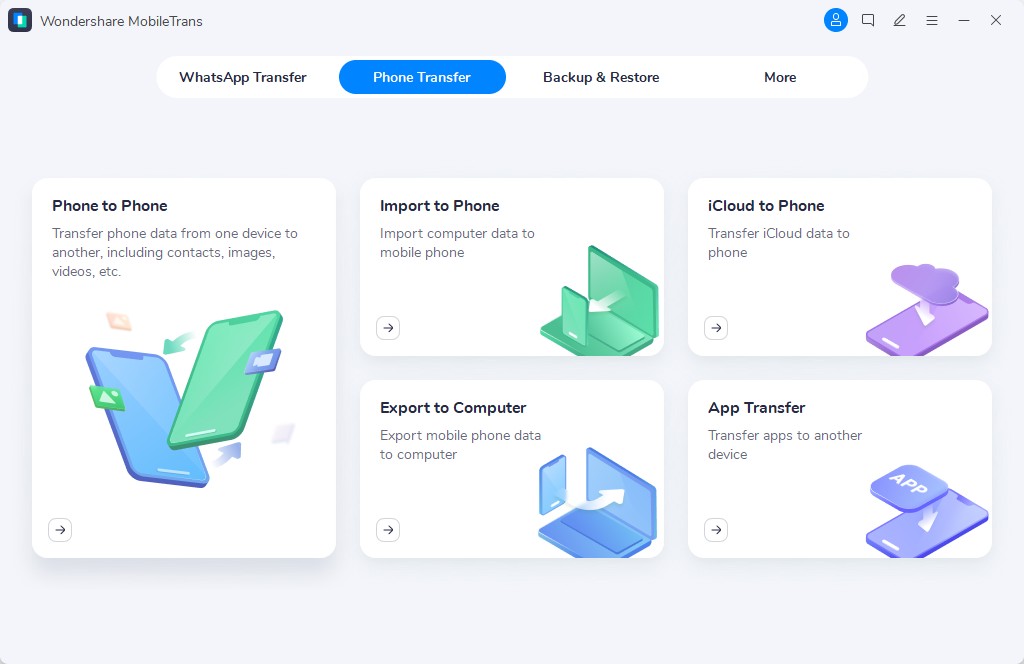
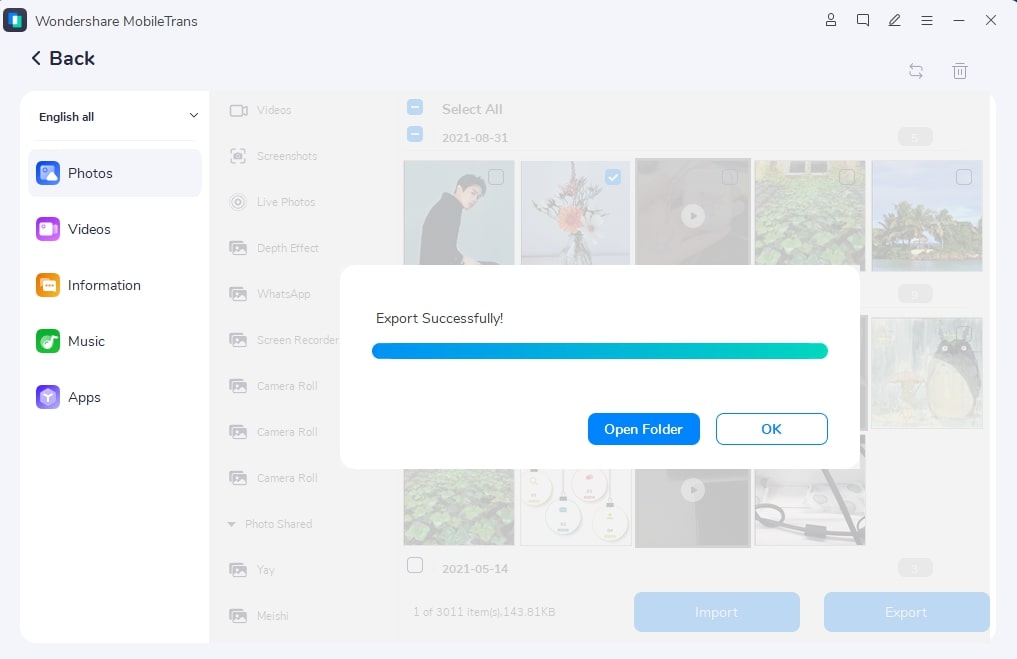
- Select data types to export to the computer, then click the Export button.

- Wait a little while for MobileTrans to complete your data transfer. You'll see a notification on the screen when it's done.
Conclusion
This article has shown you how to authorize a computer for iTunes. As you've realized, the authorization process involves a few very simple steps. Anyone can do it in a minute.
You've also learned how to deauthorize a computer for iTunes. You can apply the knowledge any time to remove a computer you no longer own.
Although rare, you can encounter hitches during the authorizing or deauthorizing exercise. If you do, use the steps discussed to troubleshoot any underlying issues. You can also install the MobileTrans - Phone Transfer. It will help you seamlessly move music and other data from your iPhone/iPad to the PC.
4.5/5 Excellent

