

![[Comprehensive Guide] How to Share an Album on iPhone](https://mobiletrans.wondershare.com/images/images2024/how-to-share-an-album-on-iphone.jpg)

 TL;DR:
You can collaborate on photo and video collections by enabling Shared Albums in your iPhone's iCloud settings, which lets you invite up to 100 people to view, add, and save media.
● Setup requires toggling on Shared Albums in Settings > Photos before using the "+" icon in the Photos app to name a new album and invite contacts.
● Album management is role-based; only the creator can rename or permanently delete the shared album, while subscribers can only unsubscribe or save media locally to their Camera Roll.
● Removing a photo from a shared album strictly deletes it from that specific shared instance without erasing it from the original owner's library or any subscriber's locally saved files.
Ask AI for a summary
 ChatGPT
 Perplexity
 Gemini
 Claude
 Grok
Grok
Wondering how to share an album on iPhone easily. You’ve come to the right place. The Shared Albums feature in the iOS Photos app allows iPhone users to collaborate and share photos and videos with selected recipients easily.
So, how do shared albums work on iPhone? Unlike general sharing from the camera roll, Shared Albums lets you create ongoing, collaborative albums that friends and family can contribute to over time.
In this comprehensive guide, we dive deep into how to share an album on iPhone. We'll cover creating your own Shared Album, adding photos/videos, managing subscribers, receiving shared albums, saving shared content, sharing items, and more.
Whether you want to stay connected with far-away family or collaborate on albums with friends, mastering Shared Albums is a must.
Let's get started!
In this article
How to Share an Album on iPhone: Setting Up
Sharing a full album from your iPhone camera roll only requires a few quick steps. Let's look at how to get started:
- Enable Shared Albums on iPhone
You need to turn on the shared albums feature using iCloud Photo Sharing to share photo albums. Follow these simple steps:
Step 1: Open your iPhone's Settings.
Step 2: Scroll down and tap on "Photos."
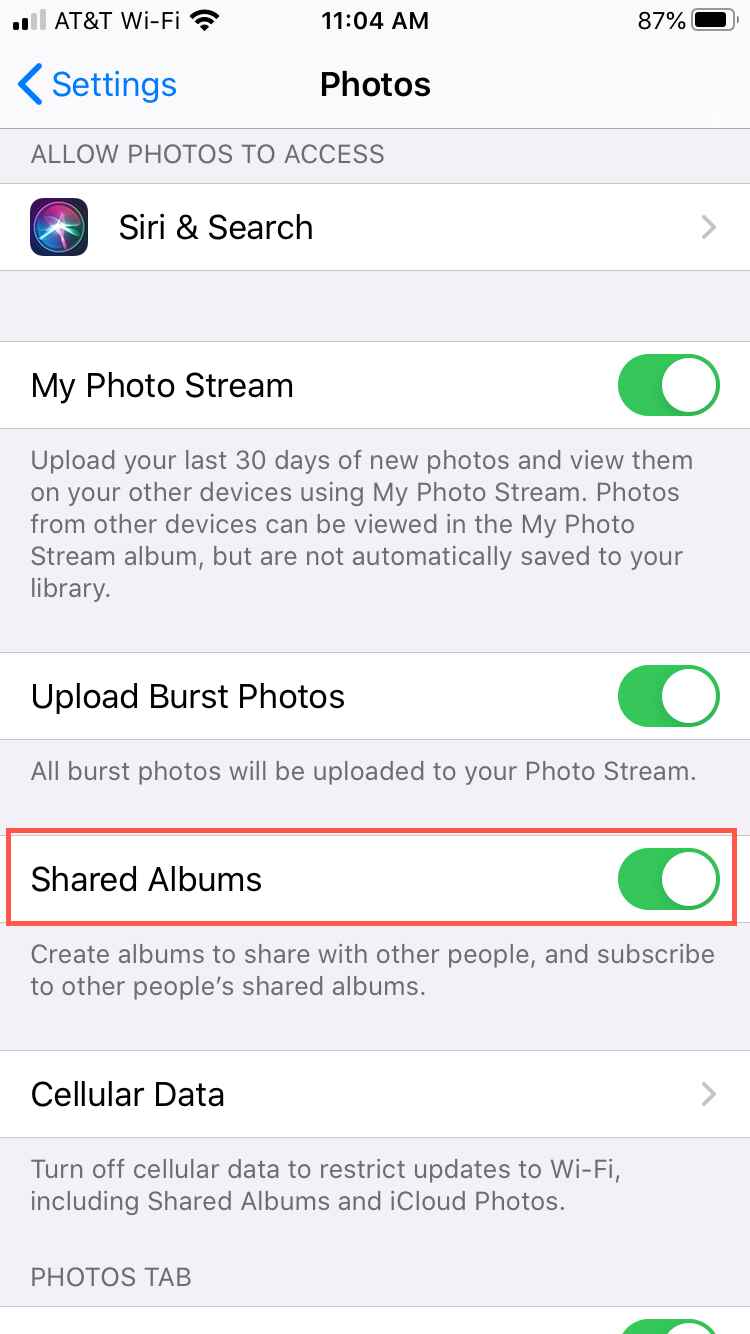
Step 3: Toggle on the "Shared Albums" option to enable it.
Now you're all set to start sharing your photo albums with others!
How to Create Shared Albums on iPhone
The process to create a new Shared Album is quick and straightforward. Here’s how to share an album on iPhone:
Step 1: Launch the Photos app on your iPhone to access your photo library. Tap the Albums Tab At the bottom of the Photos app, tap the Albums tab to view your existing albums.
Step 2: Tap New Shared Album. Tap the + icon in the top left corner followed by New Shared Album to start a new album.
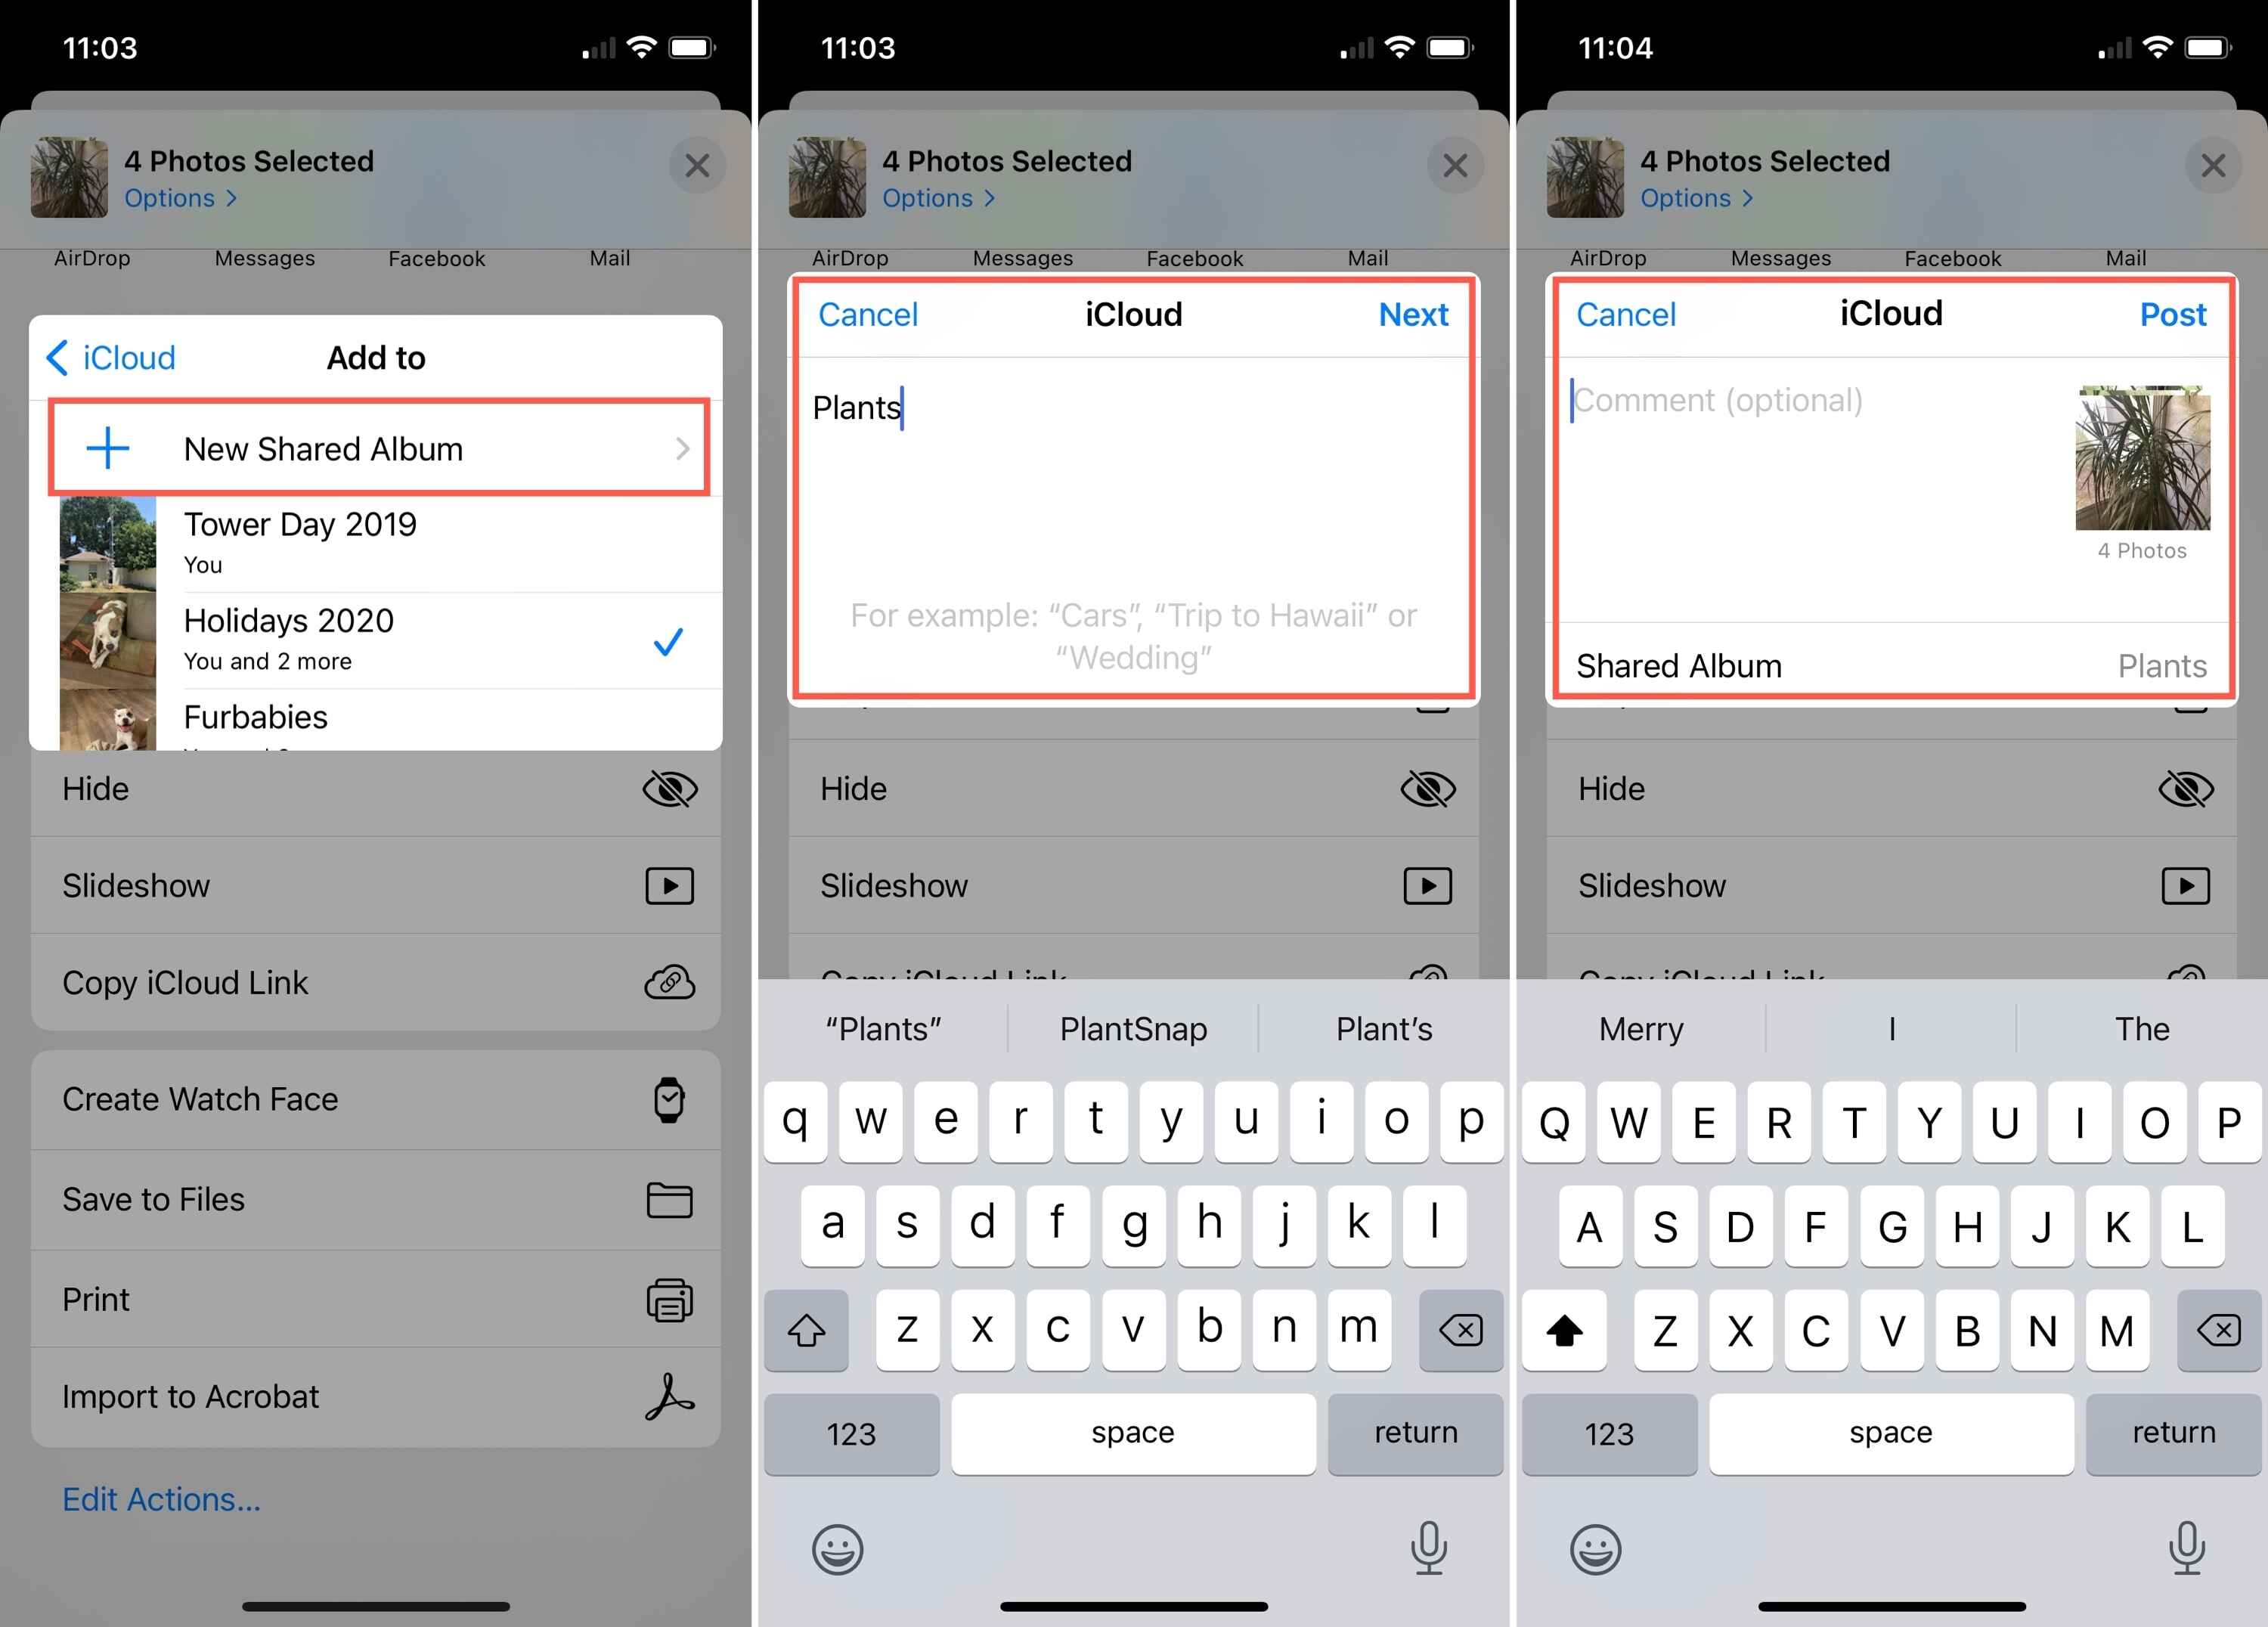
Step 3: Name the Shared Album Enter a name for the Shared Album when prompted. Try to be descriptive.
Step 4: Add Collaborators You can immediately add collaborators who can contribute to the album. Start typing names or numbers to add people.
Step 5: Tap Create in the upper right corner to finalize making the Shared Album.
And that’s it! The new Shared Album will now appear in your albums list ready for photos.
Adding Photos and Videos to a Shared Album on iPhone
Once you’ve created a Shared Album, here is how to add photos and videos:
Step 1: Open the Shared Album. Tap the new Shared Album in the Albums tab to open it.
Step 2: Tap the + button Tap the + button in the upper right to add new items. Select Photos/Videos. This will take you to your camera roll. Tap photos and videos to select ones to add to the Shared Album.
Step 3: Tap Done in the upper right once your selections are made.
Photos are Added The selected photos/videos will now be added directly to the Shared Album.
How to Accept a Shared Album on iPhone
When someone shares an album with you, here's how to accept it:
Step 1: Open Sharing Invitation. You will receive a notification that an album was shared with you. Tap the notification to view the invitation.
Step 2: Preview Shared Album. This will display a preview of the album being shared. Scroll through to view the photos/videos.
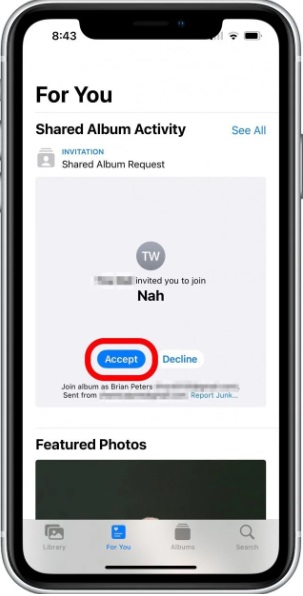
Step 3: Tap Accept. If interested in the album, tap Accept at the bottom to download the content and accept the invitation.
Step 4: Open Album in Photos App. Launch the Photos app. The new Shared Album from your friend or family member will be present in the Albums tab ready to view.
Once accepted, you can browse and interact with the Shared Album like any other native album. New items added by the owner will appear.
Save Photos and Videos from a Shared Album
Now let’s look at how you can download and save photos and videos from the shared album. As a subscriber, you can follow the steps below to save photos and videos from a Shared Album to your Camera Roll:
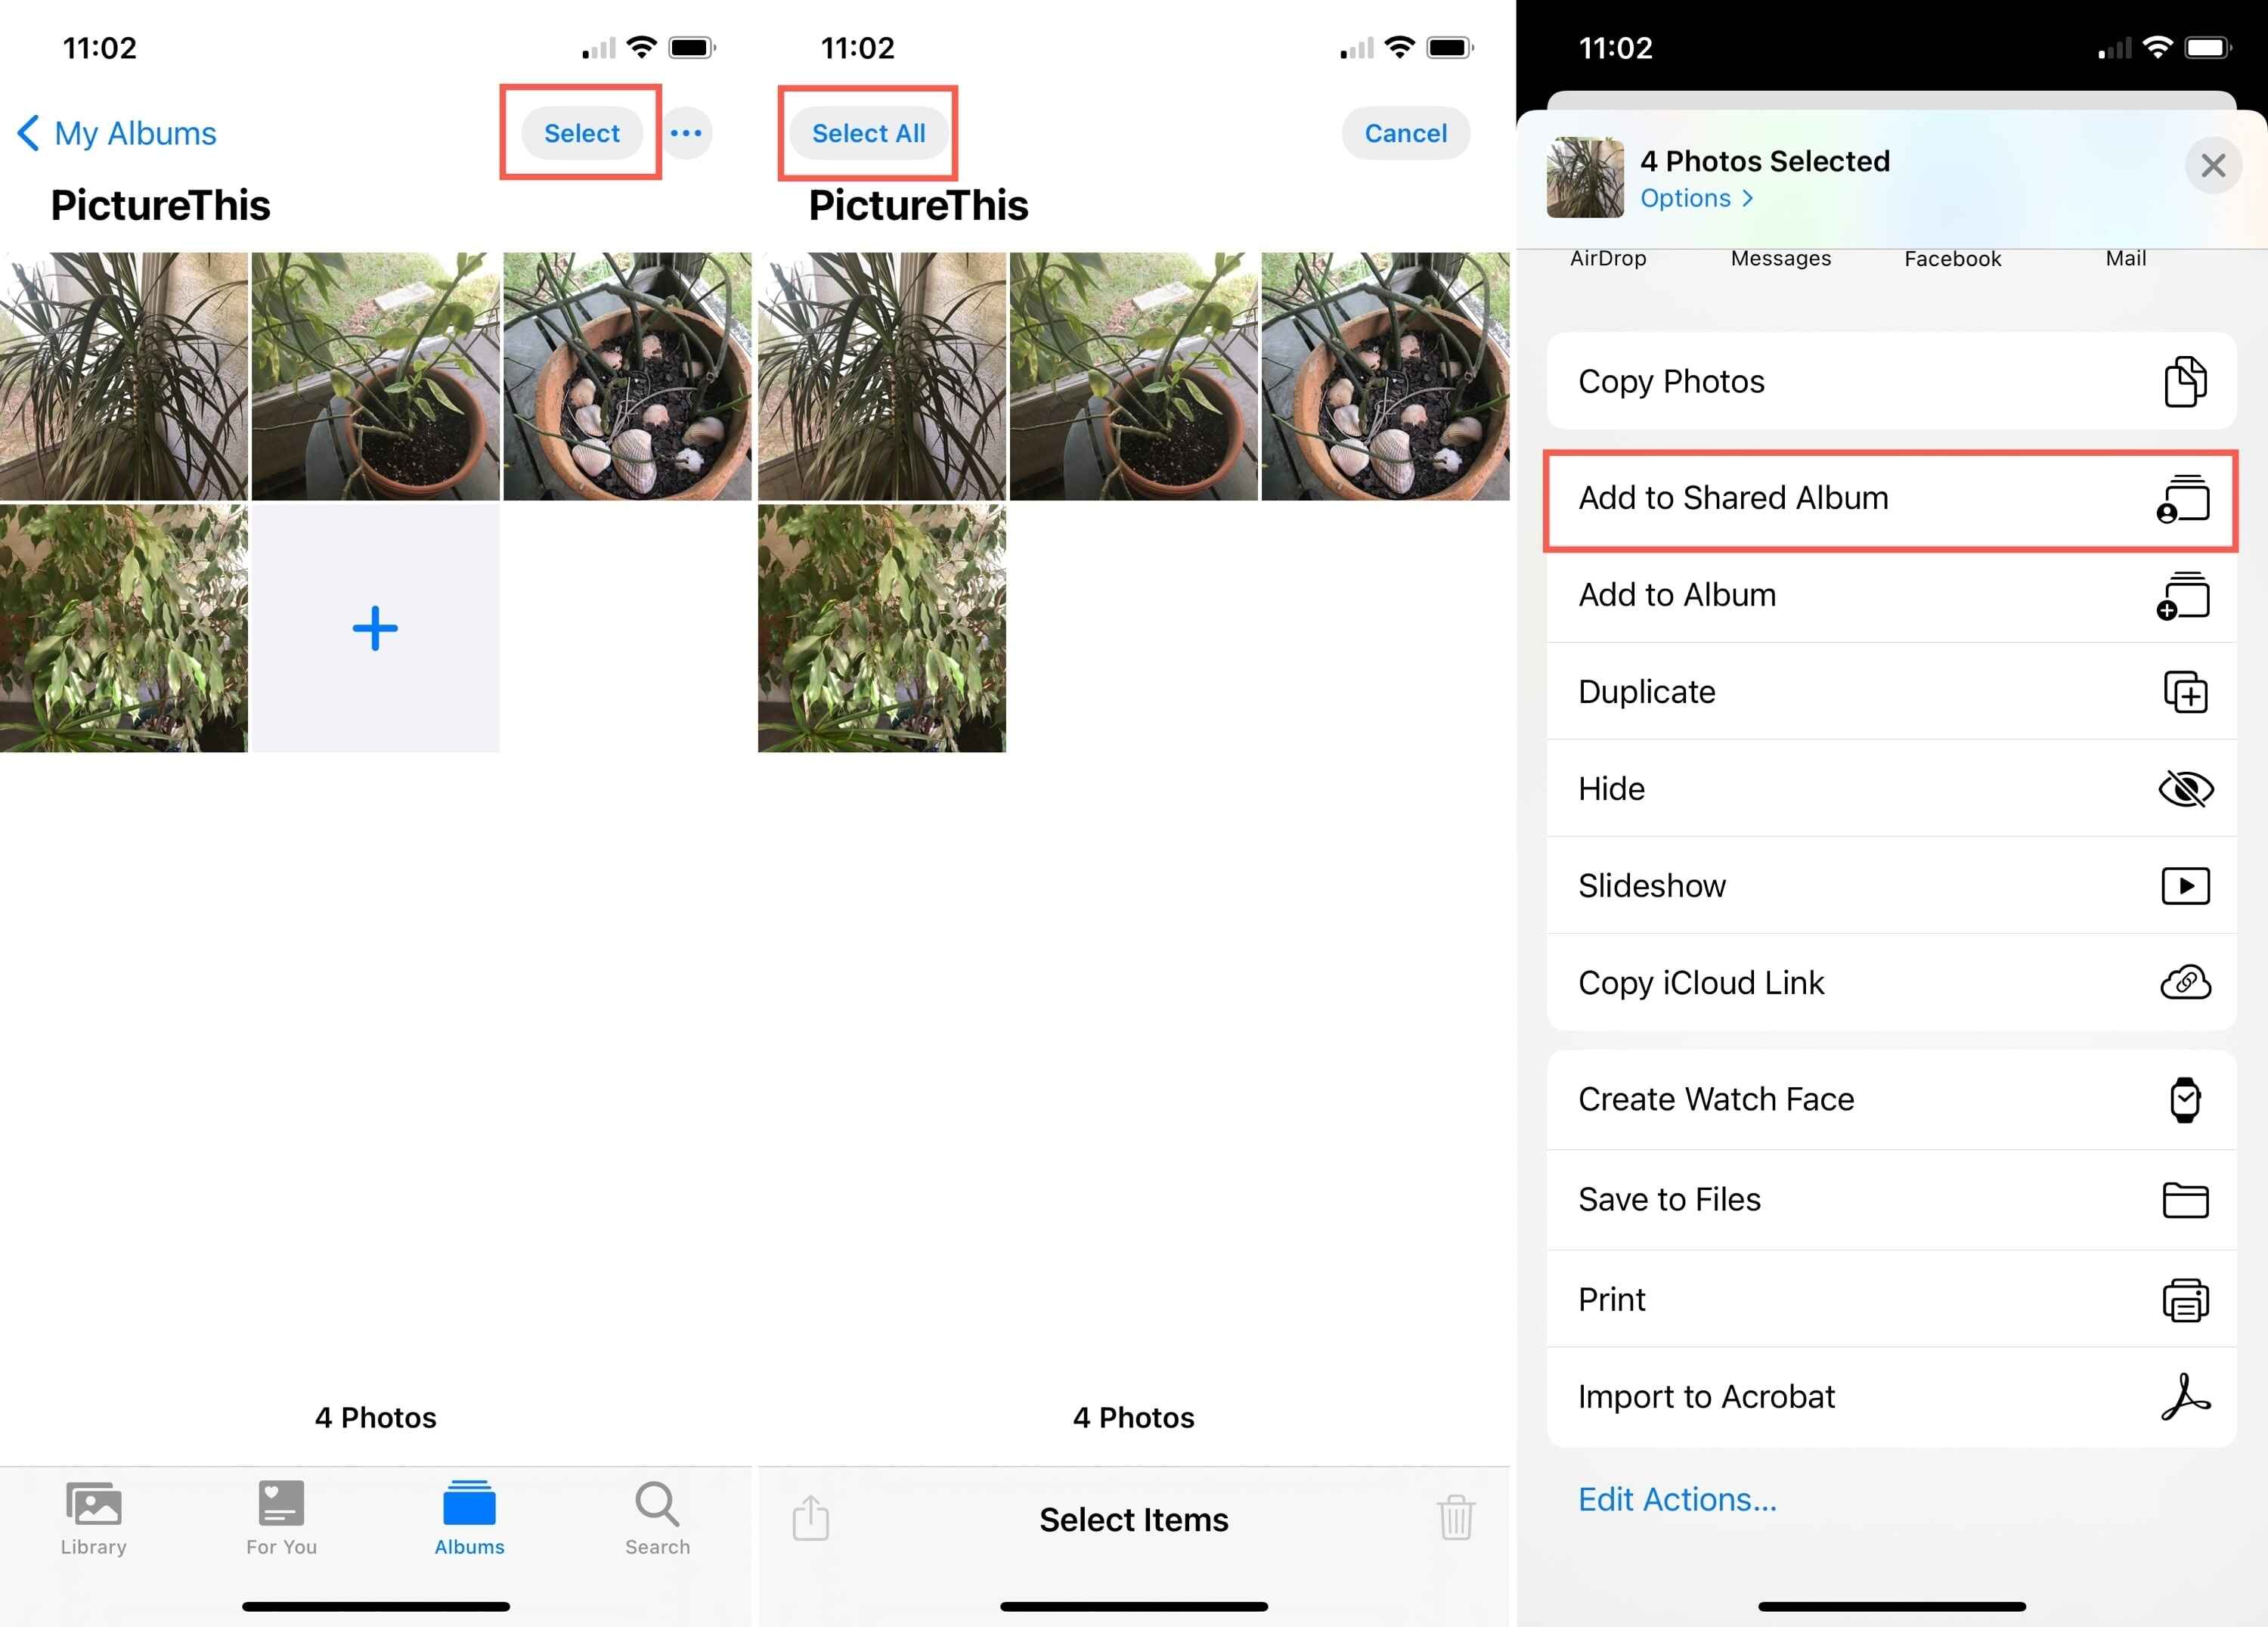
Step 1: Tap Select. With the Shared Album open, tap Select in the top right corner.
Step 2: Choose Photos/Videos. Tap each photo/video you want to save locally. Selected items will have a checkmark icon.
Step 3: Tap Add. To In the bottom left, tap Add To and select Save to Camera Roll.
Step 4: Tap “Confirm” to confirm transferring the selected items.
Step 5: Access Saved Items Open your Camera Roll album to find the saved photos and videos from the Shared Album.
While subscribed, you always have access. However, saving shared items locally lets you access them offline.
- How to Rename Shared Album on iPhone
If you are not satisfied with the album name, you can rename it. But, only the person who made a shared album can modify its name. Follow the instructions:
Step 1: Launch the Photos app on your iPhone.
Step 2: Select Albums and then choose the shared album.
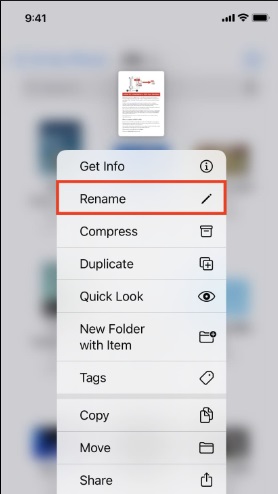
Step 3: Press the More button and select Rename Album.
Step 4: Input a new name and tap Save.
How to Delete Photos and Videos from a Shared Album
After you use the shared album on iPhone for a while, you might find it not that useful. Or, you simply don’t want it any more. You can choose to delete the shared album.
Open the Photos app on your iPhone to manage your shared albums effortlessly.
Step 1: Navigate to Albums and select the shared album.
Step 2: Click on the Add Subscribers button.
Step 3: If you're the creator of the album, choose Delete Shared Album. If you're a subscriber, select Unsubscribe.
Stay organized and in control of your shared memories!
Easily Back Up Your iPhone Album to PC
While sharing albums on iPhone is easy, actually managing a full camera roll can be challenging. The average user takes hundreds of photos and videos, quickly filling up storage.
This is where MobileTrans - Backup & Restore comes in very handy. MobileTrans is a phone transfer and backup tool that allows seamlessly backing up your iPhone camera roll to a PC.
Wondershare MobileTrans
Backup Your iPhone Photos to Computer Easily
- • No data loss. No data leaks.
- • Support various data, including files, photos, videos, apps, contacts, etc.
- • Easy photo management with a larger computer screen.
 4.5/5 Excellent
Here's how it works:
Step 1: Download MobileTrans on your Windows or Mac computer. Install and launch the software.
Step 2: Connect iPhone to Computer Use the provided USB cable to connect your iPhone to the computer. MobileTrans will automatically detect the device.
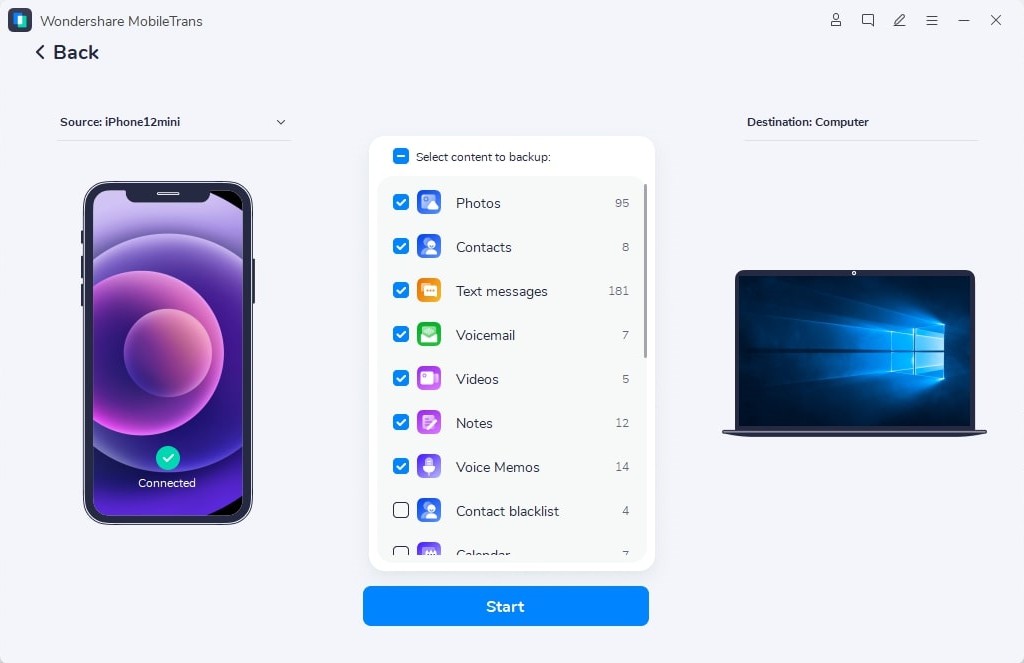
Step 3: In the MobileTrans interface, switch to the “Backup & Restore” tab. Hit on the “Backup” option placed in the “Phone Backup & Restore” section.

Step 4: .Choose Photos and other data types that you want to back up. Click Transfer to begin the process.
Step 5: Once complete, you can browse and manage all iPhone photos and albums directly on the computer. The camera roll is fully backed up.
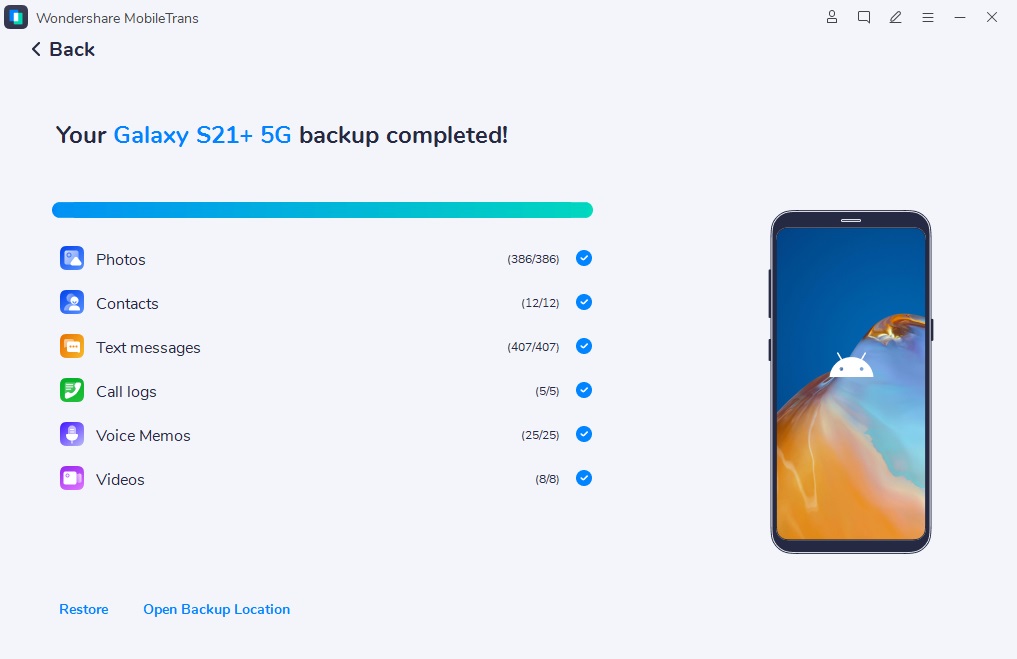
With MobileTrans, you have the perfect solution for protecting your camera roll contents while still sharing albums seamlessly on your iPhone. Try out the free trial today!
Conclusion
Sharing photo albums directly from the iPhone camera roll is an easy way to stay connected and share memories with friends and family. In this guide, we covered how to share existing albums, create new shared albums, accept shared albums, save photos from shared albums locally, remove items from shared albums, and leverage MobileTrans to back the full iPhone camera roll.
With the proper knowledge, iPhone users can master the built-in sharing tools. Follow the steps in this guide to become a pro at sharing albums on iPhone. You'll be able to capture life's moments, store them safely, and share them seamlessly.
4.5/5 ExcellentFAQ
-
1: How many people can I share an album with?
You can share an album with up to 100 people. There is no limit on how many albums you can create and share either. -
2: Can I move photos from a shared album to my main library?
Yes, subscribers can save any photos or videos from a shared album to their Camera Roll on their iPhone. Just tap the Share button from the album and choose "Save to Camera Roll". -
3: What happens if I delete photos from a shared album?
Deleting photos or videos from a shared album only removes them from the shared album itself. The original owner who added the content will still have the items in their personal photo library. Other subscribers also retain their own saved versions. Only the instance in the shared album itself is deleted.


