Services like Google Drive and Microsoft OneDrive are a lifesaver since they enable us to keep important data and files in one place.
The OneDrive offers 5 GB of free storage, while Google Drive offers 15 GB. And, once the free storage is used up, you can subscribe to any plan from each service, depending on what best meets your needs. Well, both the service plans come with 1 TB of storage.
However, many business owners migrate their data to OneDrive from Google Drive, as it offers 1 TB of storage for almost all of its plans and is more convenient for companies to rely on.
So, if you also want to migrate Google Drive to OneDrive, then here I’m going to share some quick and easy ways to make the whole procedure easy for you!
In this article
Part 1: Why Migrate Google Drive to OneDrive?
If you run a business, manage a team, and have a lot of work, then you should migrate Google Drive to OneDrive because it is a better option.
OneDrive is better for businesses and companies that rely on Microsoft Office for their computing needs or conduct a lot of synchronizing. Whereas Google Drive is ideal for individuals who store personal data exclusively and use it for their personal use.
OneDrive VS. Google Drive - Which Is the Best Choice?
| OneDrive | Google Drive |
| 1. OneDrive is preferable for businesses and teams who depend on the Microsoft Office suite for the majority of their work. | 1. Google Drive is better for individual users with average storage needs. |
| 2. Automatically sync with computer files and block-level copying speeds up the sync process. | 2. Automates file syncing but doesn't use block-level copying. |
Both services are excellent; choosing one over the other is a person's personal preference. OneDrive might be a better choice if you have a team to work with and want advanced safety features.
- More advanced safety features
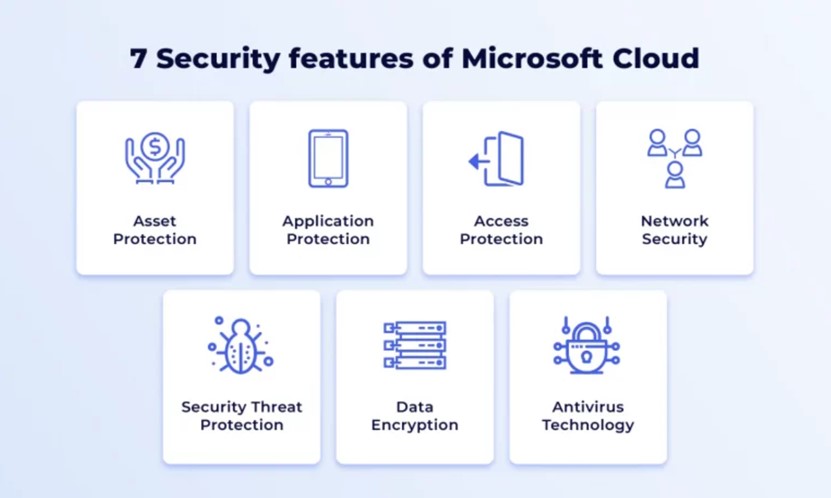
OneDrive has better and more advanced security features than Google Drive. This means that businesses can transfer Google photos to OneDrive, share their files safely, and protect and manage their data better without giving up privacy.
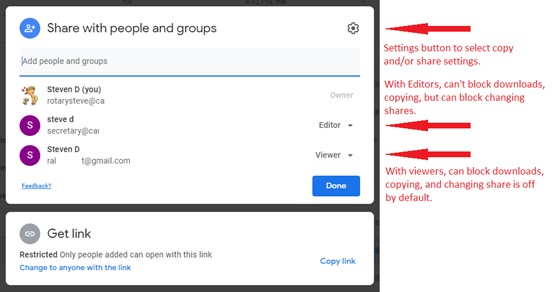
You also can manage the access of your choice, such as "view," "edit," "comment," and "co-author"; this gives you control over who can see what. Not only this, but you can also set an expiration date, stop people from downloading a shared file, and even set a password on it.
- Easy-to-Use Tools for Teamwork
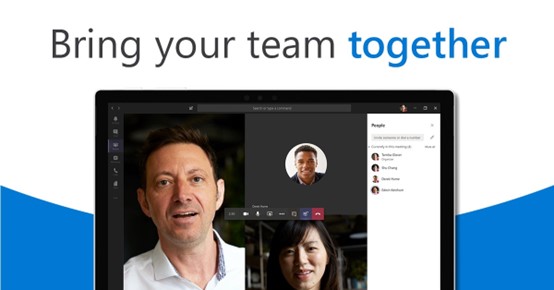
OneDrive's easy-to-use collaborative tools make it easier for businesses to operate virtually without any problem.
- Better Data Storage at a Lower Cost
OneDrive provides a larger storage space compared to Google Drive, with plans ranging from 1TB to 6TB per user. Furthermore, OneDrive plans are frequently more reasonable than in comparison Google Drive plans, which makes it a good choice for startups.
Part 2: 4 Methods to Transfer Google Drive to OneDrive
Here are 4 quick and simple ways to move Google Photos to OneDrive in a matter of minutes; just follow each step properly to finish the migration process.
Method 1: Download and Upload Process.
To download and upload is a time-consuming procedure, but it's the tried-and-true method for moving your data from Google Drive to Microsoft OneDrive.
Take the following steps to finish the download and upload process to migrate Google Drive to OneDrive:
Step 1: Log in to your Google account and go to Google Drive.
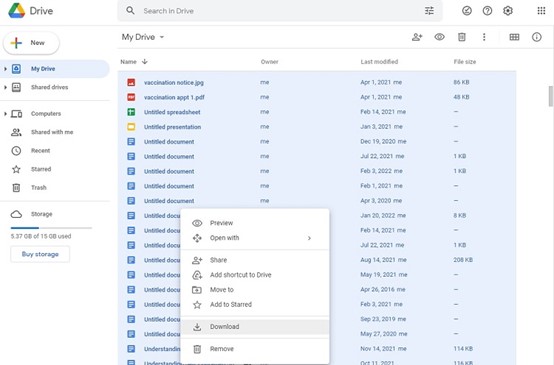
Step 2: Right-click on the file(s) you wish to import.
Step 3: Choose the Download option and proceed to save the files to a drive on your computer.
Step 5: Unzip the downloaded file into the browser folder.
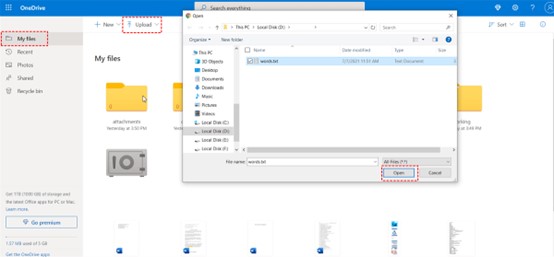
Step 6: To transfer your Google Drive files to OneDrive, simply click the "Upload" button and select the folder containing the files.
Method 2: Drag & Drop
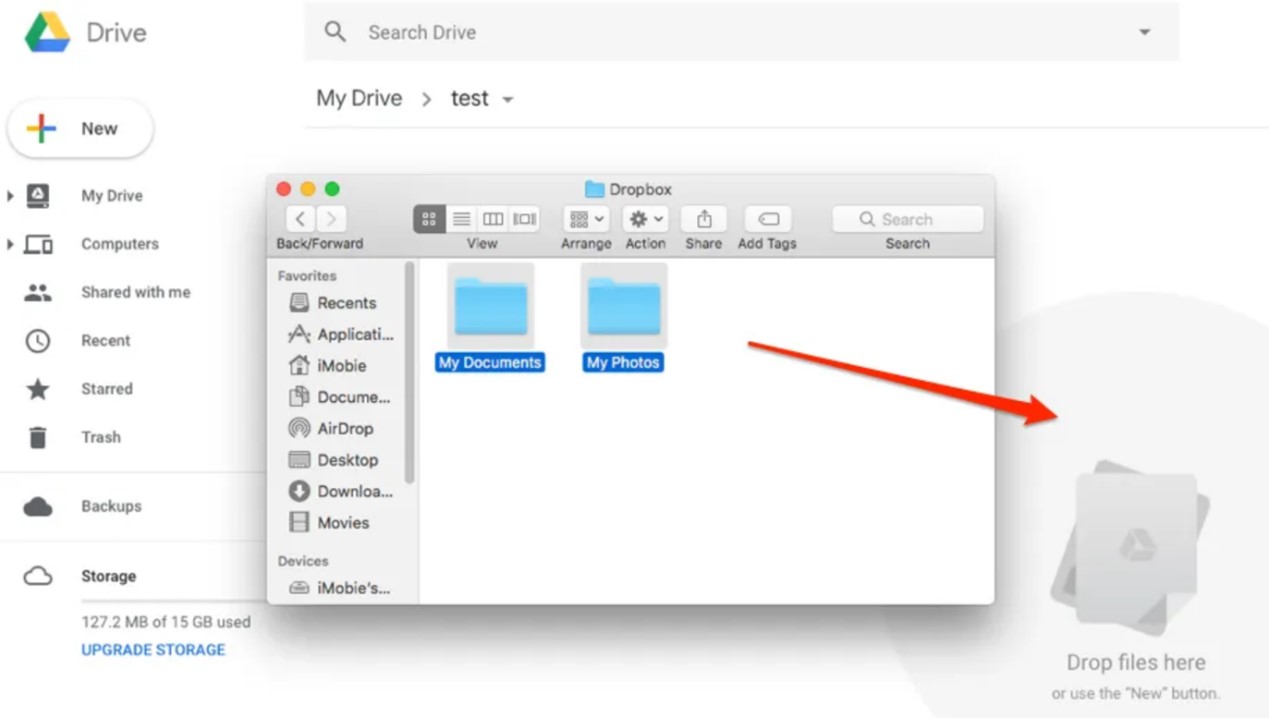
If you don't need to transfer files from Google Drive to OneDrive immediately, you can use the Drag & Drop method, which is quite simple but takes some time. Here’s how you can drag & drop your files:
Step 1: Install OneDrive on your Windows desktop.
Step 2: Sign in to your Google Drive account.
Step 3: Select the files you wish to move from OneDrive to Google Drive.
Step 4: To upload them to your Google Drive, simply drag & drop the files or folders.
Method 3: Use Google Takeouts
Google Takeouts is another option to move photos from Google Photos to OneDrive. This is like downloading and uploading, but Google Takeout lets you download and store files from Google Drive, Google Photos, and other Google services all at the same time.
Step 1: Login into your Google account.
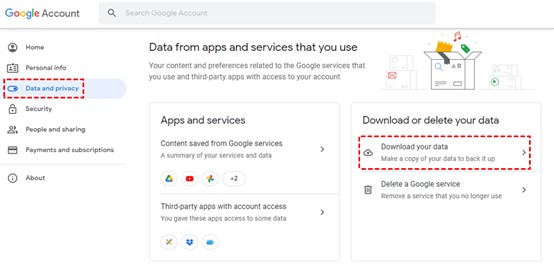
Step 2: Below the “Data and privacy” section, click “Download your data.”
Step 3: Click on "Deselect all." Only select Google Drive or certain files in your Google Drive, and press "Next."
Step 4: Select "Add to OneDrive" as the destination and then click "Link accounts and create export."
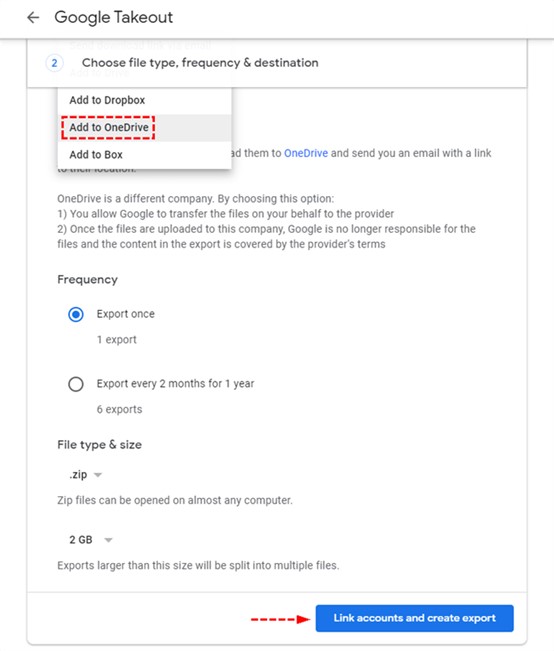
Step 5: Link OneDrive to Google Drive using the window. Then, Google Takeout will compress the data you've selected and upload it to OneDrive.
Method 4: Use the Share feature of Google Drive to Upload Files to OneDrive
While this method can transfer your Google Drive data to OneDrive, it is time-consuming because you have to import each file individually.
Step 1: Sign in to your Google Drive account and select "Shared with me" from the menu on the left.
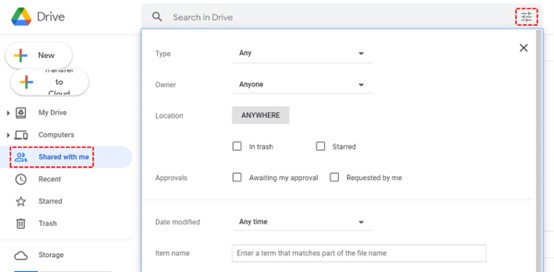
Step 2: Pick out the file you want to add to OneDrive and copy it to another folder. Transfer each file or folder using the same method.
Step 3: Right-click on the folder you want to choose. Select "Share" from the menu.
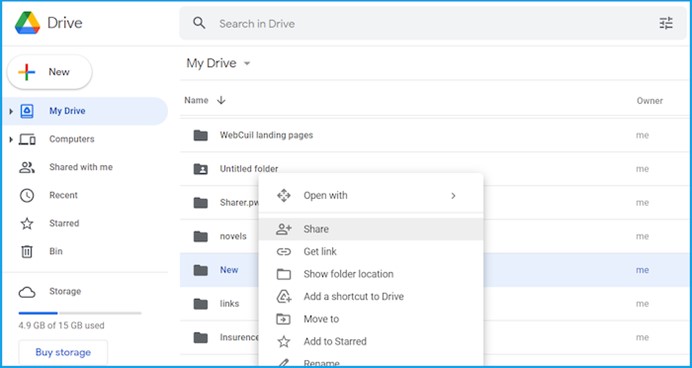
Step 4: Click on "Sharing Settings" and then "Advanced." Then, add the email address with whom you want to share. Set the appropriate access levels and hit the Send button.
Part 3: Backup data to Computer
Wondershare MobileTrans is an incredible solution that saves users from all the headaches linked to backups while offering the best possible level of ease.
If you are still unsure about why you should use MobileTrans for your backups, then the following are some of the advantages that you should consider:
1) Safety:
Unlike other drives, which may leak your data in the process of backing up your phone to a computer, MobileTrans is risk-free to use.
2) Convenience:
MobileTrans is easy to use. You can start backing up with just a few clicks without having to follow many complicated steps.
3) Easy management:
After making a backup on MobileTrans, it's easy to manage your data on a PC. You'll have quick access to your files and can move them to any other device at any time.
Simple Steps for using MobileTrans to back up data to your PC
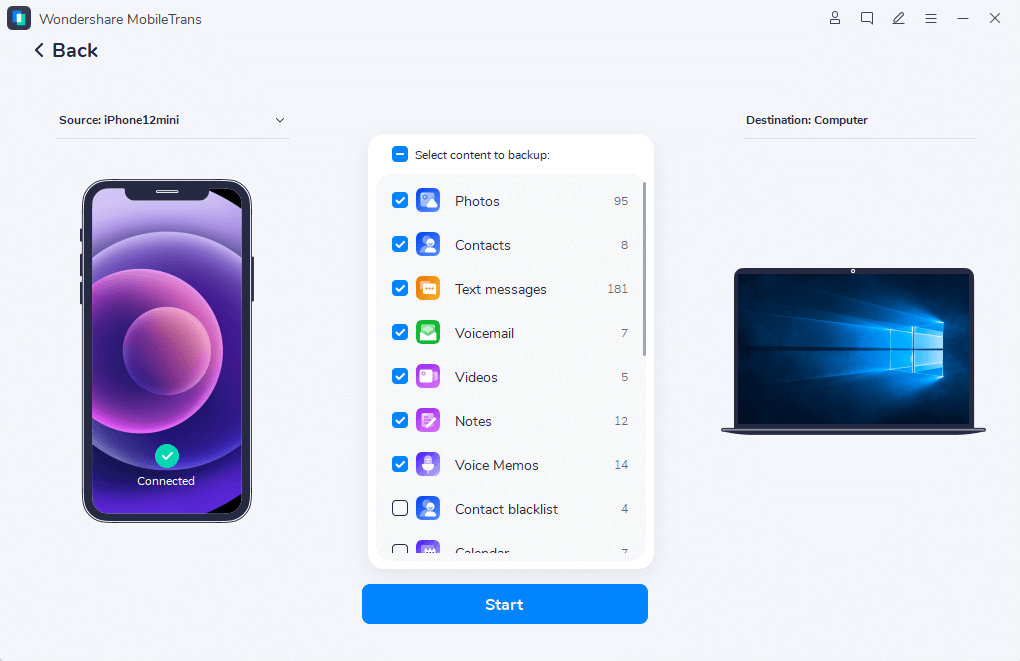
You can transfer up to 18 types of data from your phone to your computer using MobileTrans backup. This includes contacts, WhatsApp deleted chats, iTunes, photos, reminders, notes, and much more.
Wondershare MobileTrans
Back Up Your Data to Computer Easily
- • No data loss. No data leaks.
- • Support various data, including files, photos, videos, apps, contacts, etc.
- • Compatible with thousands of device types acorss Android and iOS.

 4.5/5 Excellent
To back up your data on your computers using MobileTrans, follow these simple steps:
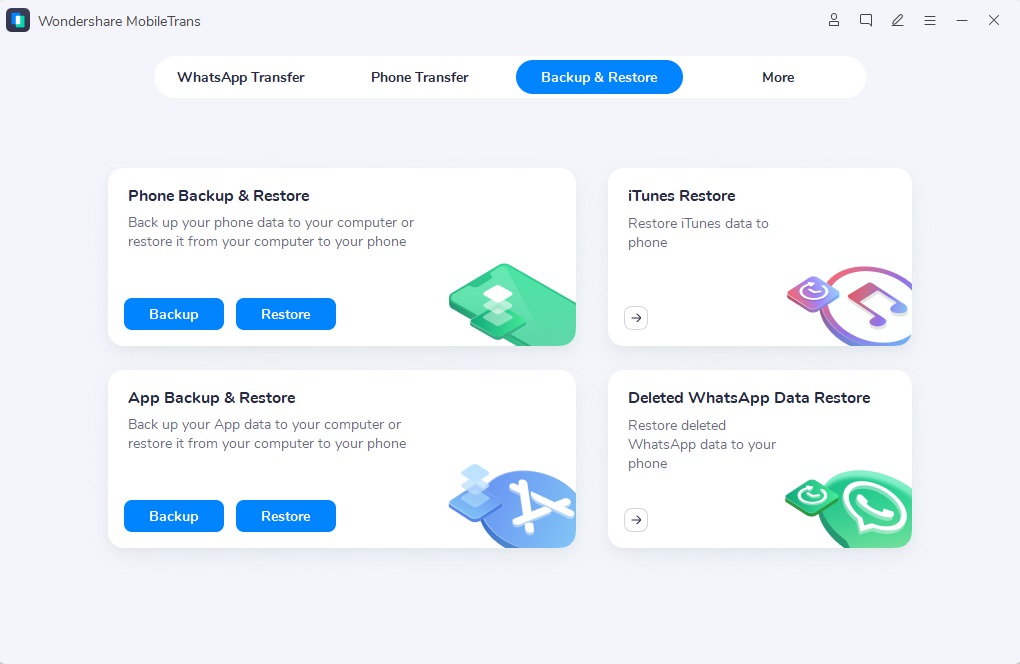
Step 1: Connect your cell phone to the computer > Open MobileTrans > click on "Backup."
Step 2: Choose the file to backup and press the "Start" button.
Conclusion
You are free to use any of the methods mentioned above to migrate your data from Google Drive to OneDrive. Although all of these methods are very simple, MobileTrans is the most effective one.
With MobileTrans, you can easily back up your data files onto your personal computer without having to put in a lot of effort. All it takes is a few clicks to finish the migration process.

 4.5/5 Excellent


