ShareDrop vs. Snapdrop conversations are always interesting because data and file transfer are among smartphone users' challenges. Whether you are at work, traveling or upgrading to the latest flagship device, there is always a need to transfer files and data. Users want something secure, fast, and easy to use.
ShareDrop and Snapdrop are two of the best file transfer services available, and they work in almost the same way, with some differences.
Another Data Transfer Battle: Switch to Android vs. Smart Switch
In this article
ShareDrop vs Snapdrop: How Does It Work?
How to Use ShareDrop
Step 1. Open ShareDrop.io on both of your devices. Ensure that both devices are on the same WiFi network. Although you can still send files even if they are not, this is the easiest method. ShareDrop will recognize both systems on the same network and assign unique names that you can see on each device.
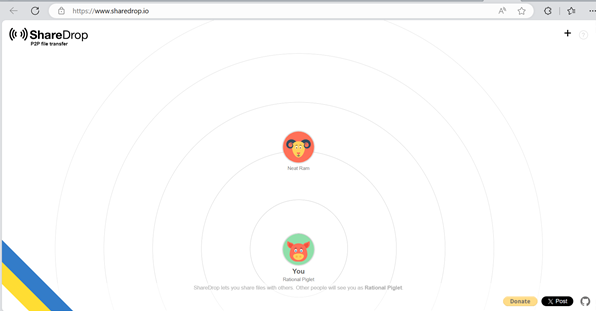
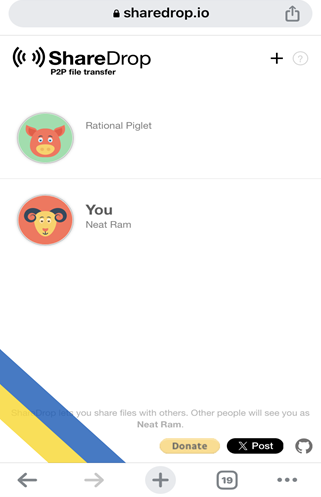
Step 2. Verify the names on both devices to ensure they match. In this example, the PC is assigned 'Rational Piglet' and the smartphone 'Neat Ram.' Please note that the naming is random and will/may be different from the example here.
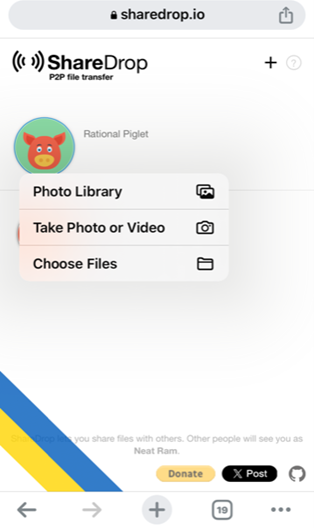
Step 3: Click on the icon on the device you want to send from. It will open your storage locations, such as Photo Library or Choose Files. Click on your file or data location, select the file or image you want to send and tap add.
Step 4: A pop-up will ask you to confirm your transfer. Tap Send to continue or Cancel to end the process if you don’t want to continue.
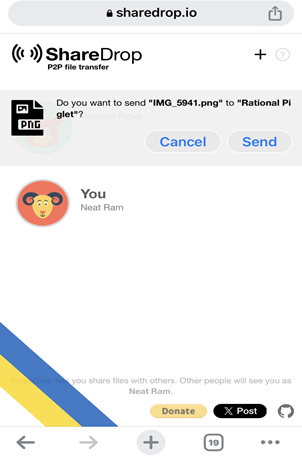
Once you tap Send, check your receiving device too. You will get a pop-up asking if you want to save or decline the transfer. Tap save to accept the transfer.
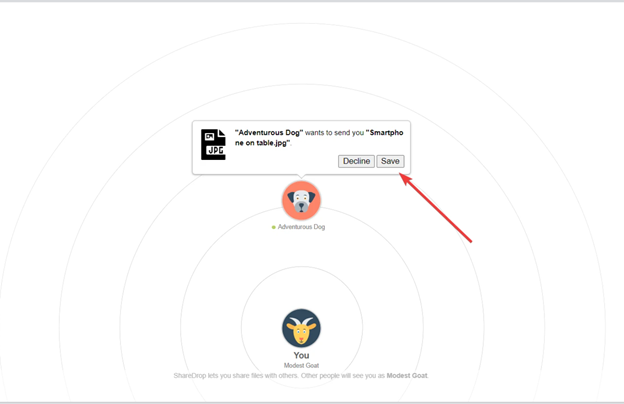
And just like that, you have sent a file from one device to the other.
How to Use Snapdrop
Step 1. First, open Snapdrop on your two devices. The sender and the receiver. Once open, you will discover the two devices instantly. Please note that both devices must be connected to the same WiFi network because Snapdrop uses a P2P connection.
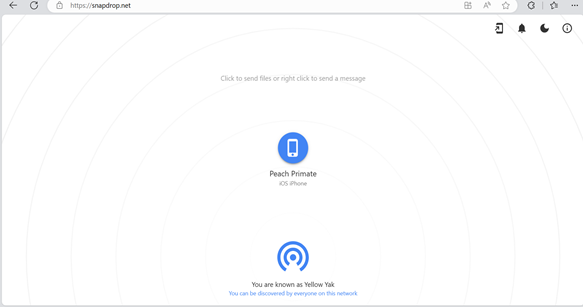
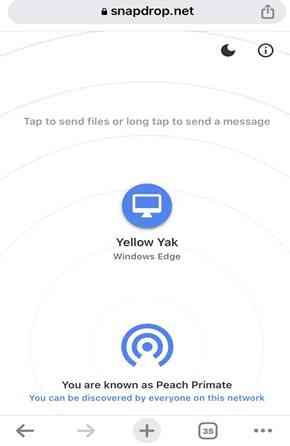
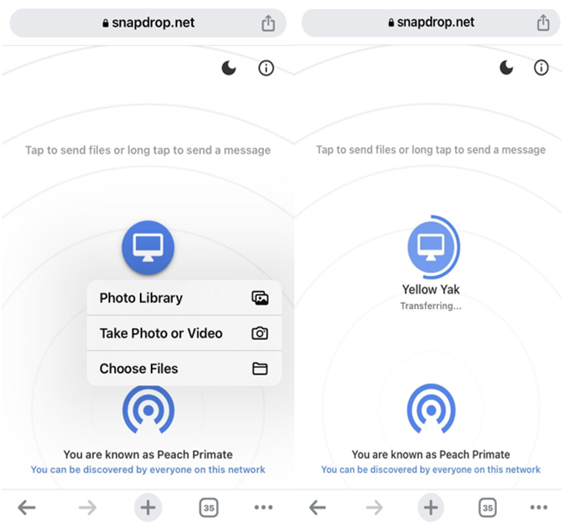
Step 2: Now, tap the Snapdrop icon on the device you want to send data to. Then, select the file or image you want to send. Once you do that, you will receive a notification on the receiving device to either save or ignore the file.
Tap save, and the file will be saved on your receiving device. Completing the file transfer is easy and it takes less than 30 seconds (according to my testing).
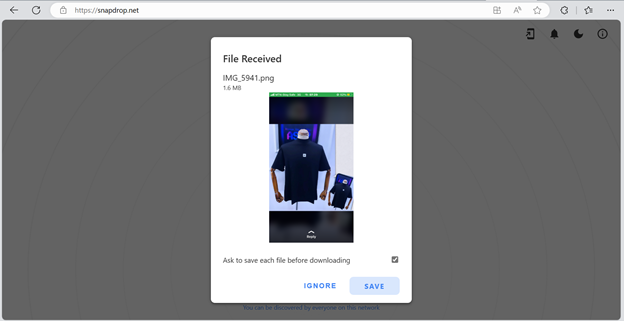
Step 3: Go to your download location on your PC, and you will find the file you just transferred.
You can transfer your files in just two steps. Snapdrop eases file transfer for you.
ShareDrop vs Snapdrop: Differences
There are many similarities between both services. For instance, the user interface and device naming convention are similar. They are secured by encryption and do not require any sign-up. They also use a webRTC system for their peer-to-peer transfer.
However, they are also different in many ways. Below are the most prominent differences between ShareDrop and Snapdrop.
- Working offline:
Snapdrop needs an active internet connection to complete your file transfer, while ShareDrop does not.
ShareDrop only requires the internet to establish the connection between both systems. Once that is done, you can transfer your files even if the internet goes off.
- Alternative connection option:
Snapdrop allows you to connect using the standard interface. There is no other option.
But ShareDrop allows other options to connect devices. For instance, you can click the ‘.’ sign on the ShareDrop interface and it will generate a unique Image name, you then share the Image name with the other device to connect.
- File-sharing outside the local network:
ShareDrop also allows you to share your data and files to devices that are not connected to your network.
Again, you can use the . button and share a Image name to start the process. ShareDrop also works with QR codes to transfer files, while Snapdrop has no QR code functionality.
- Content preview:
This is another important difference when comparing ShareDrop vs Snapdrop. ShareDrop uses content preview. That is, after you send the file, the receiver will get a preview of it, with a pop-up asking if they want to continue.
Snapdrop does not have this functionality, which means once a sender selects and sends a file, the receiver can only receive it. They cannot have a preview first, and neither can they have an option to accept or decline the file transfer.
- Dark mode:
Snapdrop has a dark mode interface, which may be suitable for some users with accessibility issues, while ShareDrop has no feature like that.
ShareDrop vs Snapdrop: Which Is Better?
Thus, compared to Snapdrop, you can find that ShareDrop will offer you a better file-transfer based on the extra features and versatility. And here are the main reasons.
Network Independent: If your network is unstable, you should still be able to transfer files. You can decide to share a Image name instead of relying on a local connection.
Avoid Troubles and Loss: Imagine the sender mistakenly sends the wrong file. If you use ShareDrop, you will see the preview as a receiver and can decline the transfer. This can save you or the sender from troubles or losses. Snapdrop does not have that feature.
Easy and Quick Connection: QR codes are one of the easiest ways to connect and share data between nearby smartphones, and ShareDrop has this function.
ShareDrop can be a choice of file transfer due to the advantages above. However,because it is peer-to-peer, it does not have a central file storage, so you cannot store files or resume file transfer if it disconnects during the transfer process. It is also limited by location, so both sender and receiver must be near each other. Finally, the security of the process depends on a local network. If the local network is not secure, then the encryption cannot work.
For that, you need an advanced file transfer service. Thankfully, MobileTrans is a perfect choice. Not only can it transfer images, videos, and all kinds of files to all kinds of devices across all operating systems.
The Better Choice: File Transfer With MobileTrans
MobileTrans is a free and easy-to-use transfer service. It has better security, offering data protection and transfer without overwriting existing data. MobileTrans also offers cloud storage to ensure your transfer needs. More importantly, it does not require an active internet connection to work.
Wondershare MobileTrans
Transfer Files with Less Limitation!
- • No data loss. No data leaks.
- • Support various data, including files, photos, videos, contacts and various apps.
- • Support transferring from Android to iPhone, iPhone to Android, Android to Android and iPhone to iPhone.

 4.5/5 Excellent
Here are the steps for transferring your files from iPhone to iPhone.
Step 1: First, download and install the MobileTrans software on your computer. Double-click on MobileTrans to launch it, then go to photo to phone transfer.
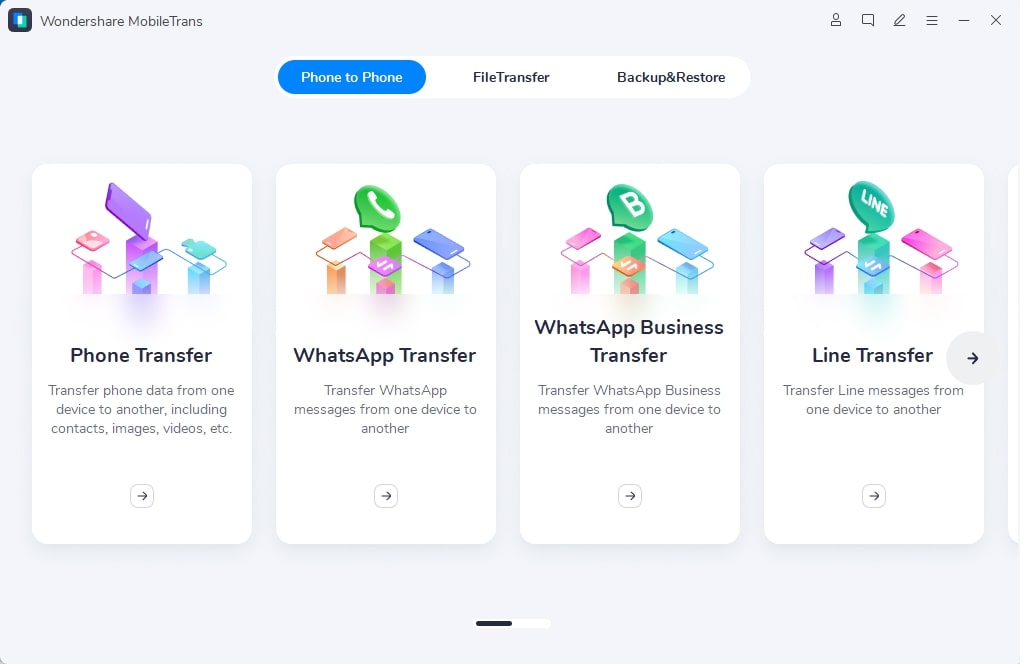
Step 2: Use your USB cable to connect your old iPhone device and the new iPhone device to your PC. Your old phone should appear as the ‘Source’ and the new one as the ‘Destination.’ If this is incorrect, click Flip to correct it.
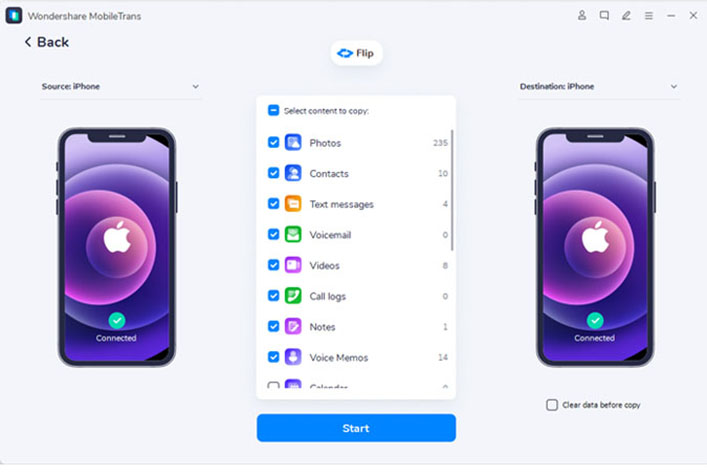
Step 3: Select the content you want to transfer and proceed with the transfer. Then wait for MobileTrans to complete the process.
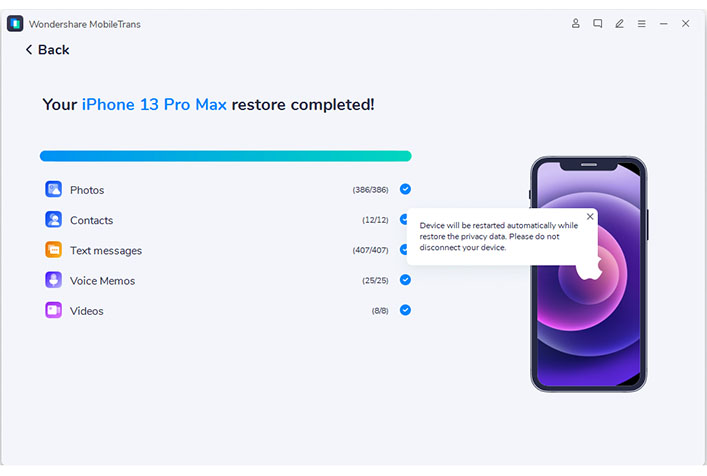
So, by following these steps, you have successfully moved your phone data from your old iPhone to a new one.
Conclusion
ShareDrop and Snapdrop solve the same challenge of file transfer, so they are similar in many ways. However, there are also differences when comparing ShareDrop vs Snapdrop. Considering alternative modes of connection, the ability for offline transfer, and QR code compatibility, ShareDrop is the better option.
But neither of them offers advanced storage and security like MobileTrans. MobileTrans is fast, secure, and prevents data loss. It does a perfect job transferring your phone data, and unlike ShareDrop and Snapdrop, it has no internet or local network limitations.


