When your iPad is disabled and cannot connect to iTunes, it means your device has locked itself for security after too many wrong passcode attempts. While annoying in the moment, this feature helps keep your information secure if someone else tries guessing the code.
Don't panic if your iPad is disabled to connect to iTunes. We can walk through fixing it together. Connecting to iTunes will undo the disabled notice swiftly. Soon you'll be back enjoying your iPad as usual. So, let's solve it together!
In this article
Common Reasons Behind iPad Disabling
- Incorrect Passcode Attempts
It's understandable to forget passwords at times. Entering an incorrect passcode several times on your iPad triggers a security alert. To protect your information, the iPad then restricts access briefly until the situation can be reviewed.
- Time Intervals and Increasing Lockout Periods
Now, you may question why your iPad does not simply permit another try. It's all about protection. Your iPad establishes time periods between passcode efforts. The greater number of wrong inputs you enter, the longer the waiting becomes. Ultimately, you face the ultimate problem the request to connect to iTunes.
- Passcode Security
Your passcode is the first line of defense for your iPad. This disabling feature protects your personal information. Even though it can be inconvenient when rushing, the passcode provides crucial protection against possible security risks.
How to Connect a Disabled iPad to iTunes
If your iPad shows that "Connect to iTunes" message, let me help get your device working smoothly again. No matter if your iPad has the original home button or the newer Face ID, I can assist.
- Turn off the iPad.

Press and hold the Lock button located at the top of the device. A slider labeled "Power Off" will appear on the screen. Slide your finger across the slider to power down your iPad.
- Connect to iTunes.

Grab a USB cable and connect your iPad to your computer. Launch iTunes on your PC or Finder on your Mac. Look for that tiny iPad icon in the top-left on iTunes or find your iPad's name in the sidebar on Finder.
- Put iPad in Recovery Mode.
This simple yoga move for your iPad starts with holding both the Home button and Lock button together. Keep them pressed until the Recovery Mode screen appears on your display.
- Restore the iPad.

Your iPad may alert you about a problem when connecting to iTunes or Finder. Stay calm. Select Restore and confirm to let the process begin. Keep your iPad plugged in as it repairs itself.
Just like on your Home Button devices, you'll receive a message regarding your iPad's issue. Choose Restore, confirm, and allow the technician to care for your device. Remaining still while your iPad reconnects requires patience - keep it plugged in until the restart completes.
Taking these measures can restore your unwell iPad. Connecting to iTunes may seem inconvenient. However, we have a helpful backup plan. Remain here to learn about that option.
Alternative Solutions If You Can't Connect to iTunes
So you've tried entering your password incorrectly multiple times and your iPad is almost locked or already locked. And the "iPad is disabled and cannot connect to iTunes" message is still there. That's when looking for another option like MobileTrans can help.
MobileTrans allows easily moving your iTunes content. It ensures smooth reconnection to your iPad so you can move your data even when your iPad is not connecting to iTunes. Let's explore the transfer process in detail.
Wondershare MobileTrans
Transfer data on iPad without iTunes!
- • No data loss. No data leaks.
- • Support various data, including passwords, photos, videos, contacts and various apps.
- • Support transferring from Android to iPhone, iPhone to Android, Android to Android and iPhone to iPhone.
- • The best alternative for you when the iPad is disabled connect to iTunes.

 4.5/5 Excellent
- Step 1: Install MobileTrans on your Mac or PC.
Get the engine running by installing MobileTrans on your computer.
- Step 2: Launch MobileTrans and click Phone Transfer.

To use the Phone Transfer feature, go to the Import to Phone option. Connect your iPad to the computer using the USB cable. Once connected, follow the on-screen steps to share data between your devices in a simple and secure way.
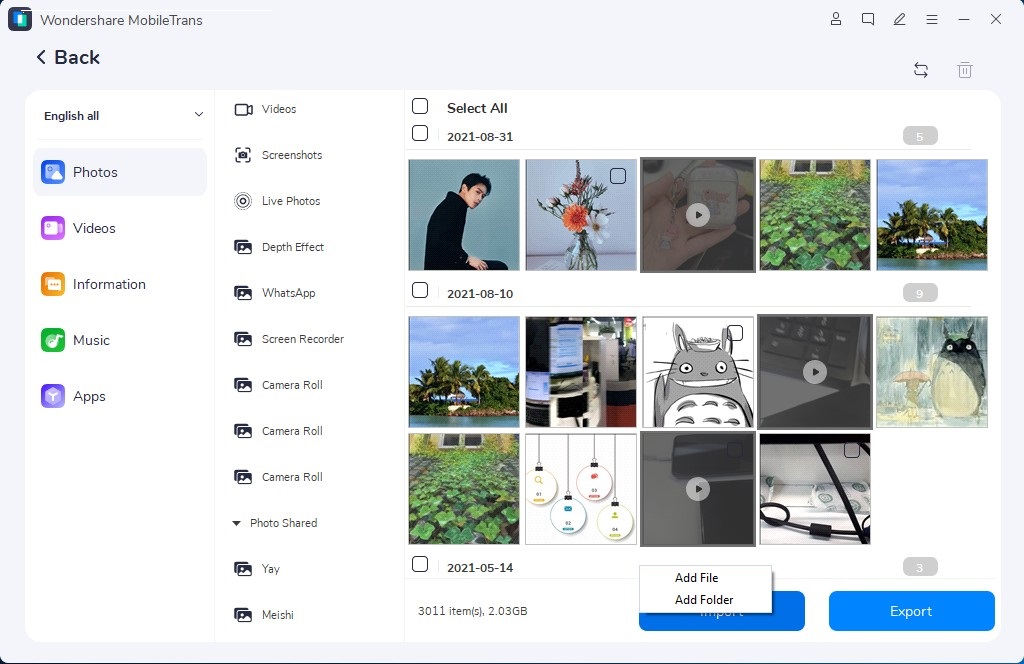
- Step 3: Click Import from the bottom of the page and select Add File.
Select the tunes you're keen to move to your iPad. Videos, pictures, and extra elements can also come along for the experience.

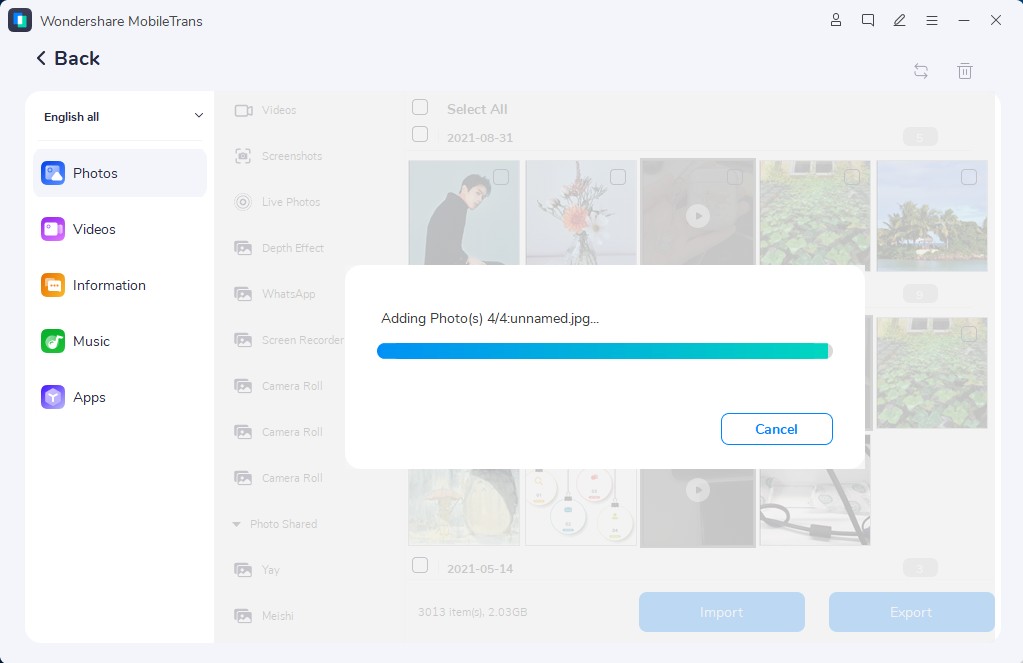
- Step 4: Allow MobileTrans to move the files.

In just a short time, your iPad will be moving to the rhythm of your music that was moved over.
Conclusion
To summarize, if you find the iPad disabled connecting to iTunes, stay calm. MobileTrans provides an easy option when the iPad is disabled and cannot connect to iTunes. It smoothly reconnects your iPad without trouble. You can easily manage your iPad's security and how it works. Download MobileTrans now to keep using your device stress-free. Transfer all your information securely. Getting your iPad back on track is just a click away.


