Have you ever felt frustration and disappointment when your iCloud gets stuck on 'time remaining estimating'? Or, it might have occurred to you that iCloud photos updating is stuck at one percent.
If you're an iPhone user, chances are you've encountered this types of issue at least once while trying to transfer data between devices.
In this guide, we'll delve into the root causes of this problem and provide step-by-step solutions for restoring your iCloud when it's stuck on 'time remaining estimating.' Additionally, we'll explore advanced methods to retrieve your data from iCloud without resorting to a factory reset.
In this article
Part 1: Why Is My iPhone Stuck at Restore from iCloud?
It can be daunting if your iPhone is stuck at Restore from iCloud time remaining estimating. Here are some factors causing the issue.
-
Large Files
Large backups from iCloud can be the real reason behind the process. The process can take time, so you must be patient.
-
Poor Internet Connection
Your internet connection often causes the backup process to get stuck. Moreover, when multiple users are on the same internet connection, it can function slower. There must be a strong Wi-Fi connection for fast data recovery from iCloud.
-
Outdated System
iPhone users need to be made aware of updating the iOS software. Your phone must run on the latest iOS 26 version for iCloud backup to run smoothly. It will fasten the data recovery process.
-
iCloud Server Issue
iCloud servers can suffer temporary glitches, affecting the data restoring process. You can check the Apple System Status page to see if there are issues with the iCloud server.
-
Insufficient Storage Space
When your iPhone freezes during data recovery from iCloud, it can be due to less storage space. Before initiating the backup process, permanently remove unnecessary data from the phone.
Part 2: Solutions to Restore from iCloud Stuck at Estimating Time Remaining
Getting stuck at 'Estimating Time Remaining' during an iCloud restore can be frustrating. Don't worry, though. We'll go through some easy fixes to help you get your iPhone working again.
1. Restart the iPhone
-
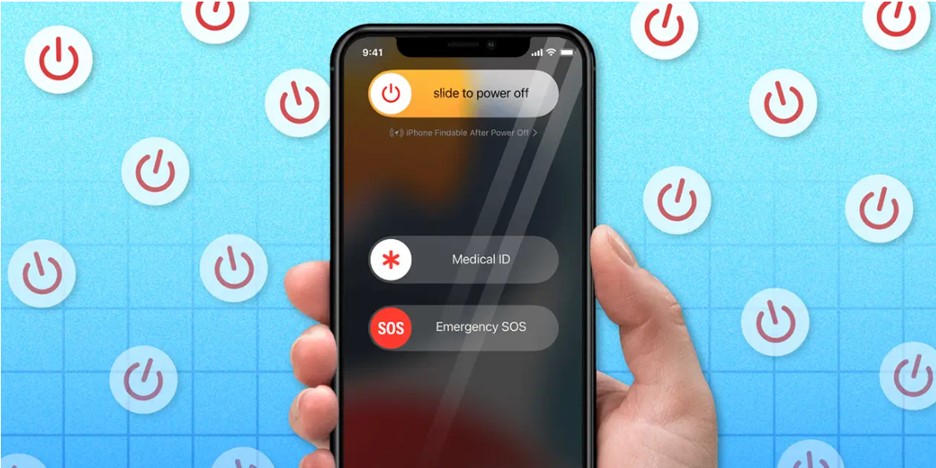
Hold down the side (or top) button on your iPhone.
-
Wait for the Slide to Power Off slider to appear on the screen.
-
Slide the slider from left to right to turn off your iPhone.
-
Wait a few seconds for the iPhone to turn off completely.
-
Hold down the side (or top) button again.
-
Let go of the button when you see the Apple logo.
-
Your iPhone will restart, and you can use it as usual.
2. Use Strong Cellular Connection: Turn off Wi-Fi
A poor internet connection can make you sit for hours near the phone. You should look for an alternate option, a cellular connection. A Wi-Fi assist option on the iPhone can automatically switch to a network connection if Wi-Fi doesn’t work.
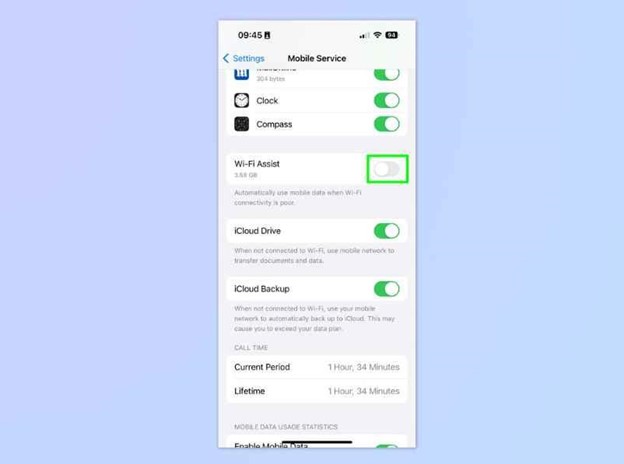
While this feature sounds good, it can interrupt the process that demands continuity. Therefore, switch off the Wi-Fi assist option before processing the data restore process.
Here’s how to do it:
-
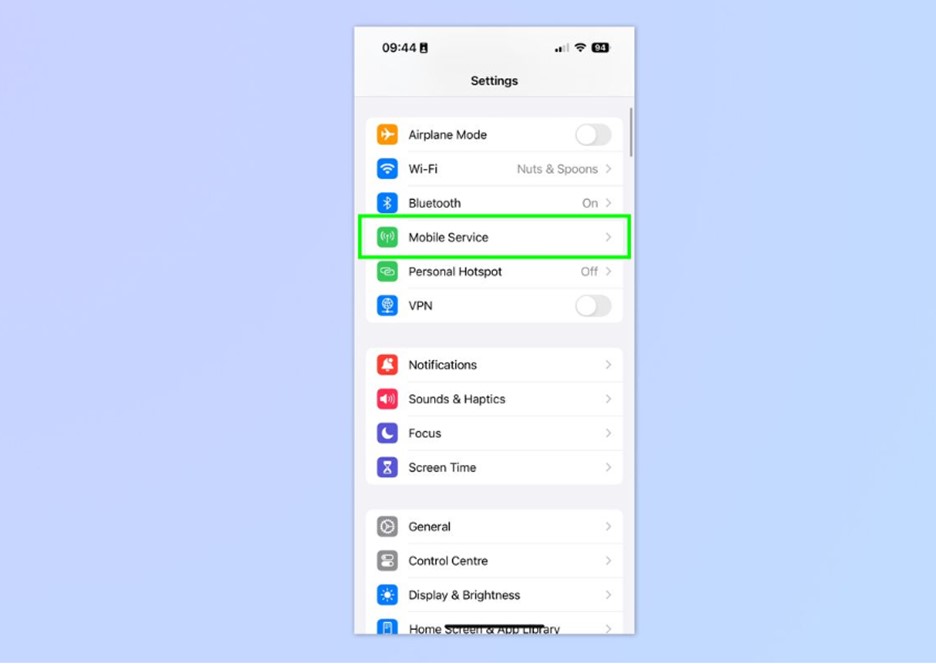
Open Settings.
-
Scroll down and tap Cellular.
-
Scroll to the bottom and disable Wi-Fi Assist by toggling it off.
3. Update Your Device Software
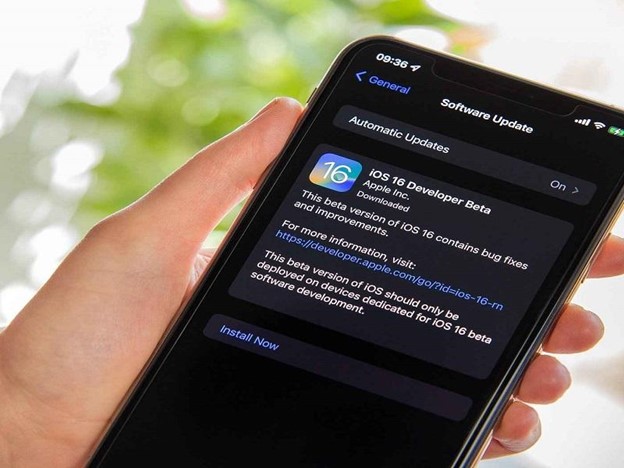
If your phone runs on an outdated iOS version, it can affect the restore process. First, you should update the iPhone to the latest iOS 26 version. If your phone is stuck on Update Requested, try to solve this issue first.
Follow the steps to update your iPhone:
-
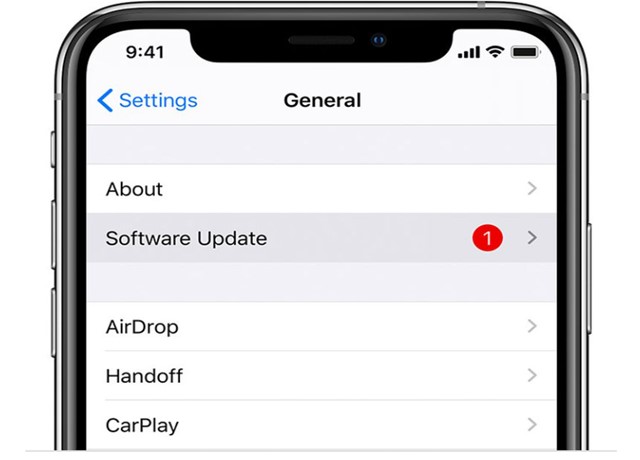
Open Settings.
-
Scroll down and tap Software Update.
-
If iOS 26 is available, tap Download and Install.
-
Follow the on-screen instructions to complete the update.
4. Pause the Transfer Process for a While
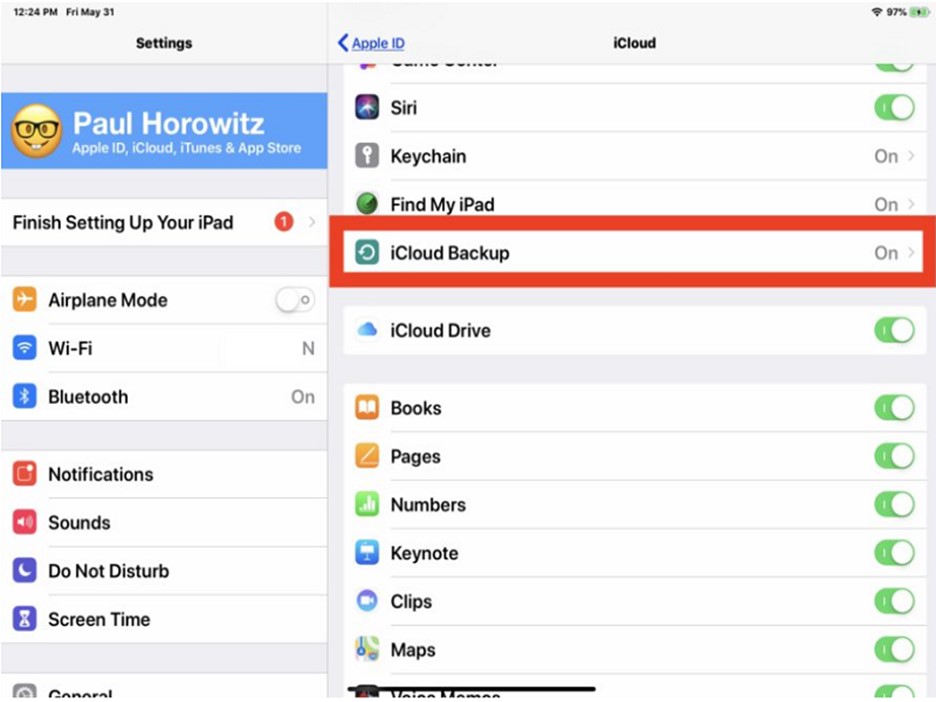
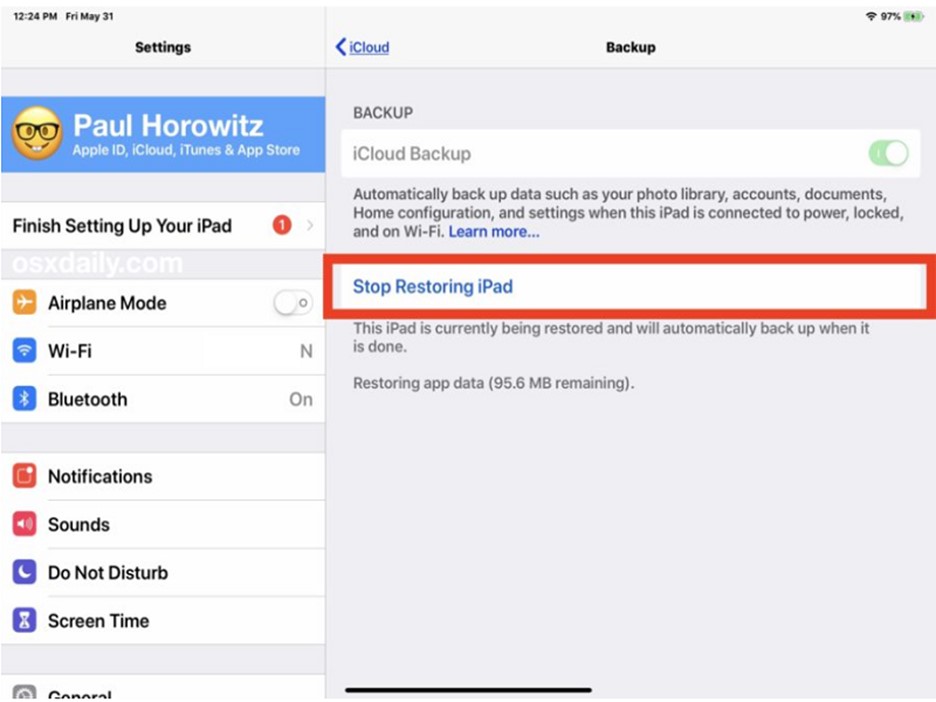
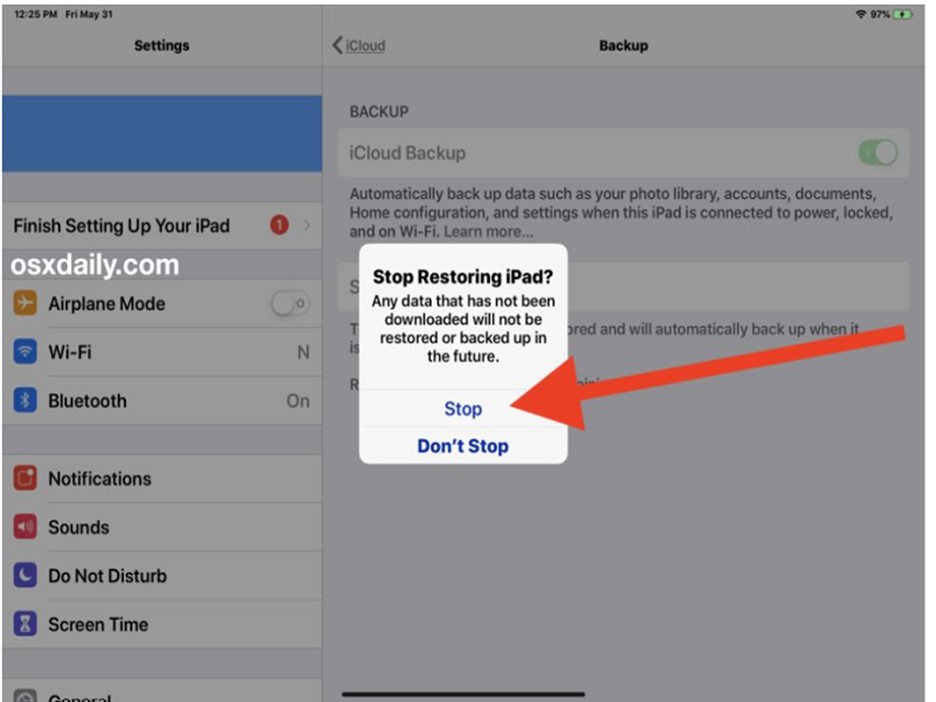
If none of the methods above work, you should give your phone a break. Overusing the phone can lead to overheating, eventually freezing the phone. Therefore, stop the transfer if you experience frequent problems during the backup process. Resume it later with a better Internet connection. Follow these steps to pause the iCloud restore process from your mobile.
-
Open your mobile settings and choose iCloud.
-
Find the Backup option.
-
Look for Stop Restoring iPhone/iPad and tap it.
-
A pop-up menu will appear; select Stop from the menu.
Advanced Method: Recover from iCloud With a Few Clicks
While the methods above can help solve the problem, there are times when using an advanced tool becomes necessary. One of the valuable tools for restoring data from iCloud is Wondershare Dr.Fone. Its user-friendly interface and extensive data recovery can make your data backup process easier.
-
Dr.Fone is compatible with iOS and Android and convenient for data recovery. User-friendly interface
-
Supports various types of data recovery, including messages, photos, contacts, and more
-
Compatible with both iOS and Android devices
-
Allows selective data recovery
-
Preview the feature to see what you're restoring
-
High success rate in data recovery
-
Data extraction from damaged or locked devices
Stepwise Instructions to Restore Data from iCloud Using Dr.Fone
-
Step 1:
Visit the official website of Dr.Fone. Download and install the software on your computer. Then open Dr.Fone on your computer.

-
Step 2:
From the main screen, select "Data Recovery." In the next window, select "Recover from iCloud Backup."
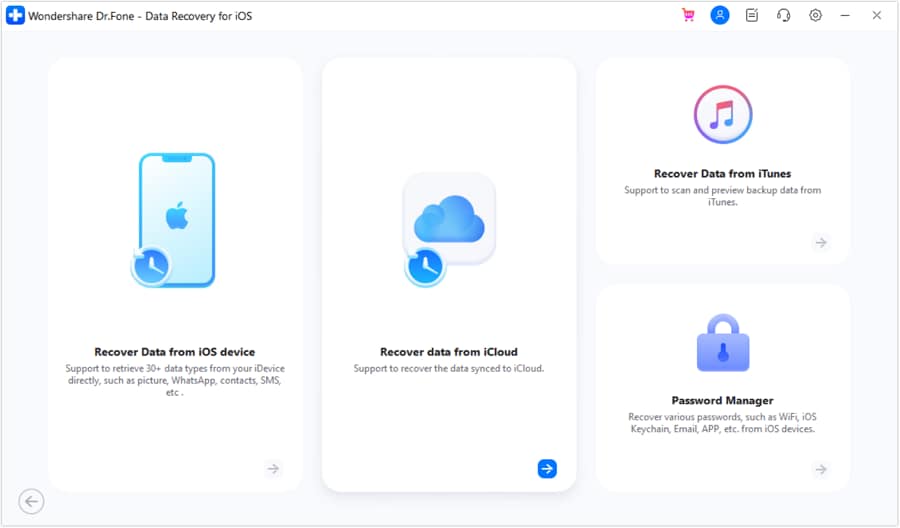
-
Step 3:
Enter your Apple ID and password to log into your iCloud account.
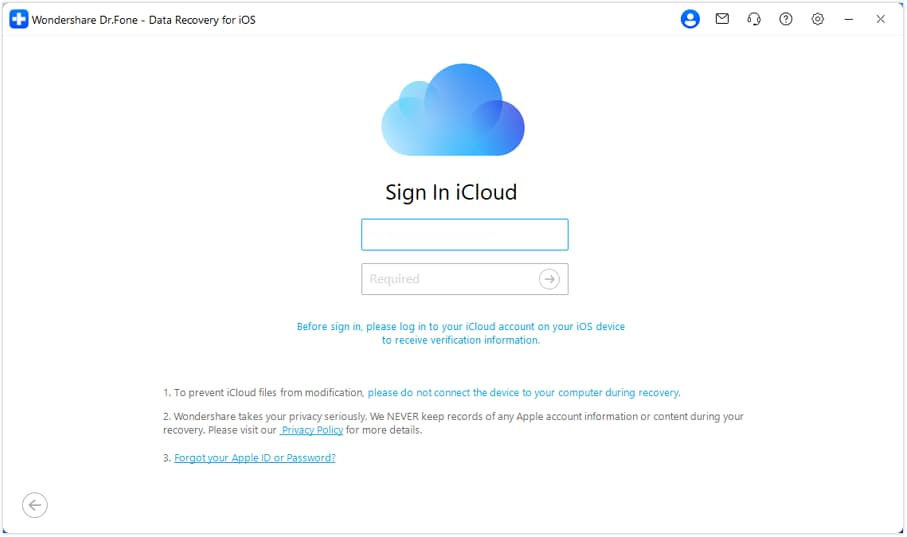
-
Step 4:
Dr.Fone will display a list of iCloud backup files. Choose the one containing the data you want to restore.
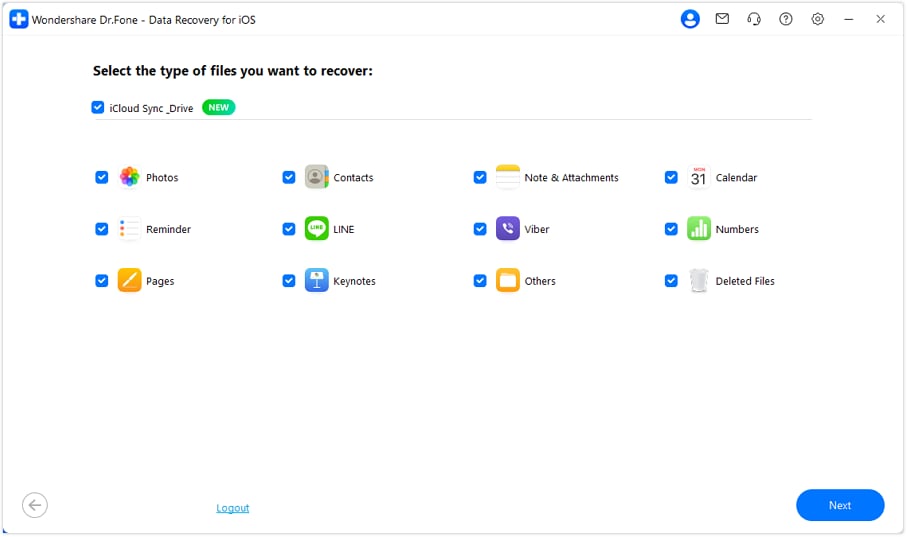
-
Step 5:
Once you select the data, the download will start. A progress screen like this will appear on the screen.
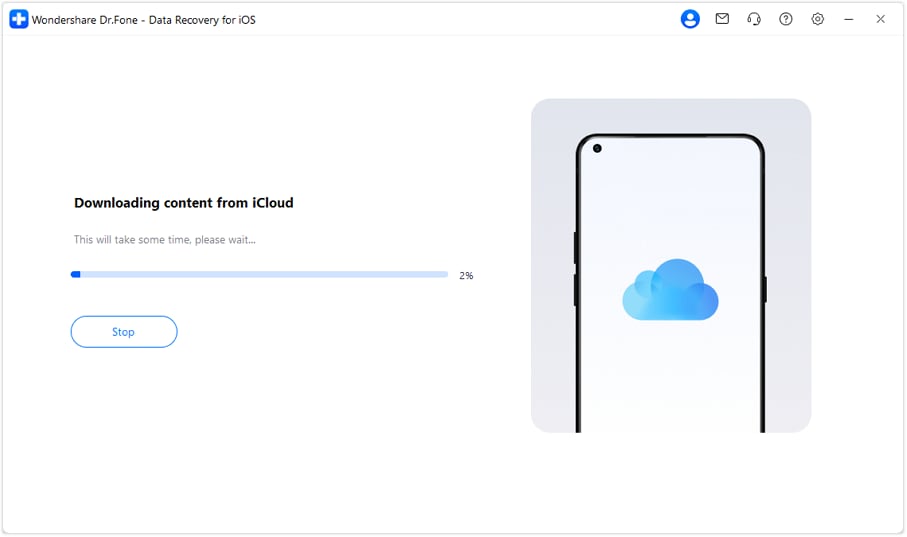
-
Step 6:
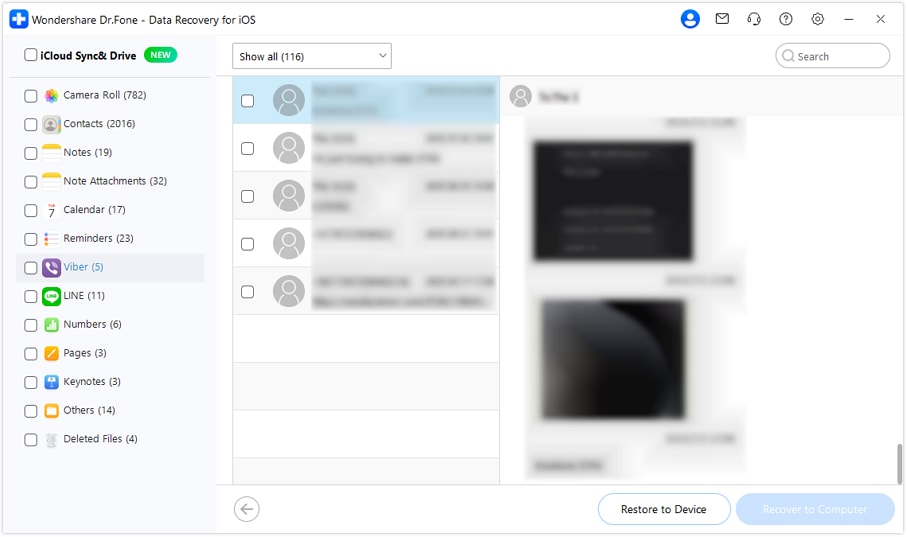
The following screen will appear showing downloaded data categorically. Select the data you want to recover.
-
Step 7:
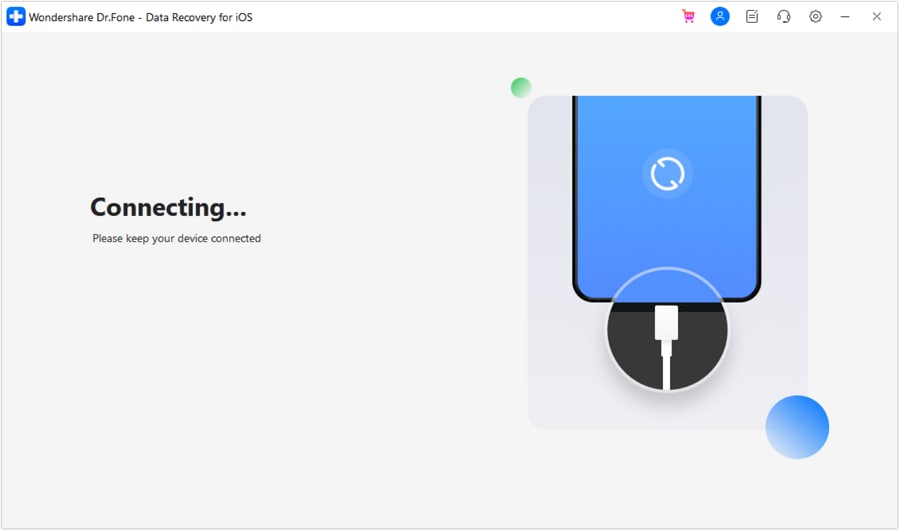
Continue restoring data to your iOS device.
-
Step 8:
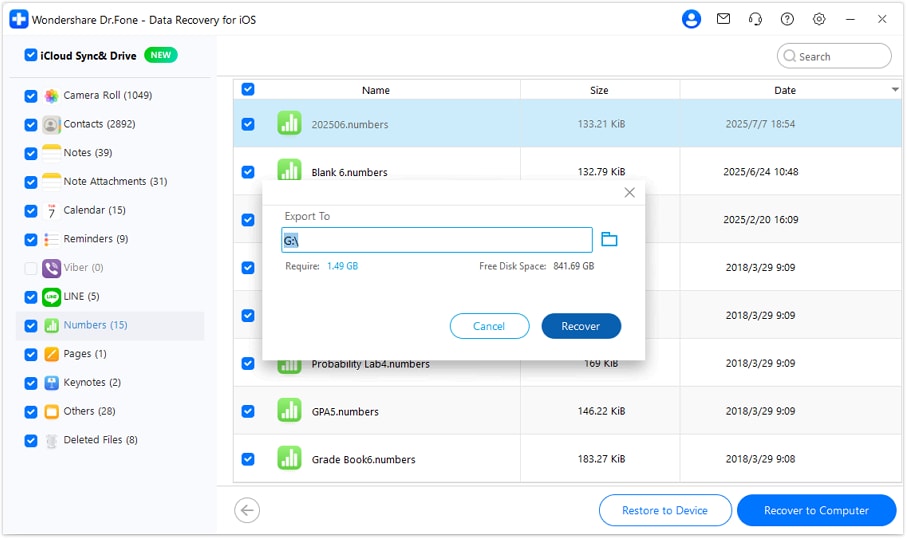
You can also recover data from your computer. Click the "Recover to Computer" button to save the selected data to your computer.
Conclusion
Transferring data from one device to another is a time-consuming and arduous task. Individuals using iPhones to restore data from iCloud face the freezing issue. The iPhone sometimes gets stuck on the time remaining estimating when restoring from iCloud. This problem can occur due to less storage space, a poor Internet connection, and cloud server issues. Besides this, we’ve also proposed solutions in this guide that will solve the problem.
FAQ
-
How long does restoring from iCloud take?
The duration it takes to restore data from iCloud entirely depends on your backup mode, i.e., iTunes and iCloud. Backing up an iPhone through iTunes takes 15 to 30 minutes. On the contrary, using iCloud to restore an iPhone takes one to four hours. -
What to do if iCloud backup is taking forever?
If your iCloud backup estimating time remaining takes longer than expected, you can check your Internet connection, the server glitches, and if your device is on low power mode. Also, connect your device to power and a strong Wi-Fi connection, and wait for a while to see if the backup becomes normal. If it’s still taking forever, you should contact Apple Support.


