Has your iPhone ever gotten stuck on that annoying "Verifying Update" screen? You know, when you try to update your phone but it just freezes up and won't let you do anything? It's the worst, right? You can't access your apps, photos, or anything else on your device. It's like your iPhone is trapped in a weird time loop!
Well, don't worry, you're definitely not alone. Lots of people have dealt with this super frustrating issue before. But guess what? There are actually ways to get your phone working normally again!
In this guide, we'll explain why your iPhone sometimes gets stuck "Verifying Update" in really simple terms. Then we'll share some easy step-by-step solutions to free your phone from this update limbo. Whether you're a total tech expert or just a regular user, this article covers fixes for everyone.
In this article
Why is iPhone Stuck at Verifying Update Screen?
Before we dive into the solutions, it's important to understand what might be causing your iPhone to get stuck at the "Verifying Update" screen. Here are a few reasons why your iPhone may get stuck on the update screen.
- Software Glitches: Software updates can sometimes encounter glitches or bugs that cause the update process to stall or freeze.
- Internet Connectivity Issues: A stable internet connection is crucial for verifying and downloading software updates. Any interruptions or weak signals can cause the update to get stuck.
- Insufficient Storage Space: If your iPhone doesn't have enough available storage space, the update process may halt, leaving you stuck at the "Verifying Update" screen.
- Hardware Problems: In rare cases, hardware issues with your iPhone's components, such as the storage drive or RAM, can interfere with the update process.
Regardless of the underlying cause, the solutions we'll cover in the next section should help you get past the "Verifying Update" screen and get your iPhone back to normal.
iPhone Stuck at Verifying Update? Try This
To fix the issue of iPhone stuck on verifying update, we have top 5 solutions here. Choose the one that fits your situation the most.
Fix 1: Use Dr. Fone - System Repair Tool
One of the most effective and user-friendly solutions for resolving the "iPhone stuck at verifying update" issue is to use a third-party system repair tool like Dr.Fone - System Repair. This powerful software is designed to fix various iOS system issues, including those related to software updates.
Here's how to use Dr.Fone to resolve the iPhone stuck on verifying update problem:
Step 1: Open Dr.Fone on your computer. Connect your iPhone to your computer using a lightning cable. Select the "System Repair" option on the interface.

Step 2: Follow the on-screen instructions to put your iPhone into Recovery Mode or DFU Mode.
Once your device is in the appropriate mode, Dr.Fone will detect it and provide you with the option to repair the system.
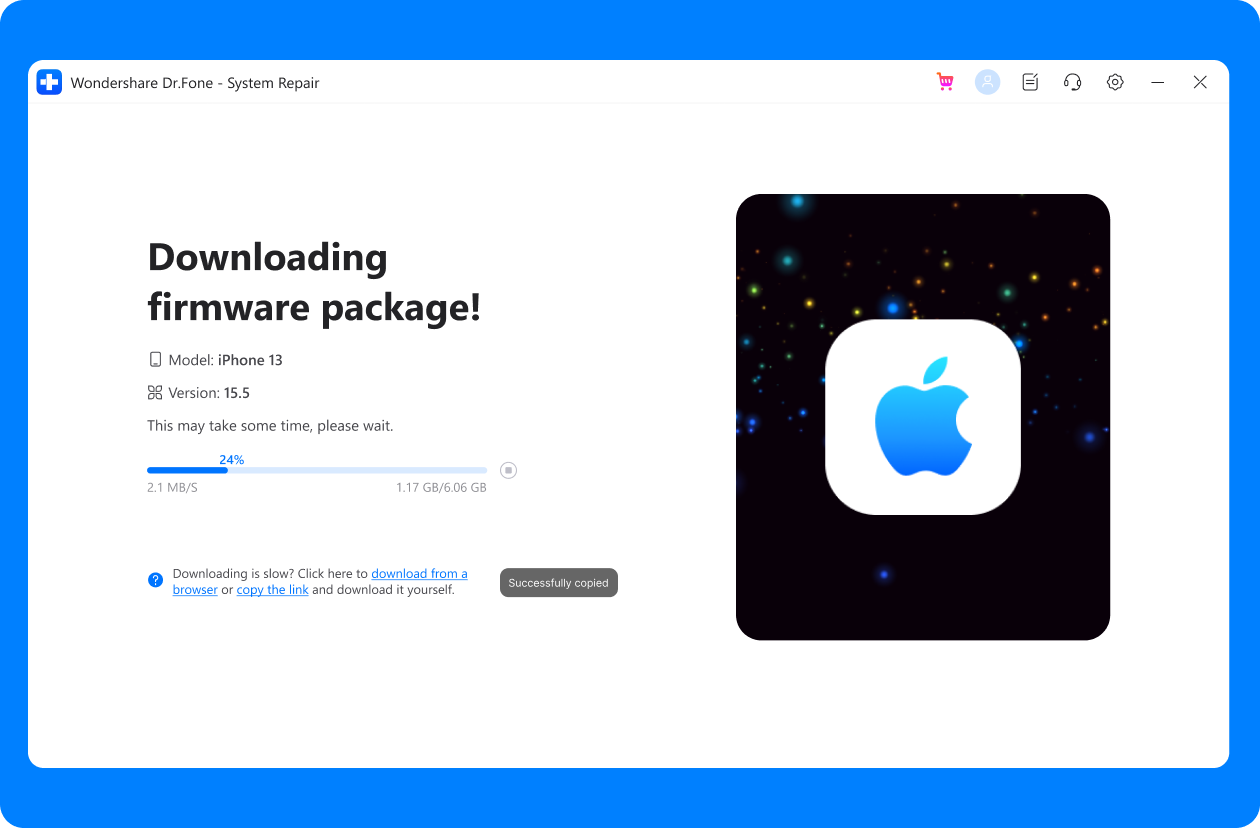
Step 3: Click on the "Repair" button, and Dr.Fone will automatically download the latest iOS firmware for your device. After the firmware download is complete, the software will begin the repair process, resolving the iPhone update stuck on verifying update issue.
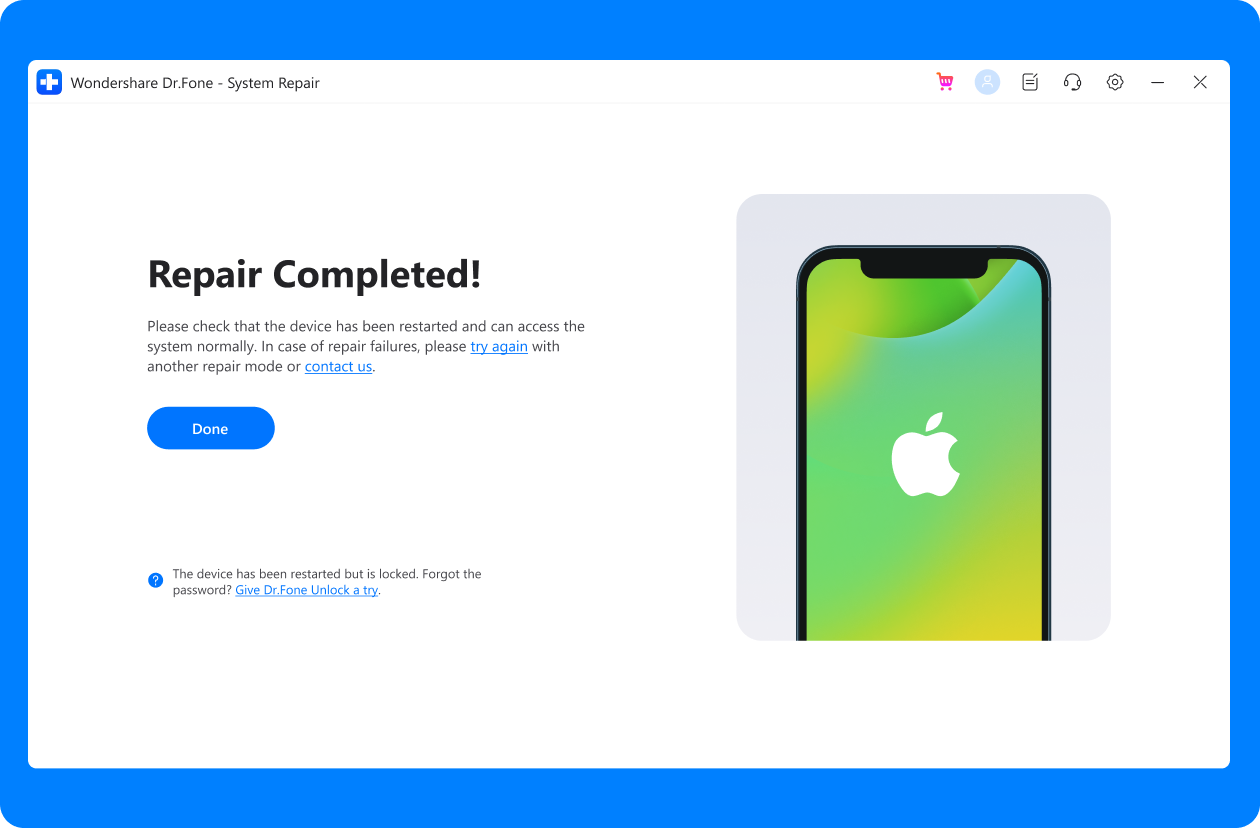
Using Dr.Fone is a safe and reliable way to address the iPhone update verifying update stuck problem without losing any data on your device. It's an excellent choice for those who prefer a straightforward and user-friendly solution.
Fix 2: Check the Wi-Fi connection
A weak or unstable internet connection can often be the culprit behind the "verifying update iPhone" issue. If your iPhone is stuck at this stage, it's worth checking your Wi-Fi connection to ensure that it's stable and fast enough to handle the update process.
Here are the steps to check your Wi-Fi connection:
Step 1: On your iPhone, go to Settings > Wi-Fi. Check if the Wi-Fi is enabled and connected to a network.
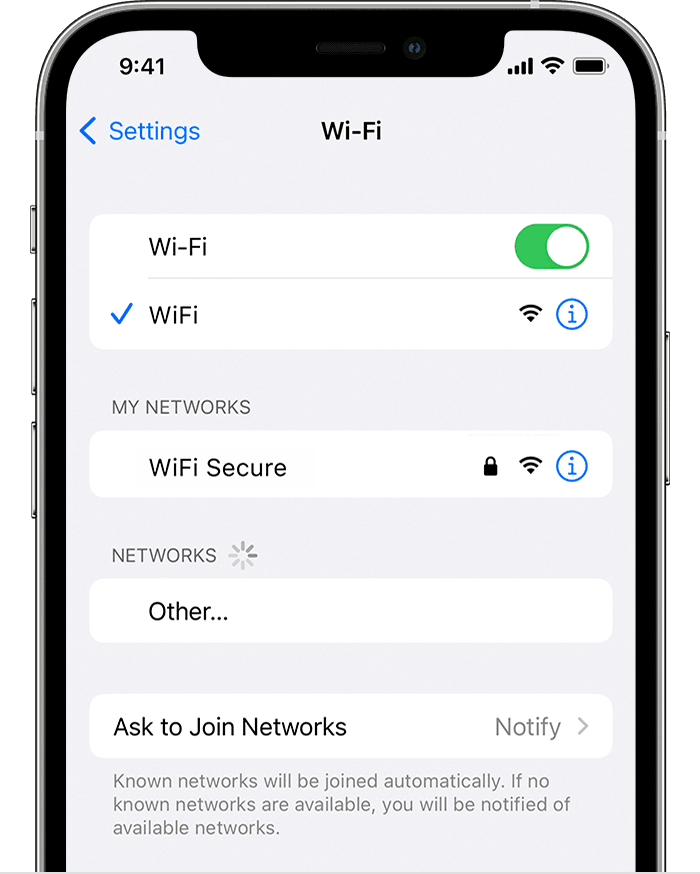
Step 2: If you're connected to a network, try disabling and re-enabling the Wi-Fi connection.
Step 3: You can also try connecting to a different Wi-Fi network or using a cellular data connection if available.
If the WiFi connection appears to be stable, you can try restarting the update process by following these steps:
Step 1: Go to Settings > General > Software Update.
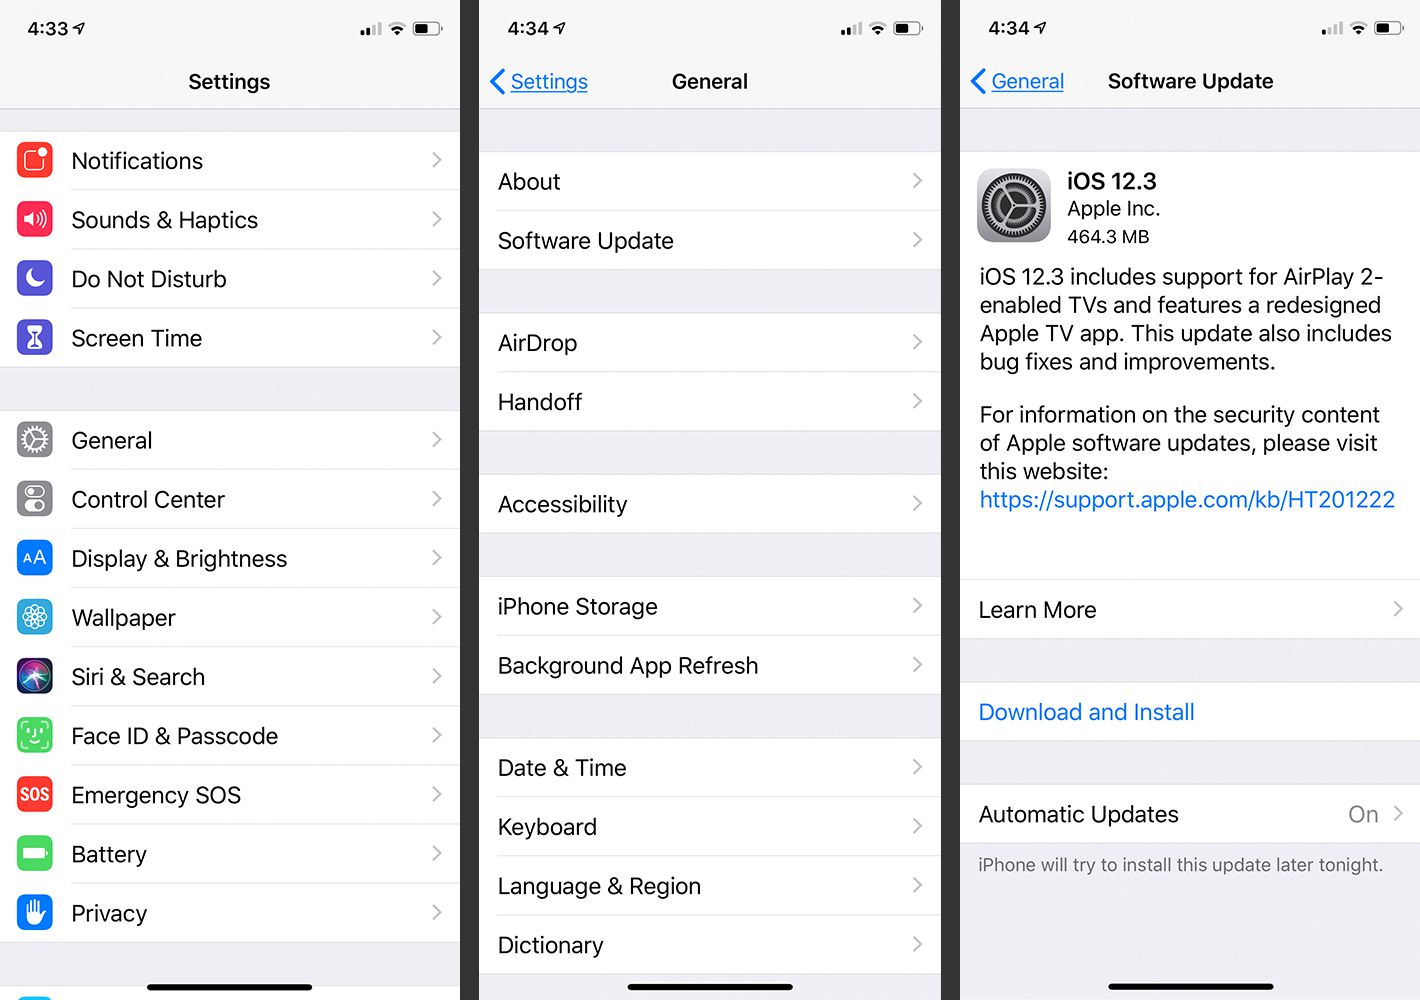
Step 2: Check for available updates and download the latest iOS version.
Step 3: Once the download is complete, your iPhone should automatically begin the "Verifying Update" process.
If the "verifying update iPhone stuck" issue persists, move on to the next fix.
Fix 3: Lock and Wake Your iPhone
Sometimes, a simple lock and wake sequence can help resolve the iPhone stuck at verifying update problem. This process can help refresh the device's memory and potentially clear any temporary glitches or freezes that may be causing the issue.
Here's how to perform the lock and wake sequence:
Step 1: Press the Power button on your iPhone to lock the screen.
Step 2: Wait for a few seconds, then press the Power button again to wake the device.
Step 3: Your iPhone should now continue the update process or prompt you to take further action.
If the verifying update iPhone stuck issue persists after trying this method, proceed to the next fix.
Fix 4: Force Restart iPhone
If the previous solutions haven't resolved the iPhone stuck at verifying update problem, you can try force restarting your device. This process is different from a regular restart and can sometimes help clear any software glitches or freezes that may be causing the issue.
Here's how to force restart your iPhone:
For iPhone 8 or later models:
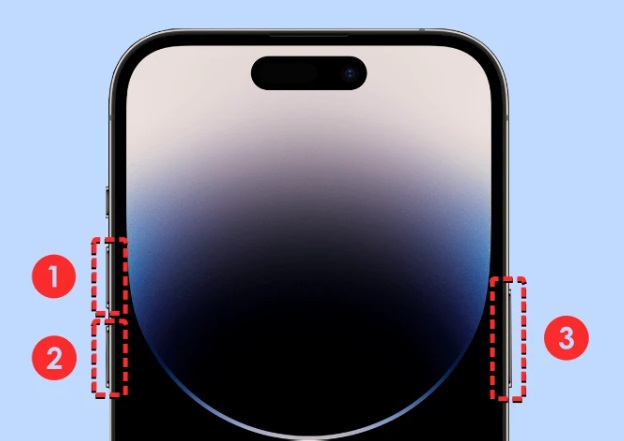
Step 1: Press and quickly release the Volume Up button. Press and quickly release the Volume Down button.
Step 2: Press and hold the Side button until the Apple logo appears on the screen. Release the Side button when the Apple logo appears.
For iPhone 7 or iPhone 7 Plus:
Step 1: Press and hold both the Side button and the Volume Down button simultaneously. Keep holding both buttons until the Apple logo appears on the screen.
Step 2: Release both buttons when the Apple logo appears.
After the force restart, your iPhone should continue the update process or prompt you to take further action. If the "iPhone verifying update" issue persists, move on to the next fix.
Fix 5: Restore iPhone with iTunes
If none of the previous solutions have worked, you may need to restore your iPhone using iTunes. This process will erase all data and settings from your device, so it's essential to back up your data beforehand if possible.
Here's how to restore your iPhone with iTunes:
Step 1: Connect your iPhone to your computer and launch iTunes. In iTunes, click on the iPhone icon near the top-left corner of the window.
Step 2: In the summary panel, click on the "Restore iPhone" button. Confirm that you want to restore your iPhone when prompted.
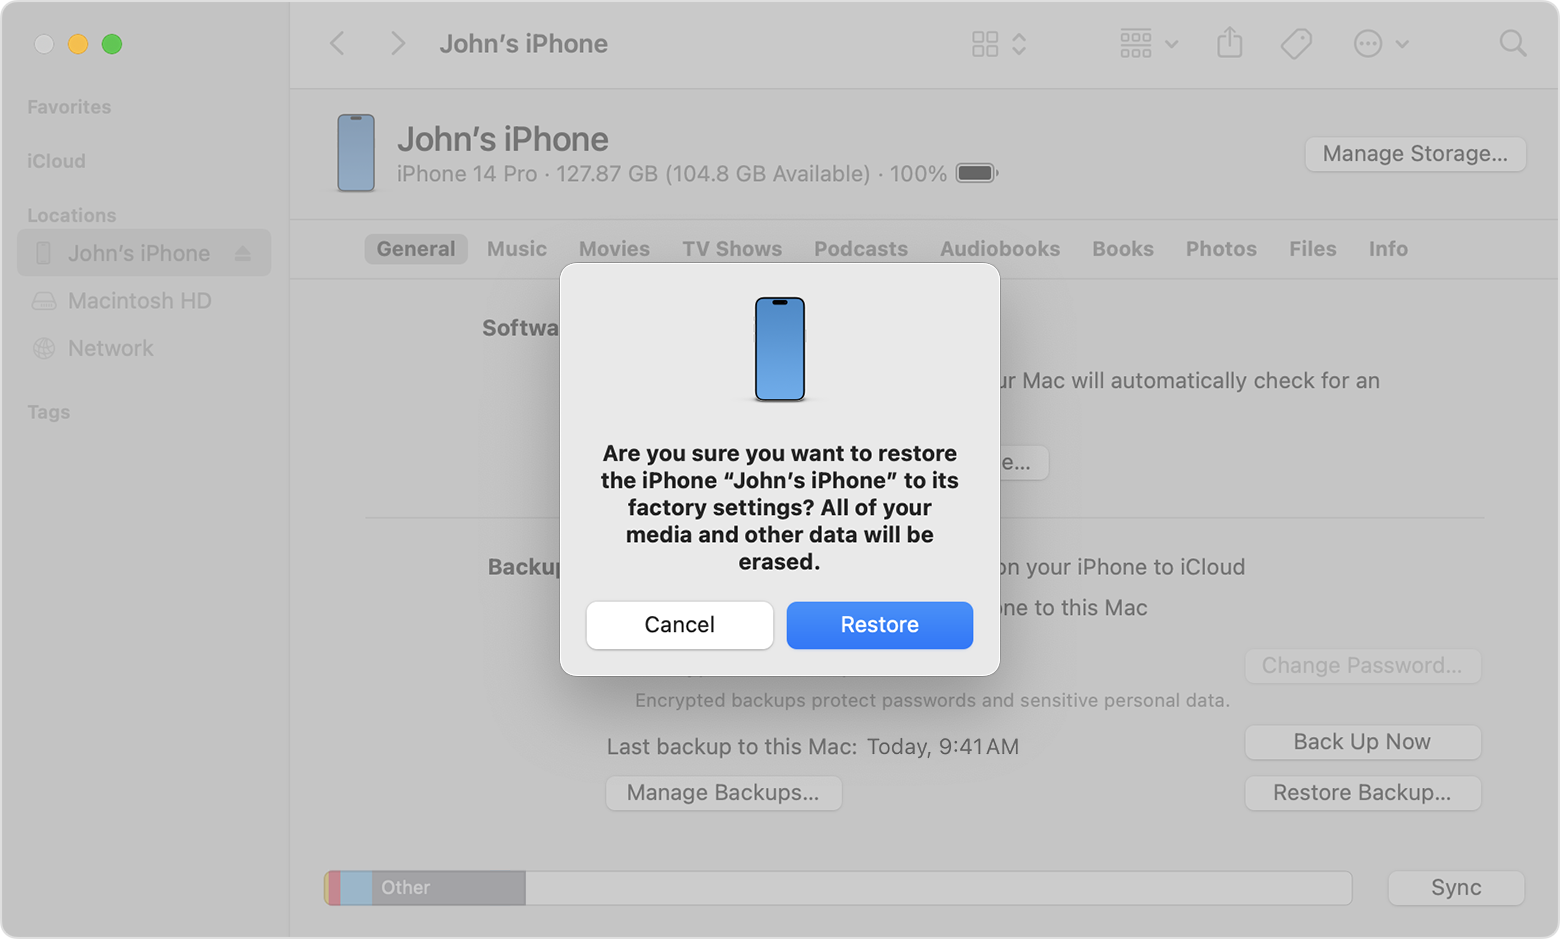
Step 3: iTunes will download the latest iOS software for your device and begin the restore process. Once the restore process is complete, your iPhone will be back to its factory settings, and you can set it up as new or restore from a previous backup.
It's important to note that restoring your iPhone with iTunes will erase all data and settings from your device, so make sure to back up your data beforehand if possible.
[BONUS] Use MobileTrans to Back Up iPhone Data to PC
Before we get into fixing that pesky "Verifying Update" issue on your iPhone, let's talk about something super important – backing up your data. You don't want to risk losing those precious photos, messages, and other important stuff, right?
Now, while iTunes does offer a backup option, some users find it a bit limiting or unreliable. That's where Wondershare MobileTrans - Backup & Restore comes in – a nifty little tool that makes backing up your iPhone data to your computer an absolute breeze.
MobileTrans is like having a personal assistant dedicated to safeguarding your digital life. It's designed specifically for backing up iPhone data, and it's so user-friendly that even tech-challenged users could probably figure it out.
Not only is MobileTrans incredibly easy to use, but it's also lightning-fast and super reliable. No more worrying about corrupt backups or lost data – MobileTrans has got your back.
Wondershare MobileTrans
Back Up Your Data to Computer Easily
- • No data loss. No data leaks.
- • Support various data, including files, photos, videos, apps, contacts, etc.
- • Compatible with thousand of device types acorss Android and iOS.

 4.5/5 Excellent
Here's how to use MobileTrans to backup your iPhone data:
Step 1: Download and install the MobileTrans software on your computer. Connect your iPhone to your computer using a Lightning cable. Launch the MobileTrans software and select the "Backup & Restore" option.
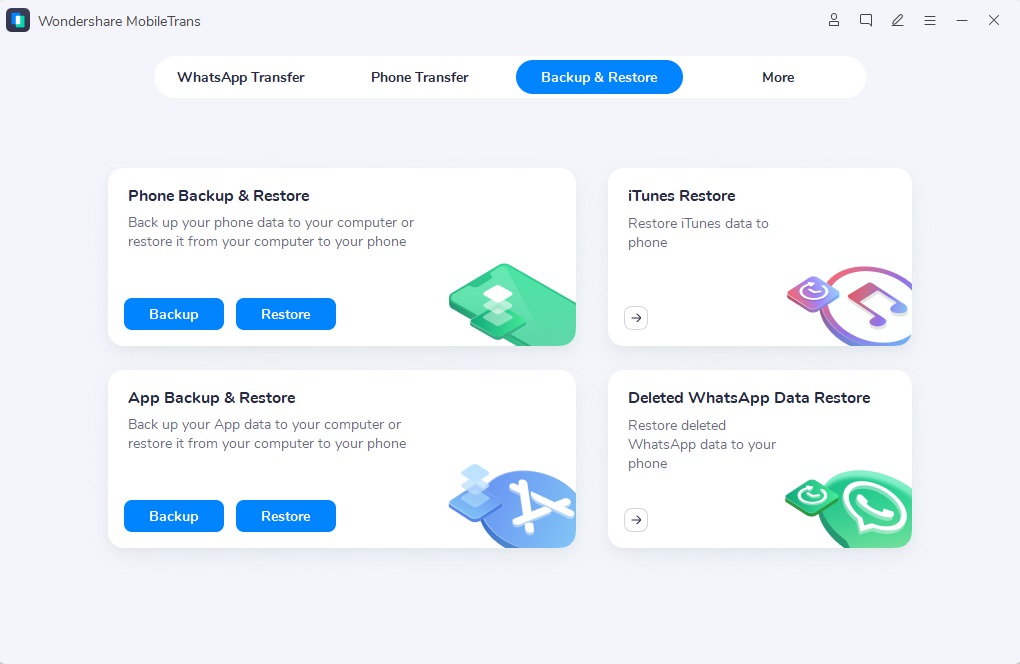
Step 2: Choose the "Phone Backup and & Restore" option to initiate a backup.
Step 3: Select the types of data you want to backup, such as contacts, messages, photos, videos, and more.
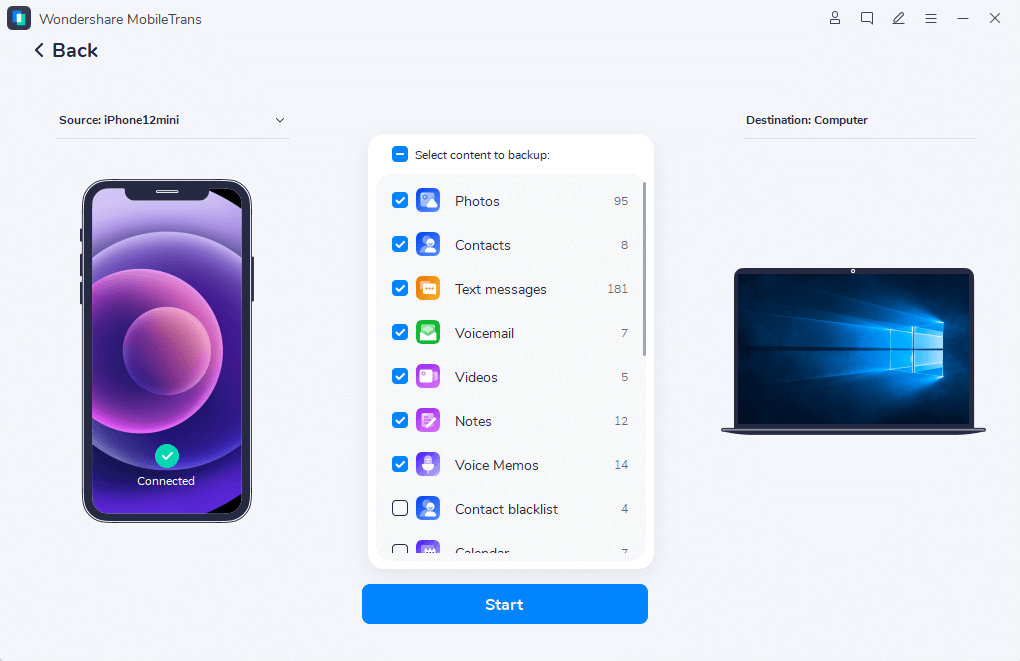
Step 4: Click on the "Start" button, and MobileTrans will begin backing up your selected data to your computer.
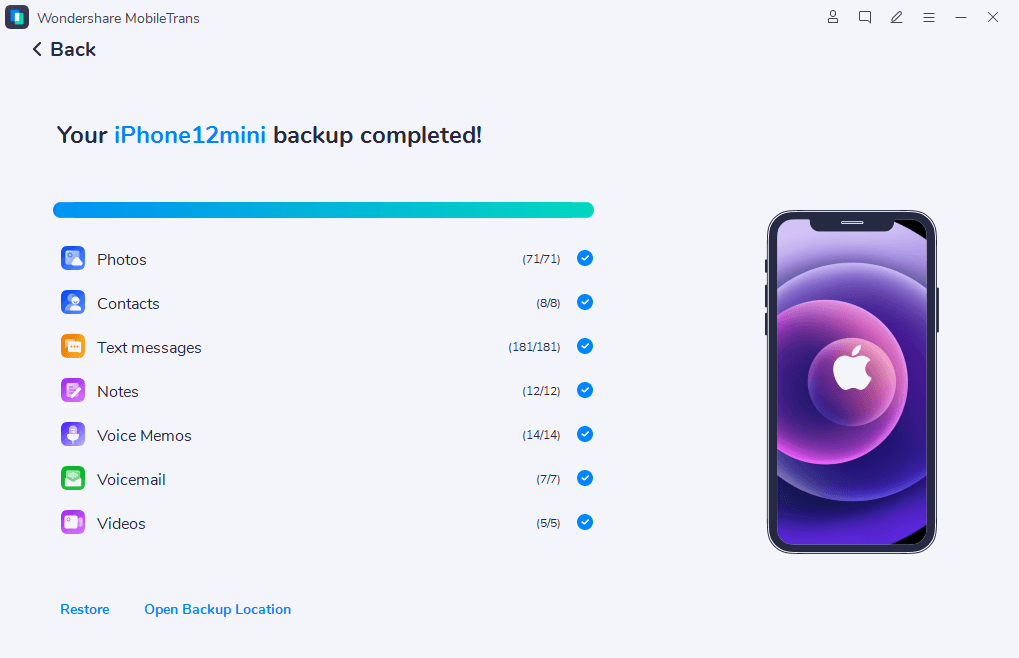
MobileTrans is a user-friendly and efficient tool that can help you back up your iPhone data with ease. It supports a wide range of data types and provides a reliable backup solution, ensuring that your important information is safe before attempting any troubleshooting or restore processes.
Conclusion
Resolving the frustrating iPhone stuck at verifying update issue is achievable through the right solutions and approach. This guide provides a comprehensive set of options to get your device running smoothly again. Whether you opt for a system repair tool like Dr.Fone, troubleshoot your WiFi connection, force restart your iPhone, or restore it using iTunes, you'll find a suitable solution.
Before attempting major troubleshooting steps, it's wise to back up your iPhone data using a reliable tool like MobileTrans. This safeguards your important information, ensuring its security regardless of the chosen solution.
With patience and perseverance, you can overcome the iPhone update stuck on verifying update hurdle and enjoy the latest software updates and features on your device.

 4.5/5 Excellent
FAQ
-
Q: What causes the "iPhone stuck at verifying update" issue?
The "iphone stuck at verifying update" issue can be caused by various factors, including software glitches, internet connectivity problems, insufficient storage space, or hardware issues. -
Q: Is it safe to use third-party tools like Dr.Fone or MobileTrans?
Yes, reputable third-party tools like Dr.Fone and MobileTrans are generally safe to use. However, it's always recommended to download these tools from trusted sources and follow the instructions carefully. -
Q: Will restoring my iPhone with iTunes erase my data?
Yes, restoring your iPhone with iTunes will erase all data and settings from your device. It's essential to backup your data beforehand if you wish to restore it after the restore process. -
Q: Can I continue using my iPhone while it's stuck at the "verifying update" screen?
No, your iPhone will be unresponsive and unusable while it's stuck at the "verifying update" screen. You'll need to resolve the issue before you can use your device again. -
Q: How long does the "verifying update" process usually take?
The "verifying update" process can take anywhere from a few minutes to several hours, depending on the size of the update and your internet connection speed. If it gets stuck for an extended period, it's likely that there's an issue that needs to be addressed.


