


 TL;DR:
To wirelessly transfer files between a Mac and an iPad using AirDrop, disable the iPad's Personal Hotspot, ensure both devices are within a 9-meter Bluetooth and Wi-Fi range, and execute the transfer via the Share menu or Mac Finder.
● Transfers will process and save automatically without a manual acceptance prompt if both the Mac and the iPad are signed into iCloud using the same Apple ID.
● If the Mac does not display an incoming transfer prompt from the iPad, you must disable the "Block All Incoming Connections" feature located in the macOS Firewall settings.
● For large file transfers where AirDrop is too slow, Wondershare MobileTrans provides a USB-connected alternative that moves up to five specific data types without overwriting existing files.
Ask AI for a summary
 ChatGPT
 Perplexity
 Gemini
 Claude
 Grok
Grok
Sharing data between Apple devices is now easier than ever using AirDrop. With a few taps/clicks, you can wirelessly share photos, videos, documents, and more on a nearby Mac, iPad, or iPhone. You might be familiar with the steps to share data from iPad to Mac. However, AirDrop is still considered a new technology. Many people still need more time to learn to use it seamlessly on various iDevices.
Even so, learning to use AirDrop is straightforward, regardless of the devices involved. This quick guide discusses the simple steps to AirDrop from Mac to iPad. Take a look!
In this article
How to AirDrop from Mac to iPad in a Few Steps
As mentioned, learning how to AirDrop files from Mac to iPad is easy. But you need to make some preparations before doing so. AirDrop uses Wi-Fi and Bluetooth to share items between devices.
Hence, first, both devices must be within Bluetooth and Wi-Fi range (at least 9 meters from each other). Second, if Personal Hotspot is enabled on your iPad, turn it off. Afterward, turn on AirDrop on the iPad by following the steps below.
- Go to Settings on your iPad. Select General, and then tap AirDrop to turn it on.

- Choose from whom you can receive AirDrop transfers. You have Contacts Only or Everyone for 10 minutes options. The former means that only your contacts can discover your device, while the latter allows all nearby Apple devices using AirDrop to see it.
You can also quickly turn on or off AirDrop from the Control Center and even select who can AirDrop to you. You can do so by executing these steps:
- Click the Control Center in the menu bar. Next, click the AirDrop icon to turn AirDrop on or off.
- Click the arrow next to AIrDrop to select who can send files to you. Then, tap Contacts Only or Everyone.
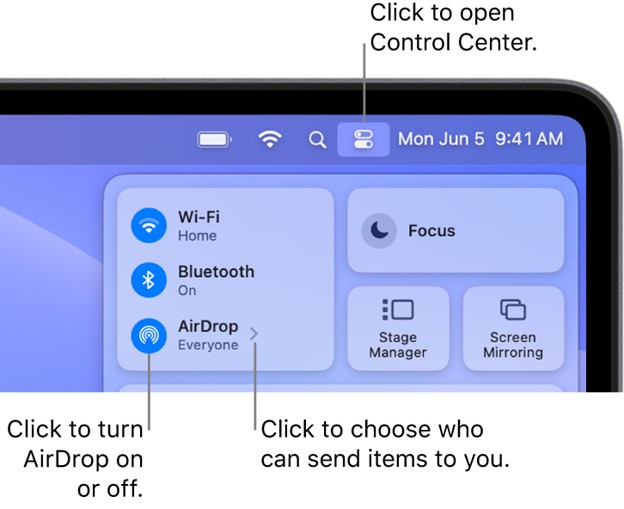
(Credit: Apple)
AirDrop from Mac to iPad
Now that the AirDrop feature is on, you're all set to AirDrop file from Mac to iPad. Work on the simple steps that follow below:
- From the desktop, control-click the item you wish to share.
- Select Share from the shortcut menu. Choose AirDrop and then click your iPad's name to share the item.

(Credit: Apple)
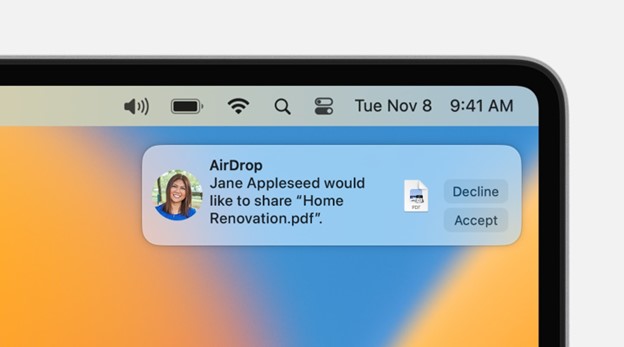
- Tap Accept on your iPad to receive the file.

You can also AirDrop an item from the Finder or within an app, such as Maps or Safari. From the Finder, click AirDrop in the sidebar. Alternatively, you can click Go from the menu bar and choose AirDrop. An AirDrop window will open, showing nearby AirDrop-supported devices. Drag the item and drop it to the iPad's name on the AirDrop window to share.
If you're sending from an app, identify the item you wish to send and click the Share button in the toolbar. Select AirDrop and then choose the iPad's name to share the item. That's all you need to do to transfer files from Mac to iPad using AirDrop!
AirDrop from iPad to Mac
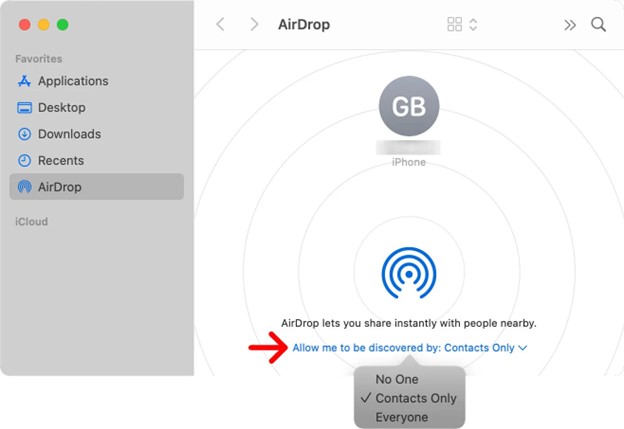
You can also AirDrop from iPad to MacBook in straightforward steps. First, you must prepare your Mac to receive the transfer(s). Launch a Finder window on your Mac by clicking the Finder icon in the Dock. Next, click AirDrop in the Finder sidebar to open an AirDrop window.
From here, click Allow me to be discovered by the pop-up menu. Then, choose who can send AirDrop files to you—Contacts Only or Everyone.
These are the easy steps to do an iPad Mac AirDrop:
- Open an AirDrop-supported app from which you wish to send the item(s). For example, open the Photos app to share a photo.
- Choose the item(s) you wish to AirDrop. Tap Share and select AirDrop from the list of sharing apps.
- Tap the Mac name you wish to share the item(s) with. Click Accept on the Mac screen to receive the AirDrop.
(Credit: Apple)
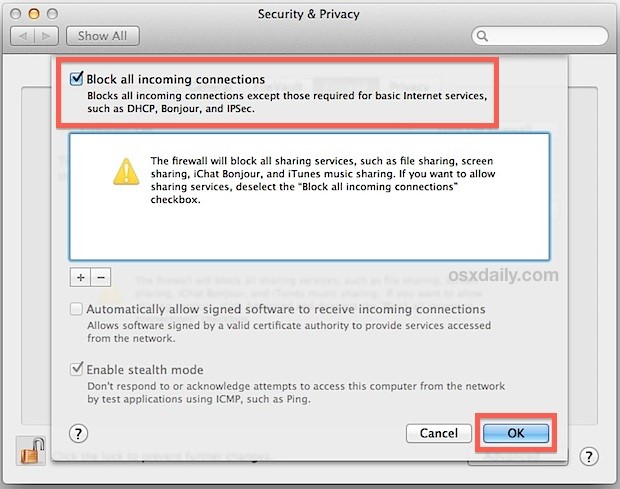
You can't see a prompt on the Mac screen? Ensure that firewall settings aren't blocking incoming connections. On MacOS Ventura or later, click the Apple menu and go to System Settings. Click Network in the sidebar, then choose Firewall on the right. Click Option, then ensure the Block All Incoming Connections button is turned off.
For a PC using an earlier version of MacOS, click the Apple menu, then click System Preferences. Select Security & Privacy, then click Firewall. Click the lock button, then enter your admin password when prompted. Click Firewall Options, then ensure that Block All Incoming Connections is disabled.
After that, repeat the steps 1-3 above. You should now be able to AirDrop from iPad to iMac (or Macbook) smoothly.
[Bonus] Transfer Files from Mac to iPad Without AirDrop
AirDrop is indeed one of the best tools for transferring data between Apple devices. However, it only works within the Apple ecosystem. For example, you can't use AirDrop to send files from an Android to a Mac.
Besides, AirDrop may not be fast enough if you share large files. You would have to send them over the Internet, or else you'll wait some time for the transfer to be completed.
Fortunately, there's an alternative. Wondershare MobileTrans - Phone Transfer supports cross-platform sharing and is relatively fast. You don't have to worry when moving large video clips or photo albums. The software will be done in a moment.
It's safe, effective, and doesn't overwrite data. Additionally, it supports up to 5 data types from Mac to iPad. These include photos, videos, information, apps, and music. The best part is that it's super easy to use for anyone.
Wondershare MobileTrans
Transfer Data from Mac to iPad Easily
- • No data loss. No data leaks.
- • Support various data, including files, photos, videos, apps, contacts, etc.
- • Compatible with over 6,000 device types acorss Android and iOS.
 4.5/5 Excellent
Here are the simple steps to AirDrop from Mac to iPad:
- Install the Wondershare MobileTrans software on your Mac. Next, plug your iPad into the Mac using a USB cable.
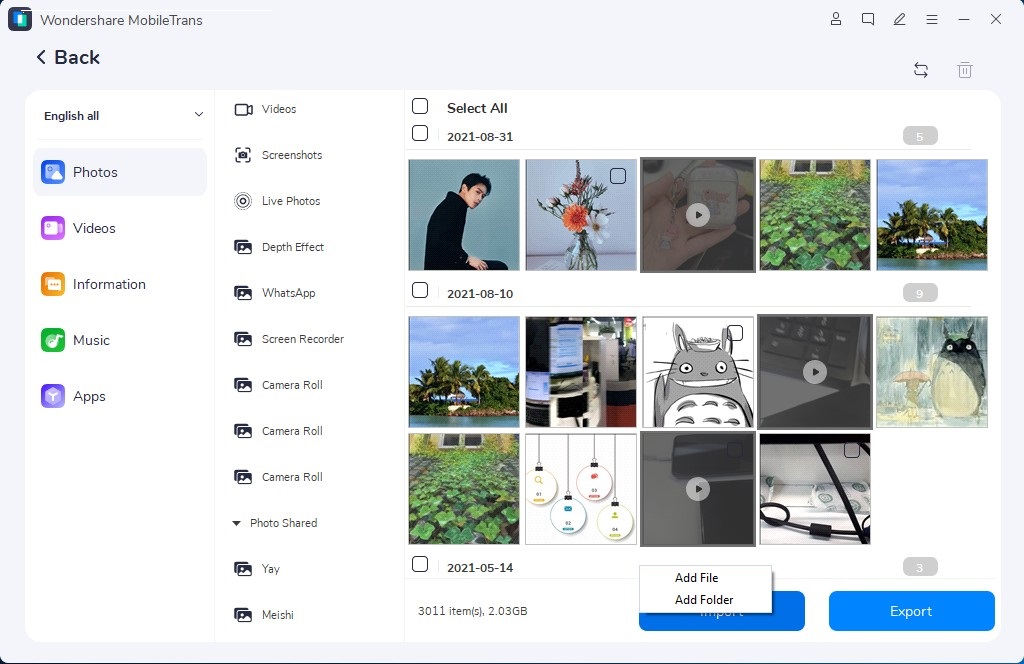
- Open the MobileTrans app on your PC and go to Phone Transfer > Import to Phone.

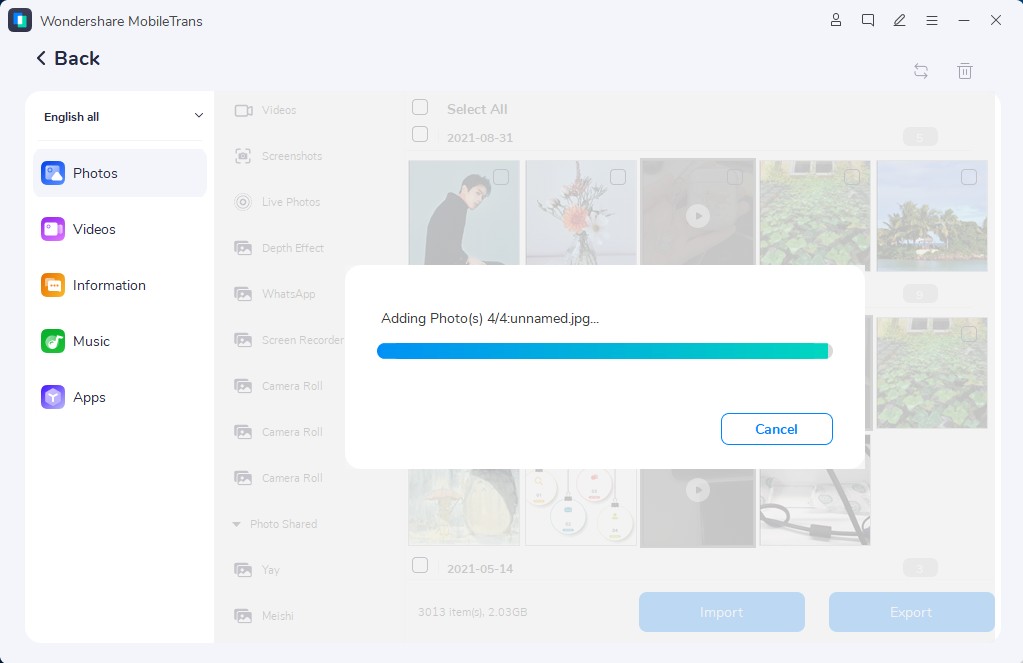
- Select the files you wish to share from the Mac to iPad, then click the Import button to start.
- Keep your iPad connected to the Mac during the entire process. You can view your data on the iPad when the import is completed.
You can also transfer data from iPad to Mac by repeating the steps 1-4 above. But, in step 2, you'll go to Phone Transfer > Export to Computer. In step 3, you'll choose the Export button.
Conclusion
Learning how to AirDrop between iPad and Mac is straightforward. This article has discussed the simple steps to AirDrop from Mac to iPad and vice versa. As you've discovered, the procedures are really simple and can be completed in a minute.
You've also learned how to transfer data between a Mac and an iPad without using AirDrop. Thus, if AirDrop doesn't work or is not supported on your Mac, don't worry. Use one of the best AirDrop alternatives - the MobileTrans - Phone Transfer.
4.5/5 ExcellentFAQ
-
Why Can't You AirDrop from the Mac to Your iPad?
An AirDrop from the Mac to your iPad can fail if the devices are out of Bluetooth and Wi-Fi range. You also must ensure your iPad is set to accept AirDrop transfers from other devices. Adjust the AirDrop receiving settings accordingly from the Control Center. -
What is the Distance Limit for AirDrop Transfers?
The distance limit for AirDrop transfers is about 30 feet or 9 meters. In other words, both Apple devices must be within 30 feet of each other. The transfer speed varies depending on the size of your file and the capabilities of the devices involved.


