


 TL;DR:
You can move photos to iCloud either by enabling the synchronization feature in your Apple device settings to upload your entire library or by using iCloud.com to manually upload specific files from an iPhone or Windows PC.
● Since iCloud works by syncing, deleting a locally stored photo also removes it from the cloud; to free up local space safely, you must enable "Optimize iPhone Storage" or disable the "Sync this iPhone" setting and select "Remove from iPhone".
● Moving photos from a Windows PC requires manual uploads through a web browser at iCloud.com, whereas Mac users can enable native synchronization by navigating to System Settings > Apple ID > iCloud > Photos.
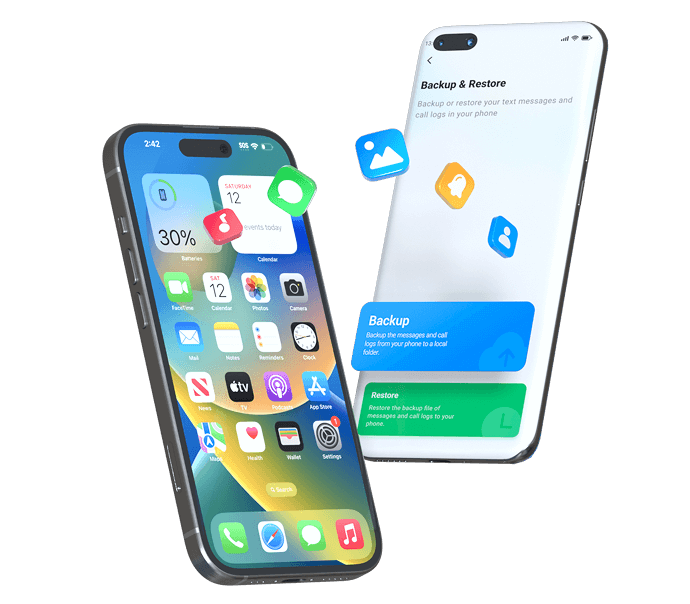
● If you are switching devices and need to move photos from iCloud directly to an Android phone or a new iPhone, you can use the Wondershare MobileTrans - iCloud to Phone desktop software via a USB connection.
Ask AI for a summary
 ChatGPT
 Perplexity
 Gemini
 Claude
 Grok
Grok
If you're new to iOS or this is your first iPhone, you may need help doing certain things. That's completely understandable.
Without further ado, this guide will show you how to move photos to iCloud. You can do it on the iPhone or from a computer. Compare the two techniques below and find out which one is better.
In this article
Part 1 How to Move Photos to iCloud on iPhone/iPad?
You can move photos to iCloud on iPhone in two different ways. Which way to choose depends on whether you want to upload all the pictures. Before you begin, ensure you’ve met the following requirements:
- You've signed in to the right iCloud account.
- You have sufficient iCloud space. Apple offers 5GB of free cloud space to every account holder. However, you can upgrade your iCloud package to get more space and acquire up to 200GB for less than $3.
- Ensure you have a stable internet connection. Your iPhone must be connected to a Wi-Fi network or cellular data to access the cloud.
If you want to move all your photos to iCloud:
- Go to Settings > [your name] > iCloud.
- Tap Photos and then toggle on the Sync this iPhone button on the next screen.

That's how to move all photos to iCloud. How can I move selected photos to iCloud? Follow these steps to upload only specific photos:
- Open your favorite browser, for example, Safari, and go to iCloud.com.
- Log in to your iCloud account with the correct Apple ID and password.
- Tap Photos from options, then select Upload.
- Tap Photo Library, then choose the photos you wish to transfer and hit Add.

As you can see, it's straightforward, whether you upload all or a few photos to iCloud. Once the photos are in iCloud, you can access them on any Apple device you're signed in with the same ID.
If you delete a photo on one of your devices, the item will disappear in the Cloud, too. That's because iCloud works by syncing. Thus, uploading photos to iCloud to free up space may not be a very good idea.
iCloud is NOT designed to offload data from your iPhone or other Apple devices. If you want to free up space without affecting your photos in iCloud, one option would be to:
- Go to your iPhone Settings > [your name] > iCloud > Photos.
- Turn off the "Sync this iPhone" option. That will pop up a window, as shown in the screenshot below. Just tap the Remove from iPhone button.

- Tap Remove from iPhone to confirm. This action will delete all the photos and videos from your iPhone but keep them only on iCloud.
Still on answering: How do I move pics to iCloud? you can also utilize the Optimize iPhone Storage feature. That allows you to keep your full-resolution photos in iCloud. As a result, it replaces the photos on your iPhone with optimized versions that take up less space. In other words, the feature lets you keep your original photos while only taking up a small space on your phone.
Part 2 How to Move Photos to iCloud from a Computer
How do I move photos to iCloud on a computer? It's easy! If your photos are stored on a PC, you can directly upload them to your iCloud account in a few steps. The steps vary slightly, depending on your PC.
If you're on a Windows computer, you can transfer pics to iCloud via the web. Here are the steps:
- Open a browser on the PC and go to iCloud.com.
- Log in and then click the Upload button.
- Choose the photos you want to move to iCloud.
- Select Open to begin moving your photos to iCloud.

If you're using a Mac computer, you don't need to use a browser. Here's how to move photos to iCloud on Mac:
- Click the Apple menu and go to System Settings. You can also choose the Apple menu, then click System Preferences.
- Click Apple ID, then choose iCloud in the sidebar.
- Select Photos, then click the switch next to Sync this Mac.

Part 3 [Bonus] How to Move Photos from iCloud to Your Device
How do you move photos to iCloud? You've learned that you can do it from your iPhone or from a computer. But suppose at one time you wish to move the photos from iCloud to a phone. For example, this may be after switching to a new phone. In that case, how do you bring your cherished photos?
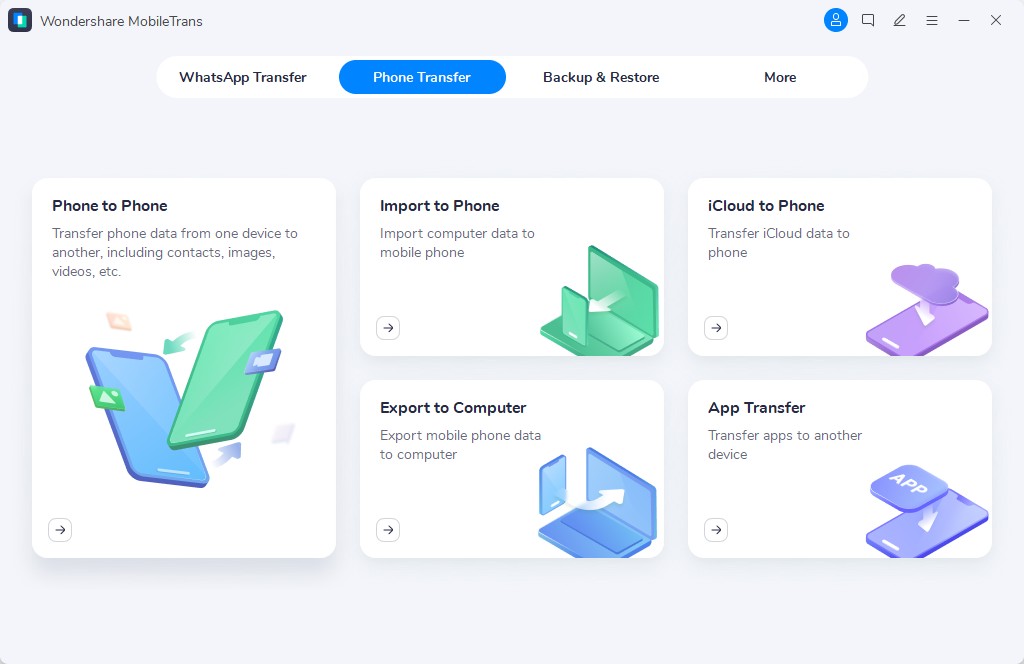
You turn to a secure and reliable tool called Wondershare MobileTrans - iCloud to Phone. It's one of the best ways to restore all data that is synced to your iCloud. In addition to photos, you can restore other vital data, such as contacts, notes, and reminders.
Follow these steps to move photos from iCloud to your phone with MobileTrans:
- Download and install the MobileTrans software on your computer.
- Once the installation is complete, open the software and go to Phone Transfer > iCloud to Phone.
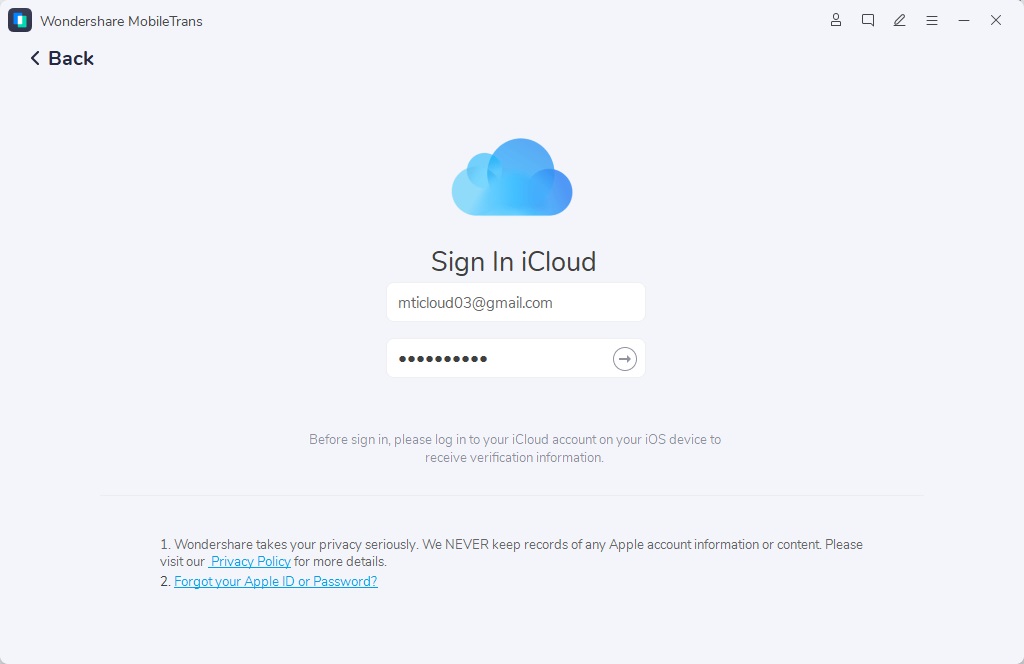
- Log in to your iCloud account using the correct Apple ID and password.
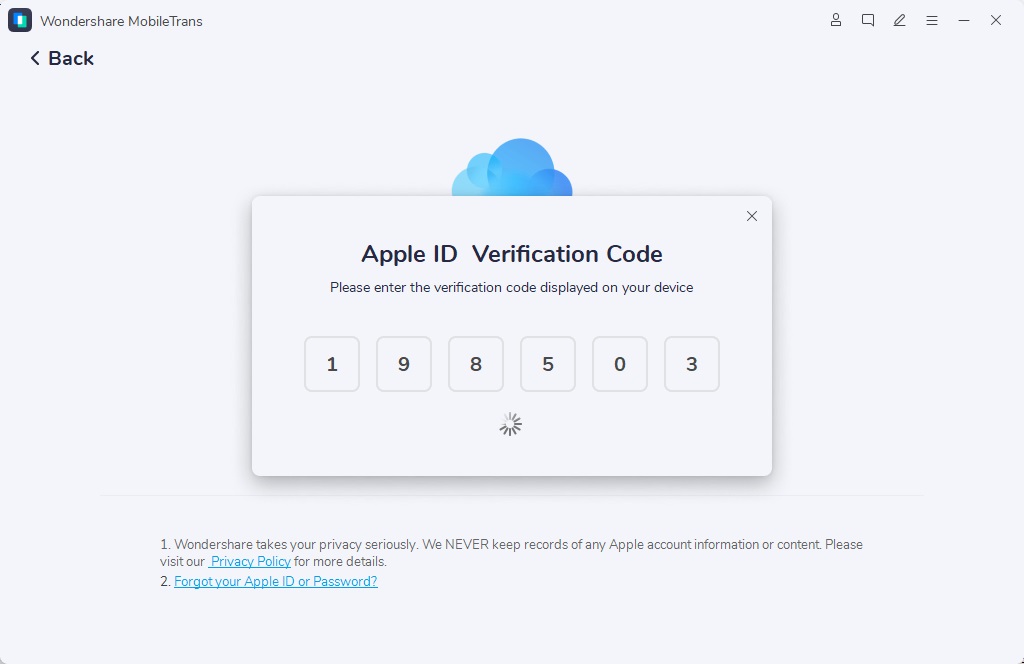
- Verify your identity to complete the login process.
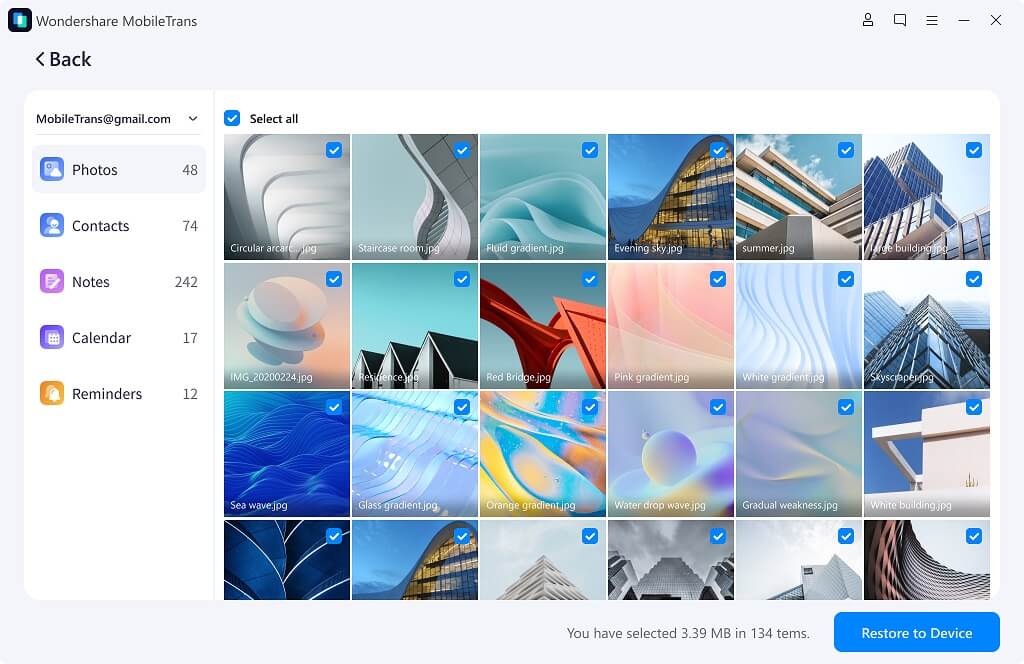
- Now you can see iCloud data on the left, including Photos, Contacts, Notes, and Calendar. Select the items you want to transfer to your phone when the data is loaded. Then click on the “Restore to Device” button at the bottom right.
- Connect your Android phone to the computer using a USB cable. For an iPhone, use a lightning cable.
- Once you connect an Android device, you'll see instructions on your computer screen. First, you'll need to turn on the USB Debugging on your phone. Next, follow other prompts to go ahead with the process.

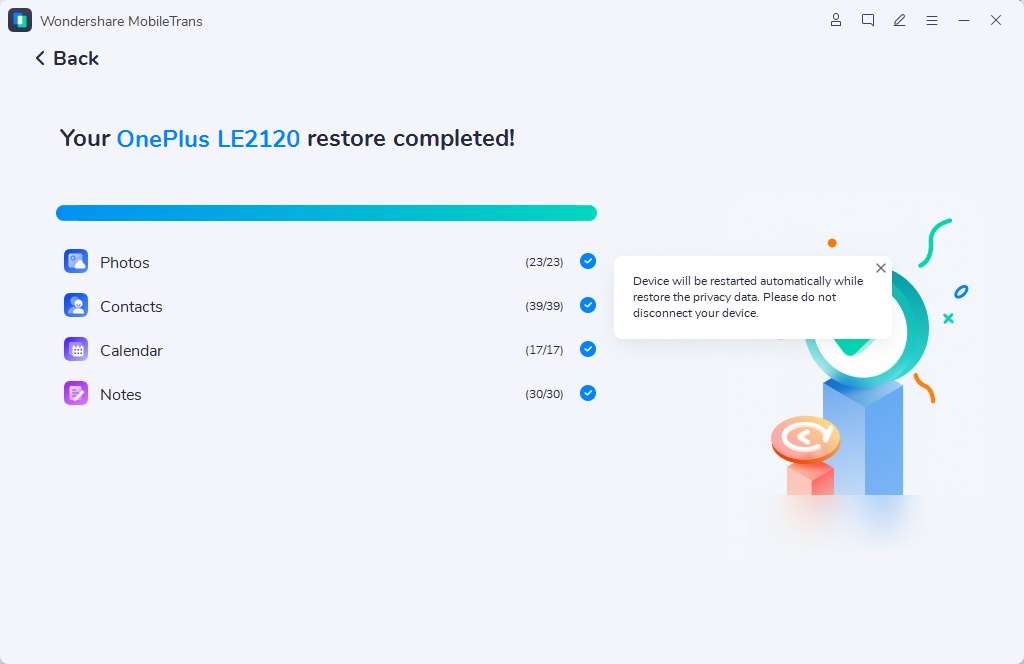
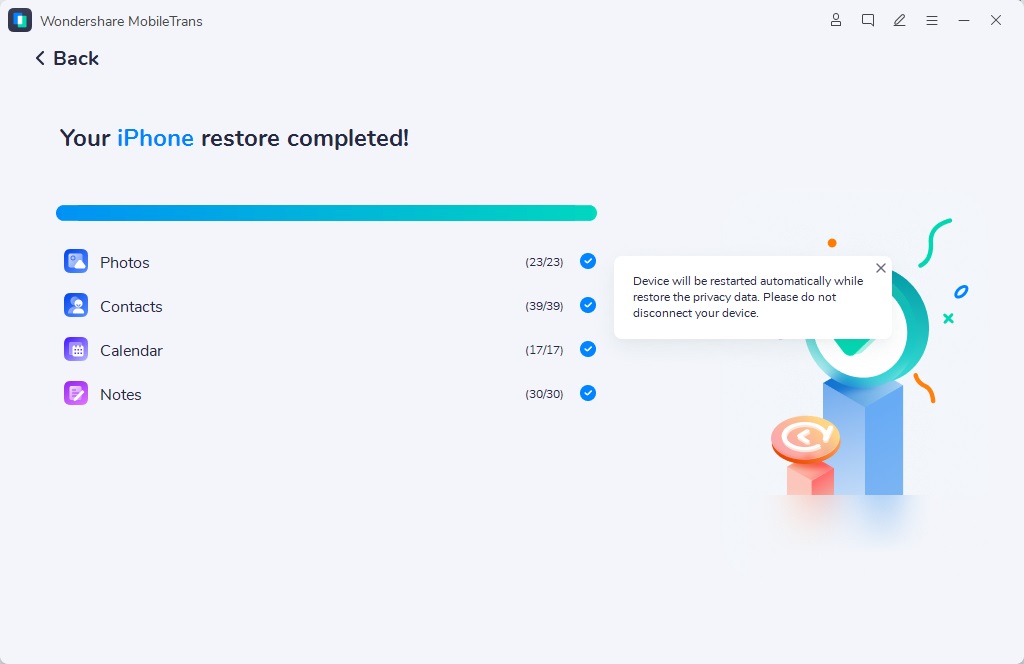
- Click Start and the iCloud photos will begin moving to the destination phone.
If you're transferring photos from iCloud to iPhone, the steps are the same as Android. First, the phone will need to Trust the PC. Then enter the passcode.
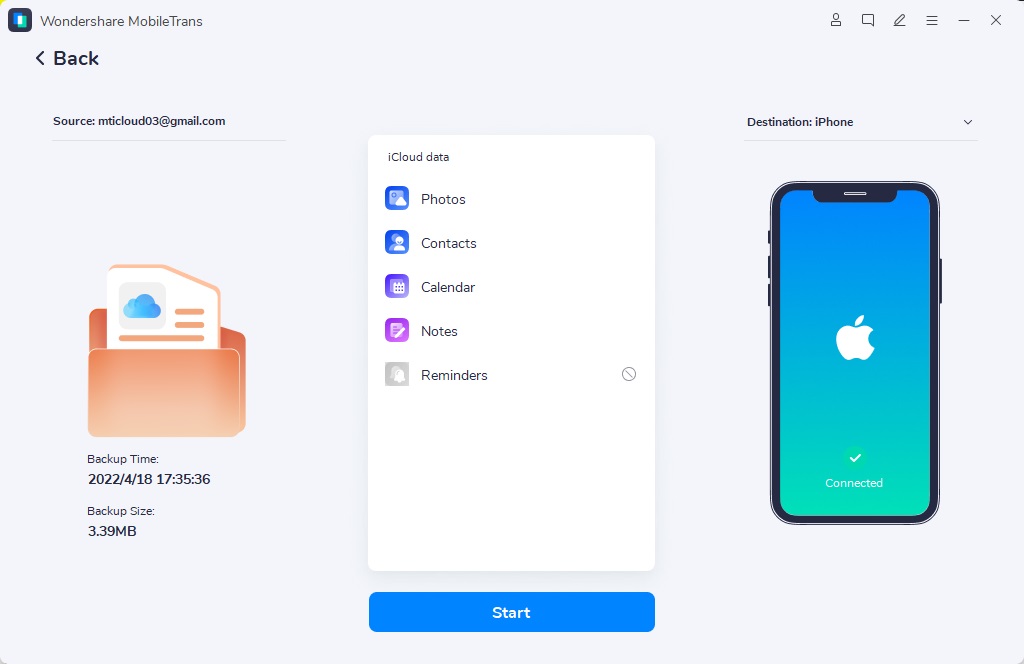
Next, follow the prompts, then click Start to begin.
Conclusion
This article has shown you how to move photos to iCloud. You can do it in two ways, depending on your preference: from the iPhone or from the computer.
If you transfer photos to iCloud from the iPhone, you can do it via Settings or iCloud.com. The former allows you to move all photos from your iPhone to iCloud while the latter only moves specific photos.
So, we leave you to choose your best option and move iPhone pics to iCloud. If at any time you need to move the photos from iCloud back to the phone (iPhone or Android), count on MobileTrans - iCloud to Phone!


