

![[Guide] How to Transfer Voice Notes from iPhone to PC](https://mobiletrans.wondershare.com/images/images2024/how-to-transfer-voice-notes-iphone-pc-01.jpg)

 TL;DR:
You can transfer voice memos from an iPhone to a PC without quality loss using cloud services like iCloud Drive and Google Drive, or batch-transfer them via USB using MobileTrans.
● Avoid using emails or messaging apps like WhatsApp, Telegram, or iMessage for transfers, as these methods apply audio compression and are inefficient for large files.
● To use iCloud Drive, you must enable Voice Memos sync in your iPhone settings, and transferring files from multiple iPhones requires using separate Apple IDs for each device.
● The transfer process only copies the files without deleting the originals from your iPhone, though you may need third-party software to convert the resulting files to MP3 or WAV formats for PC compatibility.
Ask AI for a summary
 ChatGPT
 Perplexity
 Gemini
 Claude
 Grok
Grok
Do you ever feel like your iPhone is packed with important voice notes and recordings that you wish you could easily get onto your computer? Wondering ‘how can I transfer voice memos from iPhone to computer’?
Well, maybe you've recorded lectures, interviews, or just random thoughts that would be so much easier to listen to, edit, or share if they were on your PC. Well, you're in luck! The process to transfer voice memos from iPhone to PC doesn't have to be a huge headache.
In this guide, we'll show you detailed instructions on how to transfer voice notes from iPhone to PC. quickly. From using free apps and services you already have, to some handy third-party tools, there's an option for everyone.
Whether you just need to transfer a couple of voice memos or dozens of recordings, we've got you covered. You'll be able to back up your important audio, edit it seamlessly, share it easily, and keep it all organized right on your PC.
In this article
Part 1: How to Transfer Voice Memos from iPhone to Computer via MobileTrans
Now, let's explore the various methods you can use to transfer voice notes from your iPhone to your PC, catering to different preferences and requirements.
MobileTrans is a handy tool made just for transferring different kinds of data, including voice memos, between your iPhone and computer. With just a few clicks, you can move voice recordings from your phone to your PC. It's really easy to use.
Wondershare MobileTrans
Transfer Your Notes to Computer Easily
- • No data loss. No data leaks.
- • Support various data, including files, photos, videos, apps, contacts, etc.
- • Compatible with thousands of device types acorss Android and iOS.
 4.5/5 Excellent
Here's how to use it:
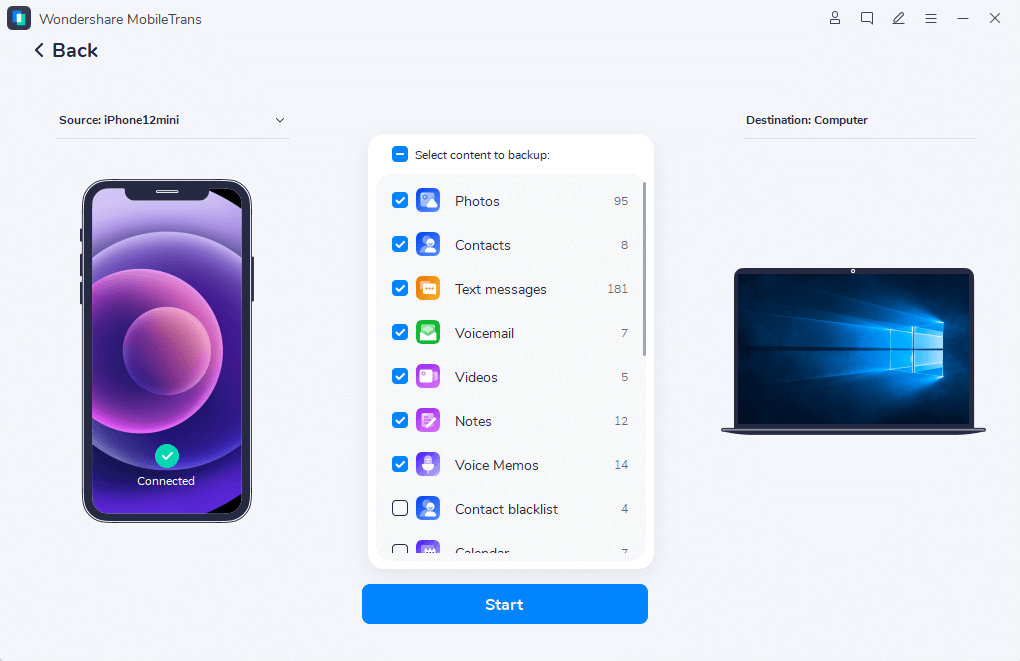
Step 1: Install MobileTrans on your PC. Connect your iPhone to your PC using a compatible USB cable. Launch MobileTrans on your PC and select the " Backup & Restore" mode. Go to “Backup” under “Phone Backup & Restore” section.

Step 2: Select "Voice Memos" from the list of data types. Choose other data types you want to transfer and click on the "Start" button.
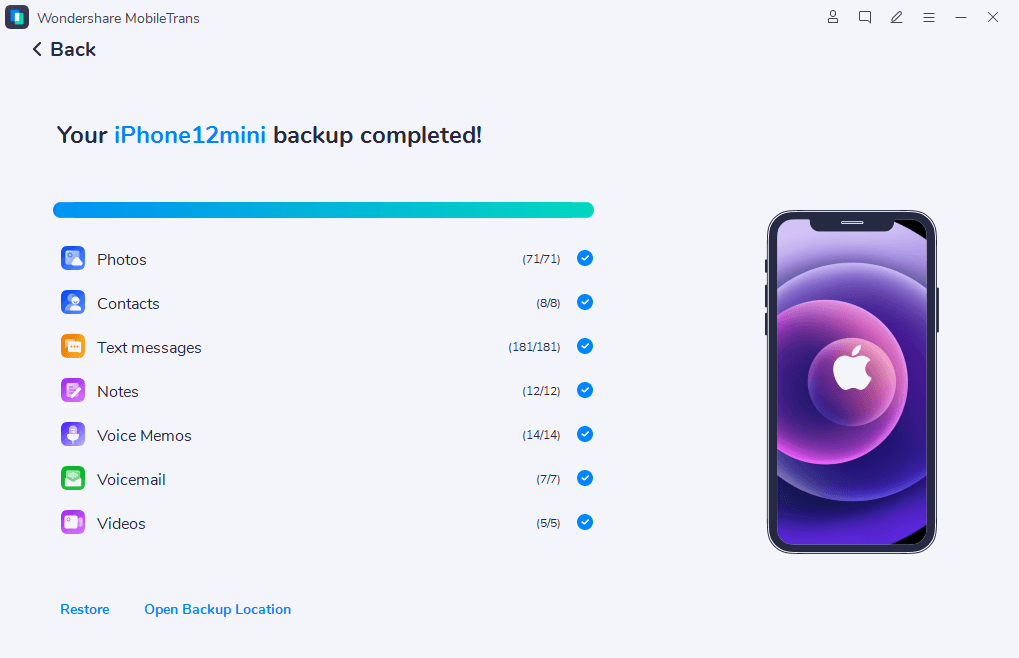
Step 3: MobileTrans will begin copying the selected voice memos from your iPhone to your PC, ensuring a safe and secure transfer.
MobileTrans offers several advantages over other methods, including faster transfer speeds, the ability to transfer multiple files simultaneously, and a user-friendly interface.
Additionally, it supports various other data types, such as photos, videos, contacts, and messages, making it a comprehensive solution for managing your iPhone data on your PC.
Part 2: How to Transfer Voice Notes from iPhone to PC via iCloud Drive
Apple's iCloud Drive also offers a convenient way to sync and access your voice memos across multiple devices, including your PC.
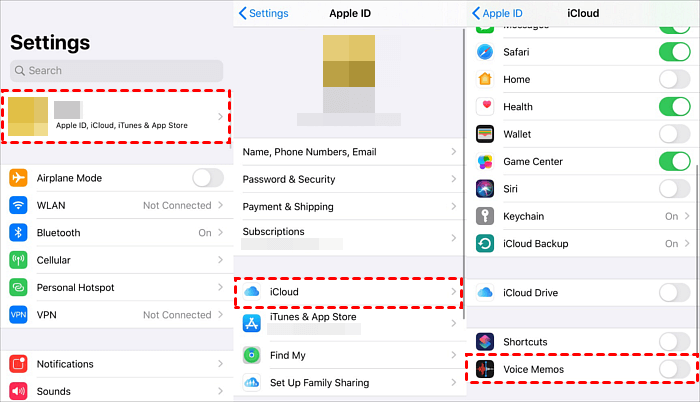
Step 1: On your iPhone, open the Voice Memos app and ensure that iCloud sync is enabled. To do so, go to Settings > [your name] > iCloud > Voice Memos.
Step 2: Now on your PC, open a web browser and go to icloud.com. Sign in with your Apple ID and password and go to “iCloud Drive”. Click on the Voice Memos icon. Here, you'll see a list of all your voice memos synced from your iPhone.
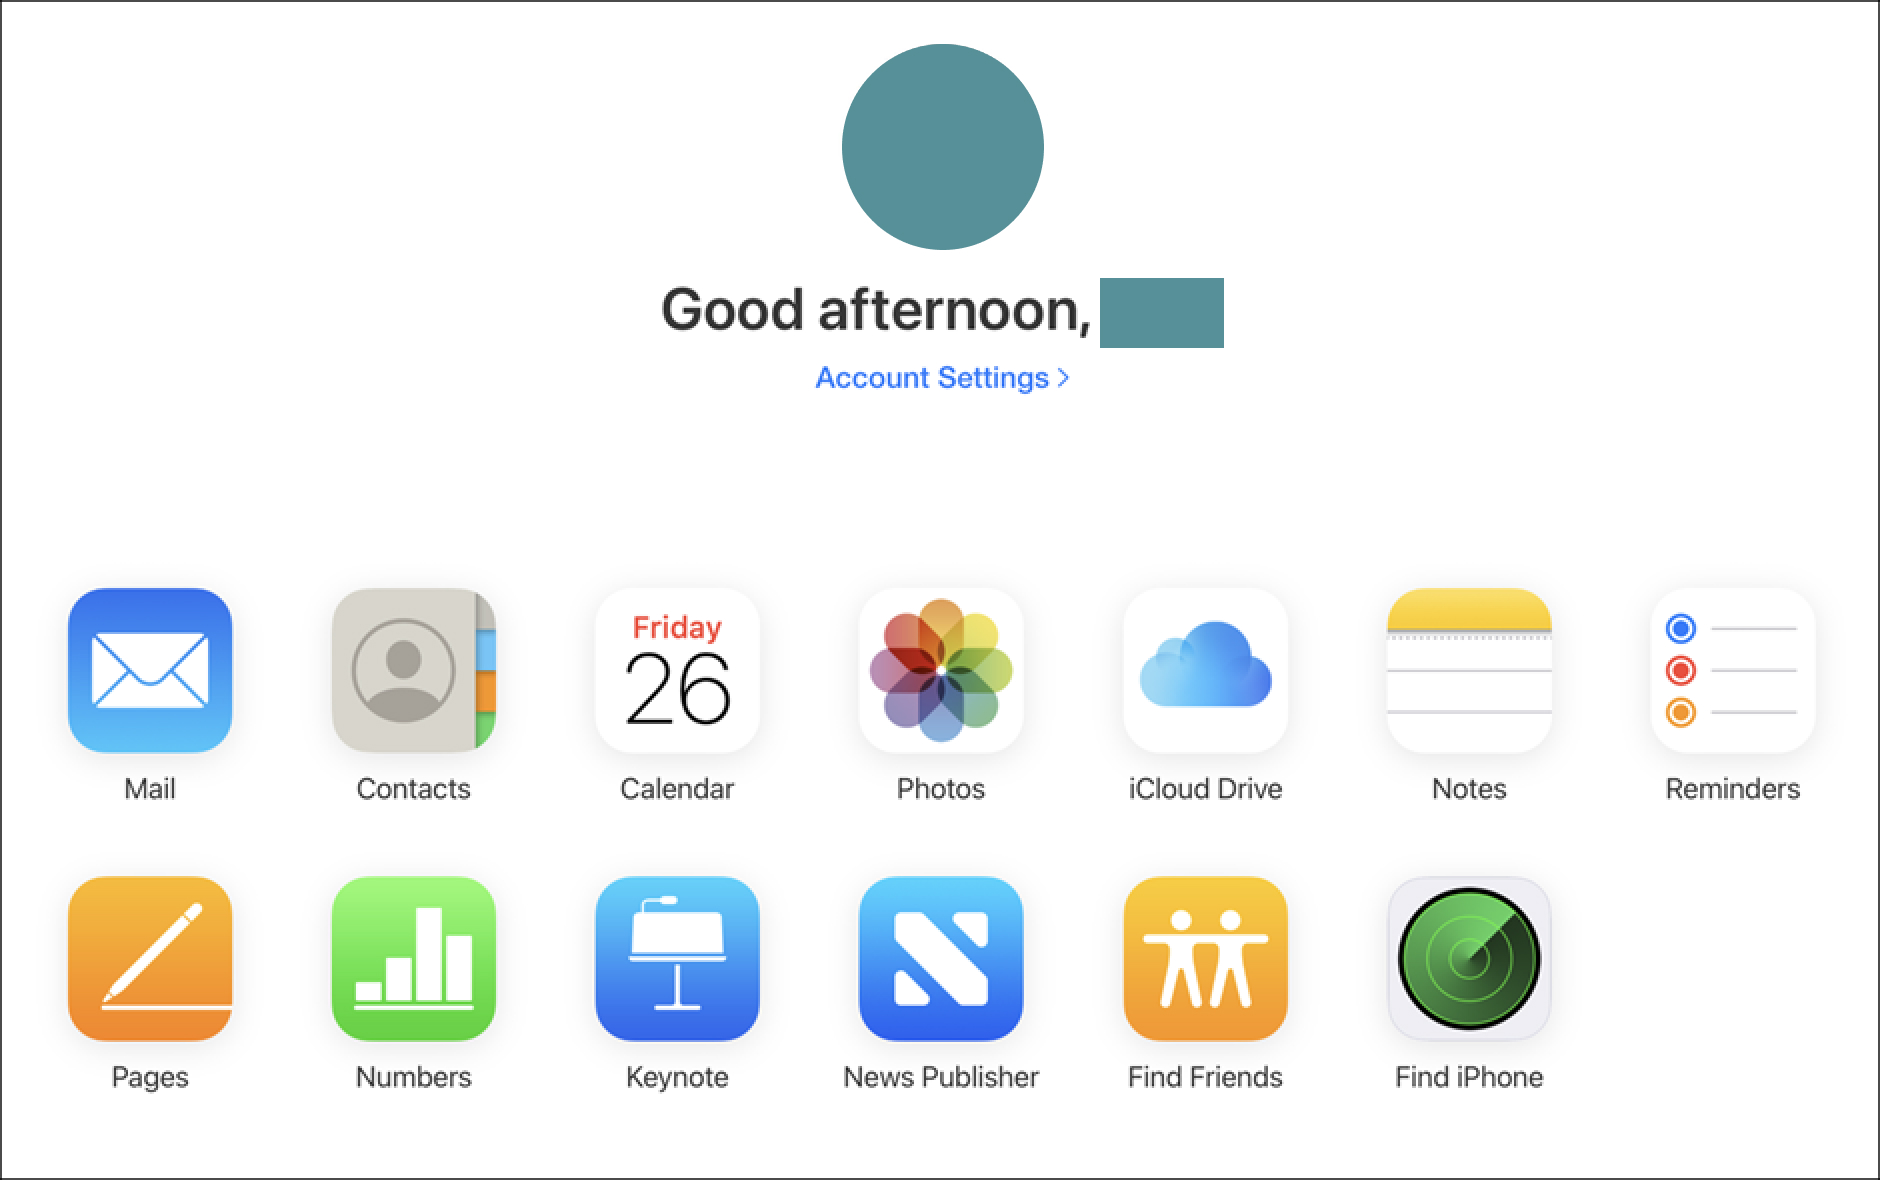
Step 3: Select the voice memo(s) you want to transfer, and click on the Download icon to save them to your PC.
Part 3: How to Copy Voice Memos from iPhone to PC via Google Drive
Another method is to use Google Drive. Google Drive is a popular cloud storage solution that can be used to transfer voice memos from your iPhone to your computer. Here’s how to copy voice memos from iPhone to computer using the Google Drive app:
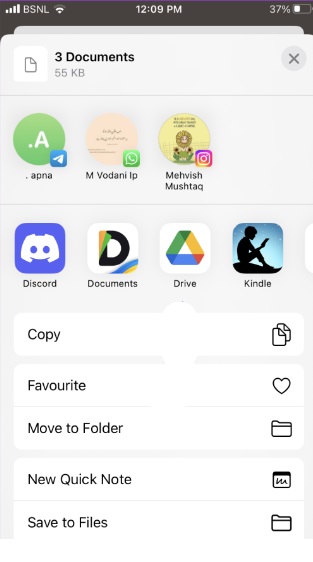
Step 1: On your iPhone, download and install the Google Drive app from the App Store. Open the Voice Memos app and locate the recording you want to transfer. Tap on the share and click on the "Save to Files” option.
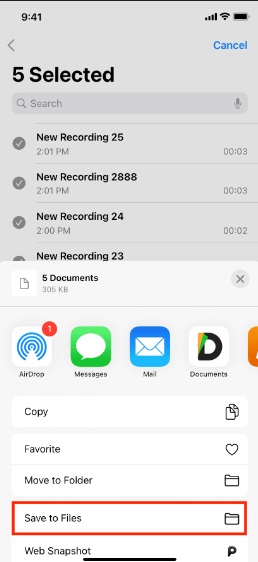
Step 2: In the "Locations" section, tap on the Google Drive icon. Choose the folder where you want to save the voice memo or create a new one.
Step 3: On your PC, open a web browser and go to drive.google.com. Sign in with your Google account. Navigate to the folder where you saved the voice memo, and you'll be able to access and download it.
Part 4: How to Transfer a Recording from iPhone to Computer via Emails
While not the most efficient method for large files, emailing voice memos can be a quick solution for occasional transfers.
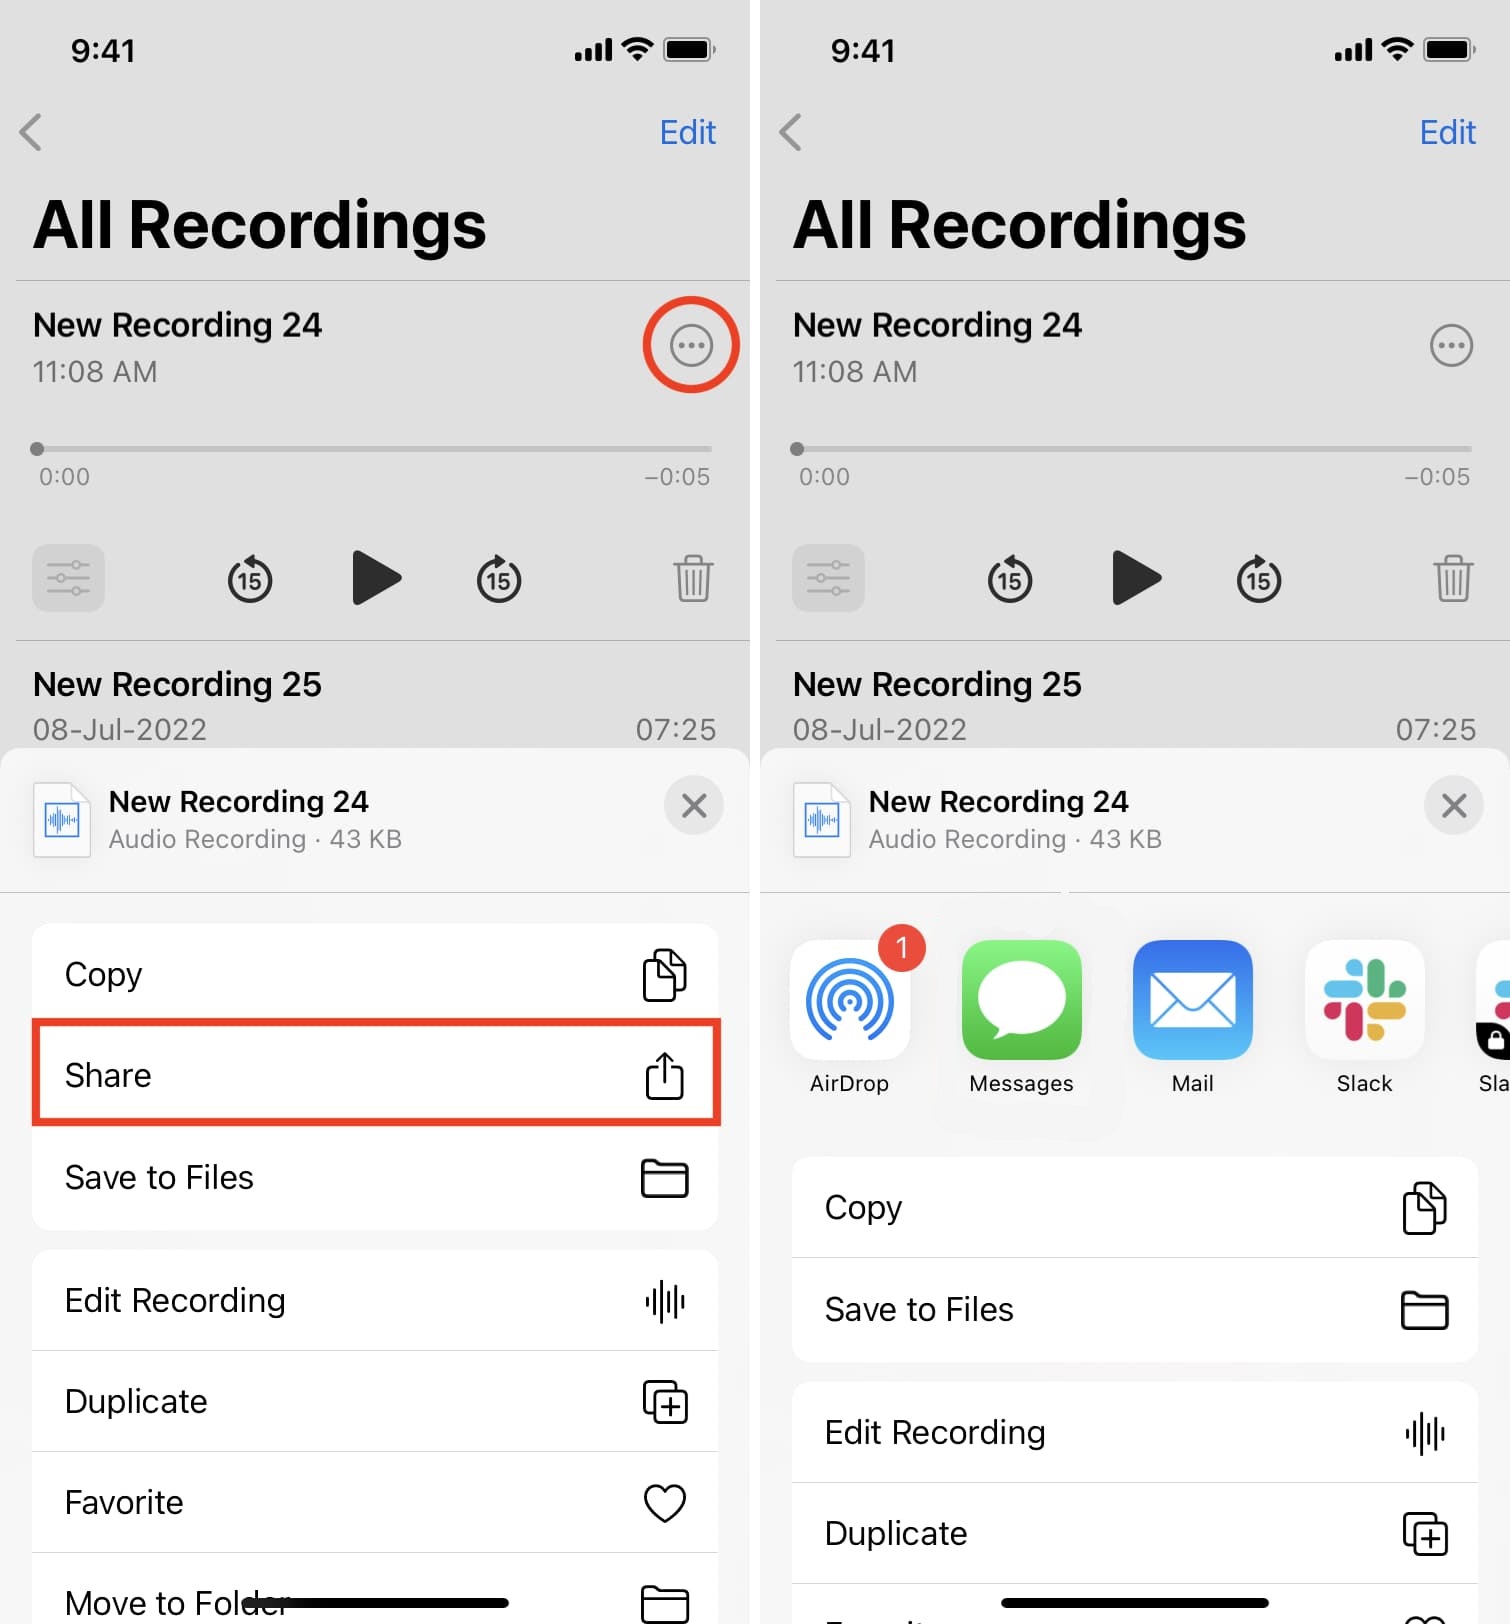
Step 1:: First, launch the default Voice Memos app on your iPhone. Locate the recording you want to transfer. Tap on the share and then select the "Mail” option.
Step 2: Enter your email address in the "To" field and add a subject line. Tap on the "Send" button to email the voice memo to yourself.
Step 3: On your PC, open your email client and locate the email containing the voice memo. Download the attached voice memo file to your PC.
Part 5: How to Transfer Voice Notes from iPhone to PC via Messaging Apps
Popular messaging apps like WhatsApp, Telegram, or iMessage can also be used to transfer voice notes from your iPhone to your PC.
Step 1: Open the Voice Memos app on your iPhone and locate the recording you want to transfer. Tap on the share icon and select the messaging app of your choice.

Step 2: Start a new conversation or select an existing one. Attach the voice memo to the message and send it.
Step 3: On your PC, open the corresponding messaging app or access the web version of the app.
Locate the received voice memo and download or save it to your PC.
Part 6: Tips for Transferring Voice Notes from iPhone to PC
While the methods mentioned above are straightforward, here are a few tips to ensure a smooth and efficient transfer of voice notes from your iPhone to your PC:
- Back up your voice memos: Before attempting to transfer your voice notes, it's always a good idea to create a backup of your iPhone data, including voice memos, to prevent accidental data loss.
- Check file formats: Different transfer methods may result in different file formats for your voice memos. Ensure that the file format is compatible with the software or applications you plan to use on your PC for editing or transcription.
- Organize your voice memos: Once transferred to your PC, consider creating a dedicated folder structure or naming convention to keep your voice memos organized and easily accessible.
- Convert voice memos if needed: If the transferred voice memos are in an unsupported or inconvenient file format, consider using audio conversion software to convert them to a more widely compatible format, such as MP3 or WAV.
- Enable iCloud sync: If you plan to use the iCloud Drive method, make sure that iCloud sync for Voice Memos is enabled on your iPhone to ensure all your recordings are synced and accessible from your PC.
- Check storage space: Before transferring large voice memo files, ensure that you have sufficient storage space available on your PC to accommodate the transferred data.
Conclusion
Transferring voice notes from your iPhone to your PC is a valuable skill that can enhance your data management capabilities. Whether you choose to use iCloud Drive, Google Drive, email, messaging apps, or a dedicated tool like MobileTrans, this guide has provided you with multiple options to suit your preferences and requirements.
By following the step-by-step instructions and applying the tips provided, you'll be able to seamlessly move your voice memos from your iPhone to your PC, unlocking new possibilities for transcription, editing, sharing, and archiving.
The key to efficient voice notes management lies in finding the method that works best for you and your workflow. With the right approach, you can ensure that your valuable audio recordings are always within reach, no matter where you are or what device you're using.
4.5/5 ExcellentFAQ
-
Will transferring voice memos from my iPhone delete them from the device?
No, transferring voice memos from your iPhone to your PC does not delete the original files from your iPhone. The transfer process simply creates a copy of the voice memos on your PC, leaving the originals intact on your iPhone. -
How can I ensure the best audio quality when transferring voice memos?
To maintain the best audio quality, try to avoid methods that involve compression or conversion, such as emailing or messaging. Instead, use iCloud Drive, Google Drive, or a dedicated tool like MobileTrans, which can transfer voice memos without any quality loss. -
Can I transfer voice memos from multiple iPhones to my PC?
Yes, most of the methods mentioned in this guide, including iCloud Drive, Google Drive, and MobileTrans, support transferring voice memos from multiple iPhones to your PC. However, for iCloud Drive, you'll need to use separate Apple IDs for each iPhone.


