There are many situations in which you would want to AirDrop files from a PC to an iPad. For example, you have a new iPad and wish to access some of the files on your computer on the iPad. Or your iPad accidentally lost data, and you have backups on the computer.
Whichever situation you're in, it's essential to know how to AirDrop from PC to iPad. But first things first, can you AirDrop to an iPad from your computer? If you are a Mac user, it will be easier as Apple provides you with mutiple ways to transfer beteween Mac and iPad.
And what if you have a Windows PC? Can you still use AirDrop? Continue reading to find answers to these and more questions.
In this article
Can You and How to AirDrop from PC to iPad?
The answer to whether you can AirDrop PC to iPad is yes and no. It depends on your type of computer. You can seamlessly AirDrop from iMac to iPad (or from MacBook to iPad). But if your computer is Windows, then AirDrop won't work.
In other words, AirDrop only works within the Apple ecosystem. You can only transfer content between two AirDrop-supported devices. These include iPhones, iPads, and Macs. There is no AirDrop for Windows-based PCs. You can't AirDrop from Windows to iPad.
With that in mind, follow the steps below to learn how to AirDrop from PC to iPad. That is, from a Mac to an iPad:
- On the Mac, open a Finder window. Click Go, then choose AirDrop.
- On the iPad, swipe down from the top of the screen to open Quick Settings. Tap AirDrop to turn it on. Next, choose Everyone or Contacts Only to make your iPad be discoverable by the Mac. Also, ensure you've enabled Wi-Fi and Bluetooth on both devices.

(Credit: ZDNet)
- On the Mac, drag a file to the AirDrop window. You can also right-click a file, then choose Share > AirDrop > iPad name.
- Tap Accept on the iPad. Your Mac will notify you once the transfer is completed. You can view the 'airdropped' file on the iPad.
What happens if you have a Windows PC? You can use a third-party app to facilitate the file transfer between the iPad and the computer. In the next part, we will introduce you MobileTrans - Phone Transfer for cross-platform file-sharing. Find out why it's the best and how to use it below.
How to AirDrop from PC to iPad with a Few Clicks
MobileTrans - Phone Transfer is a user-friendly software that helps transfer data between devices. As stated, it supports the various operating systems. It doesn't matter whether you're dealing with Windows, Mac, iPad or iPhone. The software handles them all.
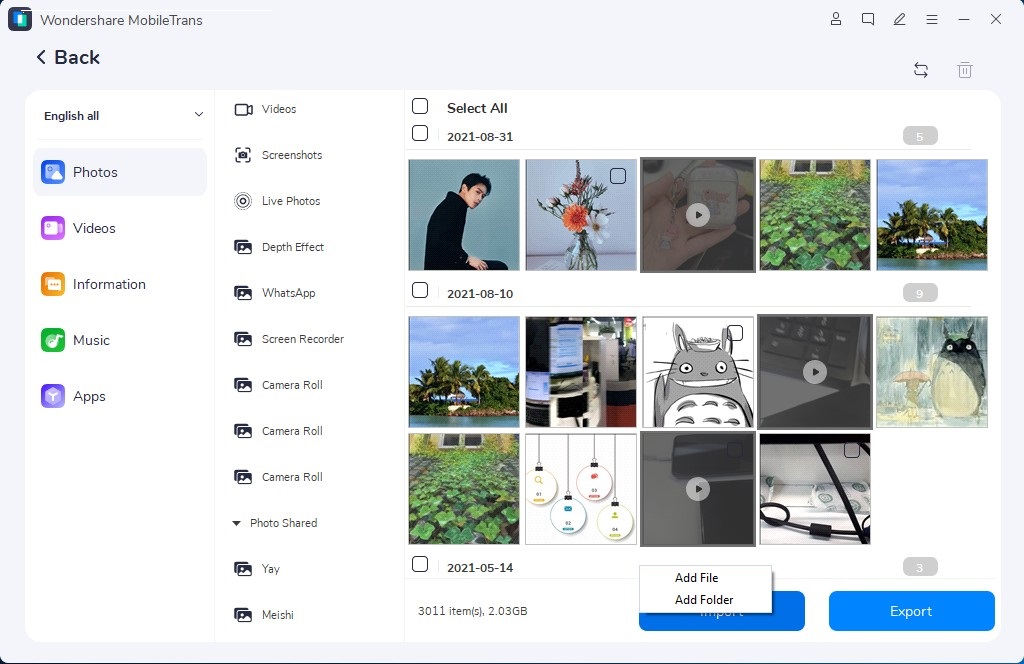
MobileTrans supports most types of data. You can transfer up to five data types from your computer to the iPad. These include videos, photos, music, apps, and information. The software is also fast and secure. You can send even large video files and photo albums quickly and safely.
Wondershare MobileTrans
Move Your Data from PC to iPad Easily
- • No data loss. No data leaks.
- • Support various data, including files, photos, videos, apps, contacts, etc.
- • Compatible with over 6,000 types of devices acorss Android and iOS.

 4.5/5 Excellent
Besides, MobileTrans doesn't overwrite data during the transfer process. It's your best option when you want to restore your iPad backup from a computer. Below, find a few easy steps to import data from PC to iPad:
- Download the MobileTrans software and install it on your PC (Windows or Mac).
- Connect your iPad to the computer using its original or a functional USB cable.
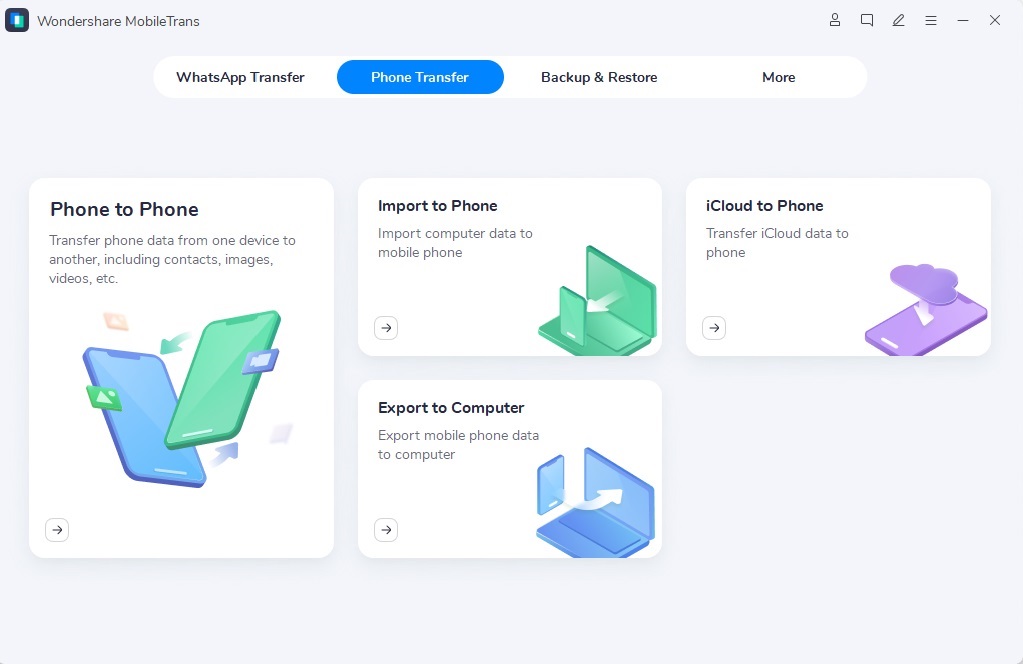
- Open the MobileTrans software on your computer. Click the Phone Transfer option on the interface, then choose Import to Phone.

- Select data to 'AirDrop' on your iPad. After that, click the Import button.

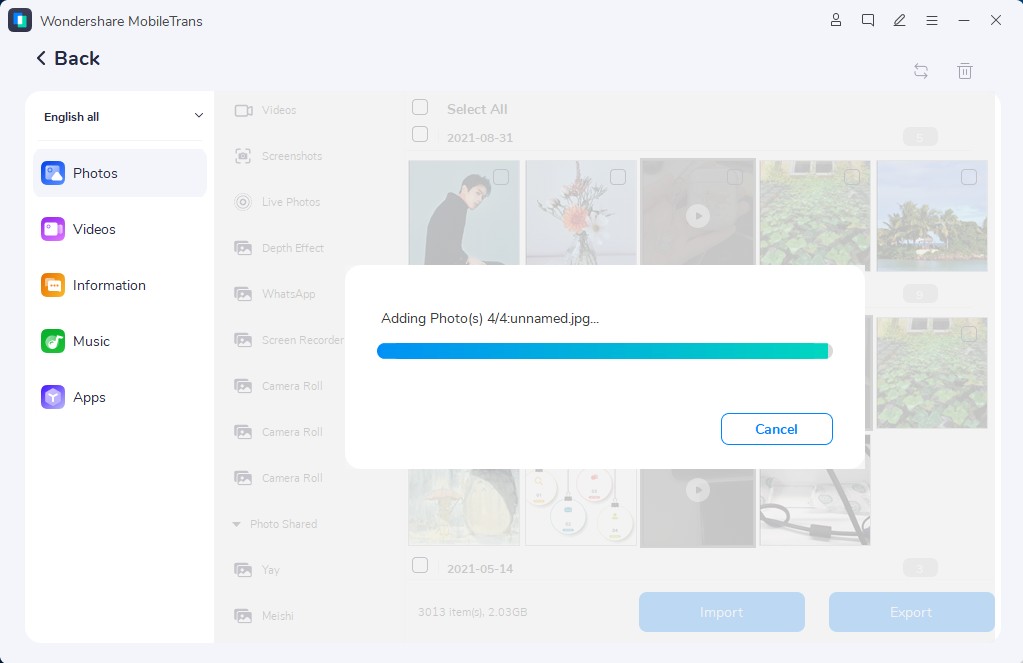
- MobileTrans will begin importing your data immediately. Wait a short while. Also, ensure the device remains connected during the entire process.

Other Options to AirDrop From PC to iPad
Besides AirDrop and MobileTrans, there are many other options for AirDrop from PC to iPad. The following are the most reputable:
- AirDrop from PC to iPad via iTunes
You can sync your iPad and the Windows PC or Mac with iTunes and transfer data between them. However, this method is best if you wish to transfer data to a new iPad. iTunes can erase existing data, which won't be recoverable anymore.
So, unless you're using a brand-new iPad, you had better use other methods to transfer data. Having said that, check out the simple steps to 'AirDrop' from a computer to a new iPad:
- Ensure you have the latest iTunes on your computer. If it's pre-installed on Windows, check for updates.
- Connect the iPad to your computer using a suitable USB data cable.
 Note: Only Macs running an operating system before Catalina can support this iTunes method. For MacOS Catalina and later, use the Finder (see below) to move files between the computer and iPad.
 - Open iTunes, then click your iPad icon on the upper-left side of the window.

- That will take you to the iPad's page. Here, click File-Sharing in the sidebar to the left.

(Credit: Apple)
- In the apps column in the center of the window, choose an app to which you wish to add a file. If you're transferring a file that doesn't fit into any specific app, you can use the Add File option.

- Scroll down, then click Add File on the button on the right side of the screen. That will open the computer's File Explorer.
- Select a file to add to the iPad. You may first need to go to the file's folder location by clicking the right folder on the left side of the screen. Click Open in the lower-right corner of the window. A file's name should appear in the app's window in iTunes.

- Click Sync on the bottom-right of the iTunes window. That will add your file to your selected app on the iPad. Click Done once the sync is completed. You can now open your file on the iPad, even if you're not connected to the internet.

- AirDrop from PC to iPad Using iCloud
iCloud Drive offers 5GB of free storage space, where you can upload files as a backup. After that, you can access your backed-up data anywhere, anytime. So, iCloud is a great way to wirelessly copy files from PC to iPad.
Follow these steps to learn how to AirDrop from computer to iPad through iCloud:
- Open a browser and go to iCloud.com.

- Sign in to your iCloud account with your Apple ID's email and password. Tap Trust on both the computer and iPad if prompted.

- Click the blue app with white clouds on it to access your iCloud Drive page.

- Click the Upload icon at the top of the page. The icon looks like a cloud with an arrow pointing up. That will open a File Explorer window (on Windows) or a Finder window (on Mac).

- Select a file to upload to iCloud Drive, then click Open in the lower-right corner of the window. Your file will start uploading to the Drive.

- Wait for the file to be uploaded, then open the Files app on your iPad. It looks like a blue folder with a white background.

- Tap Browse in the lower-right corner of the screen, then tap iCloud Drive below the Locations heading. That will launch your iCloud Drive's files.

- Tap Select in the upper-right corner of the screen. Tap each file that you wish to transfer to your iPad.

- Next, tap Move at the bottom of the screen.

- Tap On My iPad next to an icon that looks like an iPad. Choose a folder to save your files to. Tap Move at the top-right corner of the screen. That will add your files to the selected folder, making them accessible on your iPad. You can now open the files in the Files app on your iPad, even without the internet.
- AirDrop to iPad Using Google Drive
Google Drive can also help AirDrop wirelessly from Windows PC to iPad. However, it can also work on Mac. The Drive, which is part of your Google account, offers 15GB of free storage space. That means you can upload and share a lot of data between your devices.
Check the steps to transfer data from a computer to an iPad through Google Drive:
- Open a browser on your computer and go to drive.google.com. Log in to your Google account. Or sign up for free if you don't have an account. Hi choose File Upload or Folder Upload from the drop-down menu.

- Select a file or folder to upload and click Open. Wait for your data to be uploaded.

- Install the Google Drive app on your iPad from the App Store.
- Sign in using the same account credentials as your computer. You'll find your recently uploaded files ready for viewing and downloading.
- AirDrop from PC to iPad via Microsoft OneDrive
If you have a Microsoft account, you can leverage OneDrive to AirDrop files from PC to iPad. To transfer files using this cloud service:
- On your computer, go to OneDrive web and log in to your account.

- Click Upload at the top of the page, then choose Files from the drop-down menu.

- Select files to send to your iPad, then click Open to upload them to Microsoft Cloud.

- Wait as the files get uploaded. After that, open the OneDrive app on the iPad and sign in with the same account. Once you're logged in, you download your files to your iPad.
- AirDrop From PC to iPad the Old-Fashioned Way
You can transfer data types like videos, photos, music, and documents from your Windows PC to your iPad with just a USB cable. To transfer files from a PC to iPad using a USB cable:
- Connect the iPad to the Windows computer using a USB data cable. Your iPad may prompt you to choose whether you want to charge only or transfer data. Choose the latter.
- On your computer, right-click on a file or folder you wish to send to your iPad. Choose Send to, then select your iPad.

Alternatively, you can send files from your computer to the iPad through the File Explorer. Follow these simple steps:
- Press the Windows + E on your computer's keyboard. That will open the File Explorer window.
- Click This PC on the left sidebar, and open the drive bearing your iPad's name.
- Drag a file you wish to send to the iPad and drop it on your iPad's name. Wait as your files are transferred to your iPad. It may take anywhere from seconds to a few minutes, depending on the size of your files.

- Once the transfer is completed, disconnect your iPad and view the shared files through the Files app.
- AirDrop from PC to iPad via Finder (Mac)
If your computer is a Mac on MacOS Catalina or later, a data-sharing method like iTunes won't work properly. So, you must use the Finder to transfer files between your computer and the iPad. To do that, follow these easy steps:
- Connect your iPad to the Mac with a USB cable.
- Launch a Finder window by clicking on the half-white, half-blue icon with a smiley face on the Dock. It's the Mac equivalent of File Explorer on Windows.

- Locate your iPad on the sidebar. If the Mac recognizes the iPad, it should appear in the sidebar under Locations.

 Note: If the iPad isn't recognized, use a different USB or restart both devices, then try again.
 - Browse your computer and find the file you wish to transfer. You can open another window or use the same window for this step.
- Drag the file into an app folder on your device. If the file you want to transfer doesn't fit into any specific app, add it to the Files app folder.

Conclusion
Whether you can AirDrop from PC to iPad depends on your kind of computer. As explained, you can only transfer files between a Mac and an iPad. AirDrop doesn't work on devices outside Apple's ecosystem.
Thus, for a Windows PC, you must rely on third-party apps, such as the MobileTrans - Phone Transfer. You can also use other apps and software that support cross-platform file sharing. We've discussed Google Drive, Microsoft OneDrive, Apple iCloud Drive, and iTunes. Or you could use a USB and transfer files the old-fashioned way through the Finder or Windows Explorer.
Which of these methods works for you? If you can't use AirDrop, we strongly recommend MobileTrans for all your data-sharing needs.

 4.5/5 Excellent
FAQ
-
How Else Can You AirDrop from PC to iPad?
You can also transfer data from PC to iPad using the Email's attach feature. The method applies only for a few copies due to its limitation on attachment size. A single photo or a few documents are fine. For a large video or an album of images, you're better off with a more efficient method like MobileTrans - Phone Transfer.


