


 TL;DR:
You can transfer videos from a Mac to an iPad using third-party software like Wondershare MobileTrans for automated bulk transfers, or utilize Apple's native AirDrop, iMessage, Finder, and iTunes depending on file size and cable availability.
● Wondershare MobileTrans requires software installation and a USB connection, but it excels at batch transfers and automatically converts incompatible video formats like AVI or MKV into playable MP4 files.
● AirDrop provides the fastest wireless transfers for newer Mac and iPad models in close proximity with Wi-Fi and Bluetooth enabled, whereas iMessage is restricted by attachment size limits and only practical for sending one or two small videos.
● Finder allows direct drag-and-drop file management without extra software and iTunes syncs existing media collections, but both native wired methods are notably slower or more tedious when moving multiple large videos at once.
Ask AI for a summary
 ChatGPT
 Perplexity
 Gemini
 Claude
 Grok
Grok
Transferring videos from your Mac to your iPad allows you to view your favorite movies, shows, home videos, and more on the go. While there are several ways to transfer videos from Mac to iPad, some methods are easier than others.
In this guide, we'll walk through the top 5 approaches to how to transfer videos from Mac to iPad, troubleshoot common issues, and provide tips for playing the transferred videos smoothly on your iPad.
Let's get started!
In this article
5 Methods to Transfer Videos from Mac to iPad
In the first part, we will offer you a direct guide on how to transfer videos from Mac to iPad and 5 effective methods for you to choose from. Now let’s check them out.
#1 Wondershare MobileTrans Tool
One of the easiest ways to transfer videos from Mac to iPad is by using the Wondershare MobileTrans - Phone Transfer. This handy software provides an "Import to Phone" feature that allows you to quickly move videos, music, photos, and other files from your Mac to your iPad with just a couple of clicks.
Wondershare MobileTrans
Move Your Data to iPad Easily
- • No data loss. No data leaks.
- • Support various data, including files, photos, videos, apps, contacts, etc.
- • Compatible with over 6,000 types of devices acorss Android and iOS.
 4.5/5 Excellent
Here's a step-by-step guide:
Step 1: Download and install Wondershare MobileTrans on your Mac computer. Launch the program once installed. Connect your iPad to your Mac using the USB cable that came with your device. Wondershare MobileTrans will automatically detect your device.
Step 2: In MobileTrans, switch to the “Phone Transfer” tab. Click the "Import to Phone" button in the toolbar. This will open up Finder so you can select files to transfer.

Step 3: In Finder, navigate to the folder(s) containing the videos you want to transfer. Select the videos and click "Open" to add them to the import queue in MobileTrans.
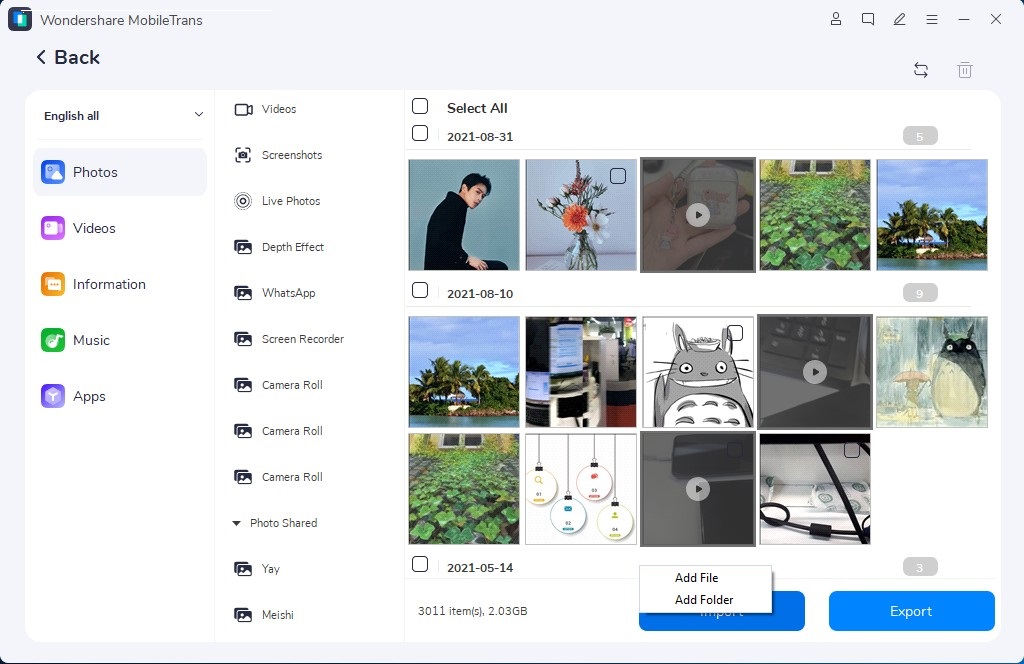
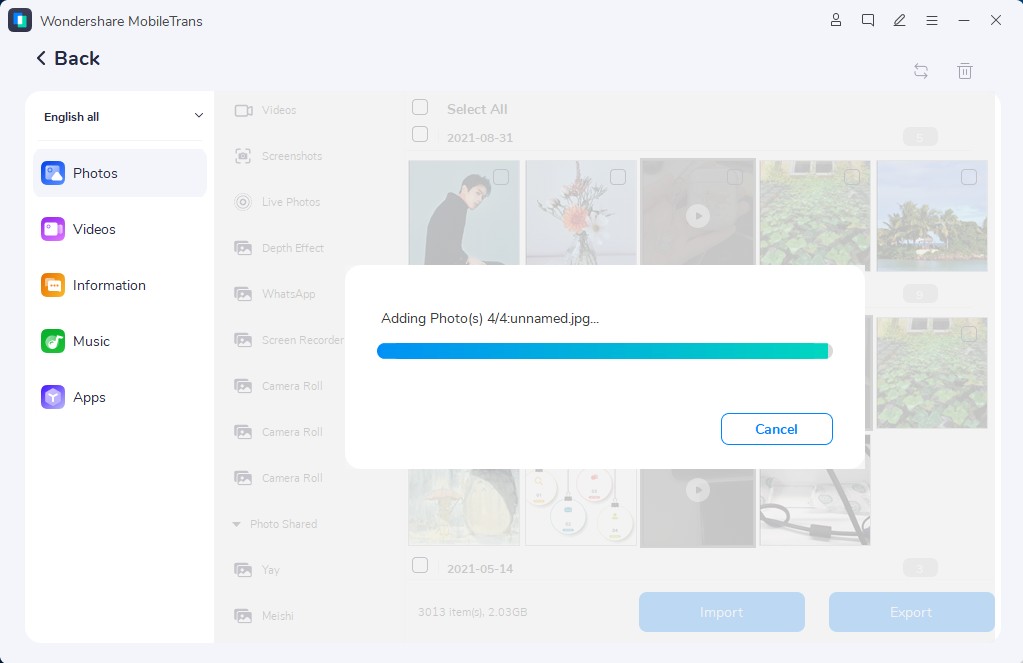
Step 4: Verify the video files you want to transfer are checked off in MobileTrans. Then click the "Import" button.
Step 5: The selected videos will begin transferring from your Mac to your connected iPad. The transfer speed will depend on the number and size of videos being moved.
When the transfer is complete, you can safely disconnect your iPad from your Mac.
The videos imported via MobileTrans will be saved directly to the Photos app on your iPad, making them easy to access and watch on the go.
#2 iMessage
If you want a quick and easy way to get a video or two from Mac to iPad, using iMessage is a convenient option. Here's how to use iMessage to transfer videos:
Step 1: On your Mac, open the Messages app. Make sure your Apple ID is signed in.
Step 2: Click the compose message button and enter your phone number Image nameed to your iPad's Messages app. Type out a message, then attach the video(s) you want to transfer from your Mac. Click the media icon, select your video file(s), and choose Attach.

Step 3: Hit return to send the message with the attached video to your iPad. Open the Messages app on your iPad. You will see the message from your number with the video attachment(s).
Step 4: Tap on a video to download and save it. The video will be saved to your iPad's Photos app for easy viewing.
While quick, iMessage does have attachment size limits. So it's best to transfer one or two smaller-sized videos quickly. For bulk transfers, use a wired method.
#3 Finder
Finder provides a simple wired transfer option between your Mac and iPad.
Here's how it works:
Step 1: Connect your iPad to your Mac with the USB cable. Open Finder on your Mac.
Step 2: Under Locations in Finder, select your connected iPad by name. This will bring up the iPad's file system.
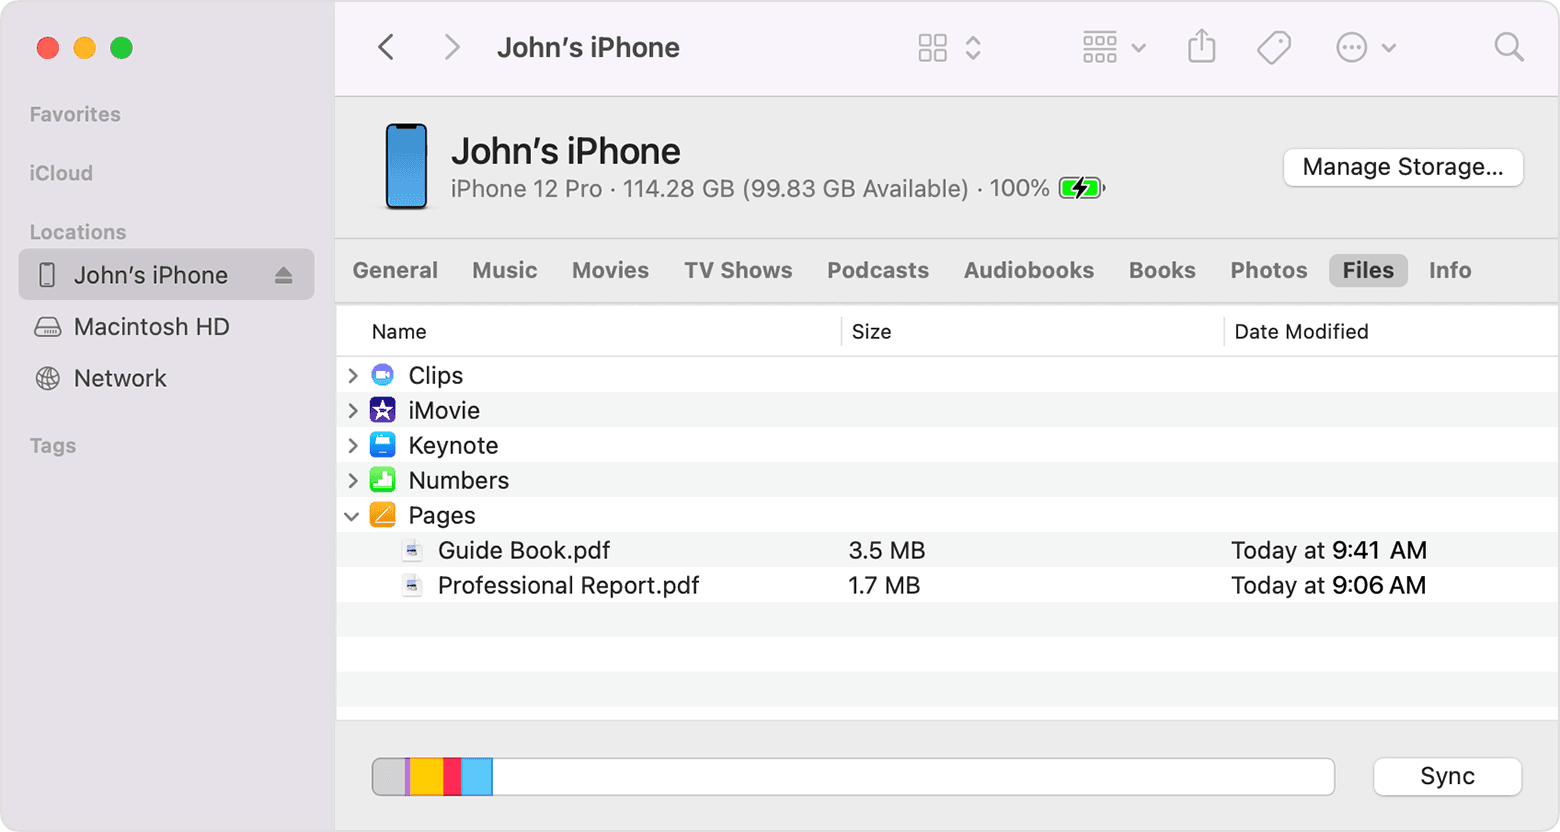
Step 3: Drag and drop the videos you want to transfer from your Mac's Finder window into the Videos folder on your iPad.
Step 4: Eject your iPad when the transfer finishes. The videos will now be available in the Photos app on your device, ready for viewing.
Finder is handy because it doesn't require any extra software. However, the drag-and-drop method can become tedious for mass video transfers.
#4 iTunes
For many years, iTunes was the go-to solution for syncing all kinds of media between your Mac and iPhone or iPad. And it's still an option if you like iTunes. Here's how to use it:
Step 1: Connect your iPad to your Mac using the USB cable and open iTunes.
Step 2: In iTunes, select your connected iPad under Devices. Then click on the Movies or TV Shows tabs.
Step 3: On the lower right corner, check the box for "Sync Movies" or "Sync TV Shows". Then select the videos you want to transfer from your Mac's media library.
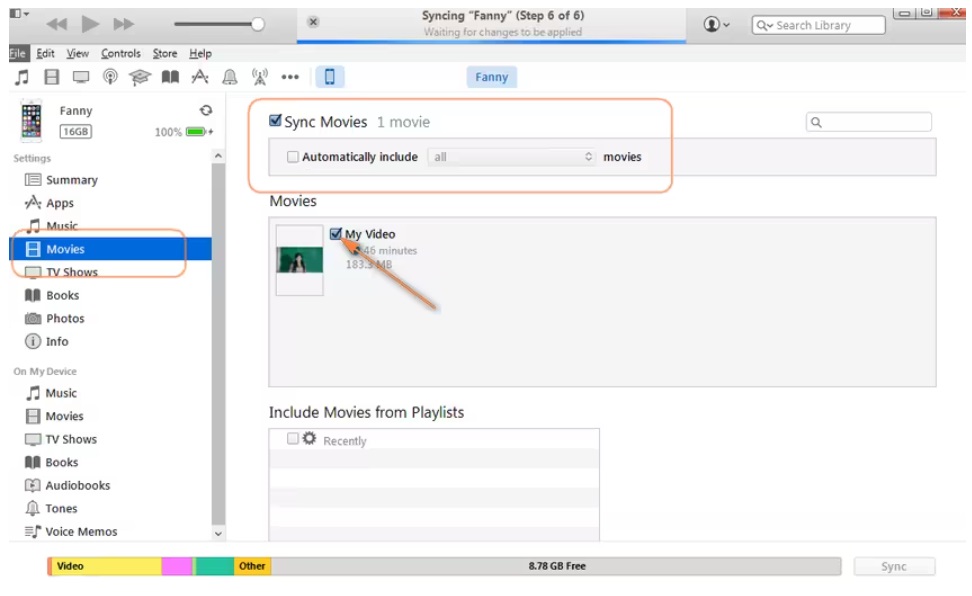
Step 4: Click Apply in the lower right corner to start the video transfer process.
The videos will sync over and be available on your iPad's Videos app for playback after the transfer completes.
#5 AirDrop
If you have newer Mac and iPad models, AirDrop is by far the fastest wireless method for transferring videos. Follow these steps:
Step 1: Turn on Wi-Fi and Bluetooth on both your Mac and iPad. Also, enable AirDrop on both devices. Indicate your AirDrop preferences as either "Contacts" or "Everyone."
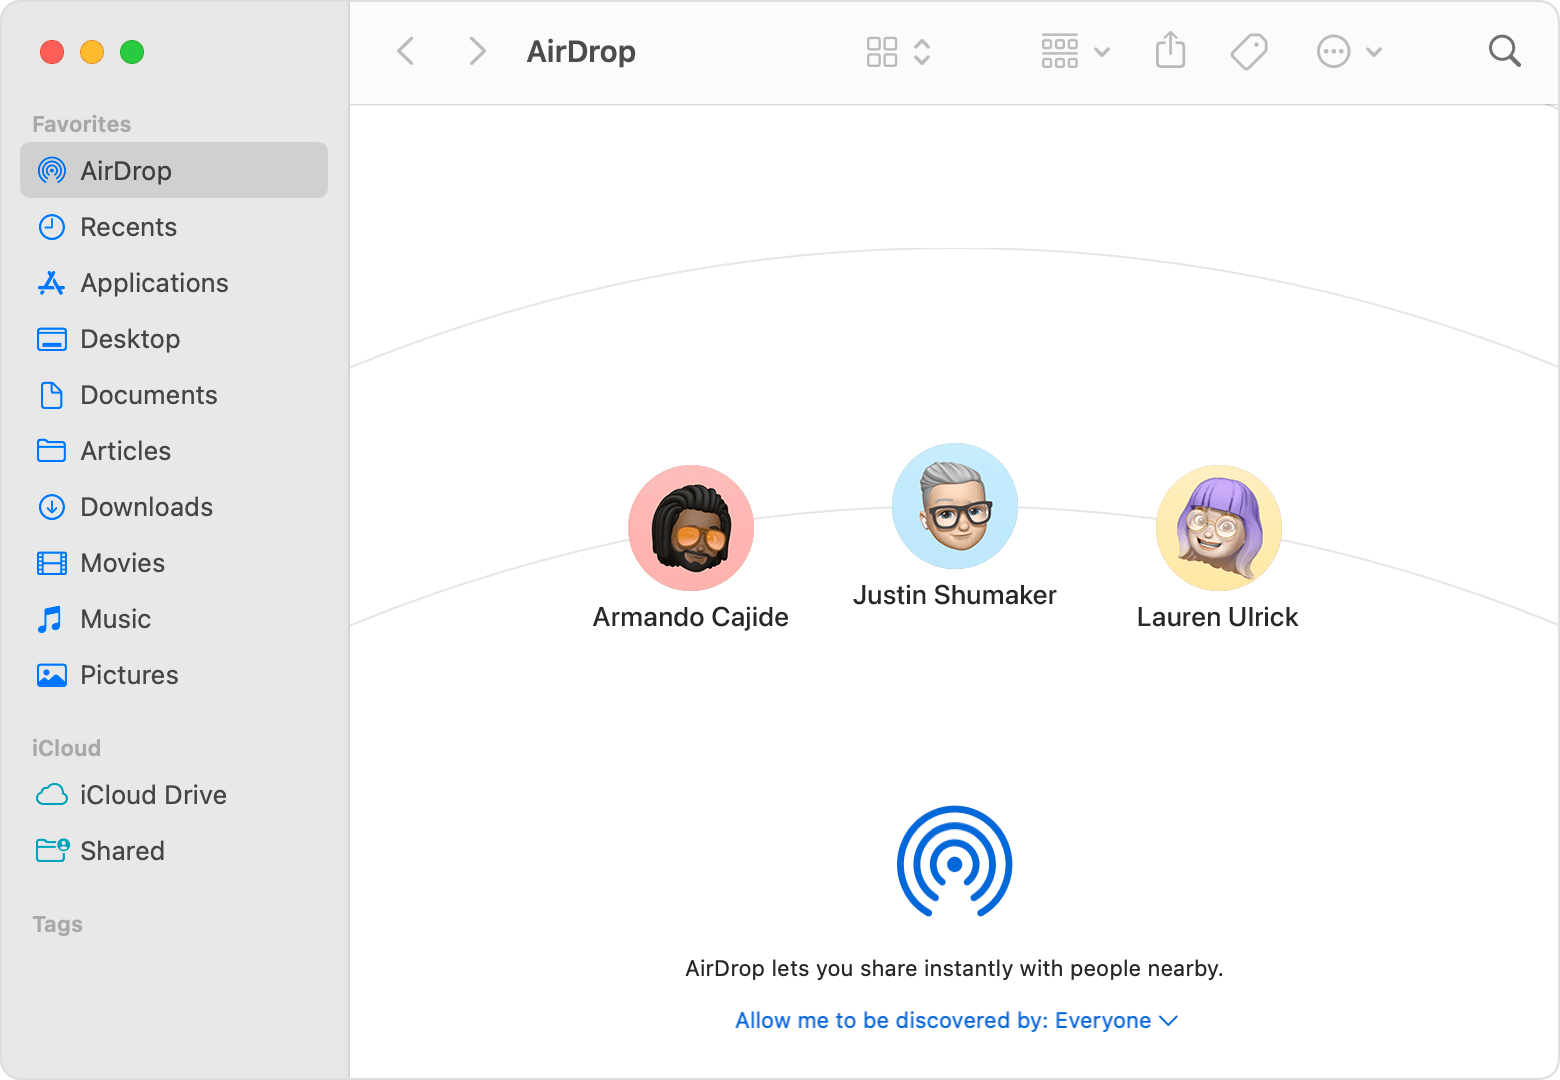
Step 2: On Mac, open Finder and click AirDrop in the Finder sidebar. On iPad, open the Control Center then tap on AirDrop.
Step 3: On your Mac, find the video(s) in Finder that you want to send. Right-click or ctrl+click on the video file(s) and choose Share > AirDrop.
Step 4: Select your iPad from the list of nearby AirDrop devices. Your iPad will automatically save the received videos to its Photos app.
AirDrop works great when both devices are newer. Transfer speeds are incredibly fast when your Mac and iPad are close by.
In summary, Wondershare MobileTrans is the best overall solution for transferring videos from Mac to iPad. It provides the fastest transfer speeds both wired and wireless, has a straightforward interface for selecting multiple videos, automatically handles format conversion, and works reliably every time.
The fact that MobileTrans offers batch video transfers wired for stability along with wireless flexibility makes it the most capable and efficient option for getting videos from Mac to iPad.
Common Issues When You Transfer Videos from Mac to iPad
Despite the various transfer methods available, you may run into occasional issues when moving videos from Mac to iPad. Here are some of the common problems and fixes:
- Long transfer times: Videos are large files. Transferring many videos, especially over Wi-Fi, can take a while. Be patient and let the transfer run its course. Close other apps during the transfer.
- iTunes syncing issues: Sometimes iTunes encounters errors during the sync process. Force quit iTunes, restart your Mac, then try again. Also, update to the latest version of iTunes.
- Incompatible video format: By default, iPads can't play certain video formats like AVI or MKV. Convert videos to MP4 format before transferring for better compatibility.
- Videos not appearing on iPad: If transferred videos aren't showing up on your iPad, double check they are in the Photos app, under Albums rather than Recently Added. Also, check for hidden or duplicate Photos albums.
- AirDrop not working: Both devices need to be upgraded to iOS/macOS to use AirDrop. Bring the devices close together during transfers. Disable Wi-Fi and Bluetooth for a few seconds to reset connections.
- Not enough storage space: Your iPad needs sufficient free storage to receive transferred videos. Delete apps or move photos/videos to the cloud to free up space.
- Corrupt videos: Extremely rarely, video files may get corrupted during transfer. Try transferring a copy instead of the original. Re-encoding corrupted videos can also fix issues.
Tips for Playing Transferred Videos on iPad
Once you successfully move your videos from Mac to iPad, here are some playback tips:
- Use the Videos app: Transferred videos will be accessible in the Videos app. It has playback controls, along with sorting and playlist options.
- Enable subtitles/closed captions: Turn on subtitles or closed captions in the Video app's playback controls for supported videos.
- Stream to a TV: Use AirPlay from your iPad to stream videos to a smart TV or AirPlay-compatible display.
- View on an external monitor: Use a cable like Lightning to HDMI to connect your iPad to a TV monitor and watch videos on a big screen.
- Change orientation lock: Videos will play full screen in the landscape by default. Swipe up and tap the Orientation Lock icon to enable portrait mode playback.
- Use Picture in Picture: Continue watching videos in a small overlay window while doing other things on your iPad with Picture in Picture mode.
- Set video playback speed: Speed up or slow down the playback of transferred videos using the Playback Speed options in the Video app.
Conclusion
Transferring videos from your Mac to your iPad is simple with the right method. iTunes and AirDrop are great for quick transfers while MobileTrans provides the easiest solution for batch video transfers. Once moved over, the videos are ready for viewing directly in your iPad's Video app. Avoid common issues by checking for incompatible formats, storage limitations, and other transfer problems.
With these tips, moving and enjoying videos from Mac to iPad can be a breeze.
4.5/5 Excellent

